
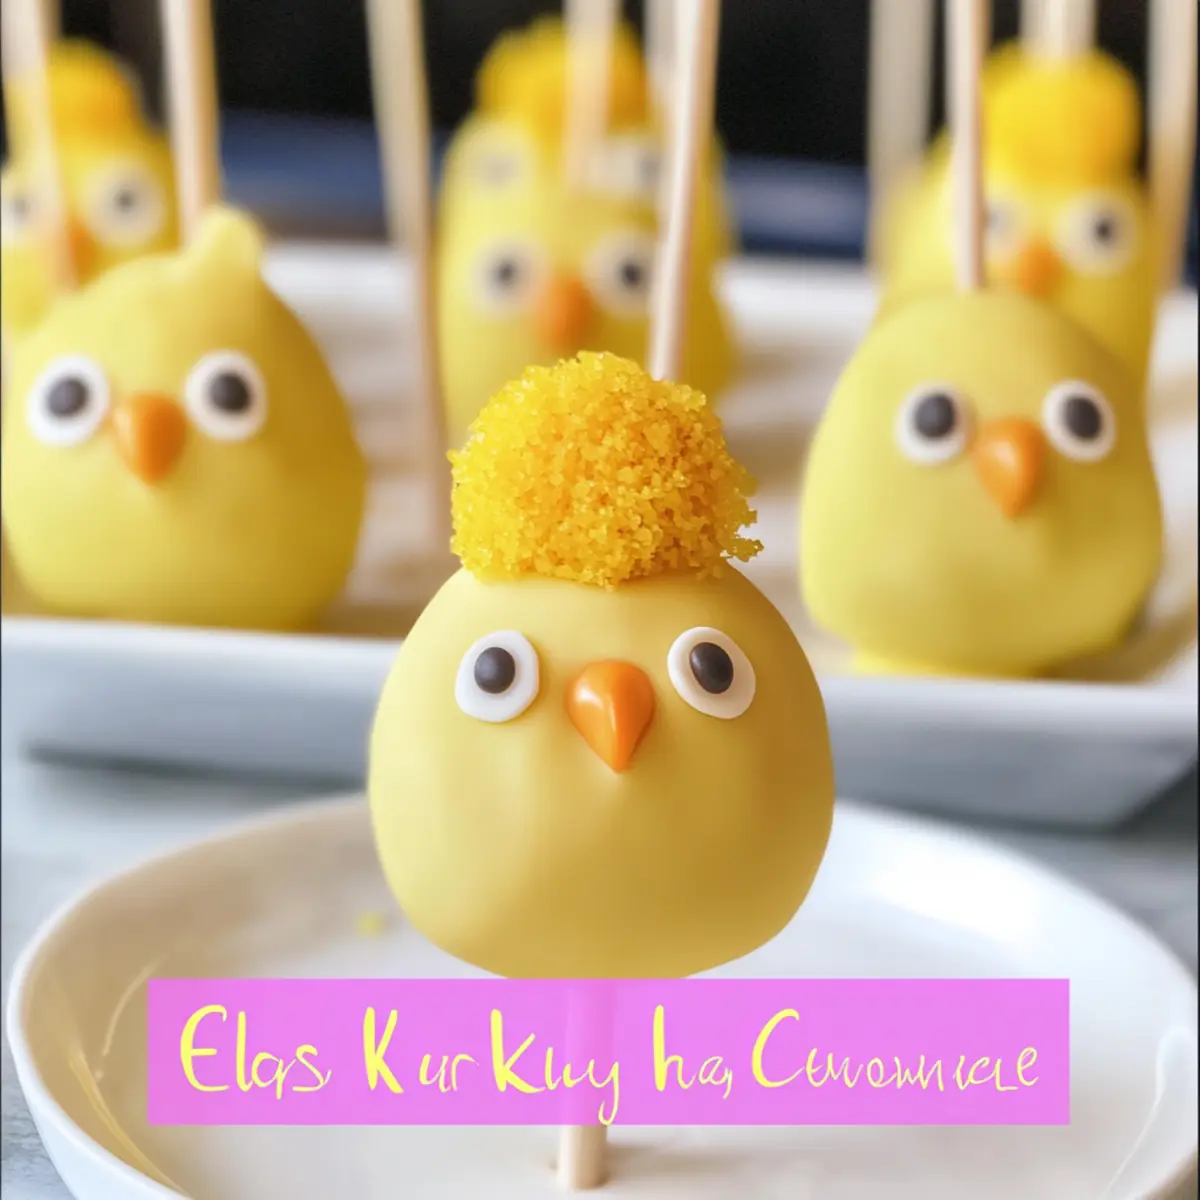
As I stood in the kitchen, surrounded by bright spring colors and the sweet scent of vanilla, inspiration struck to create something special for Easter. Enter the Easter Chick Cake Pops—a delightful twist on a classic treat that promises to add whimsy to your holiday celebrations. These adorable pops feature a moist cake center, enriched with a zesty kick of lemon, all wrapped in a cheerful yellow candy shell. Not only are they a fun project to whip up with kids, but they also make for an eye-catching centerpiece that’s sure to impress guests at your brunch. Ready to bring a touch of joy to your table? Let’s dive into this delightful recipe that’s as sweet as it is cute!
What makes these cake pops special?
Adorable Design: These Easter Chick Cake Pops are not just treats; they are miniature works of art that bring a smile to everyone’s face. Zesty Surprise: The refreshing lemon zest elevates the flavor, providing a delightful twist that sets them apart from traditional cake pops. Family Fun: Perfect for a family cooking session, these pops encourage kids to get creative with their decoration. Easy to Customize: Try using chocolate or red velvet cake for a fun variation, or swap out the candy melts for colorful icings. Eye-Catching Centerpiece: Their vibrant look makes them a stunning addition to your Easter brunch table, ensuring they’re the star of the show!
Easter Chick Cake Pops Ingredients
• The perfect blend for a festive treat!
For the Cake
- Baked Vanilla or Yellow Cake – Creates a moist and flavorful base; a dense cake helps retain shape.
- Lemon Zest – Adds a refreshing citrus note to elevate your Easter Chick Cake Pops’ flavor.
For the Frosting
- Cream Cheese Frosting or Buttercream – Binds the cake crumbs together while adding creaminess; store-bought works great, too.
For the Coating
- Yellow Candy Melts – Provides a bright and sweet candy shell; feel free to mix in white melts for a fun layered look.
- Vegetable Oil – Helps to achieve the perfect consistency for dipping your pops, ensuring a smooth finish.
For Decoration
- Mini Chocolate Chips or Black Sugar Pearls – Perfect for creating adorable eyes; any similar-sized candies can work as a substitute.
- Orange Candy or Fondant – Represents the beak of your little chick, bringing a pop of contrasting color.
- Yellow Fondant or Melted Candy – Used for the quirky tuft of “hair” on top, making your pops even cuter!
Step‑by‑Step Instructions for Easter Chick Cake Pops
Step 1: Crumble the Cake
Start by crumbling your cooled baked vanilla or yellow cake into fine crumbs in a large mixing bowl. Aim for a texture that resembles damp sand, ensuring there are no large chunks. Gradually mix in enough cream cheese frosting until the crumbs hold together when pressed. This process should take about 3-5 minutes, and the mixture should feel moist and sticky, perfect for shaping into balls.
Step 2: Shape the Cake Balls
Once your mixture is combined, scoop out portions and roll them into 1-inch balls using your hands. Place the shaped balls on a parchment-lined baking sheet. This step is crucial for your Easter Chick Cake Pops to maintain their shape. After shaping all the balls, chill them in the refrigerator for at least 30 minutes. The chilling helps set the structure and makes them easier to handle.
Step 3: Prepare the Lollipop Sticks
While the cake balls are chilling, melt a small amount of yellow candy melts according to package instructions. Once melted, dip the tips of your lollipop sticks into the coating, then gently insert them into the center of each chilled cake ball about halfway. This technique secures the stick and will prevent the cake from falling off later. After inserting the sticks, return the pops to the fridge for another 15 minutes to firm up.
Step 4: Coat the Cake Pops
Prepare your work area by melting the remaining yellow candy melts until they are smooth and fluid. Carefully dip each chilled cake pop into the melted candy, ensuring it is fully coated and tapping off the excess. Look for an even, shiny finish on the candy coating. If desired, let the first layer dry for a few minutes, then re-dip for an extra thick layer for that delightful Easter Chick Cake Pops appearance.
Step 5: Decorate the Pops
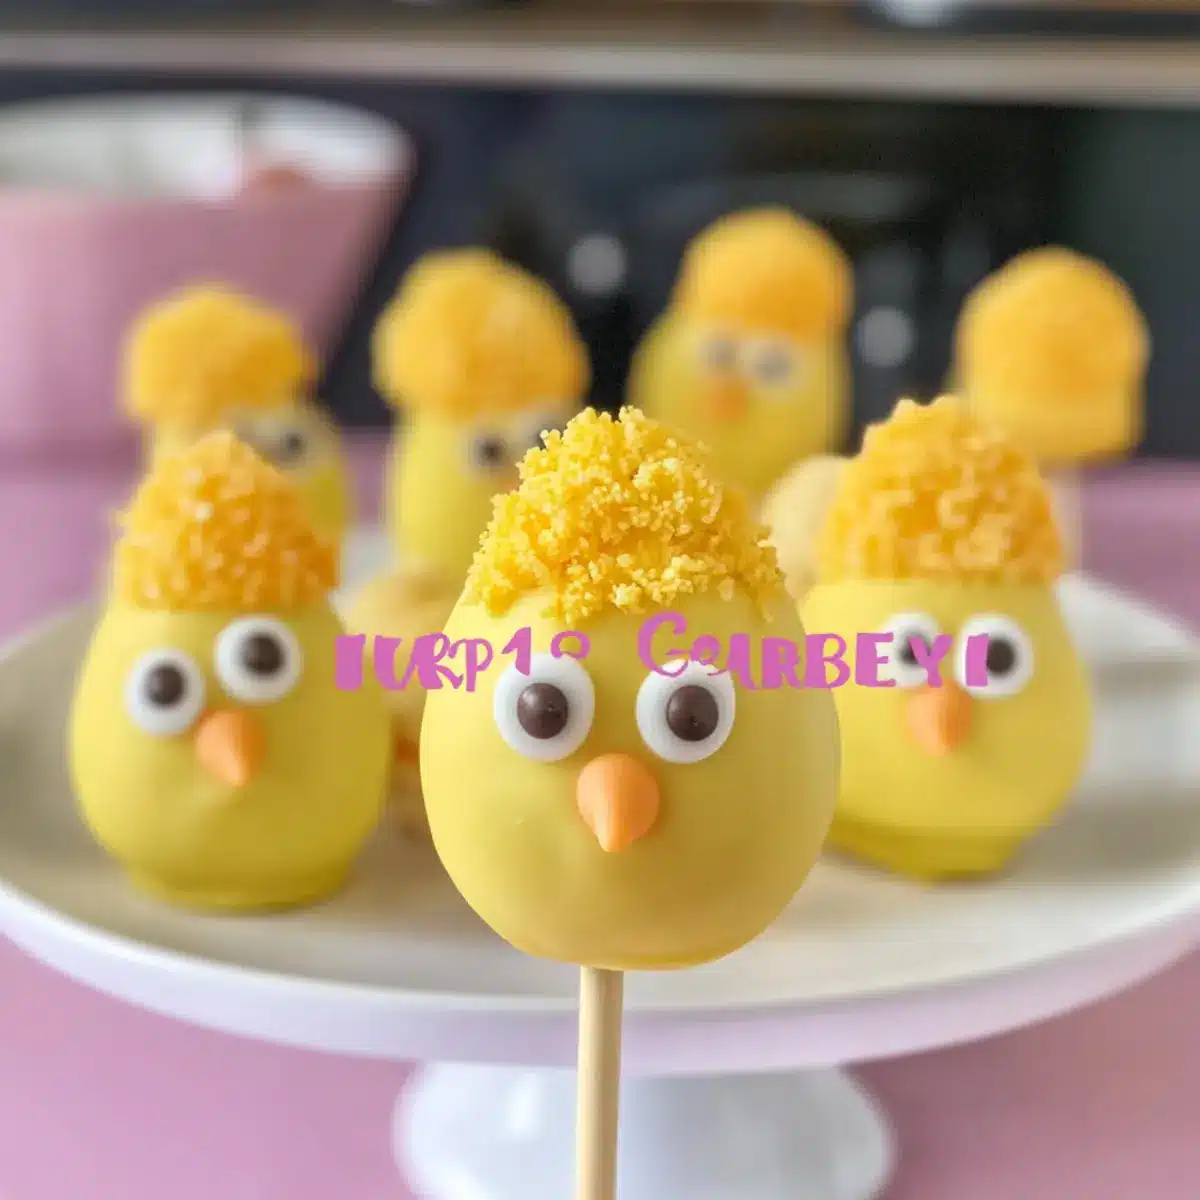
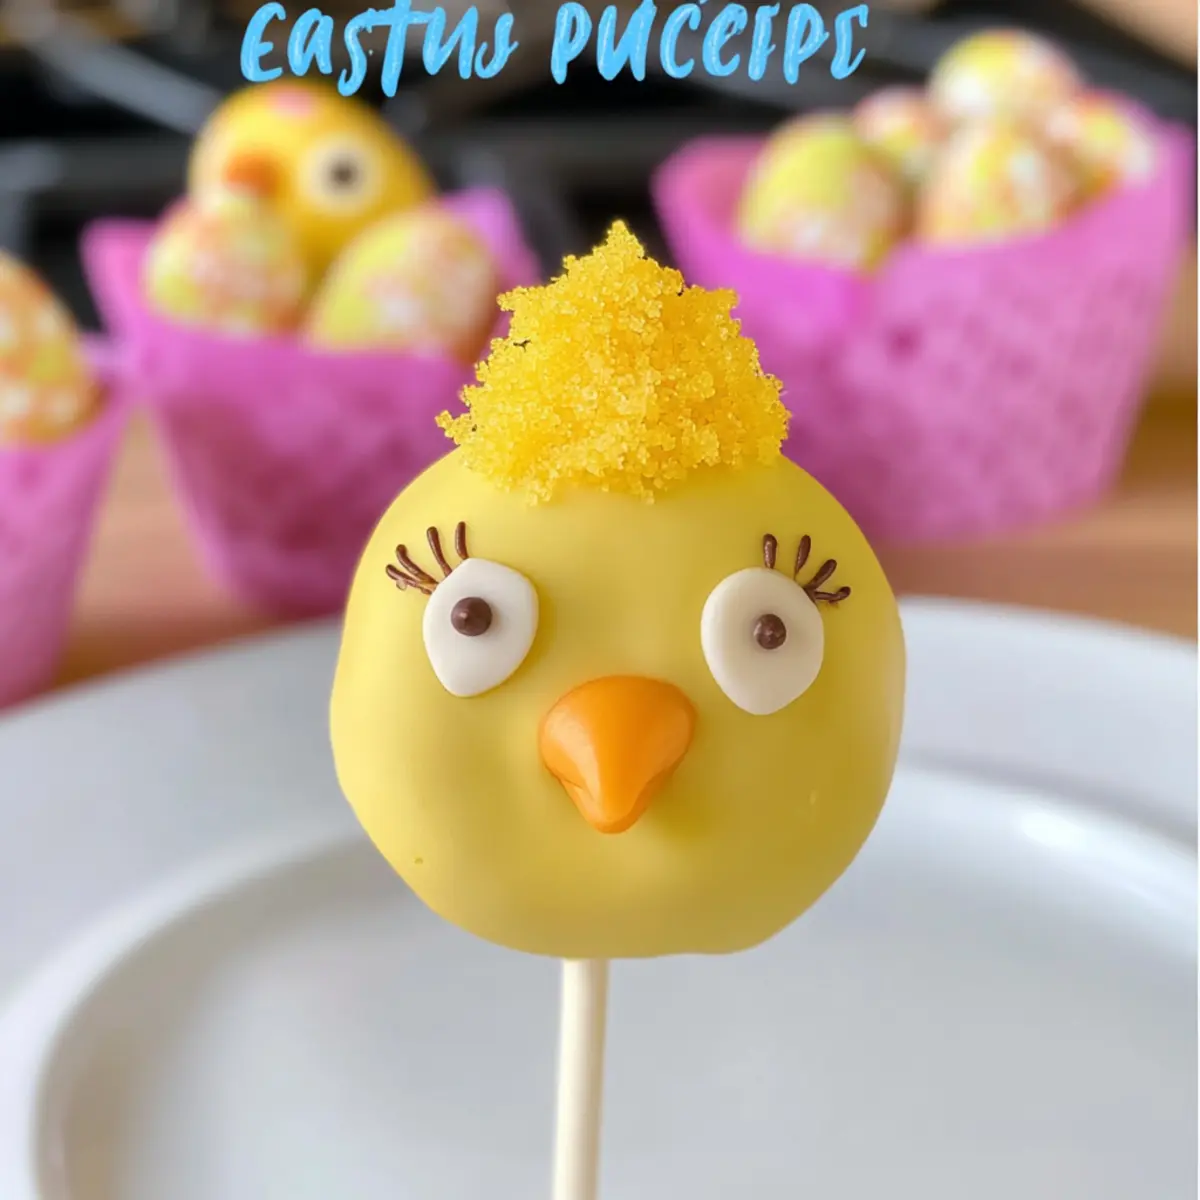
Once the coating has set, it’s time to bring your Easter Chick Cake Pops to life! Use mini chocolate chips or black sugar pearls to create eyes, pressing them gently into the candy coating while it’s still soft. For the beak, cut small pieces of orange candy or fondant and attach them just below the eyes. Finally, add little tufts of yellow fondant or melted candy on top for a playful chick look. Each pop should look adorable and colorful!
Step 6: Let Them Set
To finish off, place each decorated cake pop into a foam block or stand upright while the coating sets completely. This will take about 15-30 minutes at room temperature. Ensure they are in a cool, dry spot to avoid any melting or drips. Once set, your festive Easter Chick Cake Pops are ready to be enjoyed or served at your spring gatherings!

What to Serve with Easter Chick Cake Pops
As you plan an enchanting Easter celebration, consider what delightful accompaniments can elevate your dessert experience!
-
Fluffy Vanilla Cupcakes: These light and airy cupcakes offer a classic flavor that complements the brightness of lemon in your cake pops.
-
Fresh Fruit Platter: A colorful medley of berries and melons adds a refreshing touch, balancing the sweetness of the cake pops with natural zest.
-
Creamy Lemonade: A chilled pitcher of homemade lemonade with a hint of mint makes a vibrant, thirst-quenching drink that pairs perfectly with all your Easter treats.
-
Chocolate Dipped Strawberries: Their sweet and slightly tart profile harmonizes well with the cake pops, creating a delightful fusion of flavors on your dessert table.
-
Mini Cheesecakes: These bite-sized desserts can feature fruity toppings for contrast, allowing guests to enjoy a variety of textures and flavors along with the Easter Chick Cake Pops.
-
Easter-themed Sugar Cookies: Fun, decorated cookies featuring bunnies or eggs bring additional whimsy to your gathering while enchanting both kids and adults alike.
-
Buttery Popcorn: A light, crunchy snack sprinkled with sea salt offers a savory contrast to the sweet cake pops, perfect for those who enjoy a mix of flavors.
-
Sparkling Water: Serve this refreshing beverage with slices of citrus to enhance your party’s festive atmosphere, providing a zesty contrast to the rich cake pops.
Easter Chick Cake Pops Variations
Feel free to get creative with these delightful Easter Chick Cake Pops and tailor them to your taste!
-
Chocolate Cake: Swap vanilla for a rich chocolate cake base for a decadent twist.
-
Red Velvet Delight: Use red velvet cake for a festive look and a hint of cocoa flavor.
-
Gluten-Free Option: Substitute regular cake mix with a gluten-free cake mix for a tasty alternative.
-
Dairy-Free: Use dairy-free frosting and candy melts to make these pops suitable for lactose-intolerant friends.
-
Fondant Fun: Instead of candy melts, use colorful fondant for decorative detailing for a more artistic approach.
-
Zesty Variations: Amp up the lemon zing by adding a lemon glaze on top of the candy coating.
-
Spicy Kick: If you love heat, incorporate a pinch of cayenne pepper into the cake mix for a surprising flavor twist.
-
Change the Eyes: Use edible glitter or colorful sprinkles instead of chocolate chips for a sparkle that’ll dazzle at your Easter celebration.
Remember, if you’re looking for other sweet treats to impress, try pairing these pops with a delicious Chocolate Mousse Cake or a light and fruity Chick Fil Frosted. Happy baking!
Make Ahead Options
These Easter Chick Cake Pops are perfect for meal prep enthusiasts! You can prepare the cake balls up to 24 hours in advance by following the first three steps of the recipe and chilling them well. Once shaped, store them in an airtight container in the fridge to maintain moisture and freshness. For the best quality, coat the cake pops on the day of serving, as this ensures the vibrant candy shell stays crispy and doesn’t soften. On the day of your celebration, simply dip each chilled cake pop into melted yellow candy and proceed with the decoration for delightful, ready-to-enjoy Easter Chick Cake Pops that are just as delicious!
How to Store and Freeze Easter Chick Cake Pops
Room Temperature: Store your Easter Chick Cake Pops in an airtight container at room temperature for up to 3 days to keep them fresh and delicious.
Fridge: For longer storage, place the cake pops in the refrigerator for up to one week. Ensure they are in a sealed container to prevent them from drying out.
Freezer: To freeze, wrap each cake pop individually in plastic wrap and place them in a freezer-safe container. They can be stored in the freezer for up to 2 months; just thaw in the fridge before serving.
Reheating: If you’d like to enjoy them slightly warm, gently microwave them for about 5-10 seconds on a low setting. This softens the candy coating but be careful not to melt it!
Expert Tips for Easter Chick Cake Pops
-
Cool Cake First: Allow the cake to cool completely before crumbling. This prevents excess moisture loss and ensures delightful cake pops.
-
Smooth Coating: When dipping your pops in candy melts, aim for a smooth, even layer. Tap off any excess to achieve a beautiful finish.
-
Chill for Stability: Chilling the cake balls and pops helps maintain their shape, making it easier to handle them during decoration and coating.
-
Use Foam Blocks: For easy decorating, use a foam block to hold your decorated Easter Chick Cake Pops upright until the coating sets.
-
Lemon Zest: Don’t skip the lemon zest! It enriches the cake’s flavor, providing a refreshing twist that makes your Easter Chick Cake Pops irresistible.
Easter Chick Cake Pops Recipe FAQs
What type of cake should I use for the Easter Chick Cake Pops?
Absolutely use a baked vanilla or yellow cake for the base! A denser cake is ideal as it retains its shape better when crumbled. Avoid using overly moist cakes like sponge cakes because they can lead to mushy pops.
How should I store my Easter Chick Cake Pops?
For optimal freshness, store your cake pops in an airtight container at room temperature for up to 3 days. If you want to keep them longer, refrigerate them, and they will last up to one week. Just make sure to seal them well to prevent them from drying out!
Can I freeze Easter Chick Cake Pops?
Yes, you can! To freeze, wrap each cake pop individually in plastic wrap and place them in a freezer-safe container. They can be stored for up to 2 months. When you’re ready to enjoy them, simply move them to the fridge to thaw before serving. This step ensures they maintain their delightful texture!
What if my coating doesn’t stick properly to the cake pops?
No worries! This can sometimes happen. First, make sure your cake balls are chilled, which helps them hold their shape and the coating better. If the coating still isn’t sticking, consider dipping the sticks into melted candy melts before inserting them into the cake balls to create a stronger bond.
Are there any allergies I should be aware of with these cake pops?
Definitely! Since the Easter Chick Cake Pops contain common allergens like dairy from the cream cheese frosting and eggs in the cake, be cautious if you or your guests have any allergies. You can also explore using dairy-free alternatives for the frosting and cake, making it inclusive for various dietary needs.
How long will it take to make these cake pops from start to finish?
Plan for about 2 hours to complete your Easter Chick Cake Pops. This allows time for chilling, coating, and decorating. The chilling time is key, so don’t rush it! You’ll be rewarded with adorable, delicious pops that everyone will love!
Easter Chick Cake Pops with a Zesty Lemon Twist
Ingredients
Equipment
Method
- Crumble the cooled baked vanilla or yellow cake into fine crumbs in a large mixing bowl. Gradually mix in enough cream cheese frosting until the crumbs hold together.
- Scoop portions of the mixture and roll them into 1-inch balls. Chill in the refrigerator for at least 30 minutes.
- Melt a small amount of yellow candy melts and dip the tips of the lollipop sticks into the coating, then insert them into the center of each chilled cake ball.
- Melt the remaining yellow candy melts and dip each chilled cake pop into the melted candy, ensuring it is fully coated.
- Decorate by pressing mini chocolate chips or black sugar pearls into the coating for eyes, and attach small pieces of orange candy or fondant for the beak.
- Place each decorated cake pop upright in a foam block until the coating sets completely, about 15-30 minutes.
Leave a Reply