
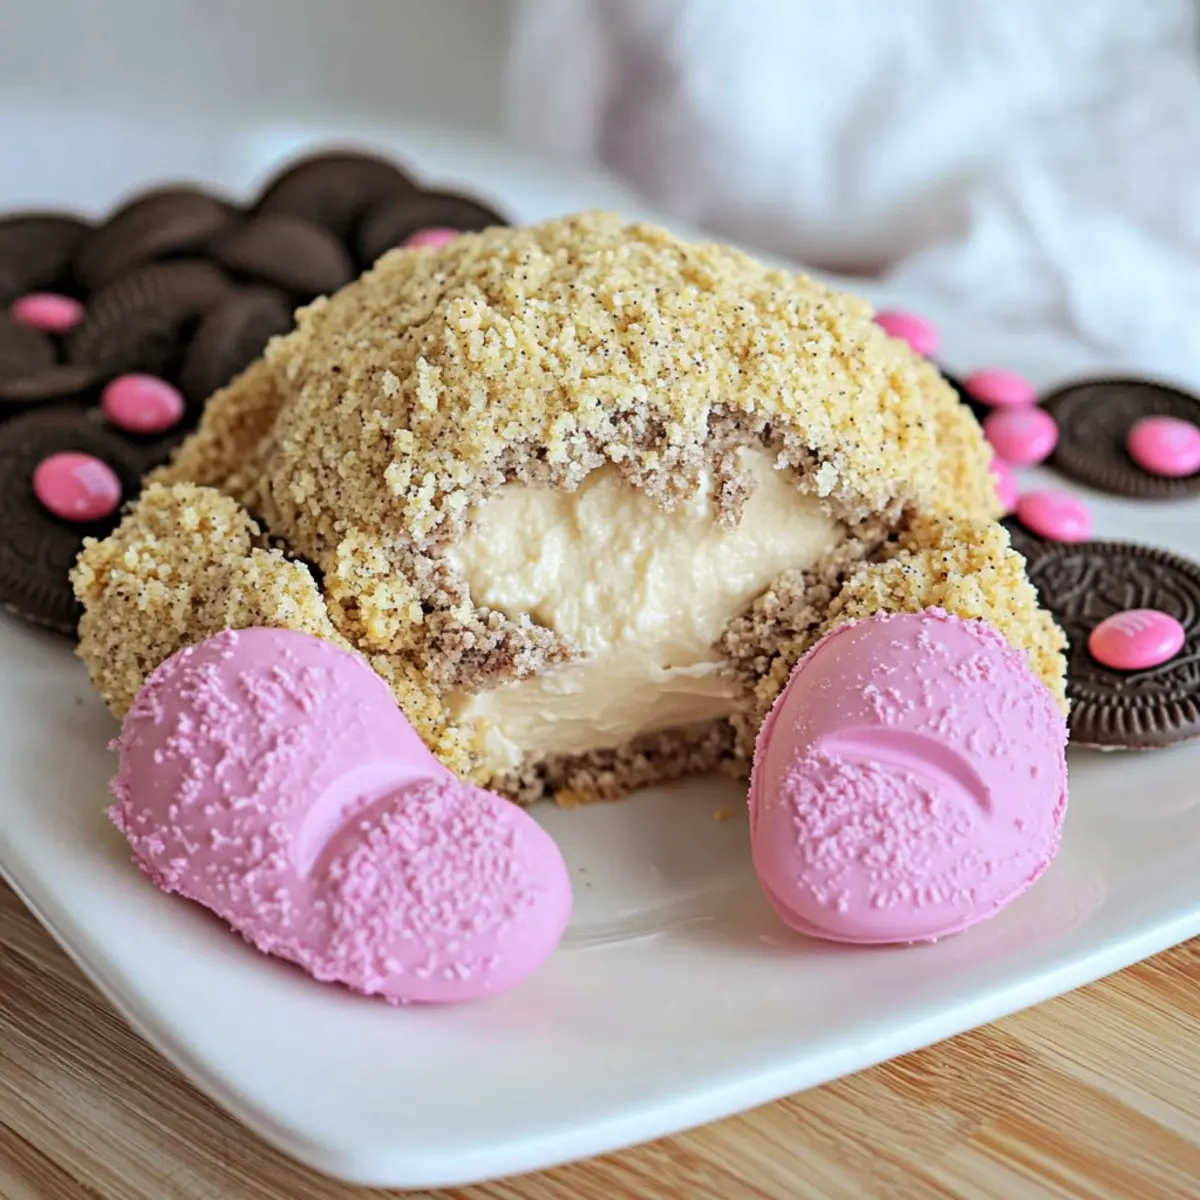
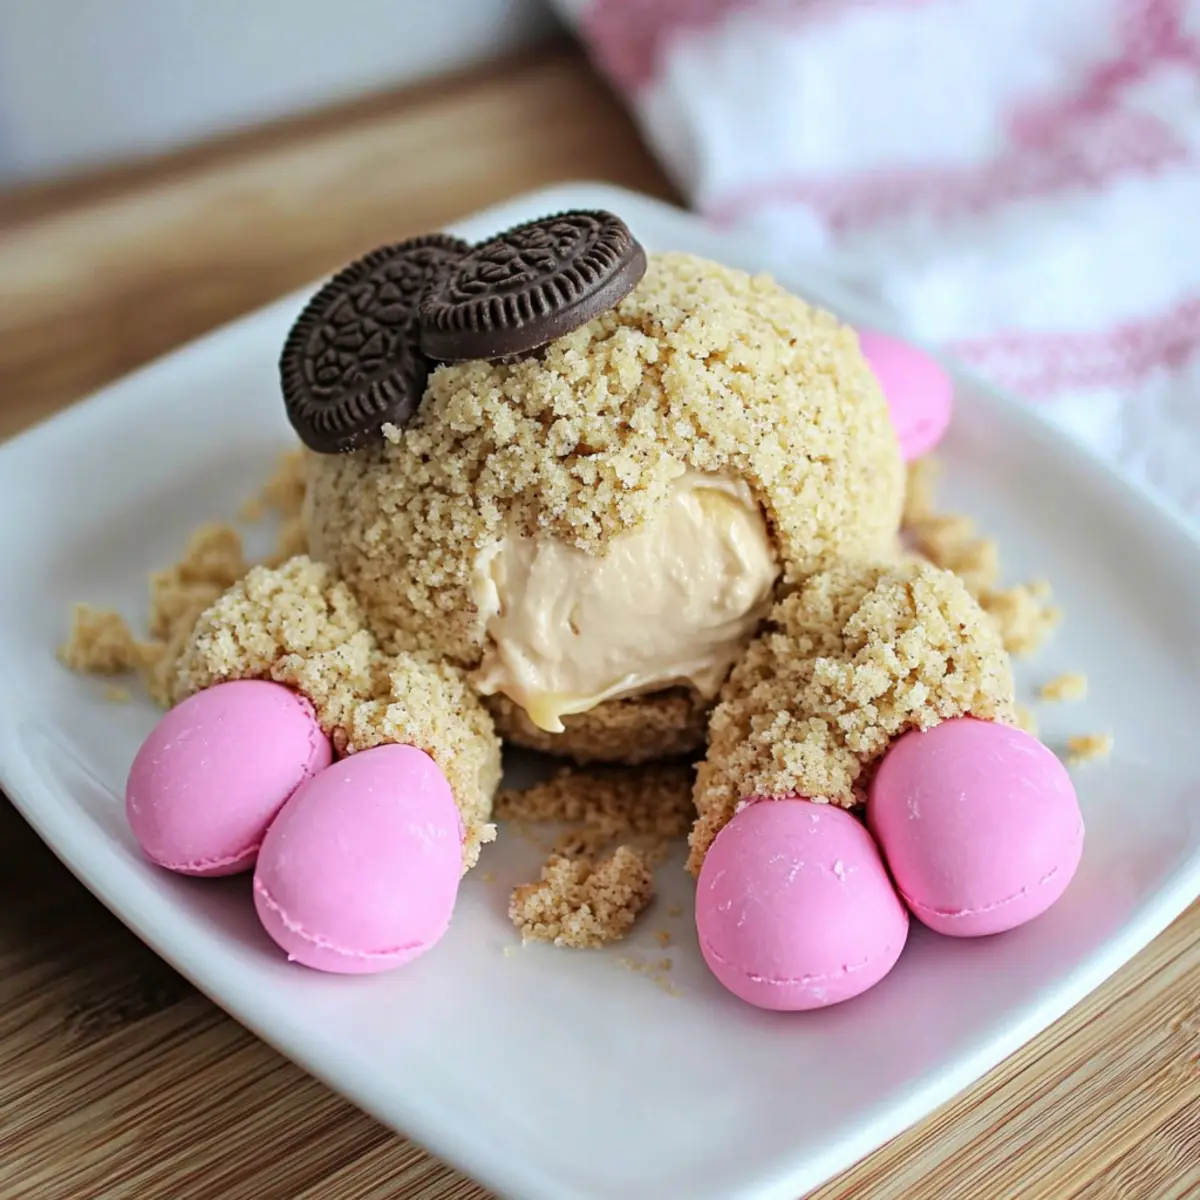
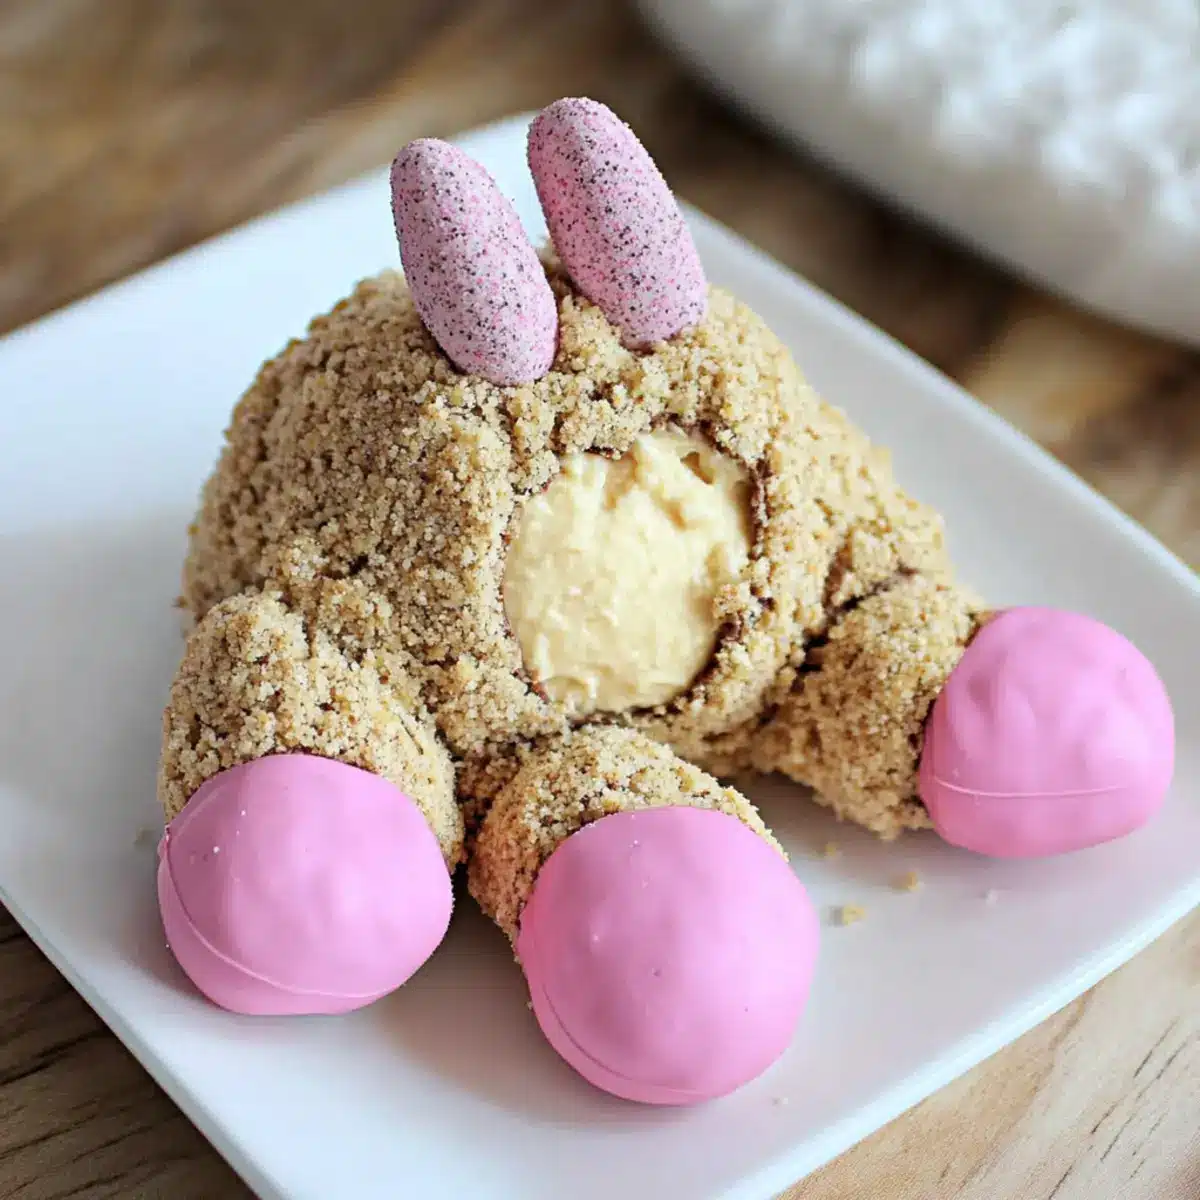
As I unwrapped the first batch of Easter treats, an unexpected glee washed over me. This Easter Bunny Butt Chocolate Cheesecake Cheese Ball is about to take center stage at my holiday gathering! With its rich double chocolate cheesecake flavor and a playful design, it’s the kind of no-bake dessert that is quick to whip up yet stands out on any festive table. Coated in crunchy Golden Oreo crumbs and adorned with cute pink M&Ms, this adorable concoction not only brings smiles but also combines the joy of indulgent chocolate with creative presentation. Perfect for your next celebration, this dessert cheese ball invites everyone to gather around and dig in. Are you ready to impress your friends and family with this delightful little rabbit?
Why is this dessert a must-try?
Irresistible Fun: This Easter Bunny Butt Chocolate Cheesecake Cheese Ball not only tastes divine, but its adorable presentation will be the showstopper at any gathering.
Quick & Easy: No baking required! Simply mix, mold, and chill for a deliciously satisfying treat.
Decadent Chocolate Flavor: The rich double chocolate cheesecake base creates an indulgent experience that chocolate lovers will adore.
Versatile Serving Options: Serve it with fruits or cookies, and watch everyone eagerly dip in for a taste!
Endearing Aesthetic: The cute design, topped with delightful pink M&Ms, adds a cheerfulness that perfectly fits any Easter celebration.
Get ready to wow your guests with this festive treat that can be made ahead, just like my Chocolate Peanut Butter or Pistachio Mushroom Cheesecake.
Easter Bunny Butt Chocolate Cheesecake Cheese Ball Ingredients
• Gather the essentials for your festive delight!
For the Cheesecake Base
- Cream Cheese – Provides creaminess and structure; must be softened for easy mixing.
- Cocoa Powder – Adds rich chocolate flavor and color; use less for a milder taste.
- Butter – Contributes richness; ensure it’s softened for easy blending.
- Mini Chocolate Chips – Adds texture and an extra chocolate kick; opt for dark or semi-sweet for variation.
- Brown Sugar – Offers sweetness and moisture; can be swapped with granulated sugar if necessary.
- Powdered Sugar – Sweetens and creates a smooth texture in the mixture.
For the Decoration
- Pink M&Ms – Essential for creating adorable bunny feet; adds a pop of color.
- Golden Oreos – Provides a crunchy coating; can be replaced with coconut flakes or other cookies for a twist.
Get ready for an enchanting cooking experience with this delightful Easter Bunny Butt Chocolate Cheesecake Cheese Ball that will surely become the highlight of your Easter festivities!
Step‑by‑Step Instructions for Easter Bunny Butt Chocolate Cheesecake Cheese Ball
Step 1: Prepare the Oreo Coating
Start by processing two rows of Golden Oreos in a food processor until they resemble fine crumbs, which should take about 30 seconds. Once you achieve a sandy texture, transfer the crumbs to a shallow bowl, setting the stage for the delicious coating that will give your Easter Bunny Butt Chocolate Cheesecake Cheese Ball its delightful crunch.
Step 2: Mix the Cheesecake Base
In a large mixing bowl, blend together 8 ounces of softened cream cheese, ¼ cup cocoa powder, ¼ cup softened butter, ½ cup mini chocolate chips, ⅓ cup brown sugar, and ⅔ cup powdered sugar. Using an electric mixer, beat the mixture on medium speed for about 2 minutes until it’s smooth and creamy, ensuring everything is well combined, with no lumps remaining for that perfect cheesecake base.
Step 3: Shape the Bunny Body
Once the mixture is creamy and smooth, use your hands to shape it into a large ball for the bunny’s body. Then, create two medium-sized balls for the feet and one small ball for the tail. As you mold the shapes, aim for a nice, round form—this adds to the overall cute presentation of your Easter Bunny Butt Chocolate Cheesecake Cheese Ball.
Step 4: Roll in Oreo Crumbs
Take each shaped piece and roll them in the Oreo crumbs, making sure to coat them thoroughly. This process should ensure each piece of your bunny is covered, enhancing both flavor and appearance. The crumbs will stick well if you apply gentle pressure while rolling, and you should see a nice even layer forming around each ball.
Step 5: Assemble the Bunny
On a festive serving plate, arrange the large bunny body in the center. Position the two medium balls in front of it for the feet, followed by placing the small ball on top of the large ball as the tail. This cute assembly gives your Easter Bunny Butt Chocolate Cheesecake Cheese Ball its recognizable shape, making it a delightful centerpiece for any gathering.
Step 6: Decorate with M&Ms
For the final touches, use pink M&Ms to create the cute bunny toes and pads on each foot. Choose four M&Ms for each foot, and don’t forget to arrange extra crumbs around any bare areas for a cohesive look. This will add a burst of color and charm, making your dessert even more inviting and festive.
Step 7: Chill and Serve
To achieve the best flavor and texture, cover the assembled cheese ball with plastic wrap and refrigerate it for at least 30 minutes before serving. This chilling time allows the flavors to meld beautifully, resulting in a fresher and richer taste for your guests to enjoy with this adorable Easter Bunny Butt Chocolate Cheesecake Cheese Ball.
Easter Bunny Butt Chocolate Cheesecake Cheese Ball Variations
Feel free to let your creativity shine as you customize this delightful treat! A few easy tweaks can elevate the experience even more.
-
Graham Cracker Crust: Swap out Golden Oreos for crushed graham crackers for a classic flavor twist. This adds a subtle sweetness that perfectly complements the chocolate base.
-
Coconut Coating: Use coconut flakes instead of cookie crumbs for a tropical flair. The fluffy texture mimics bunny fur and brings a light, fun element to your dessert.
-
Flavored Cream Cheese: Incorporate flavored cream cheese, such as strawberry or key lime, for a unique cheesecake twist. Each flavor variation brings a refreshing vibe perfect for spring gatherings.
-
Nutty Crunch: Add chopped nuts like almonds or pecans to the chocolate mixture for an unexpected crunch. This not only enhances the texture but also adds a delightful nutty flavor that pairs beautifully with the chocolate.
-
Extra Chocolate: Boost the chocolate flavor by adding more mini chocolate chips or even some chocolate shavings on top for a decadent touch. No such thing as too much chocolate during the holidays!
-
Spicy Kick: For those who love a little heat, consider adding a pinch of cayenne pepper or chili powder to the cheesecake mixture. The subtle spice against the sweet chocolate is both new and exciting!
-
Fruit Garnish: Serve alongside fresh strawberries or raspberries to complement the cheesecake. These fruits not only add color but also enhance the dessert’s flavors with their natural tartness.
Let your imagination soar with this Easter Bunny Butt Chocolate Cheesecake Cheese Ball, and for more thrilling dessert ideas, you might enjoy my Texas Chocolate Pecan or rich Chocolate Mousse Cake.
What to Serve with Easter Bunny Butt Chocolate Cheesecake Cheese Ball
As you gather around the table, consider complementing this fun dessert with a variety of delightful accompaniments that enhance the festive spirit.
-
Fresh Fruit Platter: A medley of strawberries, blueberries, and apple slices provides a refreshing contrast to the rich cheesecake, cutting through the sweetness.
-
Graham Crackers: These crunchy, slightly sweet crackers are perfect for dipping, adding a delightful texture and flavor that pairs wonderfully with the chocolatey goodness.
-
Chocolate Covered Pretzels: The salty crunch of pretzels dipped in chocolate harmonizes beautifully with the sweet cheesecake ball, embodying the perfect balance of flavors.
-
Mini Marshmallows: Soft and fluffy, they can be skewered and dipped into the cheese ball, offering a nostalgic touch that feels like a playful indulgence.
-
Whipped Cream: A dollop of light, airy whipped cream on the side adds decadence and a creamy texture to every bite, inviting guests to dive in.
Pair these delightful sides with your Easter Bunny Butt Chocolate Cheesecake Cheese Ball for a memorable and joyful holiday feast!
Make Ahead Options
These Easter Bunny Butt Chocolate Cheesecake Cheese Balls are perfect for busy home cooks looking to save time! You can prepare the cheesecake base up to 24 hours in advance. Simply follow the instructions to mix the ingredients and shape them into a bunny body, feet, and tail. Wrap the formed pieces tightly in plastic wrap and refrigerate until you’re ready to coat them in Oreo crumbs. To maintain that delightful texture, add the crumb coating just before serving; this ensures the crispiness remains intact. When ready to impress, simply assemble and decorate your Easter Bunny Butt Chocolate Cheesecake Cheese Ball, and enjoy deliciously festive results with minimal effort!
Expert Tips for Easter Bunny Butt Chocolate Cheesecake Cheese Ball
-
Room Temperature Cream Cheese: Ensure that cream cheese is softened to room temperature to avoid lumps. This helps achieve a smooth cheesecake base.
-
Chill Time: Allow the assembled cheese ball to chill for at least 30 minutes before serving. This step melds the flavors and enhances overall taste.
-
Cookie Coating Alternatives: Feel free to substitute Golden Oreos with crushed graham crackers or coconut flakes for a different flavor profile and texture.
-
Creative Decoration: Use various colored candies or sprinkles in place of pink M&Ms to create a unique look each time you make the Easter Bunny Butt Chocolate Cheesecake Cheese Ball.
-
Flavor Variations: Experiment with flavored cream cheeses, like chocolate or strawberry, to give your cheesecake a unique twist that will delight your guests.
How to Store and Freeze Easter Bunny Butt Chocolate Cheesecake Cheese Ball
Fridge: Store your cheese ball in an airtight container for up to 3 days. This helps maintain its creamy texture and delicious flavor.
Freezer: You can freeze the cheese ball for up to 1 month. Wrap it tightly in plastic wrap, then foil to prevent freezer burn. Thaw in the fridge overnight before serving.
Reheating: This dessert is best served cold and doesn’t require reheating. If served chilled, it will retain its delightful creaminess and shape.
Make-Ahead Tips: Prepare the Easter Bunny Butt Chocolate Cheesecake Cheese Ball a day in advance and refrigerate it, just remember to coat it in crumbs right before serving for best results!
Easter Bunny Butt Chocolate Cheesecake Cheese Ball Recipe FAQs
What kind of cream cheese should I use?
Absolutely! For the best results, choose full-fat cream cheese that’s been softened to room temperature. This will ensure a creamy texture without lumps for your Easter Bunny Butt Chocolate Cheesecake Cheese Ball. You can use block cream cheese for a thicker consistency, or whipped cream cheese for lighter notes.
How long can I store the cheese ball in the fridge?
Very! Your cheese ball can be stored in an airtight container in the refrigerator for up to 3 days. Just make sure it’s well-covered to maintain its moisture and flavor. If you’re making it ahead of time, this is a perfect option!
Can I freeze the cheese ball? How do I do it?
Yes, indeed! To freeze your Easter Bunny Butt Chocolate Cheesecake Cheese Ball, wrap it tightly in plastic wrap, then foil to prevent freezer burn. It will keep well in the freezer for up to 1 month. When you’re ready to serve it, simply thaw it in the fridge overnight and coat it in Oreo crumbs just before serving.
What if my cheesecake mix is too lumpy?
Oh no, nobody wants a lumpy cheese ball! If your cheesecake mixture has lumps, it’s likely the cream cheese was too cold. I recommend allowing your cream cheese to sit out for at least 30 minutes before mixing. For a little extra help, whip the batter with a mixer on medium speed until it smooths out. An electric mixer can also effectively break down any small lumps.
Can I make this nut-free?
Absolutely! This dessert already doesn’t include nuts, so it’s a great choice for those with nut allergies. Just double-check any add-ins like chocolate chips or decorations are also nut-free to keep it safe for everyone at your gathering.
Can I use a different cookie for coating?
Very! If you want to switch things up, you can substitute Golden Oreos with crushed graham crackers or digestive biscuits. Alternatively, coconut flakes would provide a delightful texture and flavor, adding a whimsical touch to your Easter Bunny Butt Chocolate Cheesecake Cheese Ball. Feel free to get creative with your coating!

Easter Bunny Butt Chocolate Cheesecake Cheese Ball Delight
Ingredients
Equipment
Method
- Process two rows of Golden Oreos in a food processor until fine crumbs for about 30 seconds.
- In a mixing bowl, blend cream cheese, cocoa powder, butter, mini chocolate chips, brown sugar, and powdered sugar until smooth and creamy.
- Shape the mixture into one large ball for the bunny's body, two medium balls for the feet, and one small ball for the tail.
- Roll each piece in the Oreo crumbs until thoroughly coated.
- Assemble the bunny by placing the large ball in the center and the feet and tail as instructed.
- Decorate with pink M&Ms on the feet and arrange crumbs around bare areas.
- Cover with plastic wrap and refrigerate for at least 30 minutes before serving.
Leave a Reply