
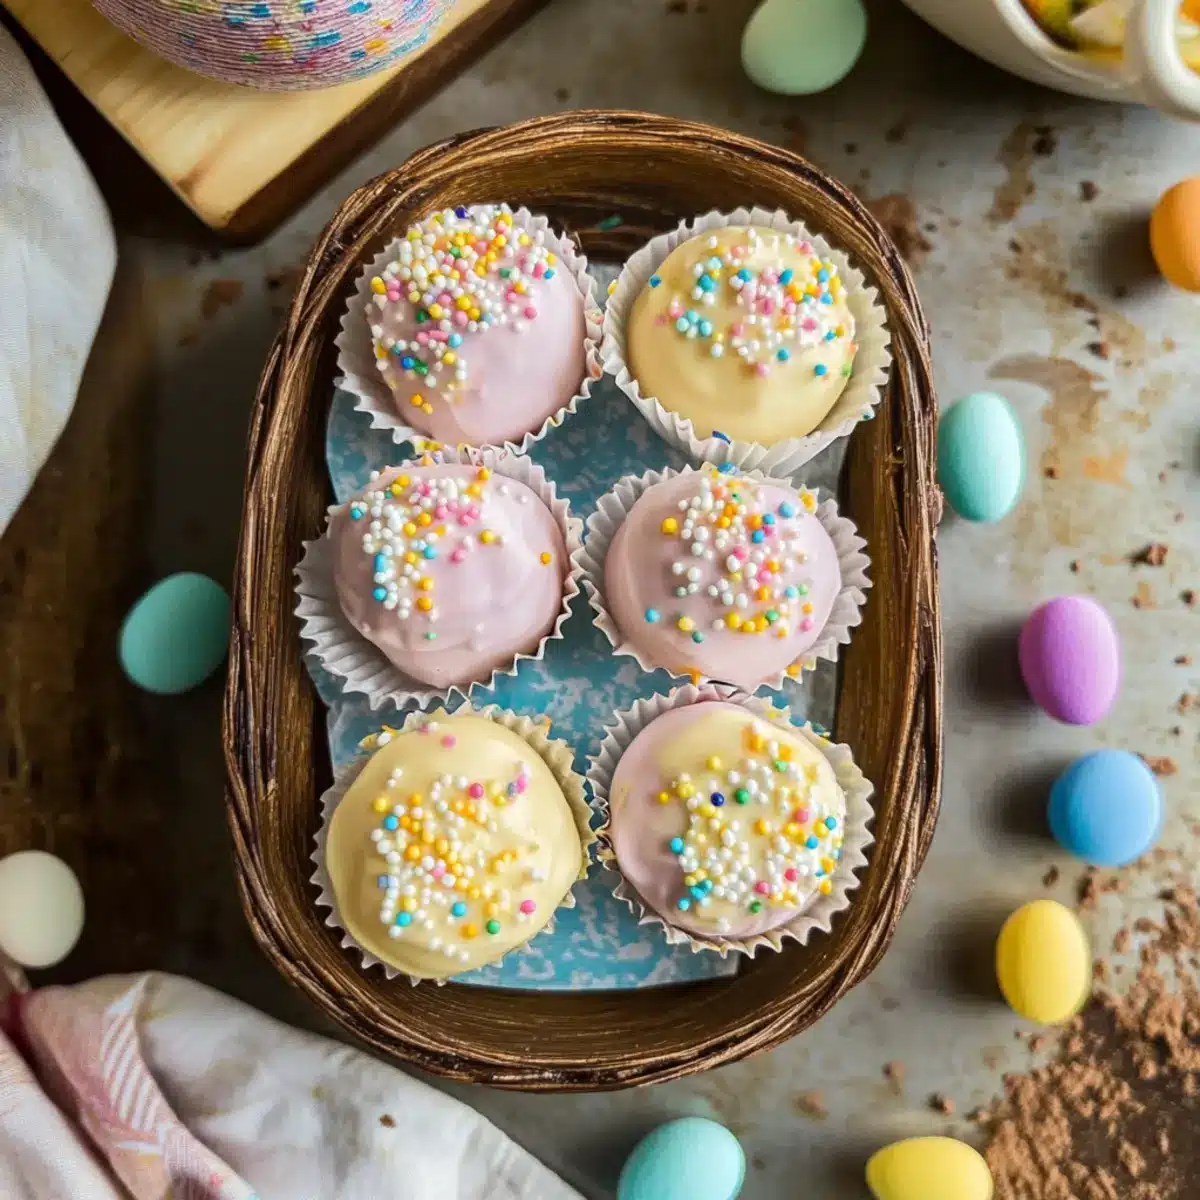
As I unwrapped the pastel-colored foil, my heart skipped a beat—inside were these irresistible Banana Pudding Easter Truffles. A delightful fusion of creamy banana pudding, crunchy vanilla wafers, and silky chocolate, these truffles quickly became the stars of my Easter gatherings. The best part? They’re no-bake and easy to whip up, making them a fantastic dessert for both kids and adults. Plus, with each bite, you get a nostalgic taste of classic banana pudding, all wrapped up in a fun, bite-sized treat. Whether you’re gifting them to friends or enjoying them yourself, these truffles add a playful touch to your Easter celebrations. Curious to see how simple it is to create this sweet spring indulgence? Let’s dive into the recipe!
Why are these truffles a must-try?
No-Bake Delight: These Banana Pudding Easter Truffles are effortlessly simple, requiring no baking skills!
Kid-Friendly Fun: Perfect for little hands, kids will love helping roll and decorate these truffles, making them a great family activity.
Crowd-Pleasing Treat: With their nostalgic banana pudding flavor wrapped in creamy chocolate, these bites are sure to impress at any gathering.
Gift-Ready Goodness: Package them in cute boxes for a thoughtful homemade gift that friends and family will adore.
Customizable Options: Feel free to experiment! Try variations like Coconut Banana Truffles or the Peanut Butter Twist to add your personal touch.
Quick and Easy: From mixing to chilling, you can whip these up in under an hour, making it a perfect last-minute dessert option.
Banana Pudding Easter Truffles Ingredients
For the Truffle Mixture
- Crushed Vanilla Wafers – Provides structure and crunch; substitute with graham cracker crumbs for variety.
- Cream Cheese (softened) – Adds creaminess and binds the mixture; ensure it’s at room temperature for easy mixing.
- Banana Pudding Mix (3.4 oz, dry) – Delivers the classic banana flavor; a high-quality mix enhances taste.
- Milk (2 tablespoons) – Moistens the filling; use almond milk or any plant-based milk for a dairy-free version.
- Vanilla Extract (1 teaspoon) – Enhances the banana flavor; optional but recommended for depth.
For the Chocolate Coating
- White Chocolate Chips or Candy Melts (2 cups) – For coating the truffles; dark chocolate can be substituted for a richer flavor.
- Food Coloring – Optional for tinting the chocolate coating in pastel colors.
For Decoration
- Crushed Vanilla Wafers or Easter Sprinkles – Optional toppings for a festive finish; adds a fun touch to your Banana Pudding Easter Truffles.
Step‑by‑Step Instructions for Banana Pudding Easter Truffles
Step 1: Make the Truffle Mixture
In a large mixing bowl, combine 1 ½ cups of crushed vanilla wafers with 8 oz. softened cream cheese, 3.4 oz. of dry banana pudding mix, 2 tablespoons of milk, and 1 teaspoon of vanilla extract. Use an electric mixer or wooden spoon to mix until smooth and a dough forms, about 2-3 minutes. The mixture should be thick but well-combined, resembling a cookie dough.
Step 2: Shape the Truffles
Using a tablespoon, scoop out portions of the dough and roll them into bite-sized balls, approximately 1 inch in diameter. Place each rolled truffle on a parchment-lined baking sheet, spacing them a little apart. Once all the dough is shaped, gently press any irregular edges for a smoother look.
Step 3: Chill
Transfer the baking sheet with the shaped truffles to the refrigerator and chill for 30 to 45 minutes, or until they are firm to the touch. This chilling step is crucial to ensure the Banana Pudding Easter Truffles hold their shape when dipped in chocolate, making each bite perfectly delightful.
Step 4: Melt the Chocolate
While the truffles are chilling, prepare the chocolate coating. In a microwave-safe bowl, add 2 cups of white chocolate chips and heat in 30-second intervals, stirring in between until fully melted and smooth. If you wish, mix in a few drops of food coloring at this point to create a pastel hue that enhances your Easter presentation.
Step 5: Coat the Truffles
Once the chocolate is melted, remove the truffles from the refrigerator. Using a fork, dip each truffle into the melted chocolate, making sure it is fully coated. Lift the truffle out and gently tap the fork against the edge of the bowl to let the excess chocolate drip off, allowing for a thin, even layer on the truffles.
Step 6: Decorate
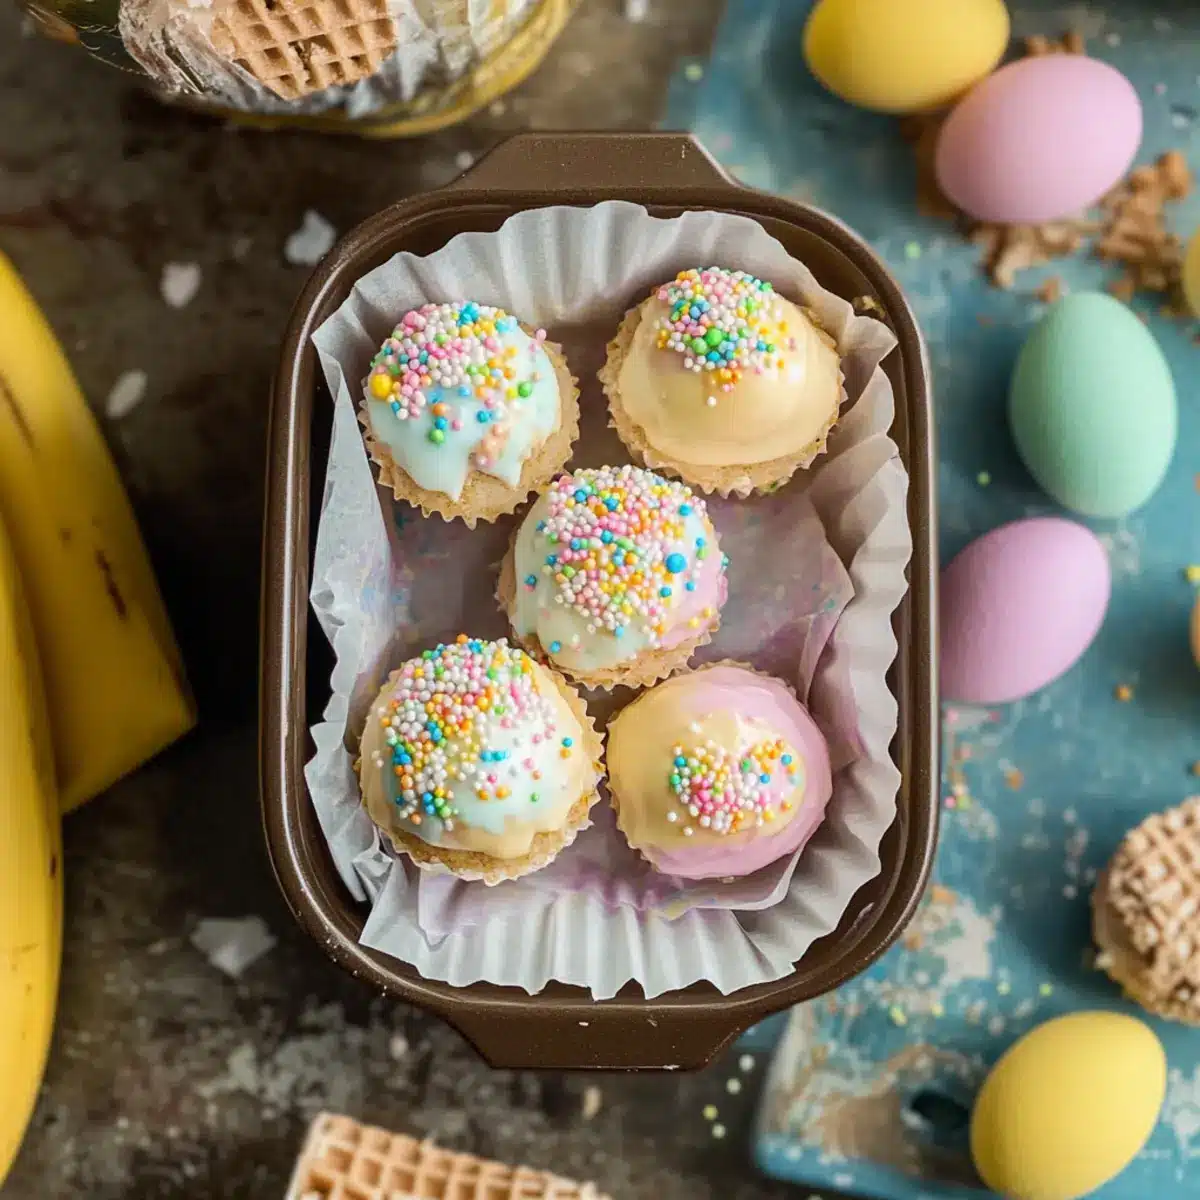
Before the chocolate coating sets, sprinkle the tops of the coated truffles with crushed vanilla wafers or colorful Easter sprinkles. This extra decoration not only adds visual appeal but also a delightful crunch that complements the creamy filling of the Banana Pudding Easter Truffles.
Step 7: Let Them Set
Place the decorated truffles back on the parchment-lined sheet. Allow them to set at room temperature for about 15-20 minutes or place them in the fridge for a quicker setting time. The chocolate will harden and create a beautiful, glossy finish on your truffles, ensuring they’re ready for serving.
Step 8: Serve
Once set, arrange your Banana Pudding Easter Truffles on a decorative platter or in cute gift boxes for sharing. These delightful treats make perfect additions to your Easter celebrations and are sure to impress both kids and adults alike. Enjoy these sweet, no-bake delights fresh or store them in an airtight container for later indulgence.

Banana Pudding Easter Truffles Variations
Feel free to get creative and personalize your Banana Pudding Easter Truffles to match your taste preferences and family favorites!
-
Chocolate-Dipped: Use dark or milk chocolate for a bolder and richer flavor, enhancing the truffle experience immensely. A little twist can make all the difference in your dessert game!
-
Coconut Infusion: Roll your truffles in shredded coconut for a tropical flair that adds both texture and a delightful sweetness. Imagine the beach vibes at your Easter celebration with this fun choice.
-
Peanut Butter Bliss: For a nutty twist, mix peanut butter into your truffle filling. This addition makes each bite a creamy delight, combining chocolate and peanut butter in a nostalgic bite.
-
Mint Chocolate: Add a drop of mint extract to the chocolate coating for a refreshing finish. Imagine the invigorating surprise as you bite into these cheerful, minty truffles!
-
Decadent Caramel: Drizzle homemade or store-bought caramel sauce over the chocolate coating for a sweet twist. The gooey addition brings an irresistible richness to your truffles.
-
Fruit Fusion: Fold in finely chopped fruits like strawberries or raspberries into the truffle mixture for fruity bursts of flavor. This will not only elevate the taste but also create a vibrant, colorful treat.
-
Nutty Crunch: Incorporate crushed nuts like almonds or pecans into the filling for a bit of crunch. This texture contrast will make your truffles even more intriguing and satisfying.
Explore these delightful variations while making these Banana Pudding Easter Truffles! Whether you’re gearing up for a family feast or gifting a fun treat, these ideas can help elevate your dessert to new heights. Don’t forget to also check out other creative dessert ideas like Coconut Banana Truffles for more indulgent options!
Make Ahead Options
These Banana Pudding Easter Truffles are a fantastic option for meal prep, allowing you to enjoy homemade treats even on the busiest of days! You can prepare the truffle mixture and roll them into balls up to 24 hours in advance, storing them in an airtight container in the fridge. This keeps them fresh and ready to coat in chocolate when you’re ready to serve. Additionally, the coated truffles can be stored for up to 3 days in the refrigerator, ensuring they remain just as delicious and beautifully set. Just remember to let them come to room temperature for a few minutes before serving for the best texture. Preparing ahead of time makes entertaining effortless and helps you get back to enjoying precious family moments!
Expert Tips for Banana Pudding Easter Truffles
Maximize Flavor: Use ripe bananas: For an added twist, mix in mashed ripe bananas to elevate the flavor of your truffles.
Perfect Coating: Melt chocolate gently: Heat white chocolate in short bursts to prevent seizing, ensuring a smooth coating for your truffles.
Chilling Time: Don’t skip the fridge: Chilling the truffles is essential; it helps them firm up, making coating much easier and neater.
Decorative Touch: Customize with colors: Use food coloring for the chocolate to match your Easter theme, creating eye-catching Banana Pudding Easter Truffles.
Storage Tips: Keep them fresh: Store your truffles in an airtight container, extending freshness up to 5 days in the fridge or 2 months in the freezer.
What to Serve with Banana Pudding Easter Truffles?
Create a delightful Easter feast with these irresistible no-bake treats, perfect for sharing and celebrating.
- Creamy Vanilla Ice Cream: Perfectly complements the truffles’ flavors, adding a refreshing and creamy note to each bite.
- Fresh Fruit Salad: Bursting with seasonal fruits, it adds a refreshing, vibrant contrast to the sweetness of the truffles.
- Classic Coffee or Tea: A warm cup brings balance, enhancing the rich flavors and providing a comforting break in between treats.
- Easter Basket Goodies: Pair them with colorful, chocolate-filled Easter eggs for an enticing dessert table that kids will adore.
- Chocolate-Covered Strawberries: These provide a lovely, juicy contrast to the rich truffles, and their vibrant color adds a festive touch.
- Mini Cheesecakes: Their creamy texture and slight tanginess create a delightful flavor balance that complements the sweetness of the truffles beautifully.
- Pineapple Coconut Smoothie: Blending tropical tastes, this smoothie offers a refreshing surprise that aligns wonderfully with Easter’s celebratory spirit.
- Carrot Cake Muffins: The spiced sweetness of these muffins echoes the festive season, making them a lovely addition to your spread.
How to Store and Freeze Banana Pudding Easter Truffles
Fridge: Store truffles in an airtight container in the fridge for a maximum of 5 days. This helps maintain their creamy texture and flavor, ensuring they remain delightful for snacking.
Freezer: For longer shelf life, you can freeze Banana Pudding Easter Truffles for up to 2 months. Place them in a single layer on a baking sheet, freeze until solid, then transfer to a freezer-safe bag or container.
Thawing: To enjoy frozen truffles, simply transfer them to the fridge for 2-3 hours or let them sit at room temperature for about 30 minutes before serving.
Avoid Freezer Burn: Be sure to use airtight wrapping when storing in the freezer to prevent any freezer burn, keeping your truffles as tasty as the day you made them.

Banana Pudding Easter Truffles Recipe FAQs
How do I choose the best bananas for this recipe?
Absolutely! For the best flavor, use very ripe bananas that have a few brown spots. This ensures sweet and rich banana flavor in your truffles. If you’re buying bananas, look for those that are slightly soft to the touch, as they are perfect for mashing into your mixture.
How should I store Banana Pudding Easter Truffles?
To maintain their delightful texture, store the truffles in an airtight container in the fridge. They can last up to 5 days. If you want to keep them for longer, freezing is a great option too!
Can I freeze Banana Pudding Easter Truffles?
Very! Freeze your truffles by placing them in a single layer on a baking sheet until solid. Then transfer them to a freezer-safe bag or container, making sure to remove as much air as possible. They will stay fresh for up to 2 months. To thaw, simply place them in the fridge for 2–3 hours or leave them at room temperature for about 30 minutes.
What should I do if my chocolate coating is too thick?
If your chocolate is too thick, it may not dip nicely. To fix this, you can add a teaspoon of vegetable oil or shortening to the melted chocolate, stirring well until you reach a smoother consistency. This will help the chocolate flow better and coat your truffles evenly.
Are there any dietary considerations for these truffles?
For sure! If you need a dairy-free option, substitute the cream cheese with a dairy-free cream cheese alternative and use almond or oat milk instead of regular milk. Also, ensure that your chocolate chips are dairy-free if required. Always check the packaging for allergen information.
Can I customize the flavors of the truffles?
Absolutely! Get creative! You can mix in a spoonful of peanut butter for a nutty version, or add a drop of mint extract to your chocolate coating for a cool twist. Don’t hesitate to experiment with crushed nuts or coconut flakes on top to suit your personal taste!
Deliciously Easy Banana Pudding Easter Truffles Recipe
Ingredients
Equipment
Method
- In a large mixing bowl, combine crushed vanilla wafers, softened cream cheese, dry banana pudding mix, milk, and vanilla extract. Mix until smooth and a dough forms, about 2-3 minutes.
- Using a tablespoon, scoop out portions of the dough and roll them into bite-sized balls, approximately 1 inch in diameter. Place each rolled truffle on a parchment-lined baking sheet.
- Transfer the baking sheet with the shaped truffles to the refrigerator and chill for 30 to 45 minutes, or until they are firm to the touch.
- In a microwave-safe bowl, add white chocolate chips and heat in 30-second intervals until fully melted and smooth. Optionally mix in food coloring.
- Once the chocolate is melted, dunk each truffle into the melted chocolate until fully coated, allowing excess chocolate to drip off.
- Before the chocolate coating sets, sprinkle the tops of the coated truffles with crushed vanilla wafers or colorful Easter sprinkles.
- Place the decorated truffles back on the parchment-lined sheet. Allow them to set at room temperature for about 15-20 minutes or refrigerate for faster setting.
- Once set, arrange your Banana Pudding Easter Truffles on a decorative platter or in cute gift boxes for sharing. Enjoy!
Leave a Reply