
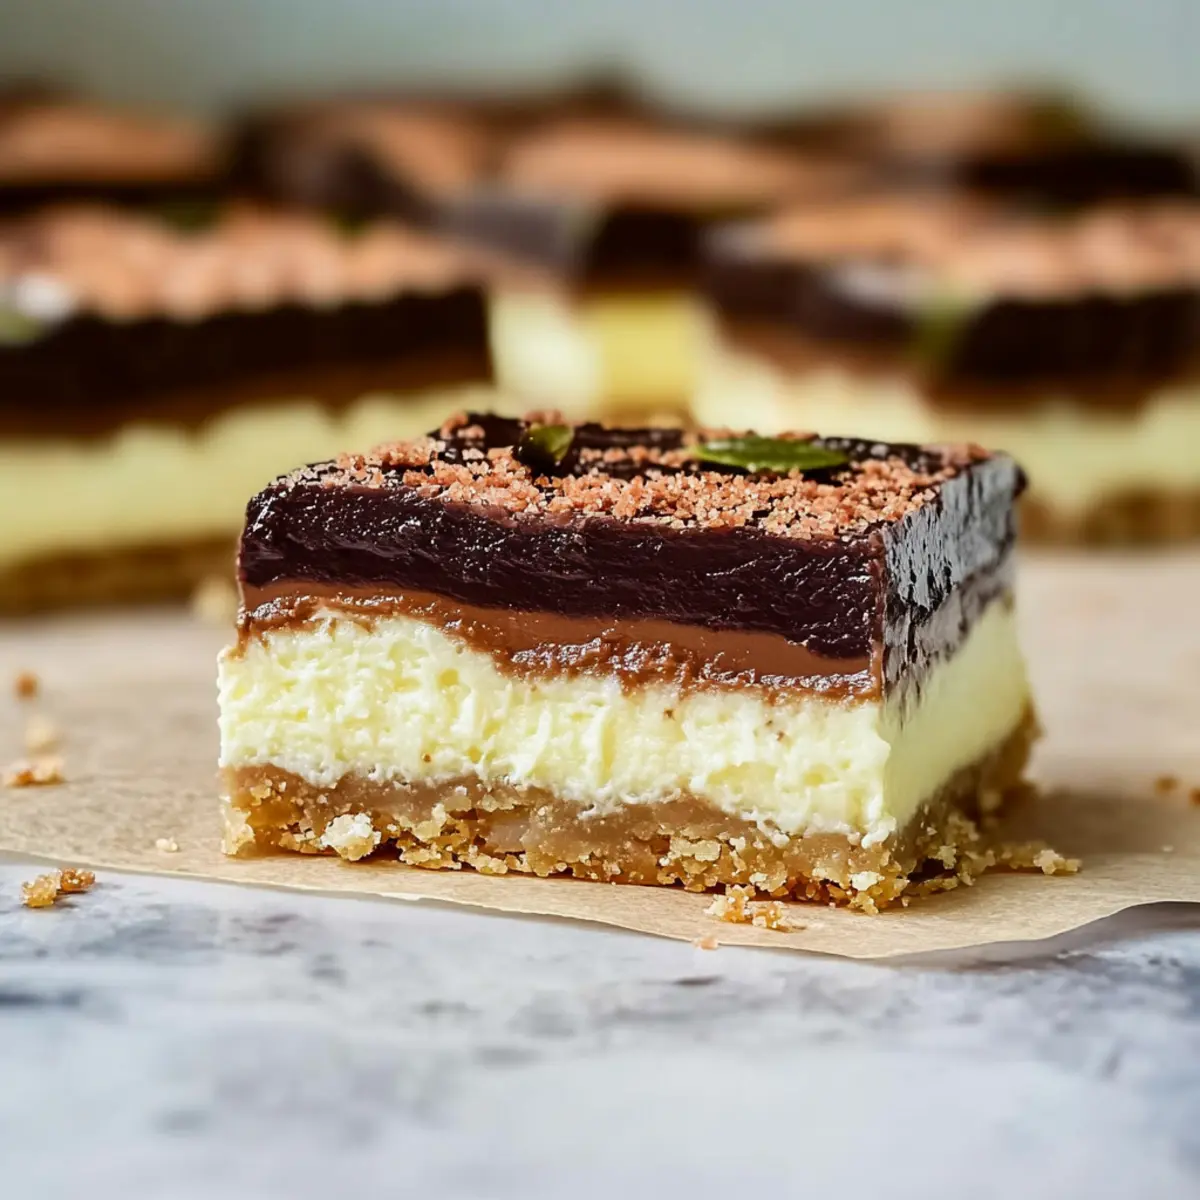
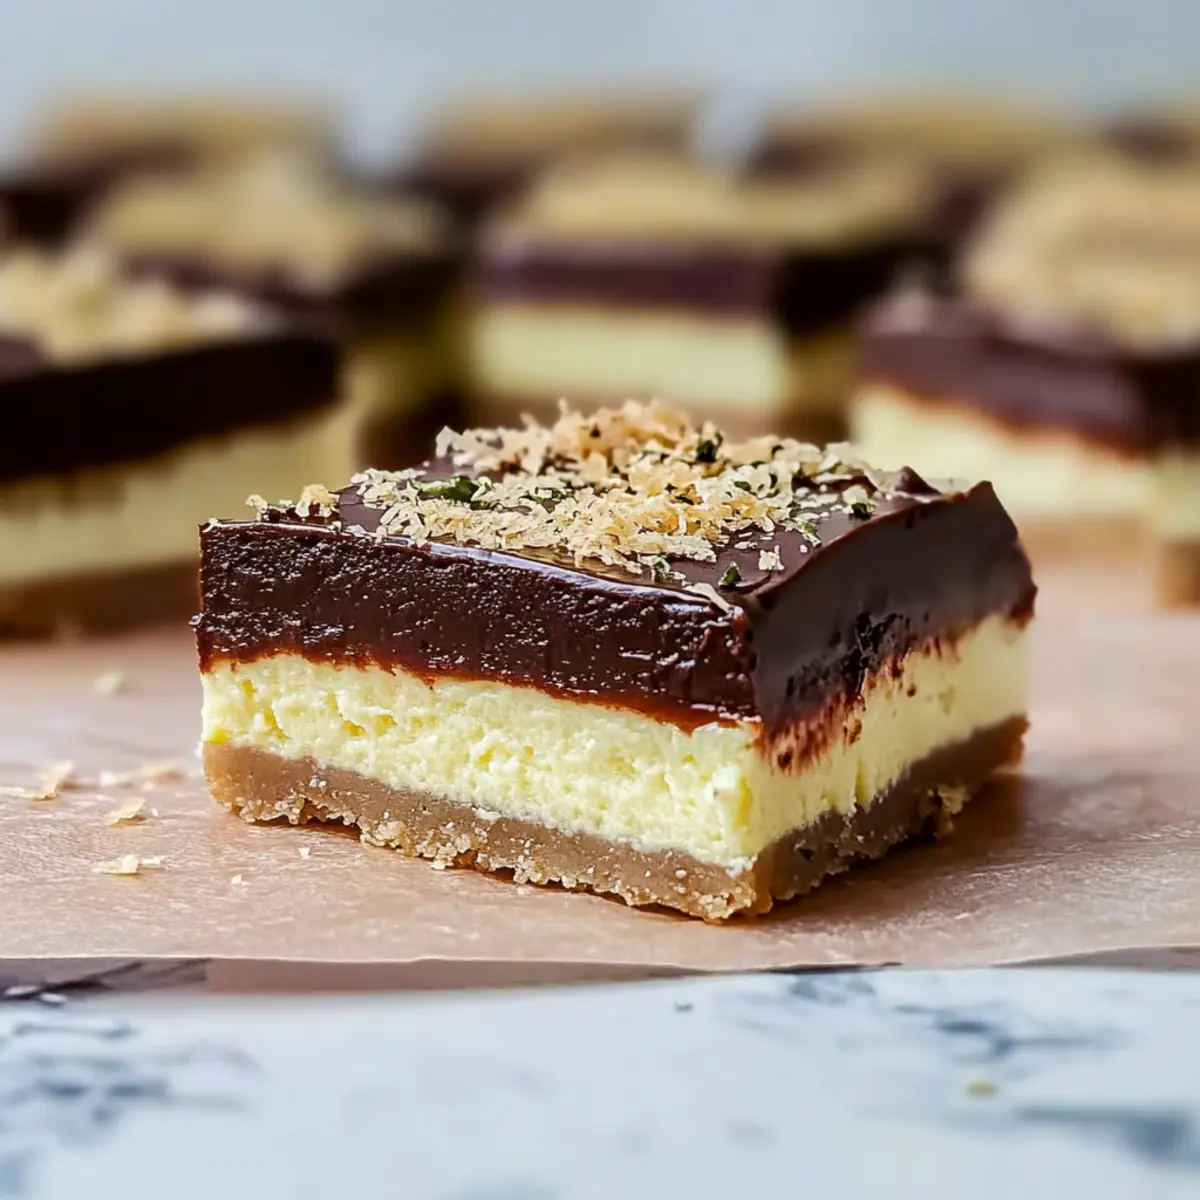
As I stood in my kitchen, a tantalizing aroma began to swirl around me, igniting my passion for creating something truly special. Enter the Dubai Chocolate Cheesecake Bars—a dessert that harmoniously marries a rich, creamy filling with the delightful crunch of kataifi crust. Not only are these Pistachio Cheesecake Bars an ode to Middle Eastern flavors, but they’re also a spectacular centerpiece for any gathering. With their indulgent yet approachable nature, they make a perfect treat for those seeking to impress without spending hours in the kitchen. Plus, the versatility in ingredient substitutions allows you to get creative based on what you have on hand! Are you ready to dive into this luxurious dessert experience?
Why are these Pistachio Cheesecake Bars irresistible?
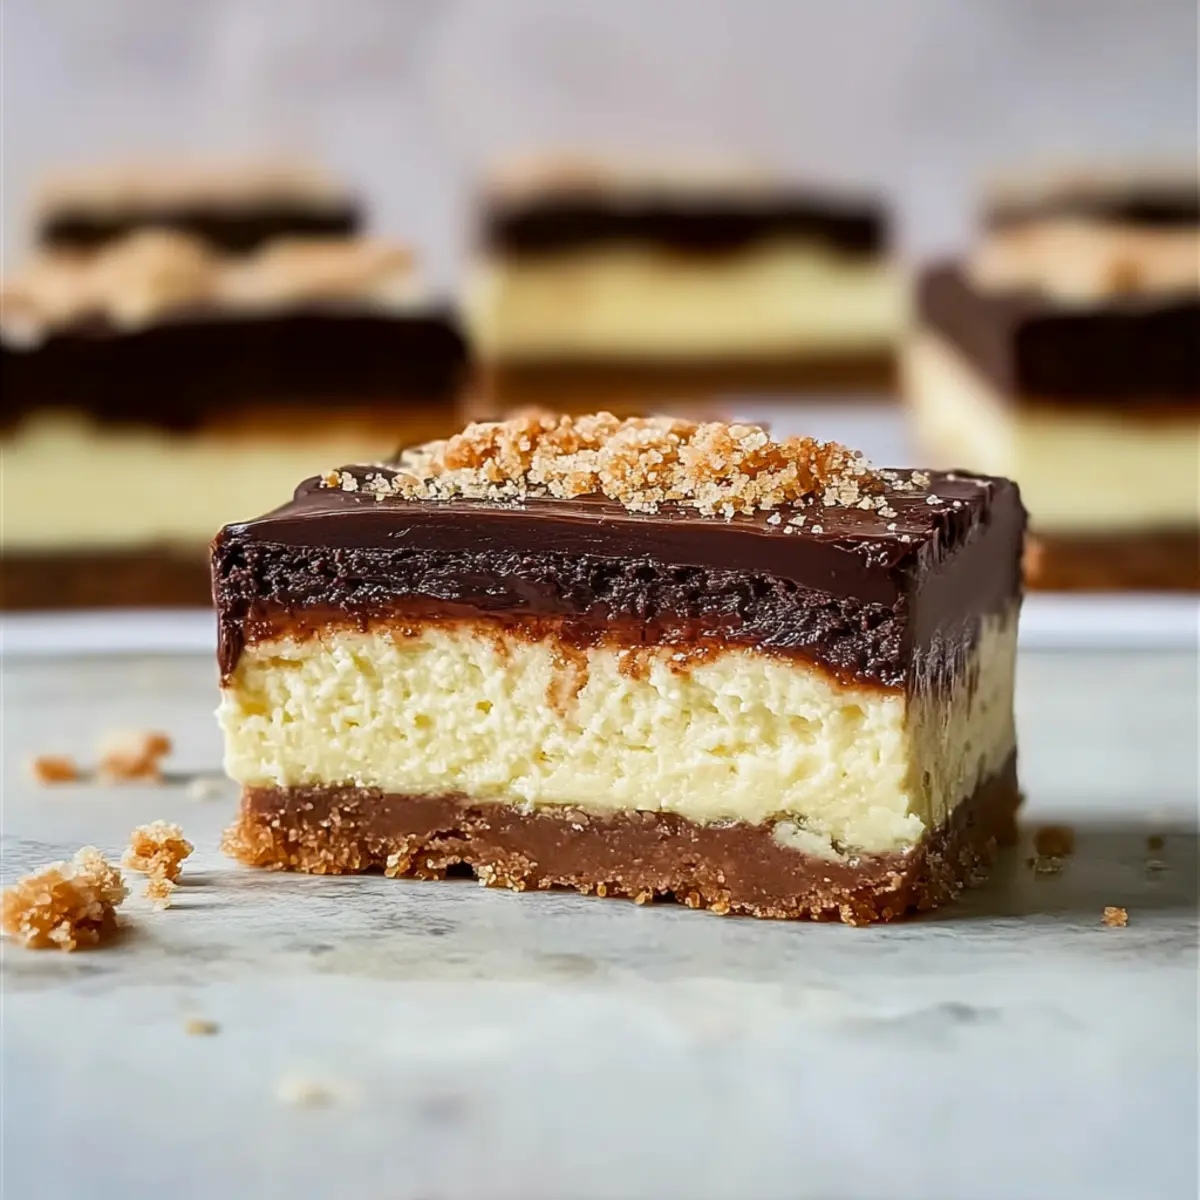
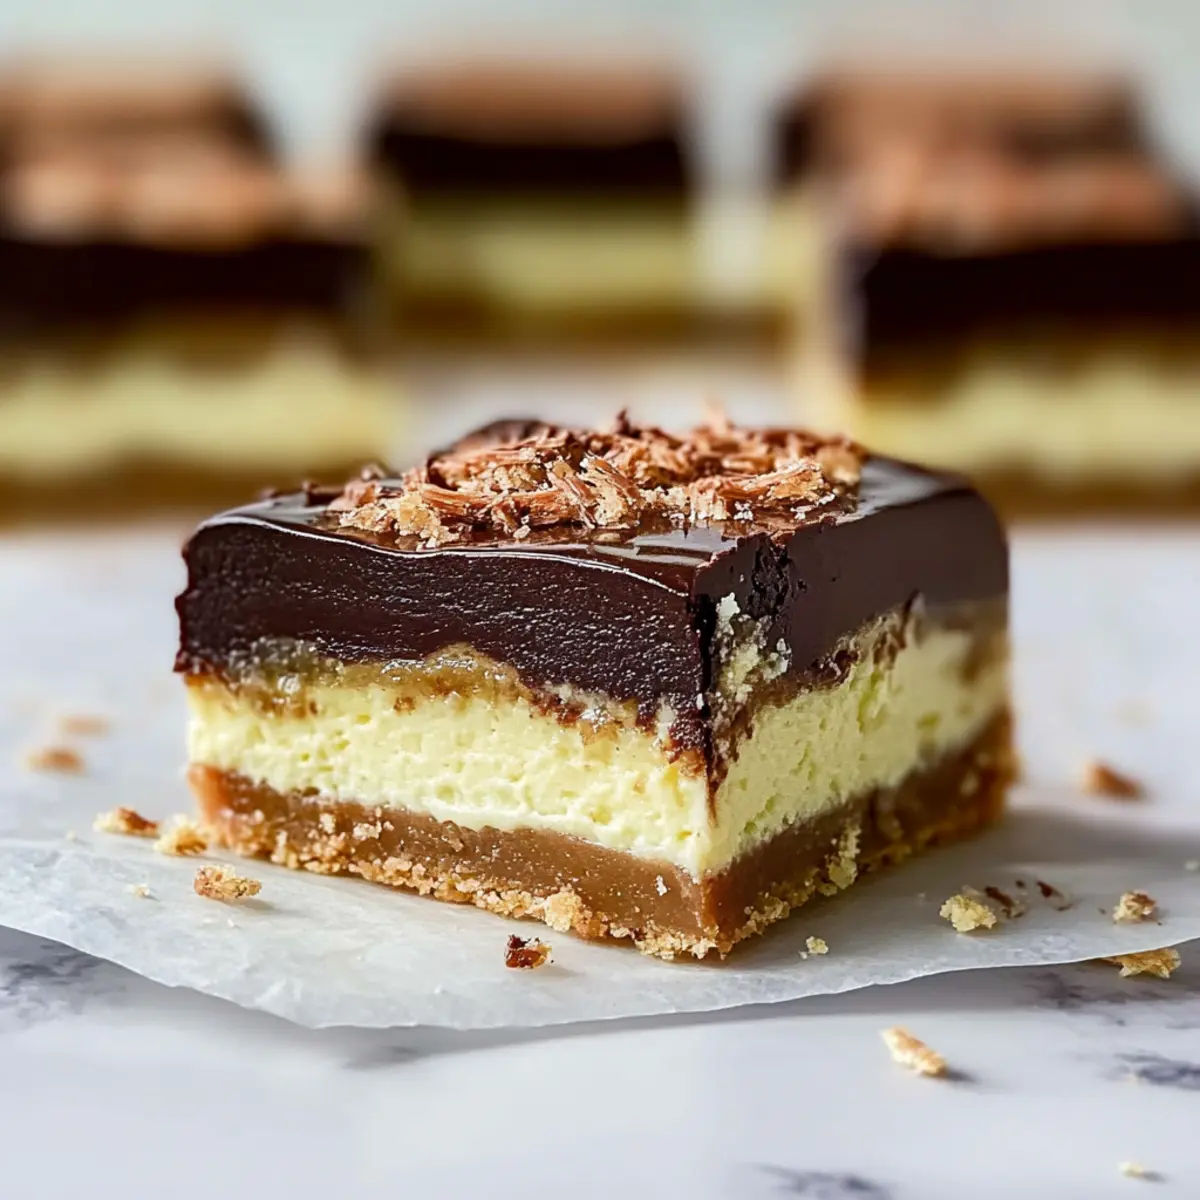
Decadent Layers: With a rich, creamy cheesecake filling balanced by a crispy kataifi crust, each bite is a delightful treat.
Unique Flavor Fusion: The combination of Middle Eastern pistachio and traditional cheesecake creates a taste that’s both familiar and exotic.
Versatile Ingredients: Easily swap in almond paste or ground nuts depending on what you have, making these bars adaptable.
Time-Saving Delight: Ready in just a few simple steps, you’ll impress your guests without spending hours in the kitchen.
Crowd-Pleaser: Perfect for gatherings or special occasions, these bars are sure to leave everyone craving more—just like my Pistachio Mushroom Cheesecake or Velvet Oreo Cheesecake!
Pistachio Cheesecake Bars Ingredients
• To create these unforgettable Pistachio Cheesecake Bars, gather your essentials and let your kitchen reflect the Middle Eastern flavors.
For the Crust
- Shredded Kataifi Dough – Provides a crispy and crunchy texture for both the crust and topping; find it in Middle Eastern stores for authenticity.
- Unsalted Butter – Adds richness and helps bind the kataifi dough; make sure it’s melted for even mixing.
For the Cheesecake Filling
- Cream Cheese – Ensure it’s at room temperature for a smooth filling; this is essential for that creamy texture.
- Granulated Sugar – Sweetens the filling; a fundamental ingredient in this decadent dessert.
- Sour Cream – Adds moisture and tang to the filling; it should also be at room temperature for best results.
- Vanilla Extract – Enhances the flavors; opting for pure extract will elevate your cheesecake.
- Salt – A pinch of salt is vital to elevate all the flavors present in the filling.
- Eggs – At room temperature to ensure even mixing and to help avoid cracks in the filling.
For the Ganache Topping
- Semi-sweet Chocolate – Choose quality chocolate chips or bars for the ganache; this ensures richness in the dessert.
- Heavy Cream – Combines with chocolate to create a smooth, luxurious topping.
Optional Flavor Boost
- Pistachio Cream – Offers a nutty sweetness that pairs perfectly with the chocolate filling; feel free to substitute with high-quality pistachio paste if needed.
- Tahini – Introduces a subtle earthiness; it’s not just for flavor, but also complements the sweetness of the cheesecake.
Gather these ingredients, and you’ll be one step closer to baking a memorable dessert that everyone will adore!
Step‑by‑Step Instructions for Pistachio Cheesecake Bars
Step 1: Preheat Oven
Begin by preheating your oven to 350°F (175°C). This initial step ensures that your Pistachio Cheesecake Bars bake evenly and achieve that perfect golden crust. While the oven heats, gather your ingredients and prepare your baking pan by lining it with parchment paper for easy removal later.
Step 2: Prepare Kataifi Dough
Take the shredded kataifi dough and cut it into smaller pieces. In a mixing bowl, combine this dough with melted unsalted butter, a generous spoonful of pistachio cream, and tahini, mixing until well-coated. Reserve half of this mixture to use as a crunchy topping, allowing the flavors to meld while you focus on forming the crust.
Step 3: Form Crust
Press half of the kataifi mixture firmly into the bottom of an 8×8-inch lined baking pan. Aim for an even layer, as this will serve as the base for your Pistachio Cheesecake Bars. Place the pan in the oven and bake for about 15 minutes, or until the crust is golden brown and fragrant, filling your kitchen with delightful aromas.
Step 4: Make Filling
In a large mixing bowl, beat room temperature cream cheese using an electric mixer until smooth and creamy. Gradually add granulated sugar, mixing until fully combined. Next, introduce sour cream, pure vanilla extract, and a pinch of salt, blending well. Finally, add the eggs one at a time, mixing gently after each addition to avoid over-mixing, which can cause cracks.
Step 5: Combine Layers
Once the crust is slightly cooled, pour the cheesecake filling over it. Spread it evenly and then sprinkle the reserved kataifi mixture on top, creating a lovely crunch that will complement the creamy filling. Return the pan to the oven and bake for about 25 minutes, or until the edges are set but the center has a gentle wobble, indicating a soft, creamy texture.
Step 6: Prepare Ganache
While the bars are baking, prepare the decadent ganache. Heat heavy cream in a saucepan just until it begins to simmer—do not bring it to a boil. Pour the hot cream over chopped semi-sweet chocolate in a bowl and let it sit for a minute. Stir until the mixture becomes smooth and glossy, creating a luxurious topping for your Pistachio Cheesecake Bars.
Step 7: Chill and Set
After baking, remove the bars from the oven and allow them to cool completely in the pan at room temperature. Once cooled, pour the prepared chocolate ganache over the top, spreading it evenly. Cover the pan with plastic wrap and refrigerate for at least 2 hours, or ideally overnight, to let the bars fully set before slicing them into squares for serving.
What to Serve with Dubai Chocolate Cheesecake Bars?
Imagine a charming afternoon gathering with loved ones, where these decadent bars take center stage as the star of your dessert spread.
- Arabic Coffee: The bold, rich flavors of Arabic coffee perfectly balance the sweetness of the cheesecake bars, enhancing your overall experience.
- Mint Tea: A refreshing mint tea serves as a delightful palate cleanser, complementing the richness of the chocolate and cheesecake filling beautifully.
- Citrus Salad: A fresh citrus salad with bright notes of orange and grapefruit adds a burst of zesty flavor to cut through the creamy richness of the dessert.
- Baklava Bites: These syrup-soaked pastry treats echo the Middle Eastern theme, offering a delightful combination of textures alongside the creamy delight of the cheesecake bars.
- Ice Cream: Serve with a scoop of vanilla ice cream for a contrast in temperature and texture that elevates each delicious bite.
- Fruit Tart: A colorful fruit tart can add vibrant freshness to your table, creating a lovely contrast in both flavor and appearance next to the cheesecake bars.
- Pistachio Gelato: Match the flavors with a creamy pistachio gelato, turning each bite into a sensationally nutty experience that’s truly unforgettable.
- Dark Chocolate Sauce: A drizzle of dark chocolate sauce on top enhances the rich flavors, creating an indulgent treat that’s perfect for special occasions.
How to Store and Freeze Pistachio Cheesecake Bars
Fridge: Store the bars tightly covered in the refrigerator for up to 4 days. This keeps them fresh and ready to enjoy!
Freezer: For longer storage, wrap the bars individually in plastic wrap and place them in an airtight container. They’ll stay delicious for up to 2 months.
Thawing: To enjoy frozen bars, simply transfer them to the fridge and allow them to thaw overnight for the best texture.
Reheating: While not typically required, if you prefer them warm, heat individual bars in the microwave for about 10-15 seconds—just enough to bring back that creamy goodness!
Pistachio Cheesecake Bars Variations
Get ready to explore creative twists on your Pistachio Cheesecake Bars that will have your taste buds dancing with joy!
-
Nut Substitutions: Swap out pistachio cream for almond paste or finely ground walnuts for a delightful change of flavor. Each nut brings its unique personality to the dish!
-
Lower-Sugar Option: For a lighter treat, reduce the sugar or use a low-calorie sweetener—perfect for guilt-free indulgence. You’ll still enjoy all the creamy goodness without the extra calories.
-
Add a Fruit Twist: Layer fresh berries or a hint of fruit puree on top of the ganache for a refreshing burst of flavor. Consider a raspberry or passion fruit drizzle that pairs beautifully with the chocolate.
-
Spicy Flair: Add a pinch of cinnamon or cardamom into the filling to introduce warm, aromatic notes. It will take the flavor profile to an exotic level, reminiscent of Middle Eastern desserts.
-
Texture Boost: Incorporate crushed graham crackers or digestive biscuits in the crust for added crunch. This slight change creates a delightful contrast to the creamy cheesecake.
-
Vegan Version: Substitute cream cheese with a vegan alternative and use flax eggs or applesauce instead of eggs for a plant-based variation everyone can enjoy. You might even discover a new favorite!
-
Chocolate Lovers: For the chocolate fans, mix cocoa powder into the cheesecake filling to deepen the chocolate flavor. Pair it with a rich layer of dark chocolate ganache for over-the-top decadence.
-
Topping Inspiration: Garnish your bars with crushed pistachios, toasted coconut flakes, or even edible flowers for a stunning presentation that tastes as good as it looks! Your guests will be impressed!
With these delightful variations, you’re not only catering to different preferences but also flexing your culinary creativity. Enjoy your delicious journey making these delightful Pistachio Cheesecake Bars, and don’t forget to check out my Chocolate Oat Bars that are equally irresistible!
Make Ahead Options
These delightful Pistachio Cheesecake Bars are perfect for meal prep, making your busy weeknights a breeze! You can prepare the kataifi crust and cheesecake filling up to 24 hours in advance. First, bake the kataifi crust and let it cool completely, then prepare the cheesecake filling and refrigerate it separately. Just before baking, pour the filling over the crust and sprinkle the reserved kataifi on top. For the silky ganache, you can also make it up to 3 days ahead; simply store it in an airtight container in the fridge until ready to pour over the chilled cheesecake bars. This way, you’ll have decadent dessert ready to impress with minimal effort and maximum flavor!
Expert Tips for Pistachio Cheesecake Bars
-
Room Temperature Ingredients: Ensure cream cheese, eggs, and sour cream are at room temperature before mixing. This helps achieve a smooth filling and prevents cracks.
-
Careful Mixing: Avoid overmixing after adding the eggs to maintain a creamy texture and reduce the risk of cracks in your cheesecake.
-
Perfect Slicing: To slice the bars cleanly, use a sharp knife dipped in hot water. Wipe it dry after each cut for the best results.
-
Flavor Substitutions: If pistachio cream isn’t available, feel free to substitute with high-quality pistachio paste or finely ground nuts mixed with a touch of honey.
-
Even Baking: Bake until the edges of the cheesecake are set but the center remains slightly wobbly. This ensures a perfectly creamy filling without overcooking.
-
Cooling Time: Allow the bars to cool completely before refrigerating. This step is crucial for proper setting, leading to delightful Pistachio Cheesecake Bars that are ready to impress!
Pistachio Cheesecake Bars Recipe FAQs
What kind of kataifi dough should I use?
I recommend looking for shredded kataifi dough in Middle Eastern grocery stores. This will give your crust that authentic crispy texture that is essential for the perfect Pistachio Cheesecake Bars.
How should I store my Pistachio Cheesecake Bars?
Store your bars tightly covered in the refrigerator for up to 4 days. This keeps them fresh and delicious, ensuring you can enjoy their creamy goodness whenever you desire!
Can I freeze Pistachio Cheesecake Bars?
Absolutely! For longer storage, wrap each bar individually in plastic wrap and place them in an airtight container. They will stay tasty for up to 2 months. When you’re ready to enjoy them, thaw in the fridge overnight for the best texture.
What if my cheesecake filling cracks during baking?
No worries! To prevent this, ensure all your ingredients are at room temperature before mixing, and avoid overmixing after adding the eggs. If cracks do occur, top with ganache and some crushed nuts for a lovely rustic touch.
Are these bars suitable for people with nut allergies?
These Pistachio Cheesecake Bars contain nuts in the form of pistachio cream and kataifi dough. If you’re serving someone with nut allergies, I suggest using a nut-free cookie crust instead and omitting the pistachio elements while adding a different flavor like chocolate or lemon zest.
What’s the best way to slice my cheesecake bars for clean edges?
To achieve perfectly cut edges, use a sharp knife dipped in hot water. Wipe it dry after each cut to keep the bars looking gorgeous and presentable for your guests!
Irresistible Pistachio Cheesecake Bars That Delight Every Bite
Ingredients
Equipment
Method
- Preheat your oven to 350°F (175°C) and prepare your baking pan with parchment paper.
- Cut shredded kataifi dough into smaller pieces and mix with melted butter, pistachio cream, and tahini. Reserve half for topping.
- Press half of the kataifi mixture into the bottom of the baking pan and bake for about 15 minutes until golden brown.
- In a mixing bowl, beat cream cheese until smooth. Gradually add sugar, then sour cream, vanilla, salt, and eggs, mixing gently.
- Pour the cheesecake filling over the cooled crust and top with reserved kataifi mixture. Bake for about 25 minutes.
- Heat heavy cream until simmering, pour over chocolate, and stir until smooth. Pour ganache over cooled bars and refrigerate.
- Allow to cool completely and chill for at least 2 hours before slicing into squares to serve.
Leave a Reply