
When I stumbled upon a simple recipe that promised creamy peanut butter bliss without the need for an oven, I couldn’t resist trying it out. These Easy No-Bake Peanut Butter Protein Bars (4 Simple Ingredients!) have become my go-to for satisfying sweet cravings—packed with protein, low in sugar, and made from just a handful of wholesome ingredients. Whether it’s a quick afternoon snack or the perfect post-workout treat, they deliver on taste and nutrition without the guilt. Plus, the best part? The recipe is super versatile, so you can customize it to suit your tastes—think nut butters, added seeds, or even a pinch of sea salt for that extra zing! Curious about how easy it is to whip up your own delicious batch? Let’s dive into the details!
Why Are These Protein Bars a Must-Try?
Convenience: These No-Bake Peanut Butter Protein Bars require just a few minutes of hands-on time, making them perfect for busy lifestyles.
Healthy Indulgence: With only four simple ingredients, you’re treating yourself to a snack that is both high in protein and low in sugar.
Endless Customization: Feel free to swap in your favorite nut butters or add-ins, like chia seeds or dried fruits, to craft your personalized bars.
Crowd-Pleasing Snack: They’re great for sharing with friends or family; everyone will love these tasty treats! Pair them with a glass of almond milk for a balanced snack.
No Preservatives: Enjoy the peace of mind that comes with homemade snacks, free from the preservatives often found in store-bought options. Give them a try—you won’t be disappointed!
No-Bake Peanut Butter Protein Bars Ingredients
For the Base
• Peanut Butter – A must-have for creaminess; almond butter is a great alternative if you want a different twist.
• Oats – These provide a hearty base and plenty of fiber; gluten-free oats work perfectly for a gluten-free option.
• Honey or Maple Syrup – This natural sweetener binds everything together; try agave syrup for a vegan-friendly choice.
For the Topping
• Chocolate Chips – Elevate your bars with a luscious topping; opt for dairy-free chocolate chips to keep it vegan.
With these simple ingredients, you’re just moments away from enjoying your very own No-Bake Peanut Butter Protein Bars!
Step‑by‑Step Instructions for No-Bake Peanut Butter Protein Bars (5 Simple Ingredients!)
Step 1: Prep the Base
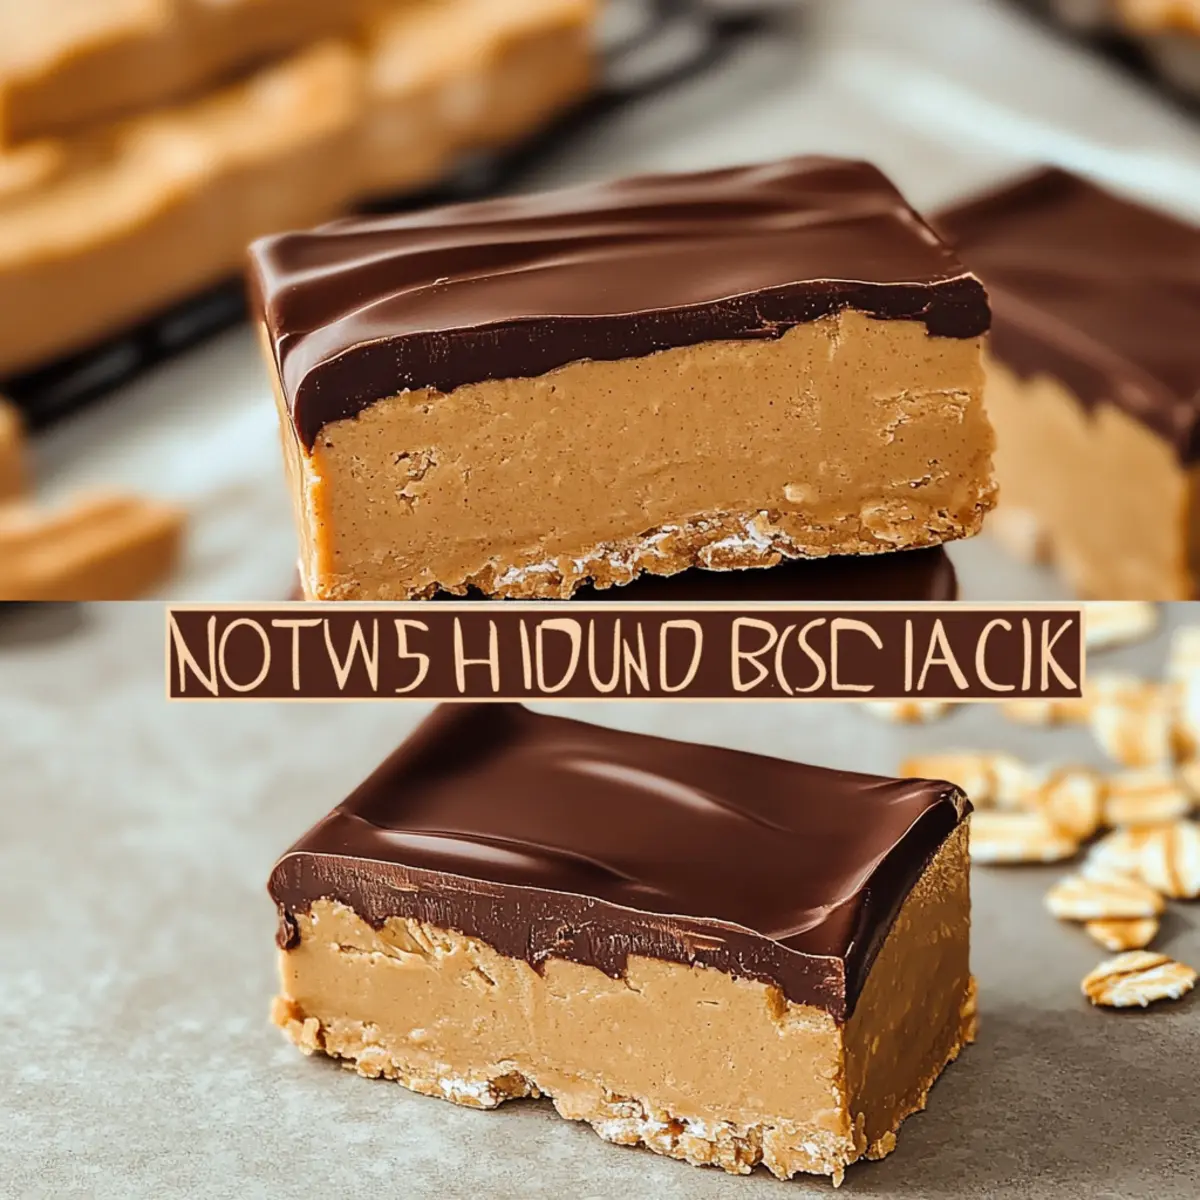
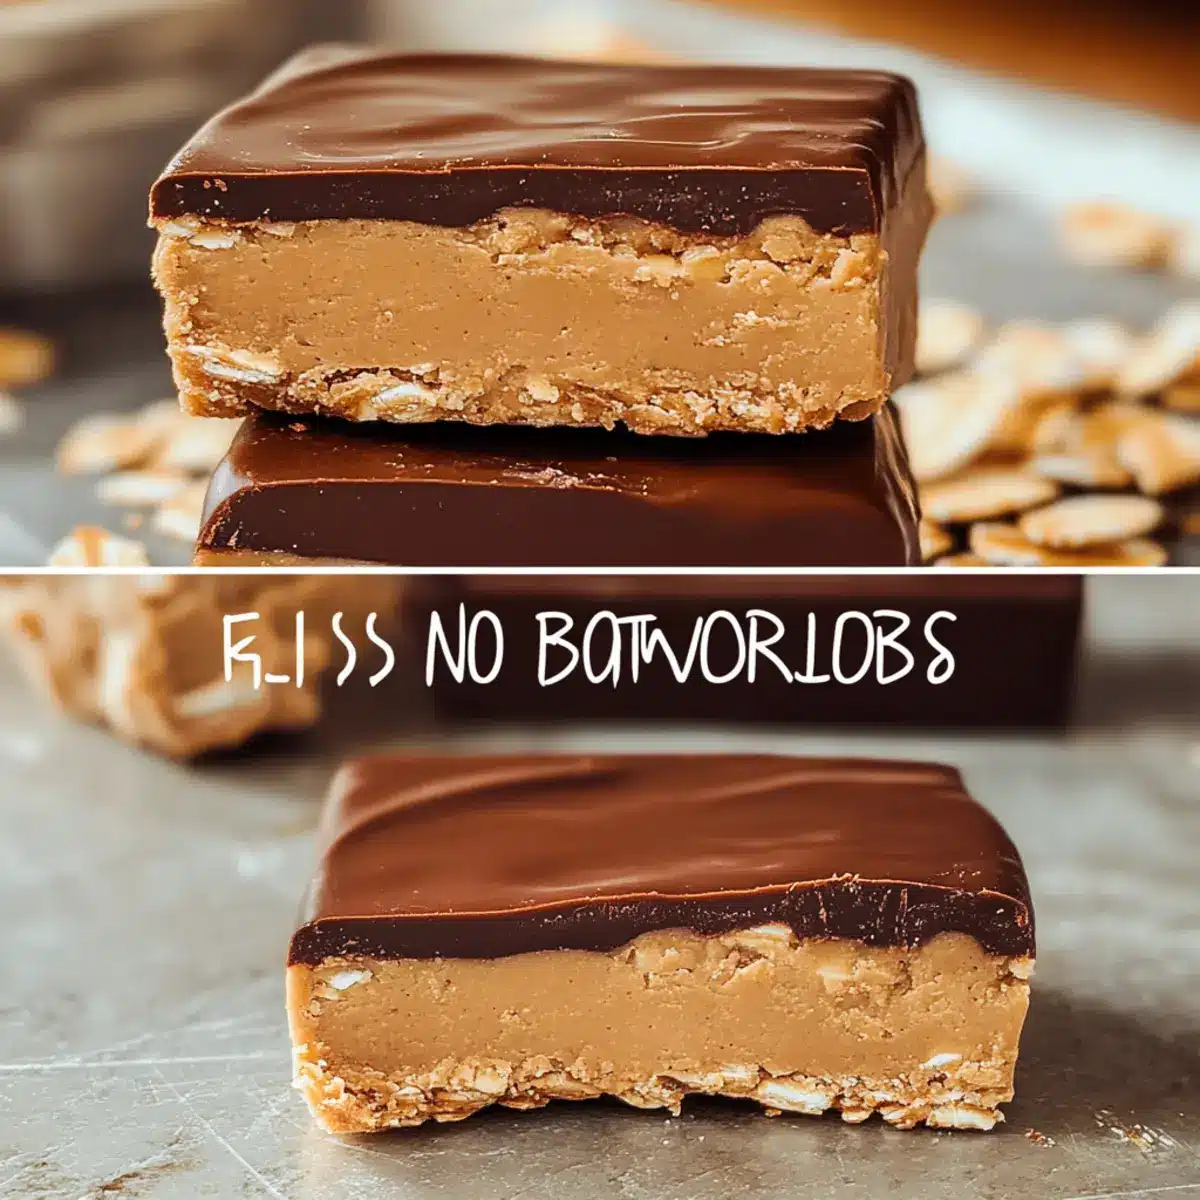
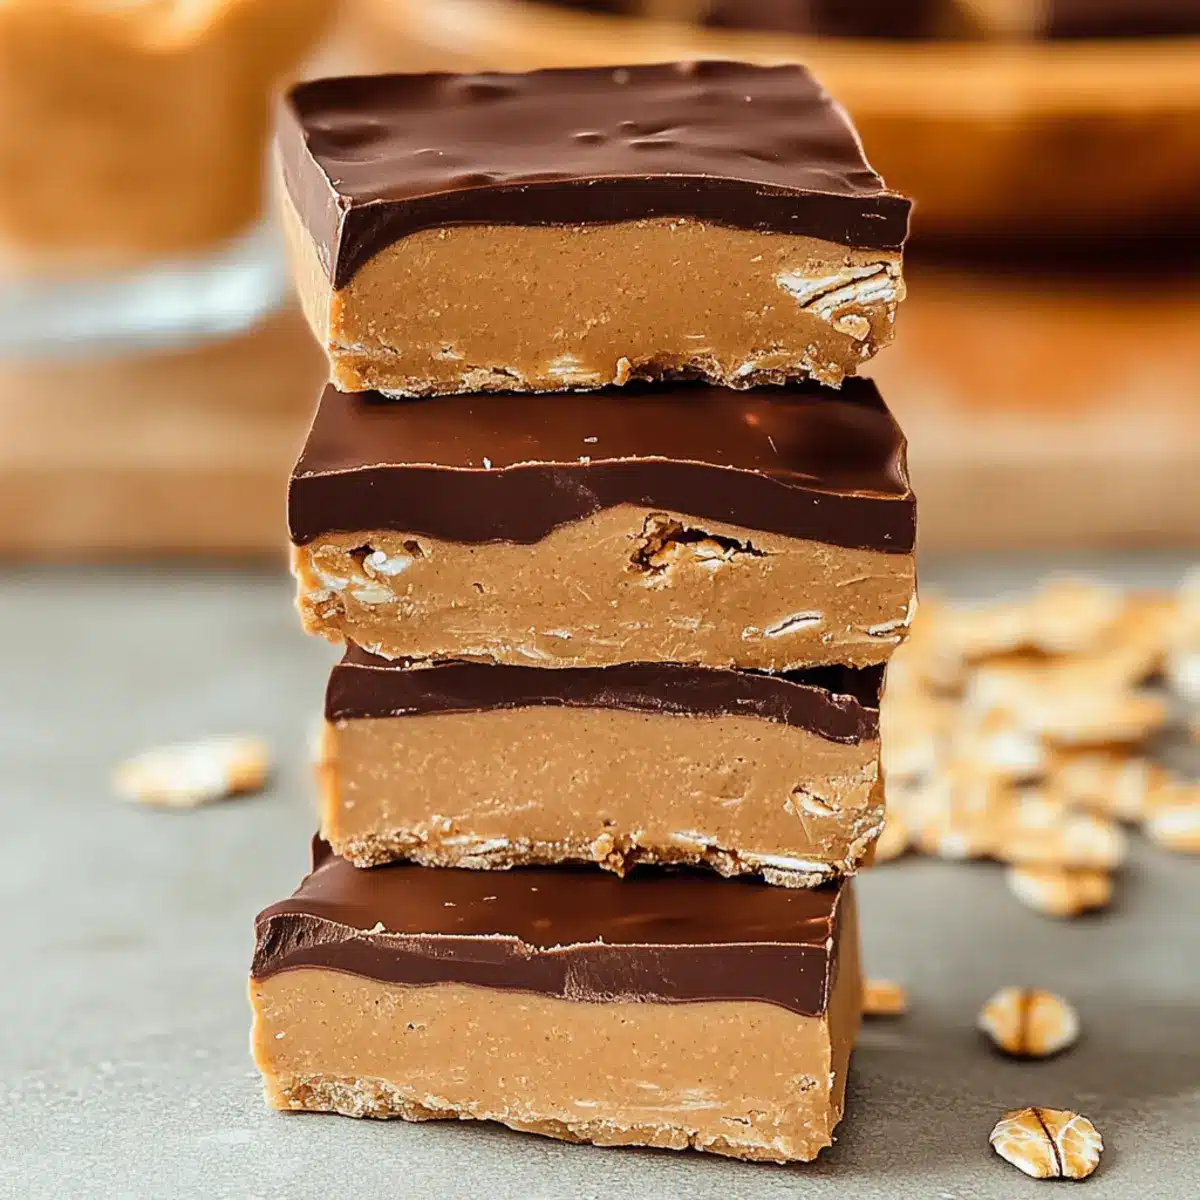
In a large mixing bowl, combine 1 cup of creamy peanut butter, 1 cup of oats, and 1/3 cup of honey or maple syrup. Use a sturdy spatula to mix until everything is fully incorporated, yielding a thick, sticky mixture that holds together. This should take about 2-3 minutes. You’ll know it’s ready when no dry oats remain visible.
Step 2: Form Bars
Line an 8×8-inch baking dish with parchment paper, allowing some overhang for easy removal. Transfer the peanut butter mixture into the dish, spread it evenly, and use your hands or a spatula to press it firmly into the corners. This ensures a consistent thickness across your No-Bake Peanut Butter Protein Bars. Aim for about 1/2 inch in height, which should take around 5 minutes.
Step 3: Add Topping
In a microwave-safe bowl, melt 1/2 cup of chocolate chips in 20-second intervals, stirring in between until smooth—this should take about 1 minute total. Pour the melted chocolate over the pressed mixture and use a spatula to spread it evenly, creating a glossy, rich layer on top of the bars.
Step 4: Chill
Cover the baking dish with plastic wrap or foil, and place it in the refrigerator for at least 1 hour. This chilling step is crucial, as it allows the bars to set properly, becoming firmer and easier to slice. You’ll know they’re ready when they’re noticeably firm and hold their shape when pushed gently.
Step 5: Cut and Serve
Once chilled, remove the bars from the baking dish using the parchment overhang. Place them on a cutting board and slice into squares or rectangles, as preferred. Transfer the bars to an airtight container for storage—these No-Bake Peanut Butter Protein Bars can be enjoyed over the next week, making them a perfect snack anytime!
Make Ahead Options
These No-Bake Peanut Butter Protein Bars are a fantastic choice for meal prep, saving you time on busy weeknights! You can easily prepare the base mixture and press it into the dish up to 24 hours in advance; just cover it tightly with plastic wrap to prevent drying out. The chocolate topping can also be melted and added the night before, or right before serving for a fresh finish—just make sure to refrigerate the bars to keep them from becoming too soft. When ready to enjoy, simply slice them into bars and indulge in a guilt-free snack. With these simple steps, you’ll have homemade treats ready in no time!
What to Serve with No-Bake Peanut Butter Protein Bars
Indulging in these delightful protein bars opens the door to a variety of exciting accompaniments that will elevate your snack ensemble.
- Creamy Greek Yogurt: A dollop of Greek yogurt provides a refreshing tang that balances the sweetness of the bars perfectly.
- Fresh Fruit Salad: Bursting with juicy flavors, a fruit salad of berries and melon adds a bright, refreshing touch to your snacking experience.
- Nutty Granola: Crunchy granola complements the creamy texture of the bars, enhancing the wholesome vibes while adding a delightful crunch.
- Almond Milk Smoothie: Blend up a quick smoothie with almond milk, banana, and spinach for a nutrient-packed pairing that’s smooth and satisfying.
- Dark Chocolate Dipped Strawberries: Enhance the chocolate goodness with fresh strawberries dipped in dark chocolate; it’s a treat that feels indulgent yet healthy!
- Chia Seed Pudding: This pudding adds a delightful texture and nutty flavor, mirroring the bars while providing an extra boost of fiber and protein.
- Iced Coffee: Pairing with a glass of iced coffee makes for a pick-me-up that balances the rich flavors of the bars with a refreshing kick.
- Coconut Yogurt: For a creamy and slightly tropical twist, serve your bars with a scoop of coconut yogurt; it adds richness and a subtle sweetness.
- Carrot Sticks with Hummus: For a savory contrast, enjoy crunchy carrot sticks dipped in hummus; it’s a balanced way to snack while keeping it nutritious.
- Oatmeal Cookies: If you’re in the mood for cookies, a side of soft oatmeal cookies creates a comforting, nostalgic pairing with your protein bars.
No-Bake Peanut Butter Protein Bars Variations
Feel free to explore and make these protein bars uniquely yours with a few simple swaps and additions!
- Nut-Free: Swap peanut butter for sunflower seed butter to make a nut-free version perfect for schools.
- Sweetness Level: Adjust the sweetness by using more or less honey/maple syrup according to your taste. Remember, the chocolate topping adds sweetness too!
- Fruit-Filled: Mix in chopped dried fruits like cranberries or apricots for a chewy texture and a burst of flavor. Together with the oats, the sweet-tart notes elevate each bite.
- Protein-Packed: Add a scoop of your favorite protein powder into the mixture for an extra boost. This is ideal post-workout, helping to fuel your recovery with some serious muscle support.
- Crunchy Texture: Toss in a handful of chopped nuts like almonds or walnuts for a delightful crunch. The added texture contrasts beautifully with the smooth peanut butter base.
- Spicy Twist: Try adding a dash of cinnamon or even cayenne pepper for a surprising heat. This twist can awaken your taste buds, making every morsel a little adventure.
- Chocolate Lover: Incorporate cocoa powder into your base for double chocolate goodness. This rich addition pairs perfectly with the chocolate topping, creating an indulgent treat.
These variations will not only personalize your protein bars but can also help keep your snacking exciting! For another treat, check out my delicious Chocolate Oat Bars for a chewy, chocolatey alternative.
Expert Tips for No-Bake Peanut Butter Protein Bars
Firm Pressure: Ensure you press the mixture firmly into the baking dish to prevent your bars from crumbling when cut.
Mix Thoroughly: Take your time to mix the ingredients until fully combined, ensuring no dry oats are visible for consistent texture.
Smooth Chocolate: Use a silicone spatula to spread the melted chocolate evenly on top for a beautiful finish—you’ll appreciate the polished look!
Chill Well: Allow sufficient chilling time in the refrigerator to ensure the bars set properly and hold their shape when sliced.
Customization Joy: Feel free to be creative with flavors! Adding seeds, nuts, or using different nut butters can elevate your No-Bake Peanut Butter Protein Bars.
How to Store and Freeze No-Bake Peanut Butter Protein Bars
Fridge: Store your No-Bake Peanut Butter Protein Bars in an airtight container in the refrigerator for up to 1 week, keeping them fresh and tasty.
Freezer: For longer storage, wrap individual bars in plastic wrap and place them in a freezer-safe container, where they can last for up to 3 months.
Thawing: When you’re ready to enjoy, simply remove the bars from the freezer and let them thaw in the fridge for a couple of hours, or at room temperature for about 30 minutes.
Reheating (optional): If you prefer them warm, lightly microwave for about 10-15 seconds; this will enhance the chocolate topping’s richness without compromising the overall texture.
No-Bake Peanut Butter Protein Bars Recipe FAQs
How do I select the right peanut butter for this recipe?
Absolutely! When choosing peanut butter, opt for a smooth, creamy variety without added sugars or hydrogenated oils for the healthiest option. If you prefer a different flavor, almond butter or cashew butter can be great alternatives that still provide a similar consistency.
How should I store my No-Bake Peanut Butter Protein Bars?
You can store your No-Bake Peanut Butter Protein Bars in an airtight container in the refrigerator for up to 1 week. This will keep them fresh and delicious for snacking!
Can I freeze these protein bars?
Very! To freeze, wrap each bar individually in plastic wrap before placing them in a freezer-safe container. They will last for up to 3 months. When you’re ready to enjoy, simply thaw them in the fridge for a couple of hours or at room temperature for about 30 minutes.
What if my bars crumble when cut?
If your bars crumble, it may be due to not pressing the mixture firmly enough into the baking dish. Next time, use both your hands and a spatula to apply firm pressure when pressing the mixture down. Additionally, ensure your ingredients are well-combined so it holds together better.
Are these bars safe for people with allergies?
Always check to see if anyone has allergies, especially to nuts. You can make these bars potentially vegan by substituting honey with agave syrup. Additionally, you can use gluten-free oats to cater to those with gluten sensitivities.
What are some variations I can try?
You can mix in nuts, seeds, or dried fruits for texture or sprinkle a pinch of sea salt on top for added flavor. You might also try using different nut butters, like sunflower seed butter, to create your unique twist on these No-Bake Peanut Butter Protein Bars!

No-Bake Peanut Butter Protein Bars with 5 Simple Ingredients
Ingredients
Equipment
Method
- In a large mixing bowl, combine peanut butter, oats, and honey or maple syrup until fully incorporated.
- Line an 8x8-inch baking dish with parchment paper and press the mixture evenly into the dish.
- Melt the chocolate chips in a microwave-safe bowl, stirring until smooth and pour over the pressed mixture.
- Cover and chill in the refrigerator for at least 1 hour until firm.
- Remove from the dish using parchment overhang, cut into bars, and store in an airtight container.
Leave a Reply