
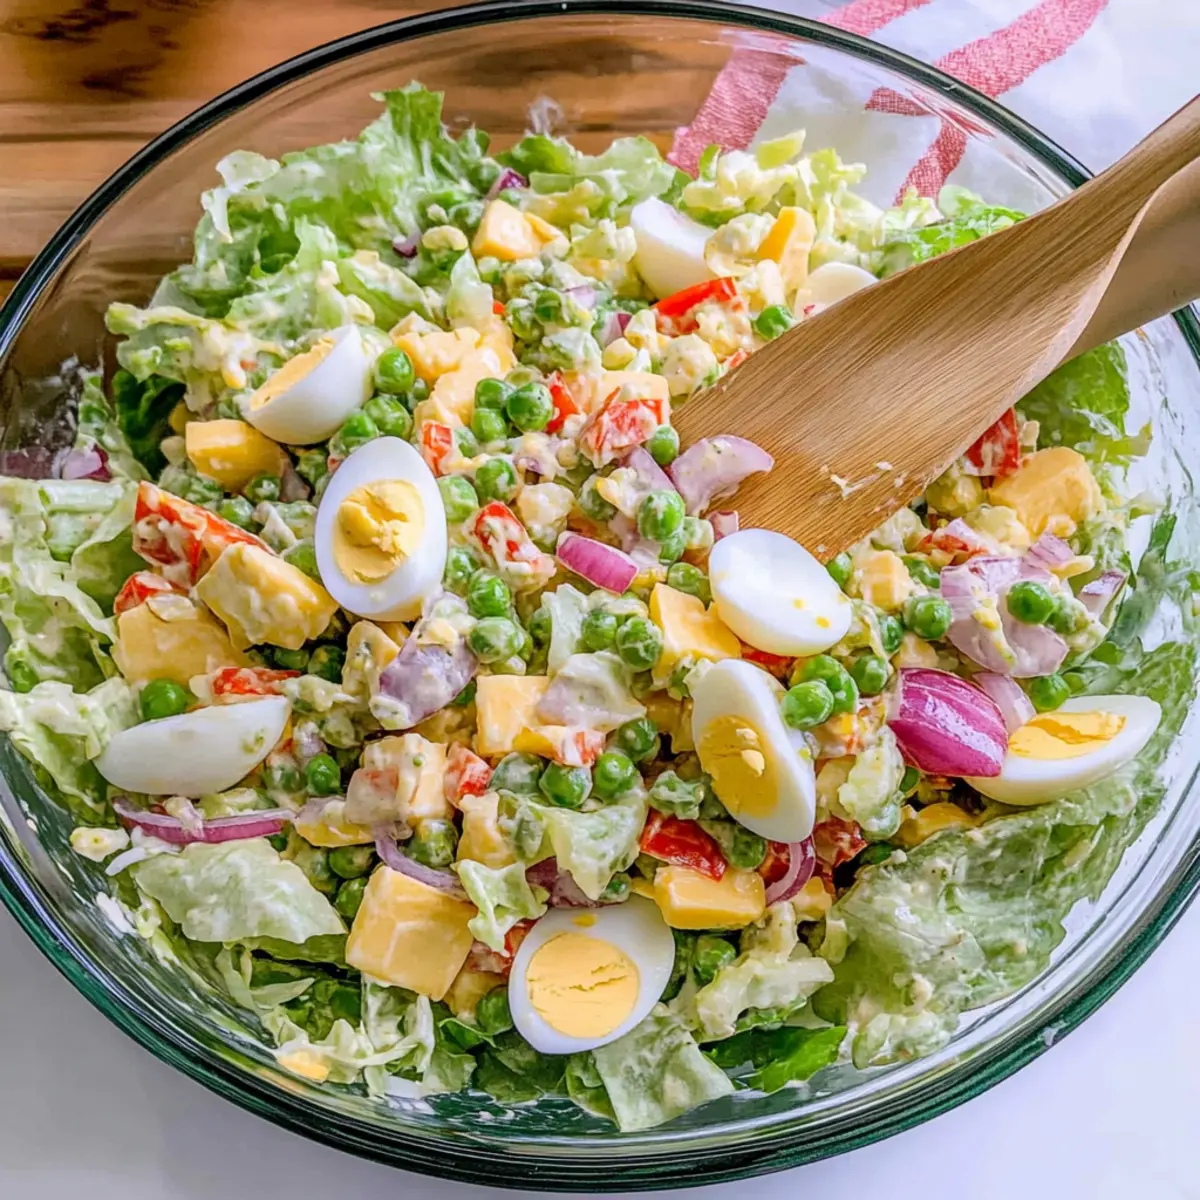
As I stood in my kitchen, surrounded by a rainbow of fresh veggies, I caught a whiff of nostalgia wafting through the air. It reminded me of lively potlucks where everyone gathered to share their favorite dishes, and that’s exactly how the Layered Dublin Salad found its way into my heart. This enchanting salad showcases crisp iceberg lettuce, hard-boiled eggs, and vibrant sweet peppers, beautifully layered to create a visual feast. Not only is it a straightforward recipe that comes together in minutes, but it’s also a crowd-pleaser that will impress your guests or family. Plus, with its wholesome, fresh ingredients, this salad is an effortless way to incorporate more veggies into your meals. Are you ready to dive into the joy of layering and discover how easy it is to create something truly stunning?

Why is Layered Dublin Salad a Must-Try?
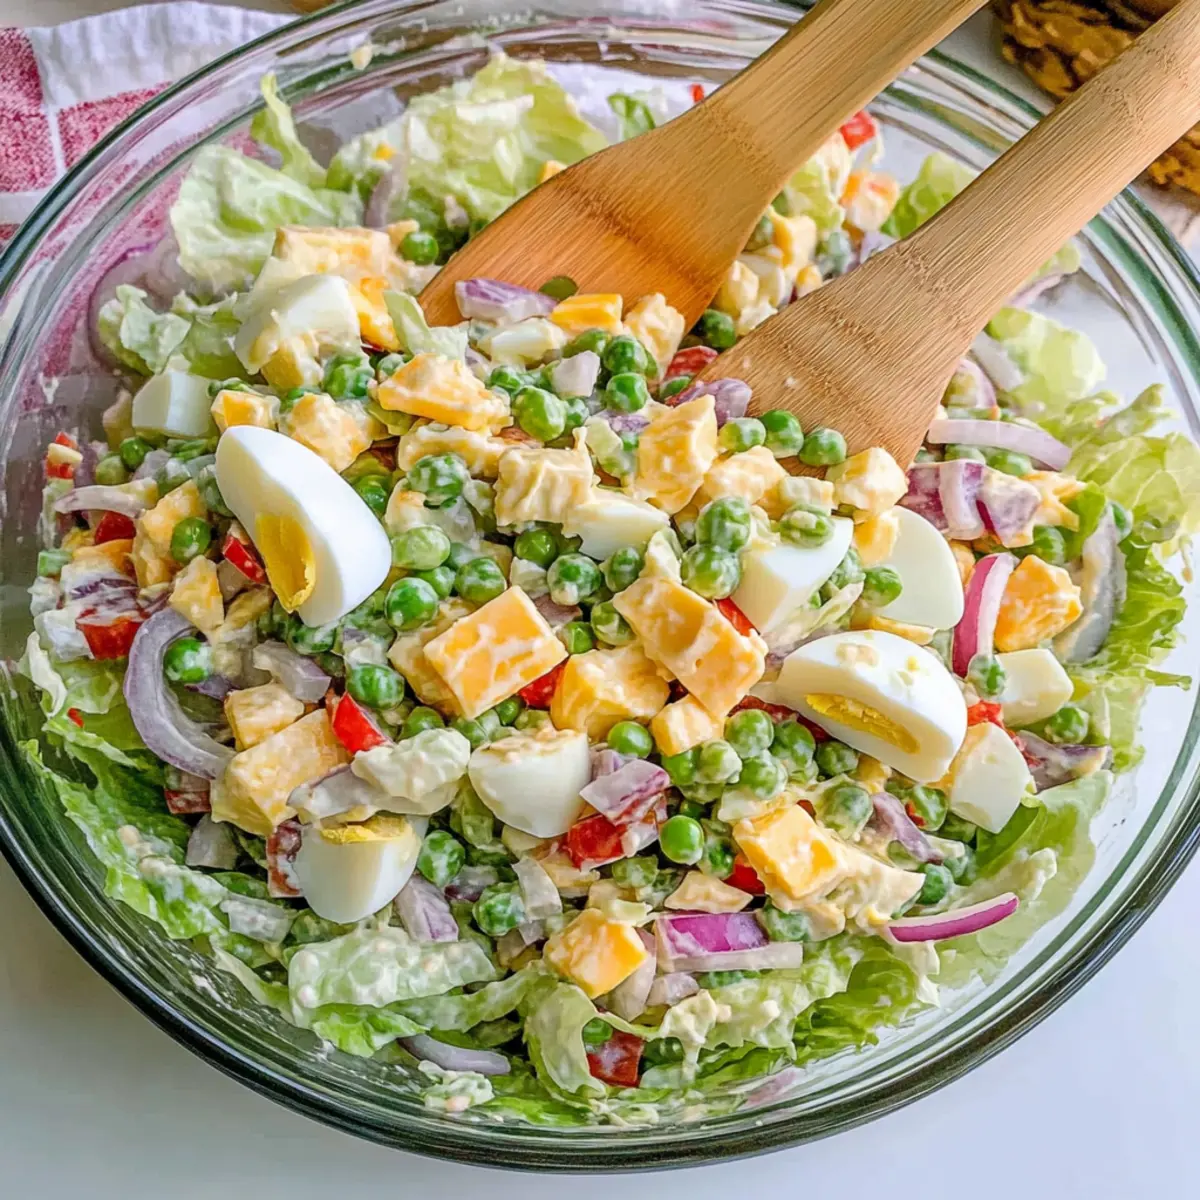
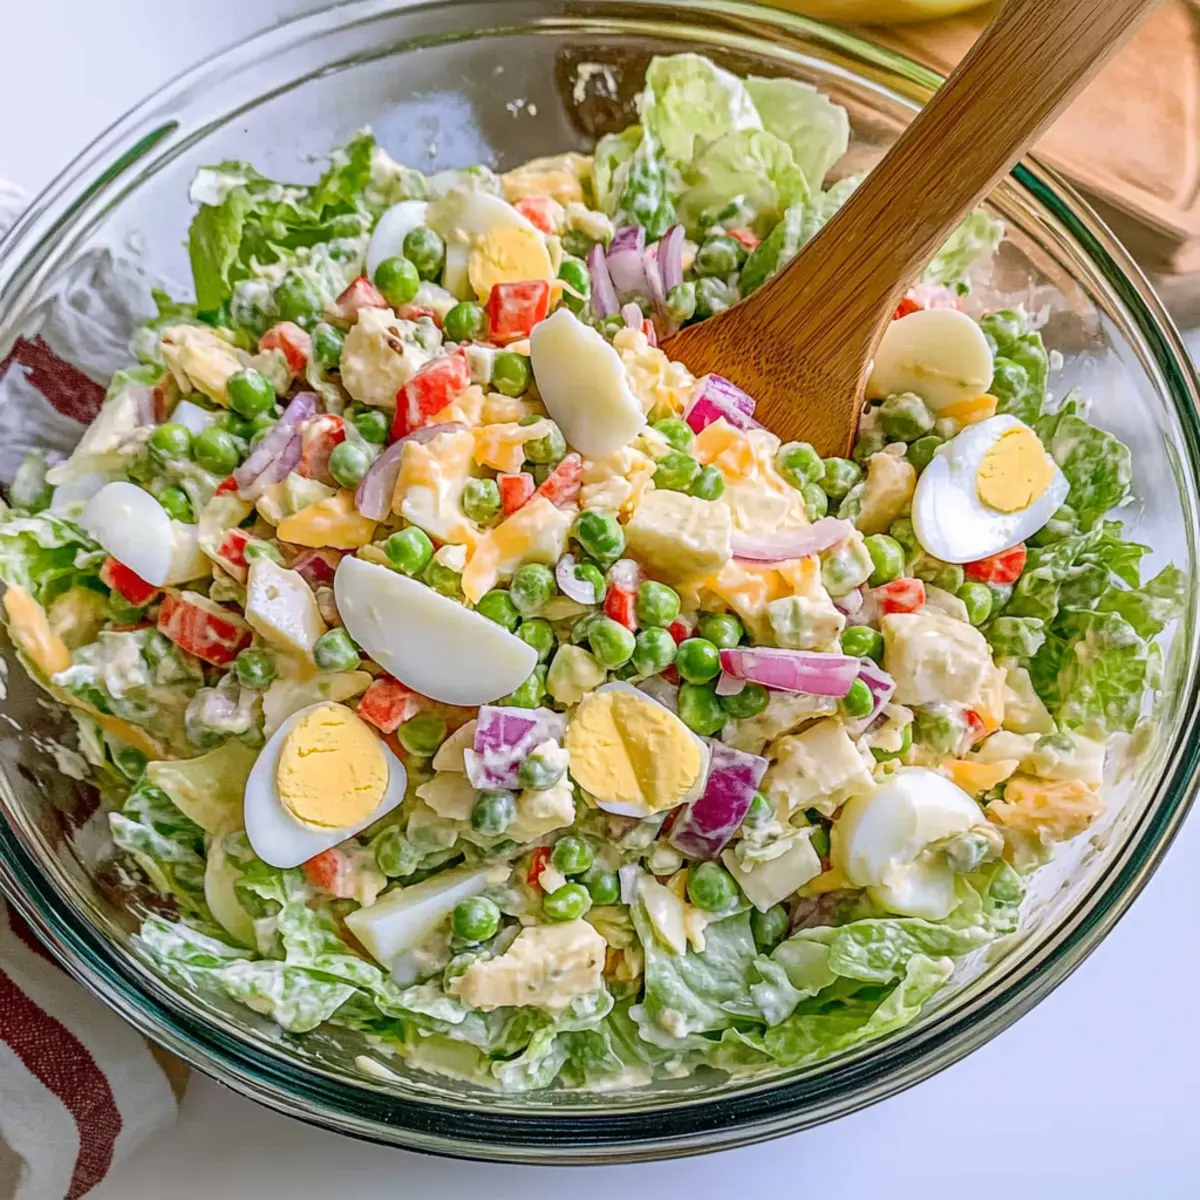
Vibrant colors: This salad dazzles with layers of vivid vegetables that make it a showstopper for any gathering.
Effortless preparation: With just a few simple steps, you can whip up this delectable dish in no time, perfect for any weeknight dinner or potluck.
Crowd favorite: Whether it’s a barbecue or a family gathering, the Layered Dublin Salad is sure to please your guests and leave them asking for seconds.
Fresh ingredients: Utilizing wholesome veggies, this salad is not only delicious but also a fantastic way to sneak in some healthy nutrients—similar to the colorful profiles of Apple Broccoli Salad or Carrot Chickpea Salad.
Customizable: Feel free to mix it up by adding proteins like chicken or chickpeas to turn it into a hearty meal or experimenting with different cheeses, just like in our various salads.
Picture-perfect: The stunning layers create an impressive centerpiece that makes you feel like a culinary artist, ready to impress!
Layered Dublin Salad Ingredients
• Note: Gather these fresh ingredients for a delightful Layered Dublin Salad!
For the Base
- Iceberg Lettuce – provides a fresh, crunchy base for texture in every bite.
- Red Onion – adds a sharp flavor contrast, enhancing the overall taste.
For the Layers
- Hard Boiled Eggs – contribute protein and creaminess, balancing the crunchiness of vegetables.
- Sweet Peppers – offer a sweet and colorful layer, enhancing visual appeal.
- Frozen Peas – deliver a pop of sweetness; simply thaw before use.
- Aged Irish Cheddar – provides a nutty flavor that ties the salad together; can substitute with another sharp cheese based on availability.
For the Dressing
- Mayonnaise – acts as the main dressing base, providing creaminess; can be swapped with Greek yogurt for a lighter option.
- Sweet Relish – infuses a sweet and tangy flavor; if unavailable, try a touch of honey or chutney.
- Spicy Mustard – adds a kick and depth; can use Dijon or yellow mustard as a substitute.
- Dried Thyme – gives an aromatic touch; can swap with Italian herbs for varied flavor.
- Salt – enhances all flavors; adapt as per taste preferences.
Step‑by‑Step Instructions for Layered Dublin Salad
Step 1: Prepare the Dressing
In a small bowl, combine mayonnaise, sweet relish, spicy mustard, dried thyme, and salt. Mix these ingredients together until smooth and well-combined, creating a creamy dressing that will enhance the Layered Dublin Salad’s flavors. Set this aside for about 10 minutes to allow the flavors to meld together.
Step 2: Assemble the Base
Take a large glass bowl or a trifle dish and begin by placing a generous layer of chopped iceberg lettuce at the bottom. Aim for an even layer that fills the bowl, as this will be the foundation of your Layered Dublin Salad. The crisp texture and vibrant color provide a refreshing base that sets the stage for the other ingredients.
Step 3: Add the Red Onion
Next, sprinkle a layer of thinly sliced red onion over the iceberg lettuce. The sharp flavor of the onion contrasts beautifully with the crispness of the lettuce and sets up the next layers. Make sure the onions are evenly distributed for a balanced taste throughout the salad.
Step 4: Layer the Hard-Boiled Eggs
Following the red onion, add a layer of chopped hard-boiled eggs on top. The protein-rich eggs contribute a creamy texture that complements the crunch of the previous layers. Ensure that the eggs are evenly spread to guarantee every bite of the Layered Dublin Salad features that delicious creaminess.
Step 5: Incorporate the Sweet Peppers
Now, sprinkle diced sweet peppers over the eggs to introduce a pop of color and sweetness. Their vibrant hues not only enhance the visual appeal but also provide a delightful crunch. Spread them evenly across the eggs for a festive and flavorful layer in your salad.
Step 6: Add the Thawed Peas
Next, distribute thawed frozen peas across the sweet pepper layer. Their bright green color adds freshness, while their sweet taste rounds out the flavors beautifully. Take your time to spread them evenly without disturbing the previous layers, keeping the look of your Layered Dublin Salad intact.
Step 7: Top with Aged Irish Cheddar
To finish your layering, add a layer of shredded aged Irish cheddar on top. This cheese brings a rich and nutty flavor that ties the salad together. The sharpness of the cheese will contrast nicely with the veggies, making the Layered Dublin Salad even more enticing.
Step 8: Drizzle the Dressing
Finally, pour the prepared dressing evenly over the entire layered salad. This step is crucial—ensure each layer receives some dressing without mixing everything together just yet. The creamy dressing will enhance the flavors of every component, creating a beautiful and tasty Layered Dublin Salad.
Step 9: Chill Before Serving
Let the salad sit in the refrigerator for about 15-30 minutes before serving. This brief chilling time allows the flavors to meld together beautifully. When you’re ready to serve, gently toss the salad to blend the layers just before serving, keeping the vibrant presentation intact and inviting.
Layered Dublin Salad Variations
Feel inspired to transform your Layered Dublin Salad into a dish that reflects your personal taste or dietary needs!
-
Vegetarian Delight: For a purely plant-based version, omit hard-boiled eggs and layer in extra veggies like shredded carrots or chopped cucumbers for additional crunch.
-
Protein Boost: Add diced grilled chicken or chickpeas between the layers for a satisfying and hearty meal that packs in extra protein. Remember, a filling salad is a fantastic way to keep you energized!
-
Cheese Swap: Experiment with different types of cheese, such as feta for a tangy twist or pepper jack for a spicy kick. Each cheese offers a unique flavor profile that can elevate your salad experience.
-
Creamy Substitute: Swap mayonnaise with Greek yogurt for a lighter, tangy dressing that still delivers creaminess while packing a nutritional punch.
-
Dressing Variations: Create a zesty vinaigrette by mixing olive oil, balsamic vinegar, and Italian herbs for a lighter approach. This will give your salad a fresh, vibrant flavor that’s perfect for summer.
-
Sweet Heat: Add diced jalapeños or a sprinkle of red pepper flakes for an exciting kick that enhances the overall flavor. Just a little spice can take your layered salad to a whole new level!
-
Fresh Herb Infusion: Mix in fresh herbs like dill or parsley for a refreshing burst of flavor. This simple addition can harmonize the taste and make your dish even more aromatic.
-
Seasonal Fruits: Top off your salad with some diced seasonal fruits like strawberries or apples for a sweet surprise in every bite. They’ll complement the savory ingredients wonderfully and create an enticing balance.
Exploring these variations is a fantastic way to craft a dish uniquely suited to you, much like the colorful profiles in Carrot Chickpea Salad. Dive in, and let your creativity flow!
Expert Tips for Layered Dublin Salad
-
Choose a Clear Bowl: Use a clear glass bowl or trifle dish to showcase the stunning layers, making your Layered Dublin Salad a visual delight.
-
Chill It Well: Allow the salad to chill for at least 15-30 minutes before serving. This enhances flavors as they meld together beautifully.
-
Dress Sparingly: Avoid overdressing your salad until just before serving to maintain the texture of the fresh ingredients and prevent sogginess.
-
Layer Carefully: When assembling, ensure each ingredient is evenly distributed for balanced flavor in every bite; this is key to an impressive Layered Dublin Salad.
-
Substitution Secrets: Don’t hesitate to substitute cheeses or add proteins like chicken or chickpeas to customize the salad to your taste.
Make Ahead Options
These Layered Dublin Salad preparations are perfect for busy cooks! You can chop your vegetables, hard-boil the eggs, and even prepare the dressing up to 24 hours in advance. Simply keep the veggies and dressing separately in airtight containers in the refrigerator to maintain their freshness and prevent sogginess. When you’re ready to serve, layer the iceberg lettuce, red onions, eggs, sweet peppers, and thawed peas in a glass bowl, then top with aged Irish cheddar. Drizzle the dressing just before serving to keep everything crisp and vibrant. With these make-ahead tips, you can enjoy a delicious, stress-free meal any night of the week!
What to Serve with Layered Dublin Salad?
Elevate your dining experience with delightful side dishes and drinks that beautifully complement this refreshing layered creation.
-
Garlic Bread: This warm, buttery delight adds a crunchy texture that perfectly contrasts the salad’s freshness and enhances the meal’s comfort.
-
Quinoa Pilaf: Fluffy and nutty, quinoa pilaf brings wholesome grains to the table, adding a healthy heartiness that balances the crispness of the salad.
-
Fruit Platter: A vibrant assortment of seasonal fruits like berries or melons introduces a sweet and juicy element, making for a refreshing contrast.
-
Creamy Coleslaw: With its tangy dressing and crunchy vegetables, coleslaw adds a creamy richness that pairs beautifully with the Layered Dublin Salad.
-
Sparkling Water: A bubbly, refreshing drink that cleanses the palate between bites, enhancing the overall taste experience of your meal.
-
Lemon Tart: This zesty dessert brings a delightful finish to your meal, with its sweet and tart profile perfectly complementing the salad’s savory flavors.
Whether you’re hosting a gathering or enjoying a quiet dinner at home, these pairings are sure to enhance your enjoyment of the Layered Dublin Salad!
Storage Tips for Layered Dublin Salad
Fridge: Keep your Layered Dublin Salad covered in the fridge for up to 3 days. Make sure to store the dressing separately until serving to maintain freshness.
Freezer: It’s best to avoid freezing the layered salad, as the texture of the vegetables and dressing may change upon thawing.
Reheating: If you have leftovers that you prefer warm, consider gently reheating individual servings in the microwave, but be mindful of the salad’s delicate ingredients.
Room Temperature: The salad can sit out for up to 2 hours during gatherings, but be sure to refrigerate any leftovers promptly to prevent spoilage.
Layered Dublin Salad Recipe FAQs
How do I choose ripe ingredients for my Layered Dublin Salad?
Absolutely! When selecting iceberg lettuce, look for crisp, vibrant leaves without dark spots or wilting. For red onions, choose those that feel firm and heavy for their size. Sweet peppers should be glossy and free of blemishes, while the eggs should be fresh. If using frozen peas, ensure they’ve been properly thawed for the best sweetness and texture.
What is the best way to store leftovers of the Layered Dublin Salad?
Very! Store your Layered Dublin Salad in an airtight container in the fridge for up to 3 days. Keep the dressing separate until you’re ready to serve to prevent sogginess. If you notice any ingredients starting to wilt or lose their crunch, it’s best to consume these portions first.
Can I freeze the Layered Dublin Salad?
I recommend avoiding freezing the salad, as the texture of fresh vegetables, especially the iceberg lettuce and cheese, may change in undesirable ways when thawed. However, if you have leftover dressing, you can freeze it in an airtight container for up to 3 months and use it later on another salad or dish. Just thaw it in the fridge before using!
What should I do if my layers become soggy over time?
To prevent sogginess, ensure you add the dressing sparingly and only right before serving. If you notice that the salad has become a bit mushy, consider layering fresh greens right on top to disguise the texture before serving. You can also add extra cheese or nuts for an added crunch!
Are there any dietary considerations for making the Layered Dublin Salad?
Absolutely! For those with specific dietary needs, the salad can easily be made gluten-free by ensuring all condiments are gluten-free. If you have egg allergies, use chickpeas or diced tofu as a protein replacement. Additionally, if you’re making this for pets, keep onions and other harmful ingredients away from them, as they are not pet-friendly.
Can I adjust the ingredients to make a variation of the Layered Dublin Salad?
Very! The beauty of this salad lies in its versatility. Feel free to switch out the aged Irish cheddar for feta or goat cheese, and add proteins like diced grilled chicken or chickpeas for an added twist. You can also try different dressings, like a tangy vinaigrette, to suit your taste. The more the merrier, let your creativity shine!
Layered Dublin Salad: A Colorful Twist on Potluck Classics
Ingredients
Equipment
Method
- In a small bowl, combine mayonnaise, sweet relish, spicy mustard, dried thyme, and salt. Mix until smooth. Let sit for about 10 minutes.
- In a large glass bowl or trifle dish, layer chopped iceberg lettuce at the bottom.
- Sprinkle thinly sliced red onion over the iceberg lettuce.
- Add a layer of chopped hard-boiled eggs on top of the red onion.
- Sprinkle diced sweet peppers over the eggs.
- Distribute thawed frozen peas across the sweet pepper layer.
- Add a layer of shredded aged Irish cheddar on top.
- Pour the prepared dressing evenly over the layered salad.
- Let the salad chill in the refrigerator for 15-30 minutes before serving.
- Gently toss the salad before serving to mix the layers while keeping the presentation intact.
Leave a Reply