
As I stirred my mixing bowl, a delightful aroma wafted through the kitchen, instantly transporting me to sun-soaked beaches with swaying palm trees. That’s the magic of this No-Bake Coquito Tiramisu, a creamy coconut rum delight that brings together the best of both worlds—an elegant dessert and an island escape. With the silky mascarpone and layers of ladyfingers dipped in coconut rum, this recipe not only takes under 30 minutes to prepare, but it also doubles as a showstopper for holidays and gatherings. Plus, it offers the wonderful perk of being made ahead, freeing up your time for celebrations. Whether you go for a gluten-free version or stick to the classic, this dessert promises to impress. Curious how to whip up this tropical treat? Let’s dive in!
Why Is Coquito Tiramisu So Irresistible?
Creamy Delight: This No-Bake Coquito Tiramisu offers a rich, creamy texture that melts in your mouth—ideal for any dessert lover.
Tropical Escape: Infused with coconut rum, it transports you to a tropical paradise, making every bite feel like a mini vacation.
Quick and Easy: With under 30 minutes of prep, you’ll have an impressive dessert ready in no time, perfect for busy hosts.
Make-Ahead Convenience: It can be prepared a day in advance, saving you stress on the day of your celebration.
Flavor Versatility: Feel free to customize with gluten-free ladyfingers or experiment with different rums to suit your taste.
Embrace the decadence of this dessert and check out our tips for perfecting it in this delightful Coquito Tiramisu recipe that everyone will adore!
Coquito Tiramisu Ingredients
For the Base
• Ladyfingers – Provide the perfect structure and texture; for a gluten-free option, substitute with gluten-free ladyfingers.
• Unsalted Butter – Binds the ingredients together; must be softened for easy mixing.
For the Cream Mixture
• Mascarpone Cheese – Essential for a rich, creamy base; don’t substitute with other cheeses.
• Whipping Cream – Creates a light, airy texture; ensure it’s cold for the best results.
• Granulated Sugar – Adds just the right sweetness to balance the flavors; no substitutions recommended.
• Coconut Cream – Adds a luscious creaminess; use full-fat coconut cream for optimal flavor.
• Vanilla Extract – Enhances depth of flavor; opt for pure vanilla for the best taste.
For Added Flavor
• Coconut Rum – Infuses the dessert with delightful coconut notes; dark or spiced rum can be used for a different profile.
• Cocoa Powder – Contributes a rich chocolate flavor; use unsweetened cocoa for the best results.
For the Topping
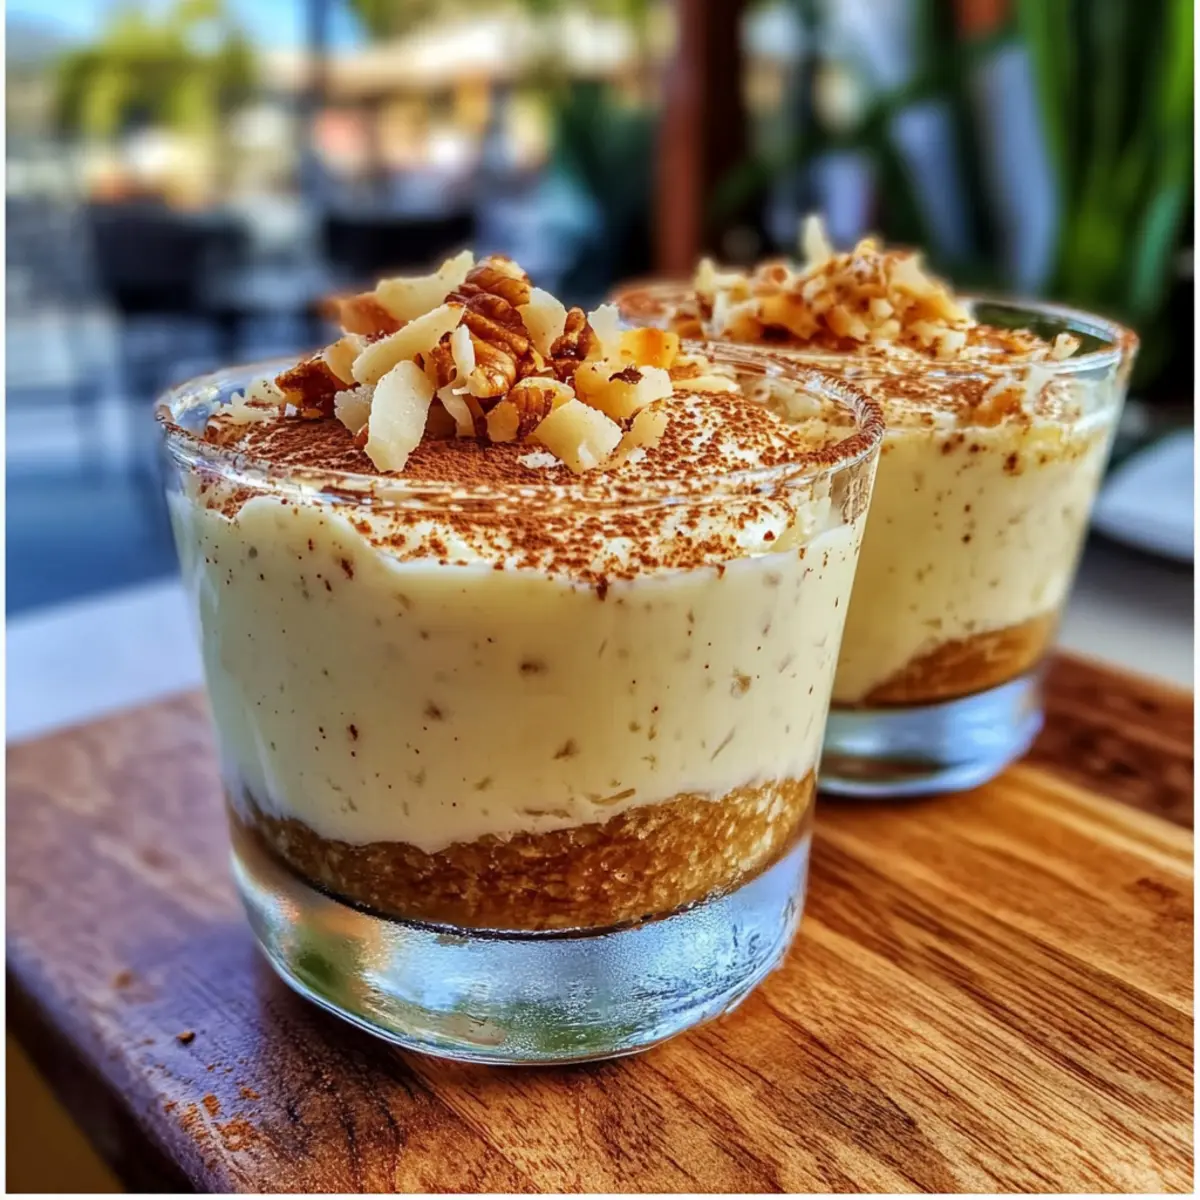
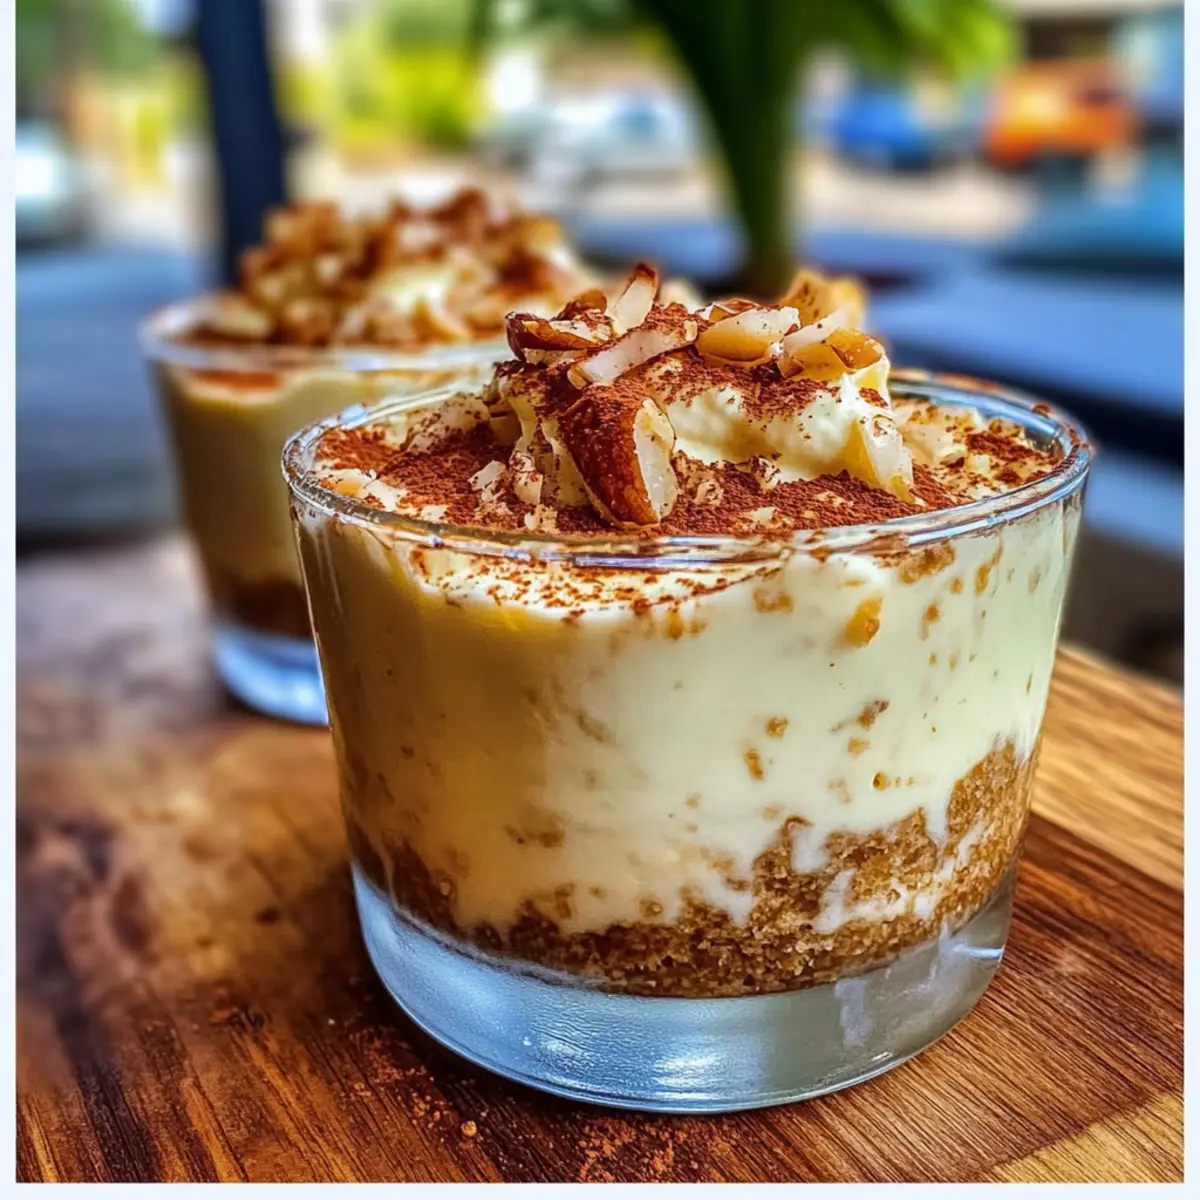
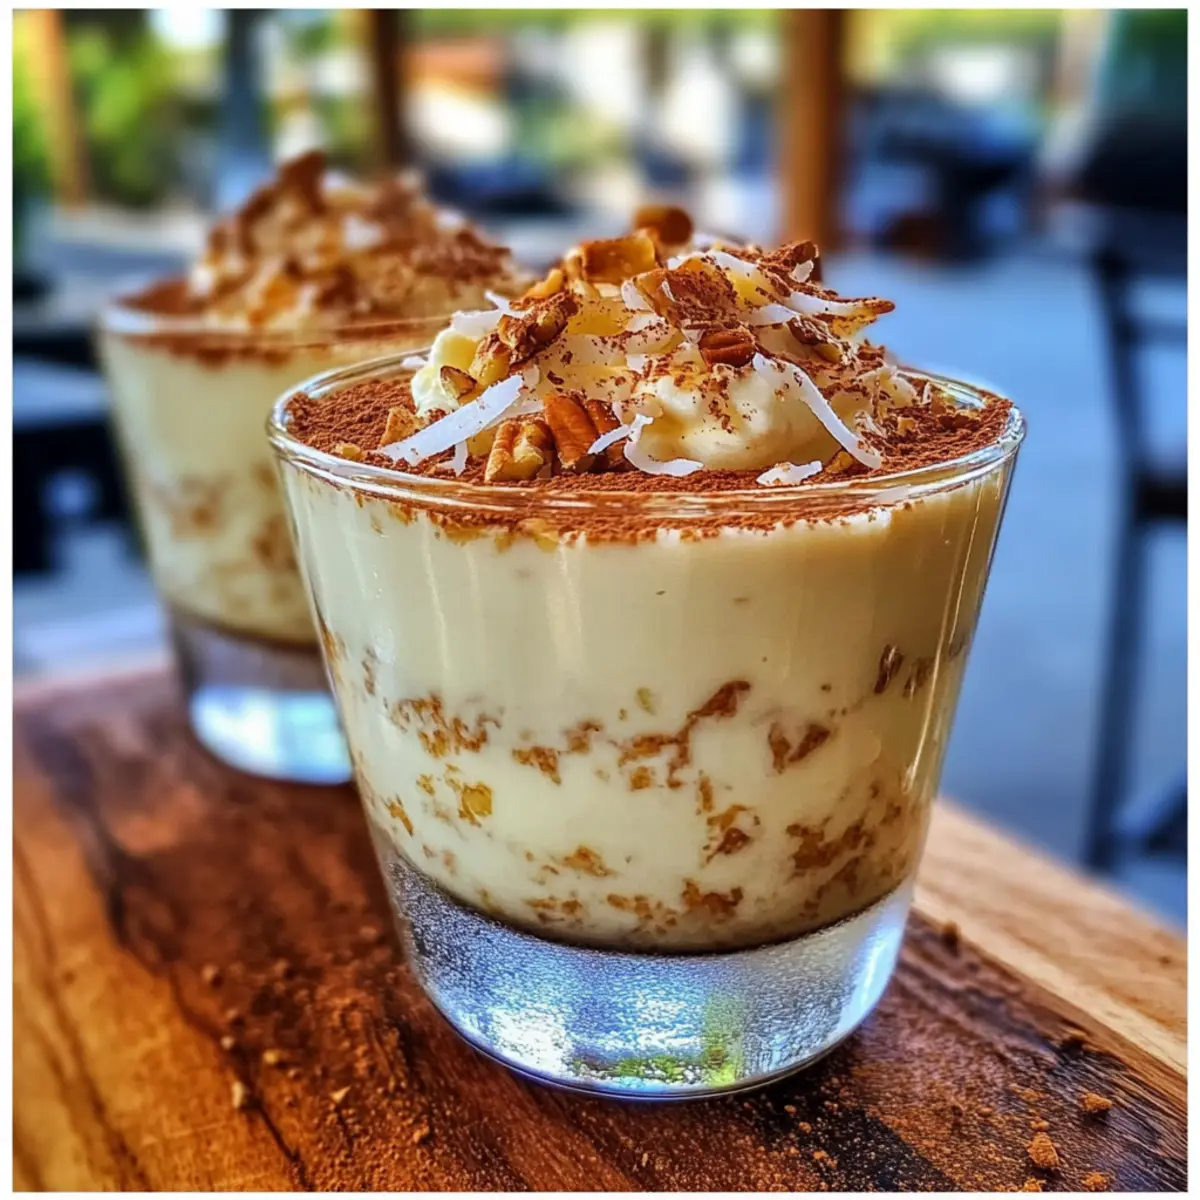
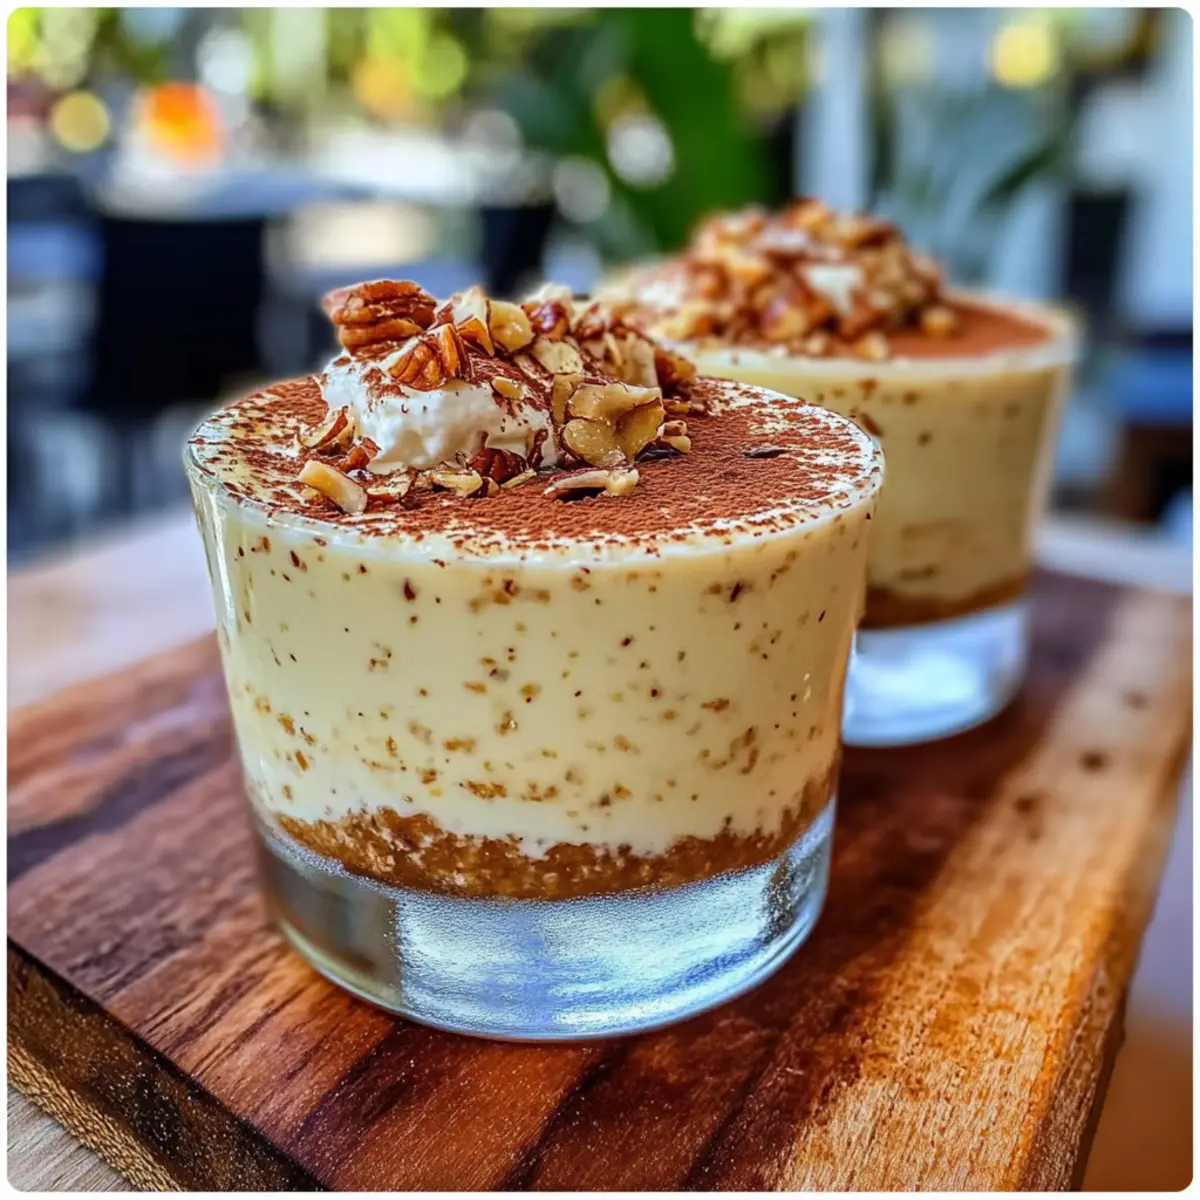
• Coconut Flakes – Adds visual appeal and texture; toasted coconut flakes are recommended for extra flavor.
• Chopped Pecans – Provides a delightful crunch; optional but can be swapped with other nuts if desired.
Get ready to experience a tropical delight with this Coquito Tiramisu!
Step‑by‑Step Instructions for Coquito Tiramisu
Step 1: Prepare the Ladyfingers
Begin by pouring the coconut rum into a shallow dish. Dip each ladyfinger into the coconut rum for about 2-3 seconds, ensuring they absorb the flavor but do not get too soggy. Arrange half of the dipped ladyfingers in a single layer at the bottom of a 9×9-inch baking dish, forming the sturdy base for your Coquito Tiramisu.
Step 2: Mix the Cocoa Base
In a mixing bowl, combine 1 cup of granulated sugar and 1/4 cup of unsweetened cocoa powder. Whisk them together until evenly blended. Gradually drizzle in 1/2 cup of coconut rum, stirring until the mixture achieves a smooth consistency. This cocoa base will add a rich chocolate flavor to your Coquito Tiramisu, enhancing its overall delightfulness.
Step 3: Whip the Cream and Mascarpone
In a separate large bowl, add 2 cups of cold whipping cream and 1 cup of mascarpone cheese. Using an electric mixer, whip on medium-high speed for about 3-4 minutes until stiff peaks form. Ensure the mixture is thick and fluffy, which will create a light and airy texture that complements the rich chocolate in the Coquito Tiramisu.
Step 4: Combine the Mixtures
Carefully fold the whipped cream mixture into the chocolate cocoa base, using a spatula to gently combine them. Aim for a smooth texture without deflating the whipped cream. Continue folding until no streaks of cocoa mixture remain visible. This careful blending will ensure that every bite of your Coquito Tiramisu is heavenly.
Step 5: Layer the Mixture
Spread half of the creamy chocolate mixture over the layer of ladyfingers in your dish. Use a spatula to evenly distribute the mixture, smoothing it out to ensure each ladyfinger is well covered. This initial layer adds richness that pairs beautifully with the coconut flavors, setting the stage for your decadent Coquito Tiramisu.
Step 6: Add the Topping
Spoon a layer of the remaining whipped cream mixture over the chocolate layer, smoothing it out evenly. Next, sprinkle a generous amount of toasted coconut flakes and chopped pecans on top for added texture and flavor. This festive topping will create a stunning visual appeal, making your Coquito Tiramisu irresistible.
Step 7: Chill to Set
Repeat the layering process by dipping the rest of the ladyfingers in coconut rum and placing them on top of the cream layer. Spread the last bit of chocolate mixture over the ladyfingers, and cover the dish with plastic wrap. Refrigerate the Coquito Tiramisu for at least 3 hours, allowing all the flavors to meld and the dessert to fully set for serving.
What to Serve with Coquito Tiramisu
Whether you’re hosting a festive gathering or enjoying a cozy night in, savoring a rich dessert with the right accompaniments elevates the experience to new heights.
-
Fresh Berries: The tartness of strawberries or raspberries cuts through the sweetness, refreshing your palate between bites.
-
Coconut Macaroons: These chewy treats echo the coconut theme, providing an additional layer of texture and flavors that complement your dessert beautifully.
-
Lightly Whipped Cream: A dollop of lightly sweetened whipped cream adds a luscious creaminess while balancing the rich flavors of the tiramisu.
-
Ice Cream: A scoop of vanilla or coconut ice cream alongside the tiramisu creates a delightful creamy contrast, enhancing that dessert experience.
-
Espresso: A shot of hot espresso intensifies the flavors of the tiramisu, making for an invigorating and classic pairing.
-
Chocolate Covered Almonds: The crunch and saltiness of these snacks provide a perfect balance to the creamy, sweet Tiramisu and add a nutty flair.
-
Pineapple Salsa: A fresh pineapple salsa introduces a zesty brightness that complements the richness, giving your meal a festive twist.
-
Sparkling Water: Crisp and refreshing, sparkling water helps cleanse the palate, making each bite of Coquito Tiramisu even more enjoyable.
Coquito Tiramisu Variations You’ll Love
Feel free to get creative with this recipe; the possibilities for customization are endless and deliciously fun!
-
Gluten-Free: Use gluten-free ladyfingers for a tasty alternative that everyone can enjoy. You won’t miss the classic ones!
-
Different Rum: Swap out coconut rum for dark or spiced rum to add a new layer of flavor. Each choice offers a unique twist on the classic.
-
Nutty Addition: Incorporate toasted almonds or walnuts for a delightful crunch. They add not just texture but a flavor burst too!
-
Chocolate Lovers: Layer in mini chocolate chips between the ladyfingers for an unexpected cocoa crunch. It’ll take your dessert to a whole new level!
-
Coconut Health Boost: Add a sprinkle of chia seeds or flax seeds to the cream for a nutritious twist. It’s a fun way to add some superfood benefits!
-
Fruity Surprise: Fold in some crushed pineapple or banana slices to the cream mixture for a fruity lift. It will be like a tropical vacation with every bite!
-
Decadent Drizzle: Drizzle caramel or chocolate sauce over the top before serving for an eye-catching finish that adds sweetness to each bite.
-
Spice It Up: Dust with a pinch of cinnamon or nutmeg for a warm, spicy note. It’s like adding a cozy hug to your dessert experience.
Feel free to check out our tips on how to make it gluten-free or experiment with our tips for perfecting your Coquito Tiramisu. Elevate your dessert game while embracing all the wonderful flavors this treat has to offer!
Make Ahead Options
These Coquito Tiramisu layers are a dream for meal prep enthusiasts! You can easily prepare the entire dessert up to 24 hours in advance, allowing the flavors to meld beautifully while making your life easier on busy occasions. Simply complete all the layering steps up to chilling, then cover the dish with plastic wrap and refrigerate. To maintain the creamy texture and avoid sogginess, be sure to properly dip the ladyfingers—just a quick soak in the coconut rum will do the trick. When you’re ready to serve, simply garnish with extra toasted coconut flakes and chopped pecans for an eye-catching finish. Enjoy the tranquility of a prepped dessert that’s just as delicious when served fresh!
Expert Tips for Coquito Tiramisu
-
Chill Your Tools: Ensure mixing bowls and beaters are cold for whipping cream. This helps achieve fluffy peaks, perfect for your Coquito Tiramisu.
-
Check Ladyfinger Freshness: Use fresh ladyfingers to avoid sogginess. If they’re stale, they’ll absorb too much rum and collapse.
-
Gradual Rum Drenching: Don’t soak the ladyfingers too long! Dipping for about 2-3 seconds preserves structure while allowing flavor to seep in.
-
Smooth Folding Technique: When combining the whipped cream with the cocoa mixture, fold gently to retain air. This keeps your Coquito Tiramisu light and airy.
-
Perfect Chilling Time: Patience is key—let your dessert chill for at least 3 hours to ensure the perfect texture and melded flavors.
How to Store and Freeze Coquito Tiramisu
-
Fridge: Store leftover Coquito Tiramisu in an airtight container for up to 3 days. This keeps it fresh and maintains its creamy texture.
-
Freezer: For longer storage, wrap the Coquito Tiramisu tightly in plastic wrap and then in aluminum foil, freezing it for up to 1 month.
-
Thawing: When ready to enjoy, thaw the frozen dessert overnight in the refrigerator to restore its delightful creaminess.
-
Reheating: This dessert is best served cold and does not require reheating. Enjoy it as-is for a refreshing treat!
Coquito Tiramisu Recipe FAQs
What type of ladyfingers should I use for Coquito Tiramisu?
I recommend using fresh ladyfingers for the best results. They provide the perfect structure and texture for your Coquito Tiramisu. If you prefer a gluten-free version, simply substitute with gluten-free ladyfingers available at most grocery stores.
How do I store leftover Coquito Tiramisu?
Store any leftover Coquito Tiramisu in an airtight container in the refrigerator for up to 3 days. This will help keep the flavors fresh and maintain the creamy texture. Ensure it’s well-sealed to prevent other fridge odors from affecting your delicious dessert.
Can I freeze Coquito Tiramisu?
Absolutely! To freeze Coquito Tiramisu, wrap it tightly in plastic wrap and then in aluminum foil to prevent freezer burn. It can be stored in the freezer for up to 1 month. When you’re ready to enjoy it, simply thaw overnight in the refrigerator for the best results.
How do I ensure my whipping cream forms stiff peaks?
To achieve stiff peaks, make sure your whipping cream is very cold before starting. Using chilled mixing bowls and beaters also helps. Whip on medium-high speed for about 3-4 minutes until thick and fluffy, but be careful not to over-whip as it can turn grainy.
Can I use other types of rum instead of coconut rum?
Yes! While coconut rum adds a tropical flavor, you can certainly substitute it with dark or spiced rum for a different flavor profile. Experimenting with different rums can add a unique twist to your Coquito Tiramisu that suits your taste preferences.
Is this dessert safe for people with nut allergies?
While the recipe includes chopped pecans as an optional topping, you can easily omit them if nut allergies are a concern. Additionally, ensure that all other ingredients used are nut-free to keep the Coquito Tiramisu safe for everyone enjoying it.
Coquito Tiramisu: Creamy Coconut Dream You’ll Adore
Ingredients
Equipment
Method
- Pour the coconut rum into a shallow dish. Dip each ladyfinger into the coconut rum for about 2-3 seconds, then arrange half of them in a layer at the bottom of a baking dish.
- In a bowl, combine 1 cup of granulated sugar and 1/4 cup of cocoa powder, whisking until blended. Gradually drizzle in 1/2 cup coconut rum, stirring until smooth.
- In a large bowl, whip 2 cups of cold whipping cream and 1 cup of mascarpone cheese together on medium-high speed until stiff peaks form.
- Carefully fold the whipped cream mixture into the cocoa base until smooth without deflating.
- Spread half of the creamy chocolate mixture over the layer of ladyfingers, smoothing it out evenly.
- Add a layer of the remaining whipped cream mixture on top, then sprinkle with toasted coconut and chopped pecans.
- Repeat the layering with the rest of the ladyfingers and cover with the remaining chocolate mixture. Cover with plastic wrap and refrigerate for at least 3 hours.
Leave a Reply