
As the aroma of baking cookies wafts through my home, I can’t help but feel a cozy rush of nostalgia. You know that perfect moment when the edges are just golden while the centers stay soft and chewy? That’s what these Chewy Chocolate Chip Cookies deliver in less than 30 minutes! With no fancy techniques required, you’ll whip up these classic chocolate chip cookies using everyday ingredients that elevate each bite to pure bliss. Not only do they make for a delightful afternoon treat, but they’re also a hit at gatherings, ensuring smiles all around. Are you ready to indulge in this warm batch of comfort? Let’s dive into the details and create some magic in your kitchen!
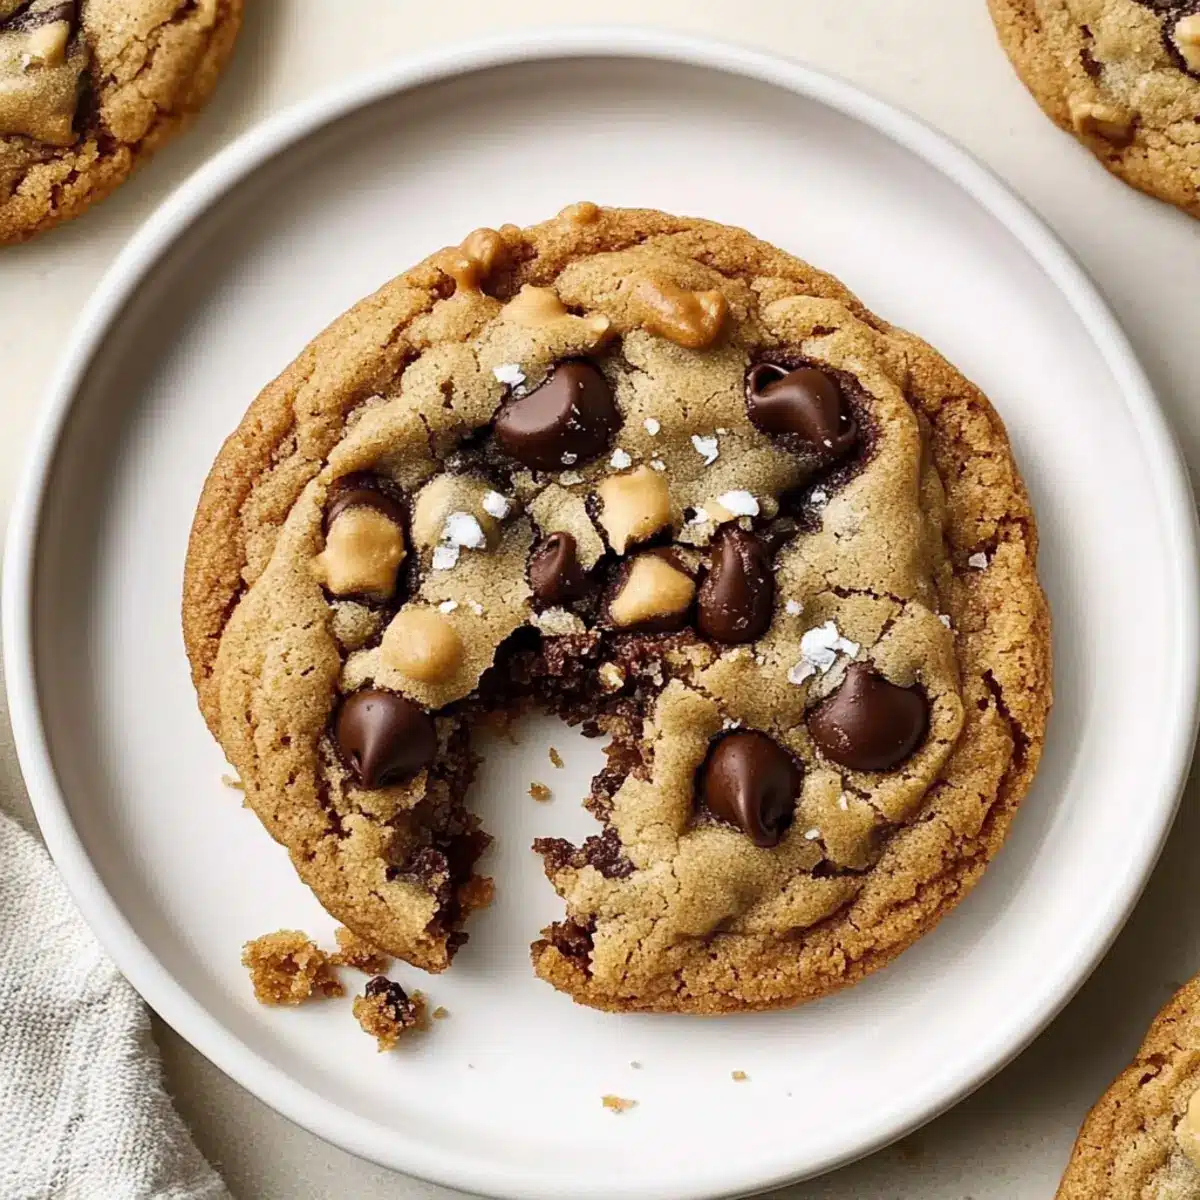
Why Are These Cookies So Chewy?
Irresistible Flavor: The combination of butter and brown sugar creates a rich, deep flavor that will have you coming back for more.
Quick Preparation: You can whip up these chewy chocolate chip cookies in under 30 minutes, making them perfect for unexpected guests or a last-minute craving.
Endless Versatility: Whether you prefer classic chocolate chips or want to switch things up with nuts or dried fruit, this recipe welcomes your personal touch.
Crowd-Pleasing Treat: From kids to adults, everyone loves a good cookie! Serve them at parties or bake them for a cozy night in.
For more tasty inspiration, check out Chocolate Oatmeal Cookies for a delightful twist on a classic!
Chocolate Chip Cookie Ingredients
For the Dough
• All-Purpose Flour – Provides structure to the cookies; ensure proper measurement for best results.
• Baking Soda – Aids in leavening, helping the cookies achieve that perfect rise.
• Salt – Enhances flavor and balances the sweetness of the chocolate.
• Unsalted Butter – Adds richness and optimal flavor; avoid margarine for the best results.
• Granulated Sugar – Sweetens the cookies and contributes to a slight crispness.
• Brown Sugar – Adds moisture and depth of flavor; using more will help achieve a chewier texture.
• Eggs – Binds the ingredients together and adds moisture for a tender cookie.
• Vanilla Extract – Intensifies the overall flavor profile, making your chocolate chip cookies irresistible.
• Semi-Sweet Chocolate Chips – Provide melty pockets of chocolate; feel free to mix in dark or milk chocolate chips for different flavors.
• Optional Nuts (e.g., Pecans, Walnuts) – Add a delightful crunch and flavor; consider using dried cranberries for a tart twist.
Step‑by‑Step Instructions for Chewy Chocolate Chip Cookies
Step 1: Preheat the Oven
Begin by preheating your oven to 375°F (190°C). This ensures your oven reaches the perfect temperature for baking, promoting even cooking. While the oven heats, gather your baking sheets and line them with parchment paper to prevent sticking. The scent of cookies in the oven will soon fill your kitchen, setting the stage for delicious Chewy Chocolate Chip Cookies.
Step 2: Cream the Butter and Sugars
In a large mixing bowl, combine softened unsalted butter with granulated and brown sugar. Using a hand mixer or stand mixer, beat the mixture on medium speed for about 2-3 minutes until it becomes light and fluffy. This creaming process incorporates air, which contributes to the soft texture of the cookies. Scrape down the sides of the bowl to ensure everything is well mixed.
Step 3: Add Eggs and Vanilla
Next, add the eggs and vanilla extract to the butter-sugar mixture. Beat on low speed until fully incorporated; this should take about 1 minute. The eggs will bind the ingredients together, while the vanilla enhances the flavor profile of your chewy chocolate chip cookies. Make sure the mixture looks creamy and smooth with no visible streaks of eggs.
Step 4: Mix the Dry Ingredients
In a separate bowl, whisk together all-purpose flour, baking soda, and salt. This step helps ensure that the baking soda is evenly distributed and avoids any lumps in your dough. Once combined, slowly add the dry mixture to the wet batter. Stir gently with a spatula until just incorporated, making sure to avoid overmixing to keep your cookies wonderfully chewy.
Step 5: Fold in the Chocolate Chips
Now, it’s time to add the star of the show! Gently fold in the semi-sweet chocolate chips (and any optional nuts, if using) until evenly distributed throughout the dough. The chocolate chips will create those delightful melty pockets in your chewy chocolate chip cookies. Take care not to over-mix; you want to maintain the thickness of the dough.
Step 6: Chill the Dough
For best results, chill the cookie dough in the refrigerator for at least 30 minutes to a few hours. This step enhances the flavor and reduces spreading, resulting in thick, chewy cookies. If you’re in a hurry, even a quick chill will help, but longer chilling creates deeper flavors that are worth the wait.
Step 7: Shape the Cookies
Using a tablespoon or cookie scoop, drop rounded spoonfuls of dough onto the prepared baking sheets, leaving about 2 inches between each cookie to allow for spreading. The dough should form nice mounds, maintaining a slightly domed shape, which will bake up beautifully chewy and golden.
Step 8: Bake the Cookies
Place the baking sheets in the preheated oven and bake for 10-12 minutes. You’ll know the cookies are ready when the edges turn golden brown, and the centers look slightly underbaked. This visual cue is crucial for achieving that perfect chewy texture in your chocolate chip cookies.
Step 9: Cool on the Baking Sheet
Once baked, remove the trays from the oven and let the cookies cool on the sheets for about 5 minutes. This allows them to set slightly while maintaining their soft centers. After that, transfer them to a wire rack to cool completely, where they’ll continue to firm up just the right amount for that irresistible chewy bite.
Expert Tips for Chewy Chocolate Chip Cookies
-
Chill the Dough: Letting your dough chill for at least 30 minutes firm up the butter and enhances the flavor, ensuring chewier results and preventing excessive spreading.
-
Monitor Butter Temperature: Use softened unsalted butter, not melted, as melted butter can lead to flat cookies. Aim for a creamy consistency when creaming the butter and sugars.
-
Parchment Paper: Line baking sheets with parchment paper to prevent sticking and control the spread of your cookies. This simple step makes cleanup a breeze!
-
Avoid Overmixing: When combining dry and wet ingredients, be gentle. Overmixing can lead to tough cookies due to the development of gluten, which is not what you want in chewy chocolate chip cookies.
-
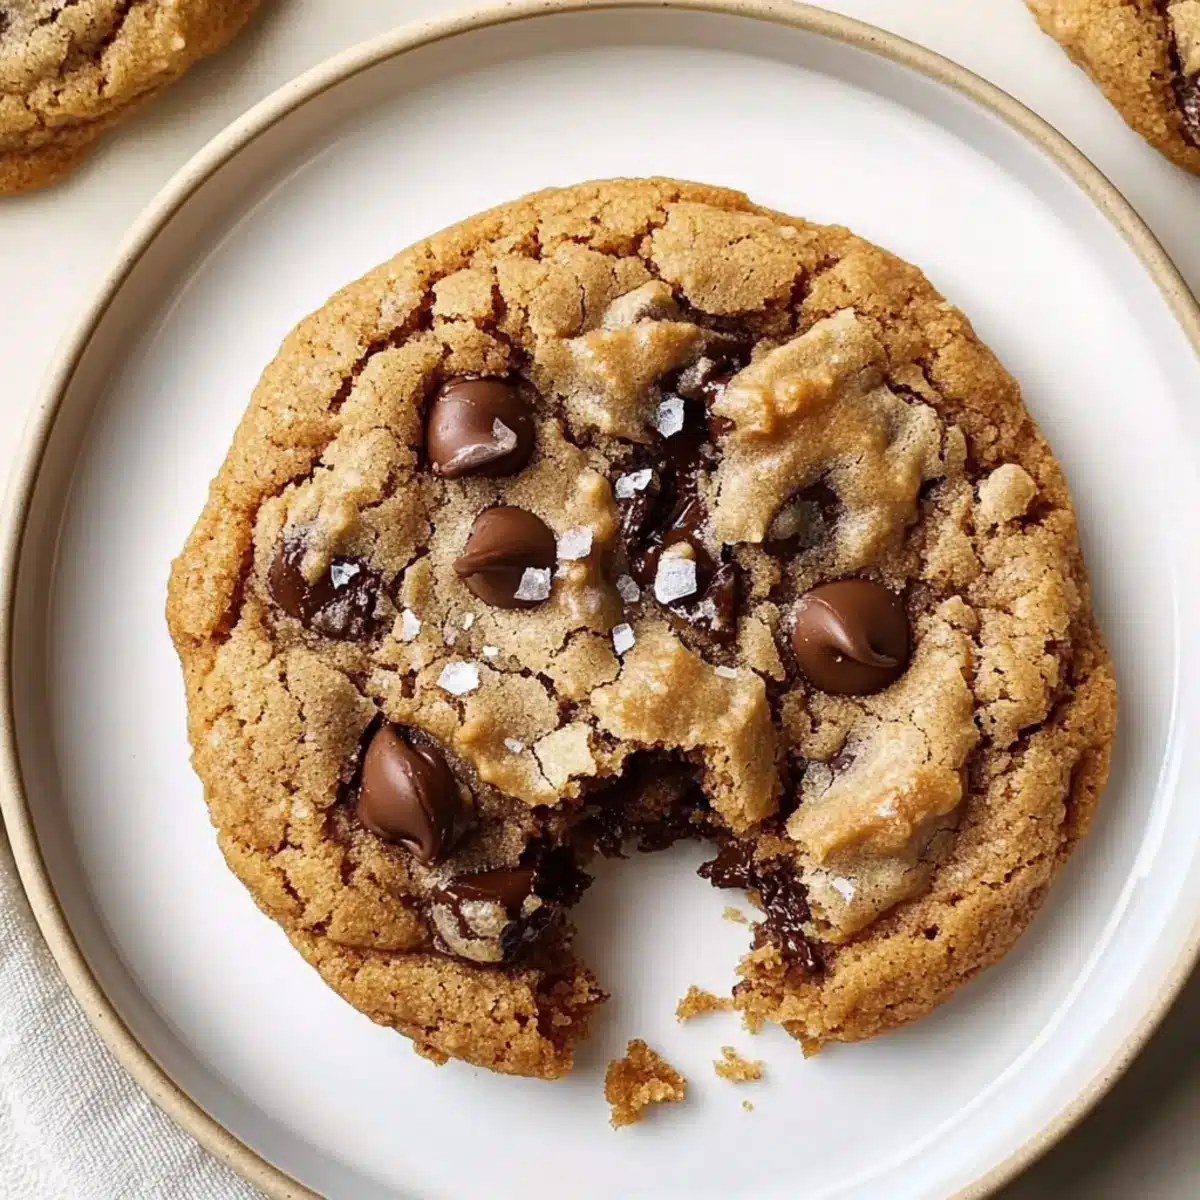
Add Salt on Top: For a gourmet touch, sprinkle flaky sea salt over the cookies before baking. This enhances flavor and adds a delightful contrast to the sweetness.
How to Store and Freeze Chocolate Chip Cookies
Room Temperature: Keep your cookies in an airtight container at room temperature for up to 1 week. Layer them with parchment paper to maintain their delightful chewiness.
Fridge: If you prefer, you can store the cookies in the fridge for up to 2 weeks. Just make sure they’re well-sealed to prevent them from drying out.
Freezer: For longer storage, freeze your chocolate chip cookies in a single layer on a baking sheet, then transfer to a freezer bag for up to 3 months. Thaw before enjoying for that fresh-baked flavor.
Reheating: When you’re ready to indulge, simply pop the cookies in a preheated oven at 350°F (175°C) for about 5 minutes to regain their warm, gooey goodness.
Make Ahead Options
These Chewy Chocolate Chip Cookies are perfect for meal prep enthusiasts! You can prepare the cookie dough up to 3 days in advance, storing it in an airtight container in the refrigerator. Alternatively, you can also freeze the dough for up to 3 months; just scoop out the dough balls and place them on a parchment-lined baking sheet to freeze before transferring to a zip-top bag. When you’re ready to bake, there’s no need to thaw—just add a couple of extra minutes to the baking time for frozen dough. This allows you to whip up fresh, warm cookies on demand, ensuring they’ll be just as delicious as when first made!
Chocolate Chip Cookies: Fun Variations
Feel free to customize your cookies with these delicious twists that will tickle your taste buds!
- Nut-Free: Simply omit nuts and add a sprinkle of cinnamon for warmth.
- Dairy-Free: Substitute unsalted butter with coconut oil or a vegan butter alternative. They’ll still be delightfully chewy and satisfying!
- Gluten-Free: Use a gluten-free all-purpose flour blend to make these cookies suitable for those with gluten sensitivities. They will still keep that chewy charm!
- Extra Rich: Mix in a tablespoon of instant coffee or espresso powder to deepen the chocolate flavor. It’s an unexpected, delightful surprise!
- Oatmeal Delight: Incorporate ½ cup of rolled oats for added texture and a wholesome essence. The oats add chewiness and heartiness to your cookies.
- Spicy Kick: Add a pinch of cayenne pepper or chili powder for a sweet and spicy combination that will leave your taste buds tingling!
- Fruit Fusion: Swap chocolate chips with dried fruit, such as cranberries or cherries, to add a tart touch. They bring a nice contrast to the sweetness.
- Peanut Butter Swirl: For a nutty twist, add dollops of peanut butter into the dough before baking. It creates beautiful swirls with a fantastic flavor!
Explore various combinations and create a batch that reflects your personality! If you’re inspired to try more delicious cookies, take a look at these delightful options: Chocolate Oatmeal Cookies, or try the classic Chocolate Chip Cookies. Enjoy baking!
What to Serve with Chewy Chocolate Chip Cookies
Indulging in warm, chewy chocolate chip cookies opens the door to delightful pairings that elevate your sweet experience.
-
Fresh Milk: A classic companion that perfectly complements the cookies’ sweetness, providing a creamy balance.
-
Coffee or Espresso: The rich, bold flavors of coffee enhance the chocolate while offering a lovely contrast to the sweetness. Each sip deepens the enjoyment of your cookie.
-
Vanilla Ice Cream: Add a scoop of creamy vanilla ice cream for a decadent dessert. As the ice cream melts, it creates a delightful cookie sundae experience.
-
Chocolate Sauce: Drizzle over your cookies for an extra touch of indulgence; this enhances the chocolate flavors and adds a luscious texture.
-
Fruit Skewers: Fresh fruits like strawberries or bananas add a refreshing contrast and playful texture, making for a vibrant feel alongside your cookies.
-
Nutty Trail Mix: Offer a crunchy side of trail mix balanced with nuts and dried fruits for a textural variation that enhances the cookie experience.
-
Hot Cocoa: Cozy up with a warm cup of rich hot cocoa, perfect for dunking the cookies and creating a blissful, comforting treat.
-
Caramel Sauce: A drizzle of homemade caramel enhances the sweetness, creating a gooey element that pairs beautifully with chewy chocolate chip cookies for a gourmet touch.
Chewy Chocolate Chip Cookies Recipe FAQs
What should I look for in ripe ingredients?
Absolutely! For the best results, ensure your unsalted butter is softened but not melted. This means it should give way easily when pressed but should maintain its shape. Also, when choosing chocolate chips, look for high-quality semi-sweet morsels with a glossy finish, which indicates freshness.
How should I store my cookies for freshness?
You can keep your chewy chocolate chip cookies at room temperature in an airtight container for up to 1 week. I recommend layering them with parchment paper to prevent them from sticking together and to keep that delightful chewiness intact. For a longer shelf life, transfer them to the fridge, where they can last for up to 2 weeks, but they must be sealed well to avoid drying out.
Can I freeze these cookies? What’s the best way?
Yes, you can absolutely freeze your cookies! To do this, first, freeze the cookies in a single layer on a baking sheet for about 1-2 hours, until solid. Once they are firm, transfer them to a freezer bag or airtight container, separating layers with parchment paper, and store them for up to 3 months. When you’re ready to indulge, allow them to thaw at room temperature or reheat in the oven at 350°F (175°C) for about 5 minutes to regain that fresh-baked charm.
What if my cookies turn out flat?
If you find your cookies aren’t as chewy and are instead spreading too much, it’s usually due to overmixing the dough or using melted butter. Next time, ensure the butter is only softened and not liquid. Additionally, chilling the dough for at least 30 minutes can help prevent excessive spreading, so don’t skip this important step!
Can I adjust the recipe for allergies or dietary restrictions?
Very much! To make dairy-free cookies, substitute the unsalted butter with coconut oil or vegan butter. For gluten-free options, try replacing the all-purpose flour with a 1:1 gluten-free baking blend. As for allergies, always use tree nut-free chocolate chips if you have nut sensitivities, and if you’re making cookies for pets, be sure to skip the chocolate and stick to pet-safe ingredients!
Is there a way to enhance the flavor further?
Definitely! For an extra flavor kick in your chewy chocolate chip cookies, consider adding a teaspoon of espresso powder to the dry ingredients—this deepens the chocolate flavor beautifully. You can also sprinkle some flaky sea salt on top right before baking for that gourmet touch!
Chewy Chocolate Chip Cookies for Irresistible Home Goodness
Ingredients
Equipment
Method
- Preheat your oven to 375°F (190°C) and line baking sheets with parchment paper.
- Cream softened unsalted butter with granulated and brown sugar until light and fluffy, about 2-3 minutes.
- Add eggs and vanilla extract to the mixture, beating on low speed until well incorporated.
- In a separate bowl, whisk together flour, baking soda, and salt. Gradually add dry ingredients to the wet batter, stirring gently.
- Fold in the chocolate chips and any optional nuts until evenly distributed.
- Chill the dough in the refrigerator for at least 30 minutes.
- Drop rounded spoonfuls of dough onto prepared baking sheets, leaving space for spreading.
- Bake for 10-12 minutes until edges are golden brown and centers look slightly underbaked.
- Let cookies cool on the sheets for about 5 minutes before transferring to a wire rack.
Leave a Reply