
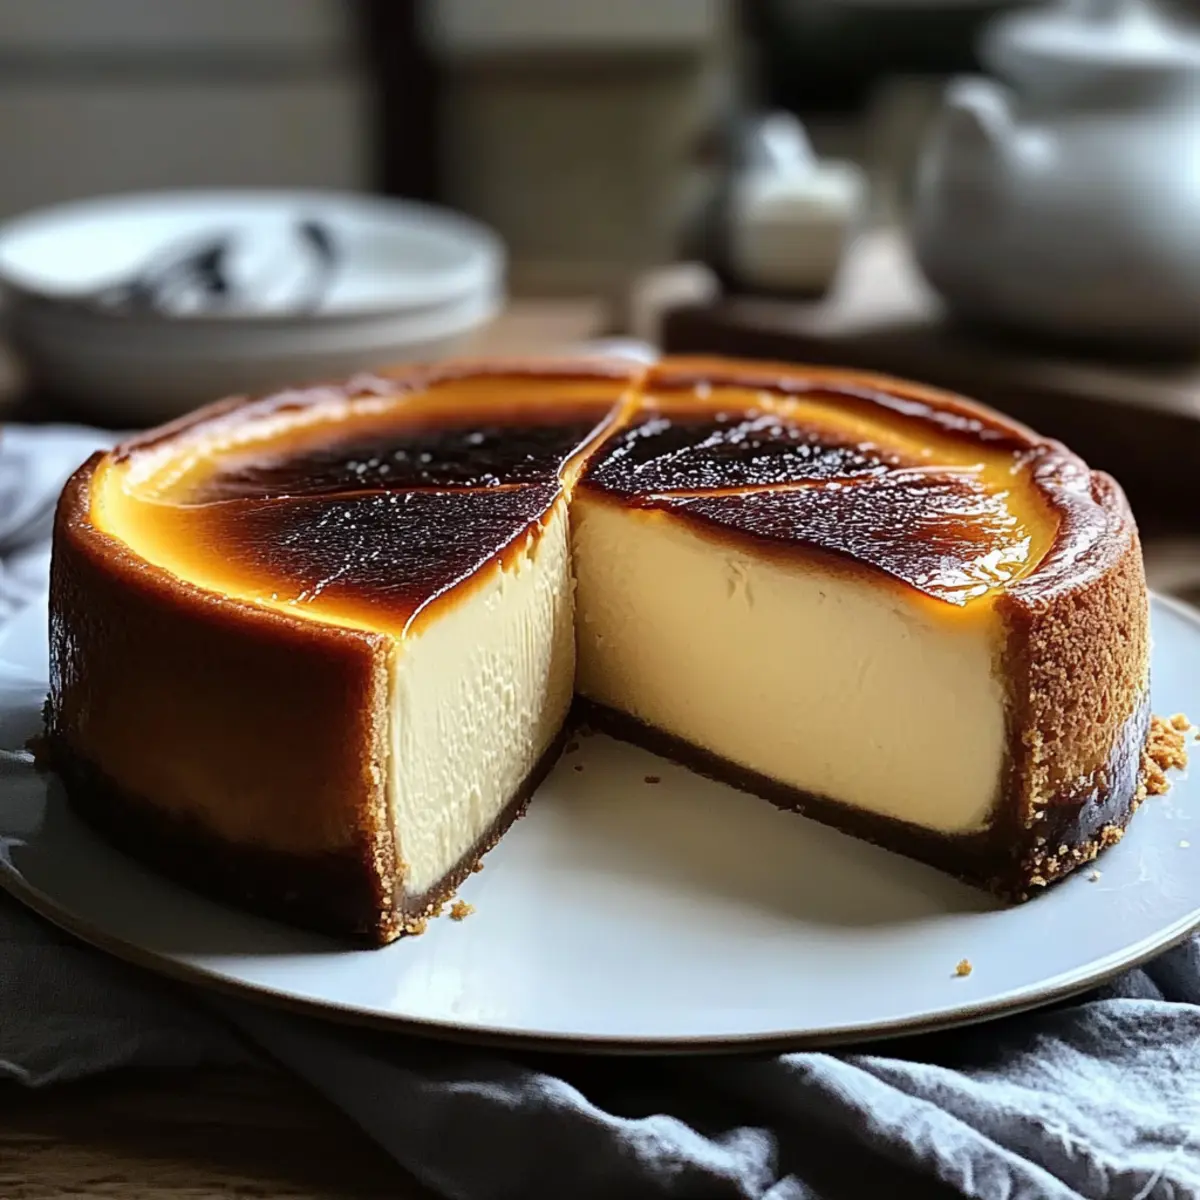
There’s something truly enchanting about the first slice of Burnt Basque Cheesecake, with its creamy, custard-like center and that stunningly scorched top begging to be savored. This crustless, vegetarian delight has become a crowd favorite not just for its flavor but also for its astonishing simplicity. You’ll love how quick it is to whip up, making it an indulgent choice for any gathering—or simply a self-treat after a long day. Plus, with a gluten-free variation, everyone can enjoy a slice of happiness! How do you like your cheesecake: plain or with a twist? Let’s dive into the recipe and discover your next baking adventure!

Why is Burnt Basque Cheesecake So Irresistible?
Creamy Indulgence: This cheesecake boasts a luxurious custard-like texture that melts in your mouth, providing the ultimate comfort food experience.
Simplicity Meets Elegance: With minimal ingredients and straightforward steps, anyone can experience the triumph of homemade dessert without the fuss.
Customization at Its Best: Whether you prefer a classic version or want to experiment with citrus zest or chocolate indulgence, this recipe is versatile for your creative spin.
Gluten-Free Delight: Perfect for any gathering, you can easily make a gluten-free variation that everyone will rave about, ensuring no one misses out on the fun!
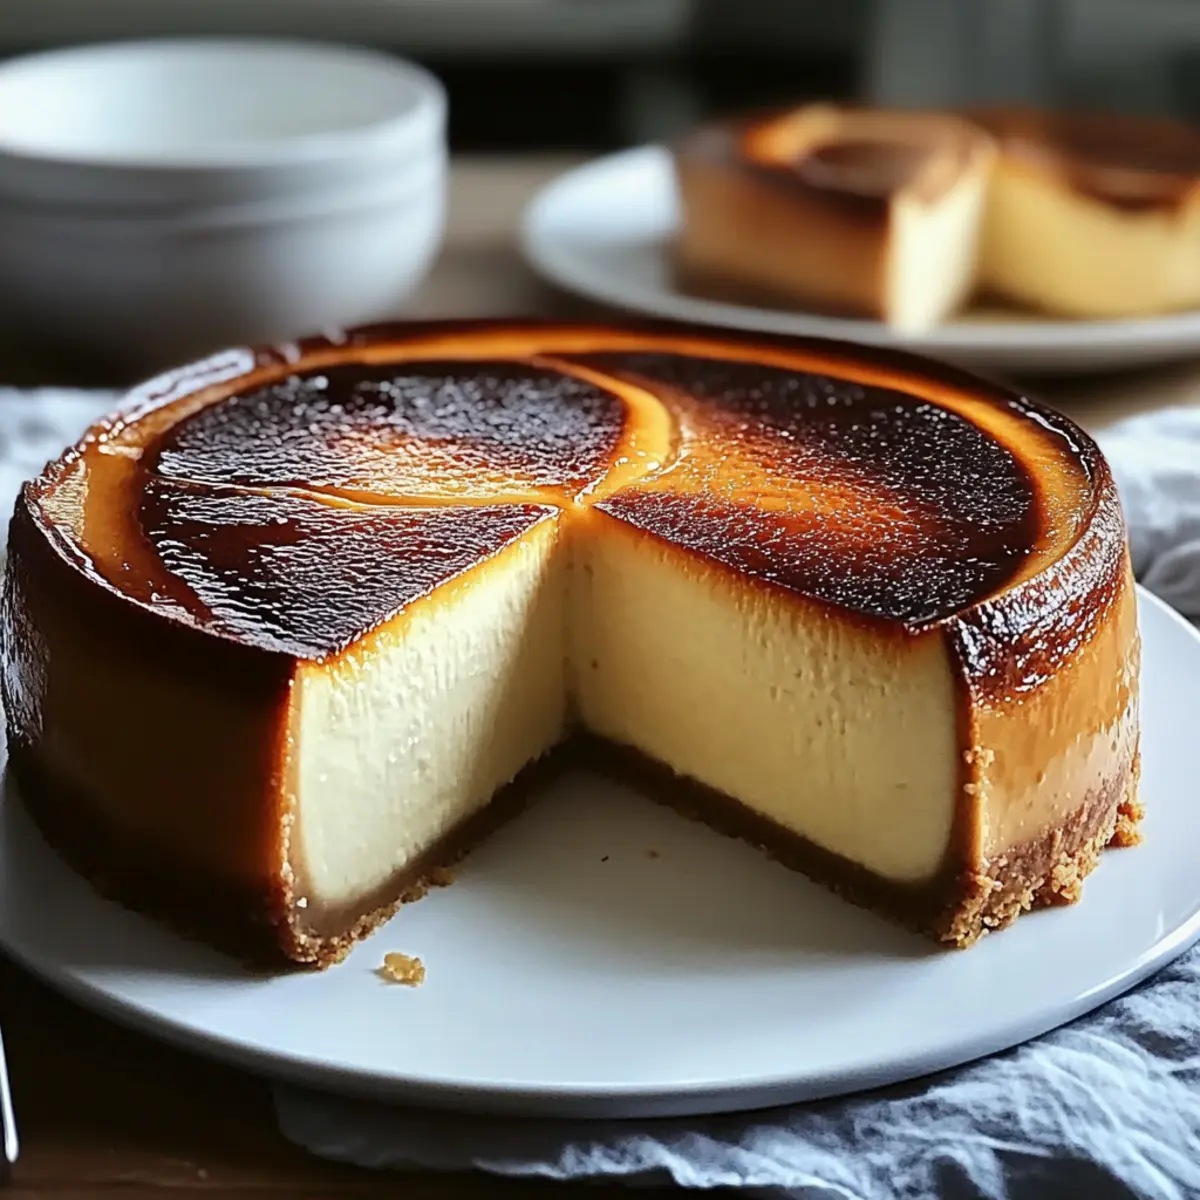
Crowd-Pleaser: Its stunning burnt top and rich flavor make it a visual and taste sensation that will impress guests at your next gathering—pair it with some fresh berries or even a scoop of vanilla ice cream for an unforgettable treat!
Discover more about Velvet Oreo Cheesecake and other delightful treats to complement your culinary journey!
Burnt Basque Cheesecake Ingredients
For the Cheesecake
• Cream Cheese – Essential for a creamy texture and stability; use full-fat for the best results.
• Granulated Sugar – Adds sweetness, enhancing consistency; coconut sugar is a delicious alternative for a unique flavor.
• Eggs – Provide richness and structure; incorporate one at a time for a smooth batter.
• Heavy Cream – Contributes indulgent richness; low-fat versions may alter the luscious texture.
• Vanilla Extract (optional) – Enhances the flavor profile wonderfully.
• Salt – Balances sweetness and amplifies flavors beautifully.
• All-Purpose Flour (optional) – Adds structure; omit for a decadent gluten-free cheesecake.
Embrace the joy of baking with this easy-to-follow recipe for Burnt Basque Cheesecake, where every bite is a heavenly indulgence!
Step‑by‑Step Instructions for Burnt Basque Cheesecake
Step 1: Preheat Your Oven
Begin by preheating your oven to 400°F (200°C). This high temperature is essential for achieving the signature caramelized top of the Burnt Basque Cheesecake. Make sure you give your oven some time to reach the desired heat before you start mixing your ingredients.
Step 2: Prepare the Loaf Pan
While the oven is heating, line a 9×5-inch loaf pan with parchment paper. Allow the edges of the parchment to overhang slightly for easy removal later. This step ensures that your cheesecake doesn’t stick and will retain its beautiful shape when finished baking.
Step 3: Mix Cream Cheese and Sugar
In a large mixing bowl, combine the full-fat cream cheese and granulated sugar. Using an electric mixer, beat the mixture on medium speed for about 5 minutes until it becomes light, fluffy, and smooth. This creamy base is crucial for the rich texture of the Burnt Basque Cheesecake.
Step 4: Add the Eggs
Next, incorporate the eggs one at a time into the cream cheese mixture, mixing well after each addition. This gradual blending will help achieve a velvety batter without lumps. Ensure that the mixture is fully incorporated before adding the next egg, producing a luscious cheesecake with a rich structure.
Step 5: Mix in the Heavy Cream
Slowly pour in the heavy cream, followed by the vanilla extract and a pinch of salt. Mix on low speed until just combined, allowing the flavors to meld. The heavy cream will add indulgent richness, elevating your Burnt Basque Cheesecake to a new level of creamy perfection.
Step 6: Fold in the Flour (if using)
If you opt for a standard version, sift the all-purpose flour gently into the mixture. Using a spatula, carefully fold it in until you see no streaks of flour. Be cautious not to overmix, as you want the batter to remain airy and light, which is key to that wonderful texture.
Step 7: Pour the Batter into the Pan
Now, pour your creamy cheesecake batter into the prepared loaf pan. Use a spatula to smooth the top, ensuring an even layer for consistent baking. This step is vital as it helps the cheesecake rise beautifully while caramelizing on the top.
Step 8: Bake the Cheesecake
Place the loaf pan in your preheated oven and bake for 40 to 45 minutes. You’ll know it’s ready when the edges are golden-brown and the center still jiggles slightly. This caramelization provides the distinctive appearance and flavor that defines the Burnt Basque Cheesecake.
Step 9: Cool and Chill the Cheesecake
Once baked, remove the cheesecake from the oven and let it cool at room temperature for about 1 hour. After it cools, transfer it to the refrigerator and chill for at least 2-4 hours, or overnight if you can wait. This cooling phase is essential for firming up the cheesecake while allowing the flavors to deepen.
Expert Tips for Burnt Basque Cheesecake
• Full-Fat Essential: Use only full-fat cream cheese for a rich, creamy texture. Low-fat alternatives can lead to a watery consistency that’s less satisfying.
• Don’t Peek: Avoid opening the oven while baking. This can cause temperature fluctuations and lead to cracks in your cheesecake.
• Embrace the Cracks: Surface cracks may occur; they add a rustic charm to your cheesecake. Remember, imperfections are part of its beauty!
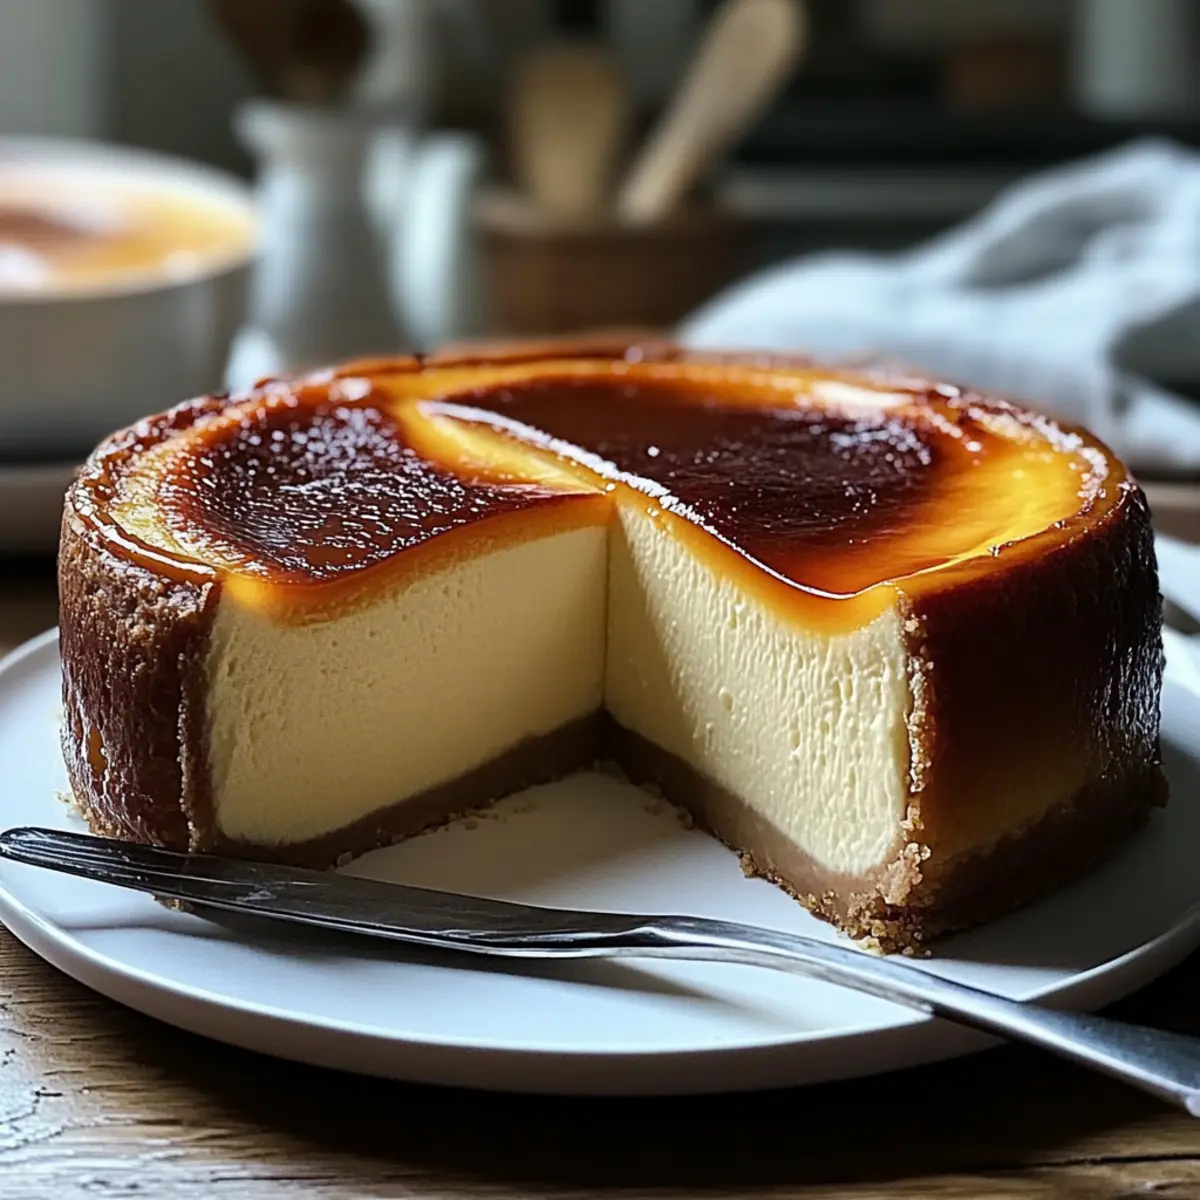
• Serve at Room Temperature: For the best flavor and creamy texture, serve the Burnt Basque Cheesecake at room temperature.
• Creative Variations: Experiment with flavorings like citrus zest or melted chocolate to elevate your cheesecake experience. The possibilities are endless!
What to Serve with Indulgent Gluten-Free Burnt Basque Cheesecake
The perfect meal deserves a delightful spread that harmonizes beautifully with every creamy slice of bliss.
- Fresh Berries: A medley of juicy strawberries, blueberries, and raspberries adds a refreshing, tart contrast to the rich cheesecake, enhancing the overall flavor experience.
- Vanilla Ice Cream: A scoop of creamy vanilla ice cream creates a delightful temperature play, beautifully melting with the cheesecake’s warmth for an indulgent treat.
- Espresso or Coffee: A bold cup of freshly brewed espresso cuts through the cheesecake’s richness, providing a delightful balance that awakens the palate.
- Honey Drizzle: A light drizzle of honey over each slice brings a touch of natural sweetness, perfectly complementing the burnt notes of the cheesecake.
- Chocolate Sauce: Rich chocolate sauce adds a luxurious touch, transforming each bite into a decadent dessert experience; pair it with a sprinkle of sea salt for extra flair.
- Almond Biscotti: Crunchy almond biscotti offers texture and a pleasant nutty flavor that pairs beautifully, turning the dessert into a delightful coffee break experience.
- Citrus Salad: A fresh salad of oranges and grapefruits brightens the table with a zesty kick, enhancing both flavor and presentation.
- Mint Tea: A warm cup of fragrant mint tea invites relaxation and balance, serving as a gentle palate cleanser between bites of the creamy cheesecake.
- Whipped Cream: Light, airy whipped cream balances the dense texture of the cake, adding a cloud-like quality that enhances every mouthful of your Burnt Basque Cheesecake.
Make Ahead Options
These Indulgent Gluten-Free Burnt Basque Cheesecake is fantastic for meal prep, allowing you to savor the joy of homemade dessert without the last-minute rush! You can mix the cheesecake batter up to 24 hours in advance and store it in the refrigerator before baking. Ensure it’s in an airtight container to maintain its delightful creaminess. Alternatively, bake the cheesecake ahead of time and then chill it in the fridge for up to 3 days; this enhances the flavors beautifully. When you’re ready to serve, allow the cheesecake to sit at room temperature for about 30 minutes for optimal taste and texture. You’ll enjoy restaurant-quality results with minimal effort!
Storage Tips for Burnt Basque Cheesecake
Room Temperature: Allow the cheesecake to cool completely at room temperature for about 1 hour before storing.
Fridge: Store in an airtight container in the refrigerator for up to 4 days. This helps maintain the creamy texture of your Burnt Basque Cheesecake.
Freezer: Wrap tightly in plastic wrap and place in an airtight container to freeze for up to 2 months. Thaw overnight in the refrigerator before serving for the best quality.
Reheating: If desired, serve slices at room temperature for optimal creaminess and flavor, enhancing your cheesecake experience.
Burnt Basque Cheesecake Variations
Embrace the joy of personalizing your Burnt Basque Cheesecake with these delightful twists—cooking should be as fun and varied as our tastes!
-
Citrus Zest: Add lemon or orange zest for a refreshing twist that brightens the flavor profile.
-
Spiced Delight: Incorporate a sprinkle of cinnamon or nutmeg for a cozy, warm essence that soothes the soul. The gentle warmth complements the rich creaminess beautifully, making each bite magical.
-
Chocolate Indulgence: Fold in melted dark chocolate for a deeper, richer dessert. Alternatively, try a drizzle of chocolate sauce on top for an added layer of decadence.
-
Savory Twist: Reduce the sugar and mix in crumbled blue cheese and fresh herbs for an unexpected savory version. This unique take will surprise and delight the adventurous eaters at your table.
-
Berry Topping: Top with a medley of fresh berries or a sweet caramel sauce to elevate the presentation and add a burst of fruity goodness. The sweet and tart contrast pairs perfectly with the creamy base.
-
Healthier Sweeteners: Swap out granulated sugar for honey or coconut sugar for a more wholesome version without sacrificing sweetness. This change adds a beautiful depth of flavor as well.
-
Nutty Flavor: Mix in crushed nuts such as almonds or pecans for a delightful crunch that contrasts beautifully with the creamy cheesecake.
If you’re intrigued by a diverse dessert experience, consider pairing this cheesecake with some joyously rich recipes like our delicious Pistachio Mushroom Cheesecake or the beloved Velvet Oreo Cheesecake for further indulgence!
Burnt Basque Cheesecake Recipe FAQs
What type of cream cheese is best for this cheesecake?
Absolutely! For the best results, use full-fat cream cheese. It provides the creamy texture and stability that this Burnt Basque Cheesecake needs. Low-fat or non-fat versions may lead to a watery consistency.
How should I store my Burnt Basque Cheesecake?
To keep your cheesecake fresh, let it cool completely at room temperature for about 1 hour after baking. Then, store it in an airtight container in the refrigerator for up to 4 days. This helps maintain that delightful creamy texture that you love!
Can I freeze Burnt Basque Cheesecake?
Yes! To freeze your cheesecake, wrap it tightly in plastic wrap and then place it in an airtight container. You can freeze it for up to 2 months. When you’re ready to serve, simply thaw it overnight in the refrigerator to enjoy its deliciousness.
Why did my Burnt Basque Cheesecake crack on top?
Very! Don’t worry if your cheesecake cracks on top; this is a common occurrence and adds to its rustic charm. Avoid opening the oven door while baking, as temperature fluctuations can impact the final result.
Is this Burnt Basque Cheesecake gluten-free?
Yes, it’s versatile! To make it gluten-free, simply omit the all-purpose flour from the recipe. This will still yield a rich, creamy texture that everyone can enjoy, making it perfect for gatherings. Enjoy your cheesecake without any worries!
Decadent Burnt Basque Cheesecake with Creamy Delight
Ingredients
Equipment
Method
- Preheat your oven to 400°F (200°C) to achieve the signature caramelized top.
- Line a 9x5-inch loaf pan with parchment paper, allowing edges to overhang.
- In a large bowl, mix cream cheese and sugar on medium speed for about 5 minutes until light and fluffy.
- Incorporate the eggs one at a time, mixing well after each addition.
- Slowly add heavy cream, vanilla extract, and salt, mixing on low until just combined.
- If using, sift the flour into the mixture, carefully folding to avoid overmixing.
- Pour the batter into the prepared loaf pan and smooth the top.
- Bake for 40 to 45 minutes until the edges are golden-brown and the center jiggles slightly.
- Let the cheesecake cool at room temperature for about 1 hour, then chill in the refrigerator for at least 2-4 hours.
Leave a Reply