
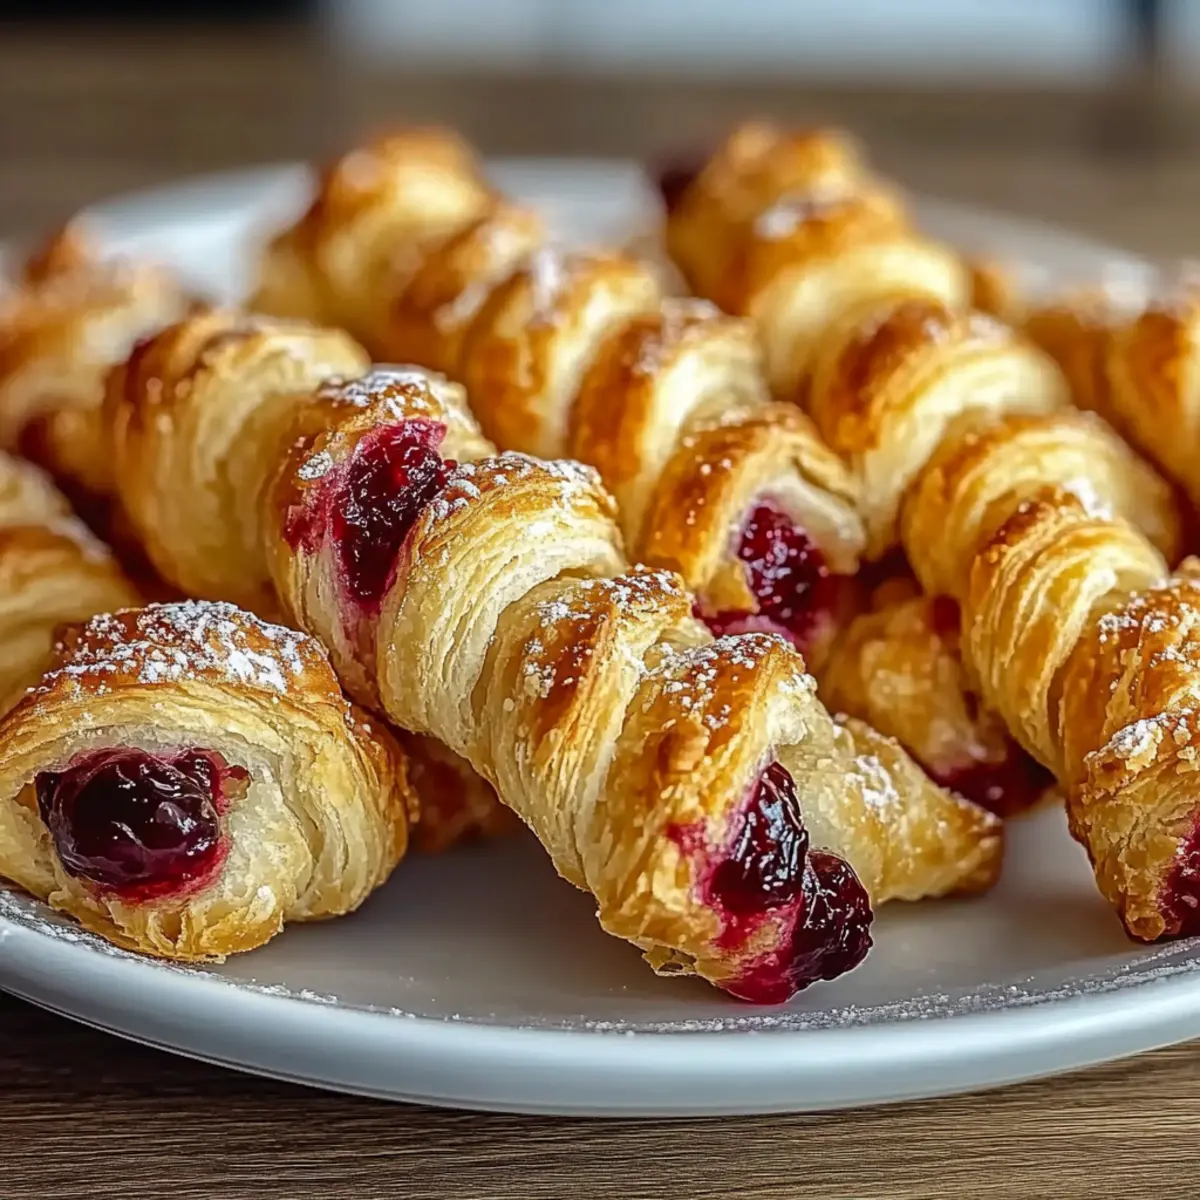
As I rummaged through my kitchen one afternoon, the last remnants of summer’s bounty caught my eye—the last jar of mixed berry preserves, glistening and begging to be turned into something special. That’s when the idea for these delightful Berry Puff Twists was born! Imagine flaky, buttery pastry spiraled with vibrant berry goodness, resulting in a stunning dessert that’s not only a feast for the eyes but also a breeze to whip up. Whether you’re preparing for a cozy brunch or just want to impress your loved ones with an easy dessert, these twists will have everyone asking for the recipe. With minimal prep time and endless flavor potential, they’re the perfect way to elevate any gathering. Curious to see how this simple dish can transform your ordinary day into a celebration? Let’s dive into the details and get baking!
Why are Berry Puff Twists irresistible?
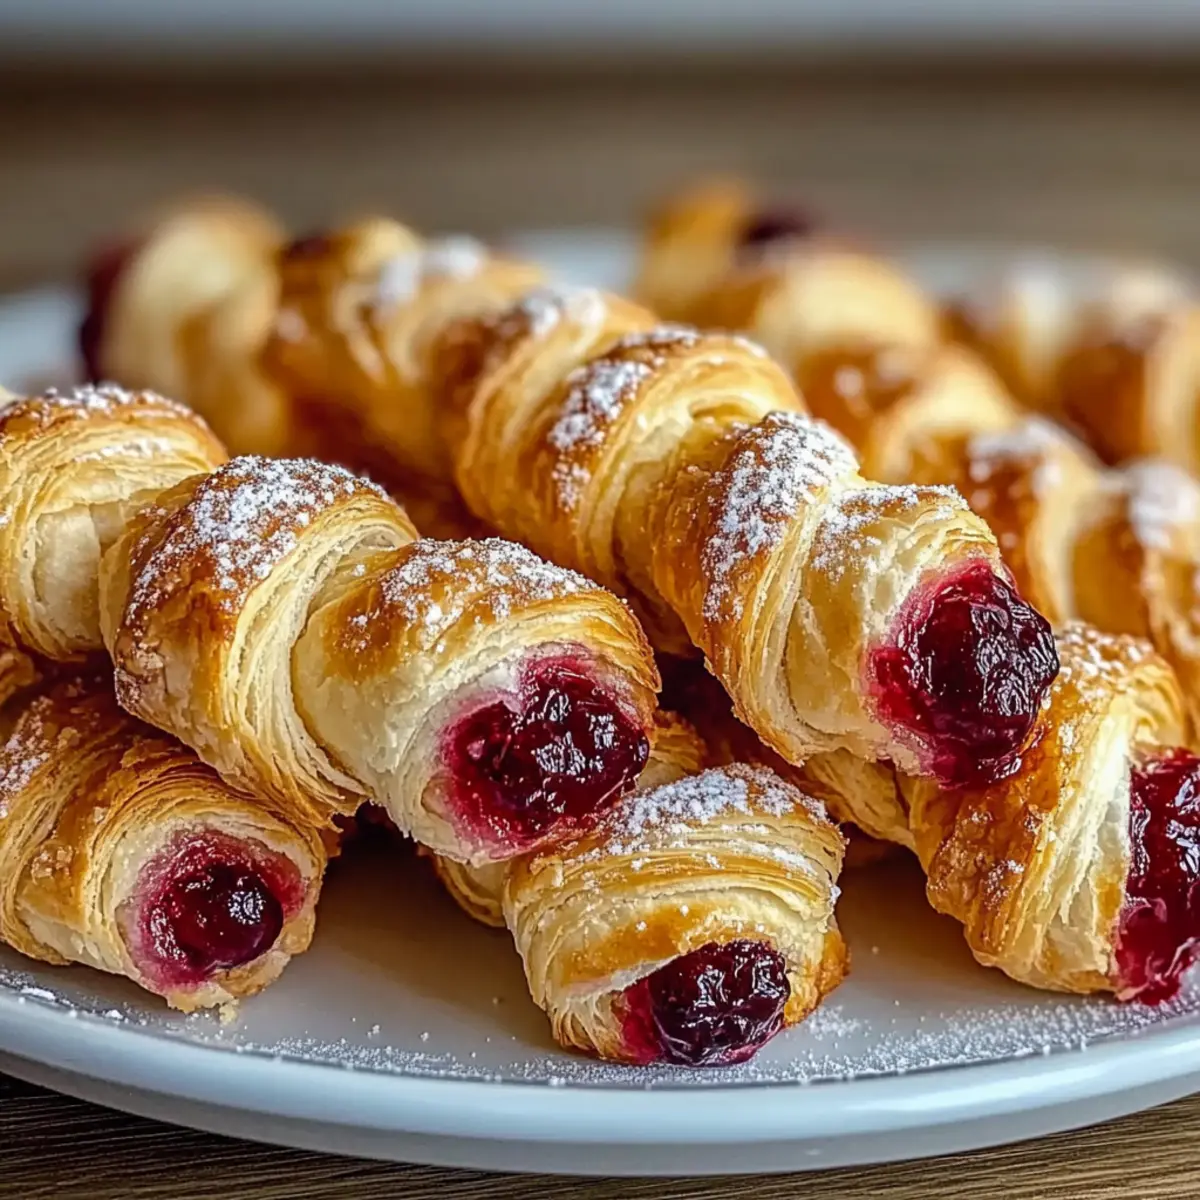
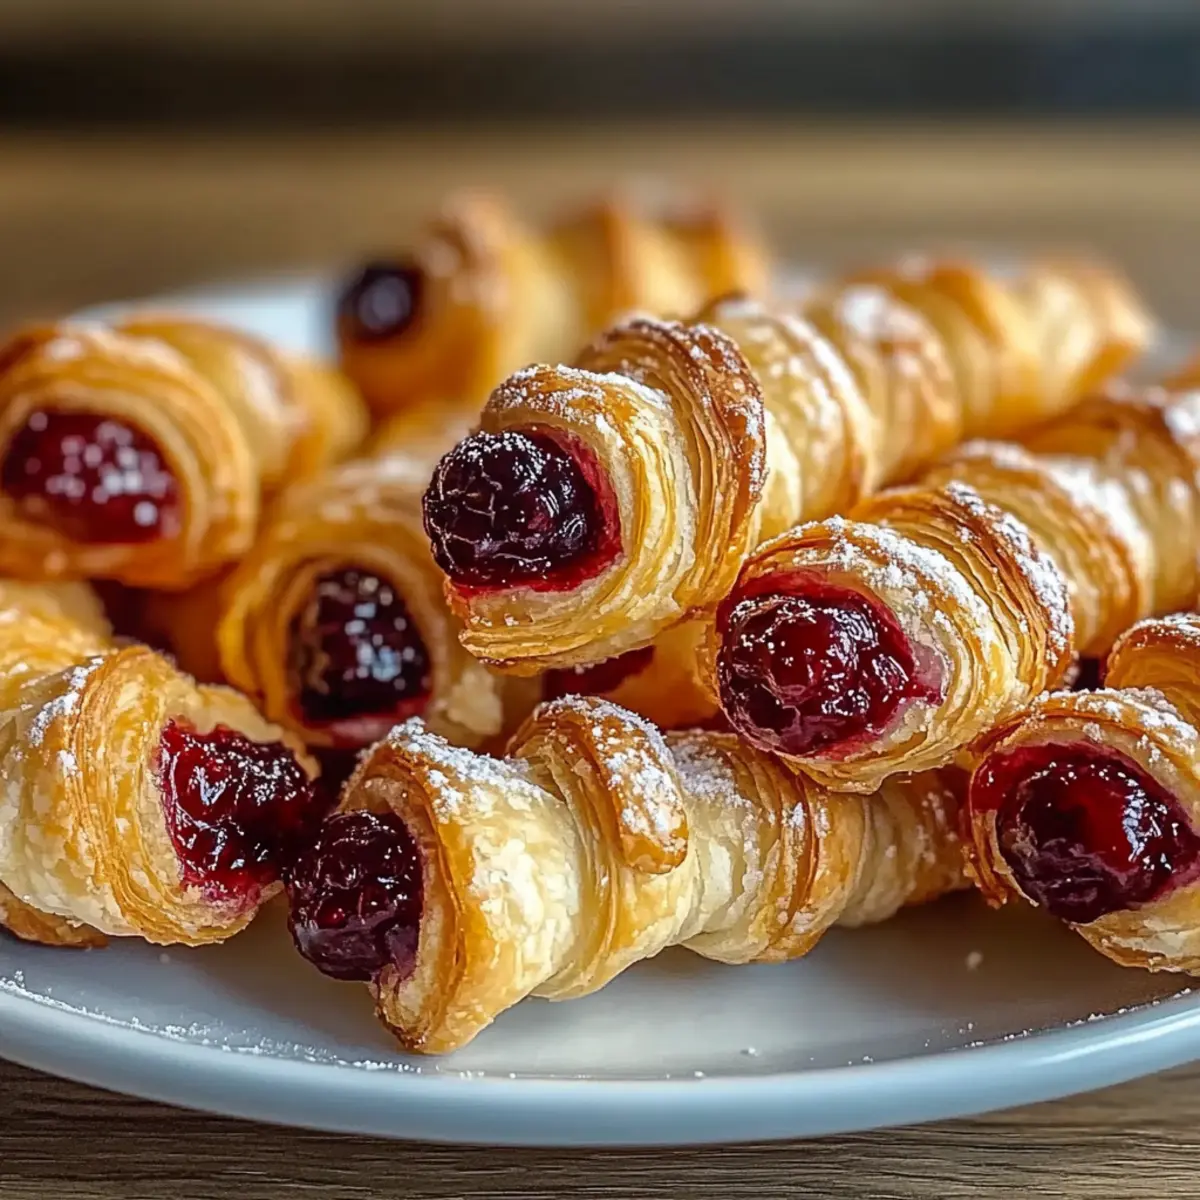
Flaky Perfection: Each bite offers a satisfying crunch, thanks to the layers of golden puff pastry that create a wonderful texture.
Vibrant Filling: The mixed berry preserves deliver a burst of fruity sweetness, easily customizable with your favorite flavors like strawberry or apricot.
Quick and Easy: With simple steps and minimal ingredients, you’ll have this delightful dessert ready to impress in no time.
Crowd-Pleasing Appeal: Perfect for brunch or dessert, these twists will leave your guests raving and asking for more, just like my delicious Pumpkin Pie Twists.
Versatile Treat: Whether served warm with a dollop of whipped cream or alongside a cup of coffee, their charm knows no bounds!
Berry Puff Twists Ingredients
For the Pastry
• Frozen Puff Pastry – The flaky base for these delicious treats; ensure it’s fully thawed before use.
• Butter (Melted) – Adds richness and is brushed over for a beautiful flavor throughout.
For the Filling
• Mixed Berry Preserves – Provides a vibrant, sweet flavor; feel free to swap with strawberry or apricot preserves as you like.
For Assembly
• Egg (Beaten) – Acts as an egg wash to give the twists a golden color and beautiful shine when baked.
• Granulated Sugar – Sprinkled on top for an extra touch of sweetness and a delightful crunch.
For Flavor
• Vanilla Extract – Enhances the overall taste, making every bite more pleasing and aromatic.
Step‑by‑Step Instructions for Berry Puff Twists
Step 1: Prepare the Oven and Baking Sheet
Begin by preheating your oven to 400°F (200°C). While the oven heats, line a baking sheet with parchment paper to prevent sticking and ensure easy cleanup. This step sets the foundation for baking your delightful Berry Puff Twists, allowing them to bake evenly and turn golden brown.
Step 2: Roll Out the Puff Pastry
Once the oven is preheated, take your thawed frozen puff pastry and gently roll it out on a lightly floured surface. This helps smooth out any creases and ensures an even thickness. Aim for about 1/8 inch thick, making it easier to work with while creating your beautiful, flaky pastry that will perfectly house the berry filling.
Step 3: Spread the Berry Preserves
Using a spatula, evenly spread a generous layer of mixed berry preserves across the rolled-out puff pastry. Be sure to leave a 1-inch border around the edges, which will help seal your twists when twisted. This vibrant layer of preserves will infuse your Berry Puff Twists with sweet, fruity flavor as they bake.
Step 4: Brush with Butter and Vanilla
In a small bowl, mix melted butter with a few drops of vanilla extract. Brush this buttery mixture evenly over the preserves, enhancing the flavor and ensuring a beautiful, glossy finish when baked. This step adds richness to the filling of your Berry Puff Twists.
Step 5: Cut and Twist the Pastry
Using a sharp knife or pizza cutter, slice the pastry into 8 equal strips. Carefully take each strip and twist it several times to form lovely spiral shapes. The twists not only showcase the filling but also create that delightful flaky texture we all love in a Berry Puff Twist.
Step 6: Arrange on the Baking Sheet
Gently place the twisted pastry strips on your prepared baking sheet, ensuring they’re spaced out to allow for puffing. Brush each twist with the remaining egg wash for a shiny, golden exterior. To finish, sprinkle a light layer of granulated sugar on top for that extra crunchy touch that beautifully complements the sweet filling.
Step 7: Bake and Cool
Transfer the baking sheet to your preheated oven and bake your Berry Puff Twists for 20-25 minutes. Keep an eye on them, as they should puff up and turn a gorgeous golden brown. Once they’re done, remove them from the oven and allow them to cool on the baking sheet for about 5 minutes before serving.
What to Serve with Berry Puff Twists
Delight in the perfect pairings that will elevate your gathering from ordinary to extraordinary.
-
Fresh Berries: Serve with a medley of seasonal berries to enhance the berry-filled experience and add a burst of freshness. Enjoying them alongside the twists brings every flavor to life!
-
Vanilla Ice Cream: A scoop of creamy vanilla ice cream complements the buttery richness of the twists while adding a delightful cold contrast to the warm pastry. It’s a match made in dessert heaven!
-
Whipped Cream: Light and airy, fresh whipped cream adds a fluffy texture that balances the sweetness. Drizzle a bit of honey on top for a touch of gourmet flair.
-
Coffee: A strong cup of coffee contrasts beautifully with the sweetness of your Berry Puff Twists, making them a perfect companion for a cozy brunch or afternoon tea.
-
Earl Grey Tea: The floral notes of Earl Grey enhance the fruity flavors of the berry preserves, creating a sophisticated pairing for a delightful afternoon treat.
-
Lemonade: A glass of refreshing lemonade adds a zesty brightness that cuts through the richness of the pastry and complements the sweet berries splendidly.
-
Chocolaty Dessert: Pair with a small piece of dark chocolate for a decadent finish. The rich chocolate meets the fruity pastries for a harmonious blend of flavors!
Expert Tips for the Best Berry Puff Twists
Prevent Sogginess: Do not overfill with preserves; stick to a generous yet controlled amount for the ideal balance of flavor and texture.
Chill the Dough: Ensure puff pastry is cold when working to maintain flakiness; working with warm pastry can lead to less desirable results.
Make Ahead: You can prepare twists up to 4 hours in advance. Simply refrigerate until baking time; adjust baking duration if starting from cold.
Seal the Edges: If your pastry tears while twisting, pinch it back together gently to keep the shape intact and prevent any filling from leaking.
Serving Warm: For the best experience, serve your Berry Puff Twists warm; they taste even more delicious fresh out of the oven!
Make Ahead Options
These Berry Puff Twists are fantastic for busy home cooks looking to save time without sacrificing flavor! You can prepare the pastry and fill it with berry preserves up to 4 hours in advance. Simply roll out the thawed puff pastry, spread the mixed berry preserves, and twist them into shape. Once assembled, place them on your baking sheet and cover tightly with plastic wrap, then refrigerate until you’re ready to bake. This not only keeps the twists fresh but also prevents them from getting soggy. When it’s time to serve, simply brush with egg wash and sprinkle sugar before baking, adjusting the time by a few minutes if starting from cold. Enjoy delightful, freshly baked Berry Puff Twists with minimal effort!
Berry Puff Twists Customization
Feel free to let your creativity shine as you personalize these delightful pastries!
- Dairy-Free: Substitute the butter with coconut oil for a luscious, dairy-free twist that still tastes great.
- Fruit Extravaganza: Mix and match your favorite fruits—consider using fresh raspberries alongside the preserves for an extra burst of flavor!
- Chocolate Indulgence: Swap the berry preserves for chocolate spread, or add a layer of melted chocolate on top for a rich dessert experience.
- Nutty Delight: Incorporate chopped nuts like almonds or pecans into the filling for an alluring crunch that complements the sweetness.
- Spice It Up: Add a sprinkle of cinnamon or nutmeg to the berry preserves for a warm, aromatic touch that calls for cozy gatherings. This will enhance the flavors, making them even more enjoyable!
- Savory Twist: Try using cheese spreads or savory jams if you’re craving a non-sweet variant; it’s a novel approach to pastries!
- Mini Versions: Cut the pastry into smaller, bite-sized squares for perfect party treats or to delight little hands. They’re sure to disappear in moments!
- Tempting Dips: Serve the twists with a side of whipped cream, fresh vanilla ice cream, or even a drizzle of yogurt for added deliciousness, amplifying the treat-factor!
Explore these variations, and if you’re looking for a different flavor profile, don’t forget to check out my delightful White Chocolate Raspberry or consider creating your own unique dessert masterpiece!
Storage Tips for Berry Puff Twists
Room Temperature: Store leftover Berry Puff Twists covered at room temperature for up to 2 days. This will keep them fresh without making them soggy.
Fridge: If you prefer, you can refrigerate them for up to 3 days; simply cover them well to avoid drying out.
Freezer: For longer storage, freeze the Berry Puff Twists in an airtight container for up to 2 months. Make sure they are completely cooled before freezing.
Reheating: To enjoy them again, reheat in a 300°F (150°C) oven for about 10 minutes. This will restore their flaky texture and warm, jammy filling!

Berry Puff Twists Recipe FAQs
How should I select my berry preserves?
Choose berry preserves that are vibrant and rich in color, avoiding any that have dark spots or appear overly runny. A good rule of thumb is to look for preserves that are thick and spreadable, as this will ensure the filling holds well during baking. If you’re feeling adventurous, opt for fruit preserves from local markets for a fresher taste!
What’s the best way to store leftover Berry Puff Twists?
Store your Berry Puff Twists covered at room temperature for up to 2 days. For optimal freshness, keep them in an airtight container. If you prefer refrigeration, they can last up to 3 days; just make sure they are well-covered to prevent drying out. Enjoy them warm by briefly reheating in a 300°F oven for about 10 minutes before serving!
Can I freeze Berry Puff Twists, and how?
Absolutely! To freeze your Berry Puff Twists, let them cool completely. Place them in an airtight container or wrap them individually in plastic wrap, then in a freezer bag. They can be frozen for up to 2 months. When you want to enjoy them, simply reheat in a preheated oven at 300°F for about 10 minutes—this will revive their wonderful flaky texture!
What should I do if my pastry tears while twisting?
No worries if your pastry tears! Just gently pinch the edges together to seal the filling back inside. This will help maintain the shape of your twists. Additionally, keep the pastry cold while you work to minimize the chances of tearing, and remember that a little imperfection adds character to your homemade treats!
Are there any dietary considerations I should keep in mind for Berry Puff Twists?
Yes! While this recipe is vegetarian, it does contain gluten from the puff pastry. If you have gluten sensitivities, consider using gluten-free puff pastry as a substitute. Also, check the ingredient list on your berry preserves to ensure they are allergy-friendly, especially if you’re serving guests with specific dietary restrictions. Enjoy these twists guilt-free and delicious!
Irresistible Berry Puff Twists for a Sweet Morning Treat
Ingredients
Equipment
Method
- Preheat your oven to 400°F (200°C) and line a baking sheet with parchment paper.
- Roll out the thawed puff pastry on a lightly floured surface to about 1/8 inch thick.
- Spread a generous layer of mixed berry preserves on the puff pastry, leaving a 1-inch border.
- Mix melted butter with vanilla extract and brush it over the preserves.
- Slice the pastry into 8 equal strips and twist each strip several times.
- Place the twisted strips on the baking sheet, brush with egg wash, and sprinkle sugar on top.
- Bake for 20-25 minutes until golden brown and then cool for 5 minutes before serving.
Leave a Reply