
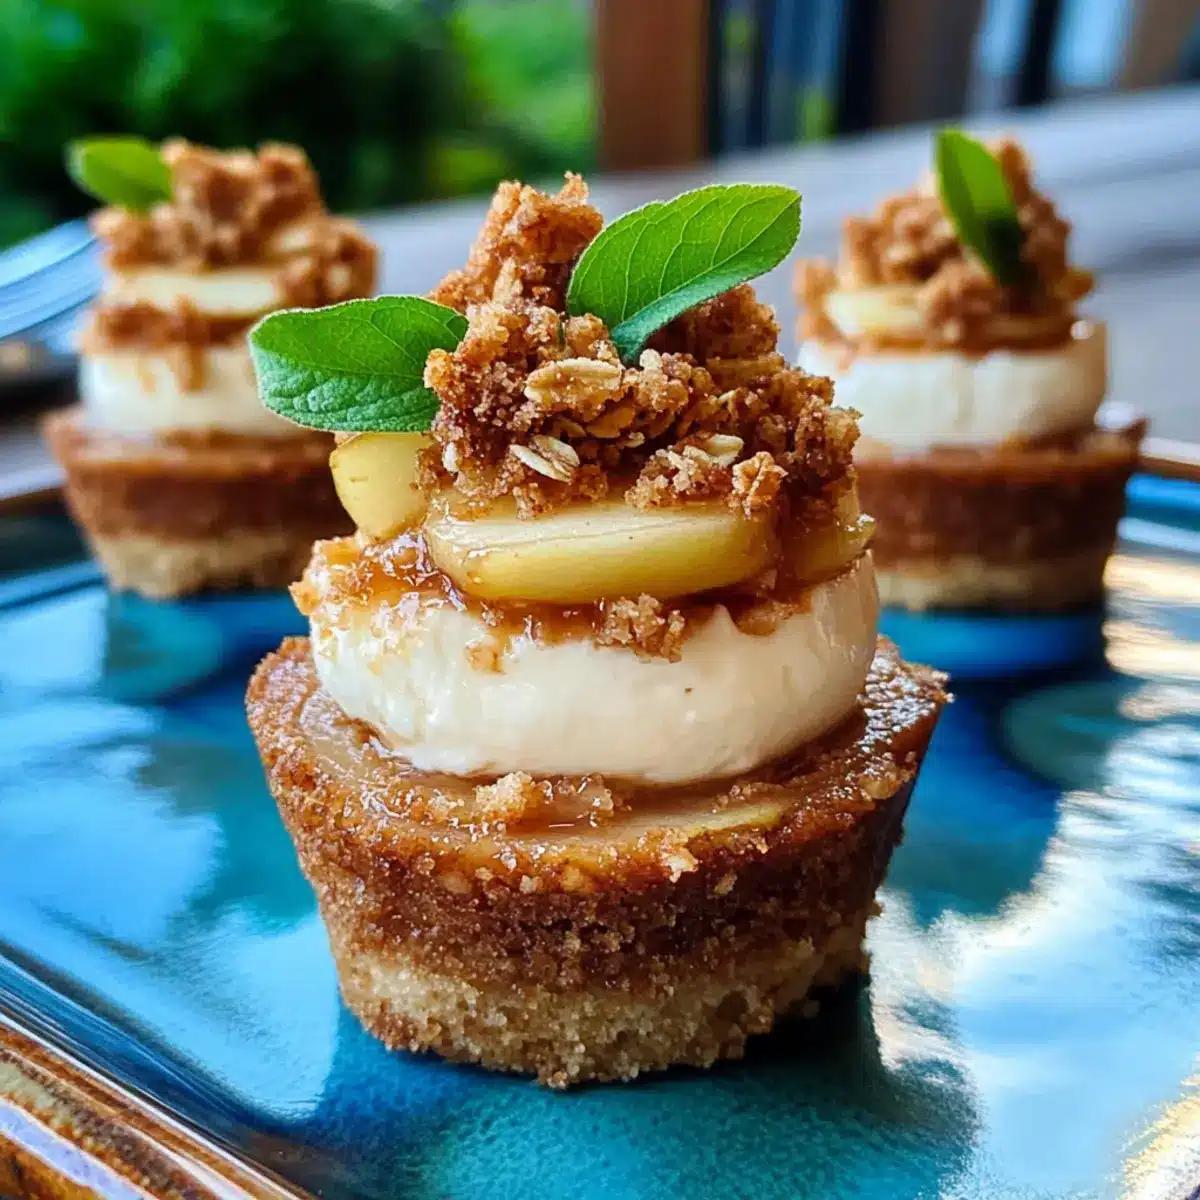
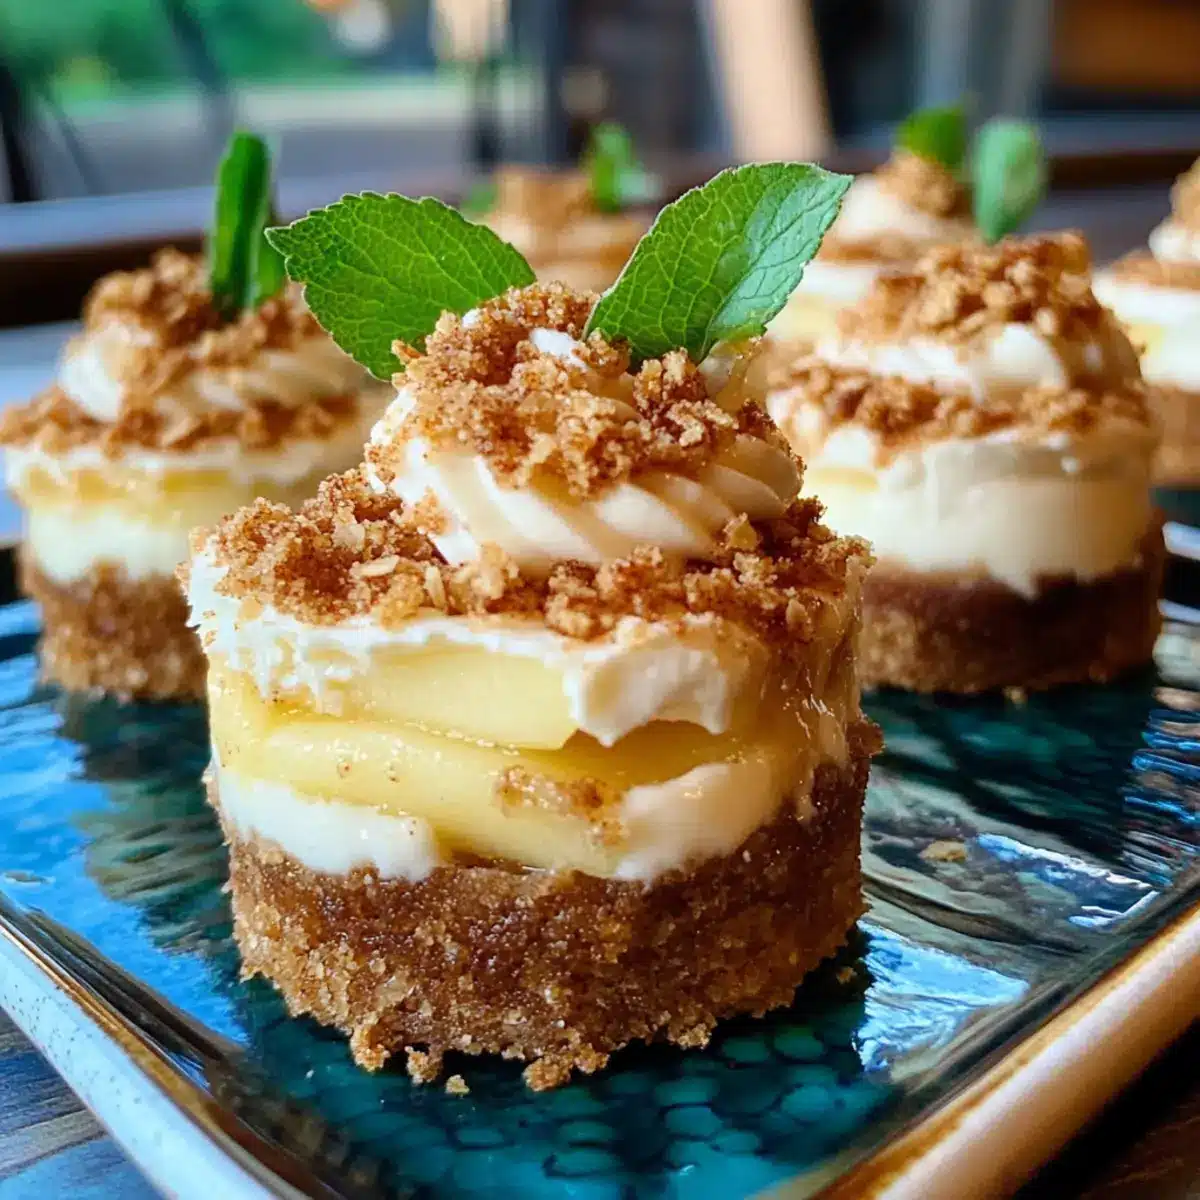
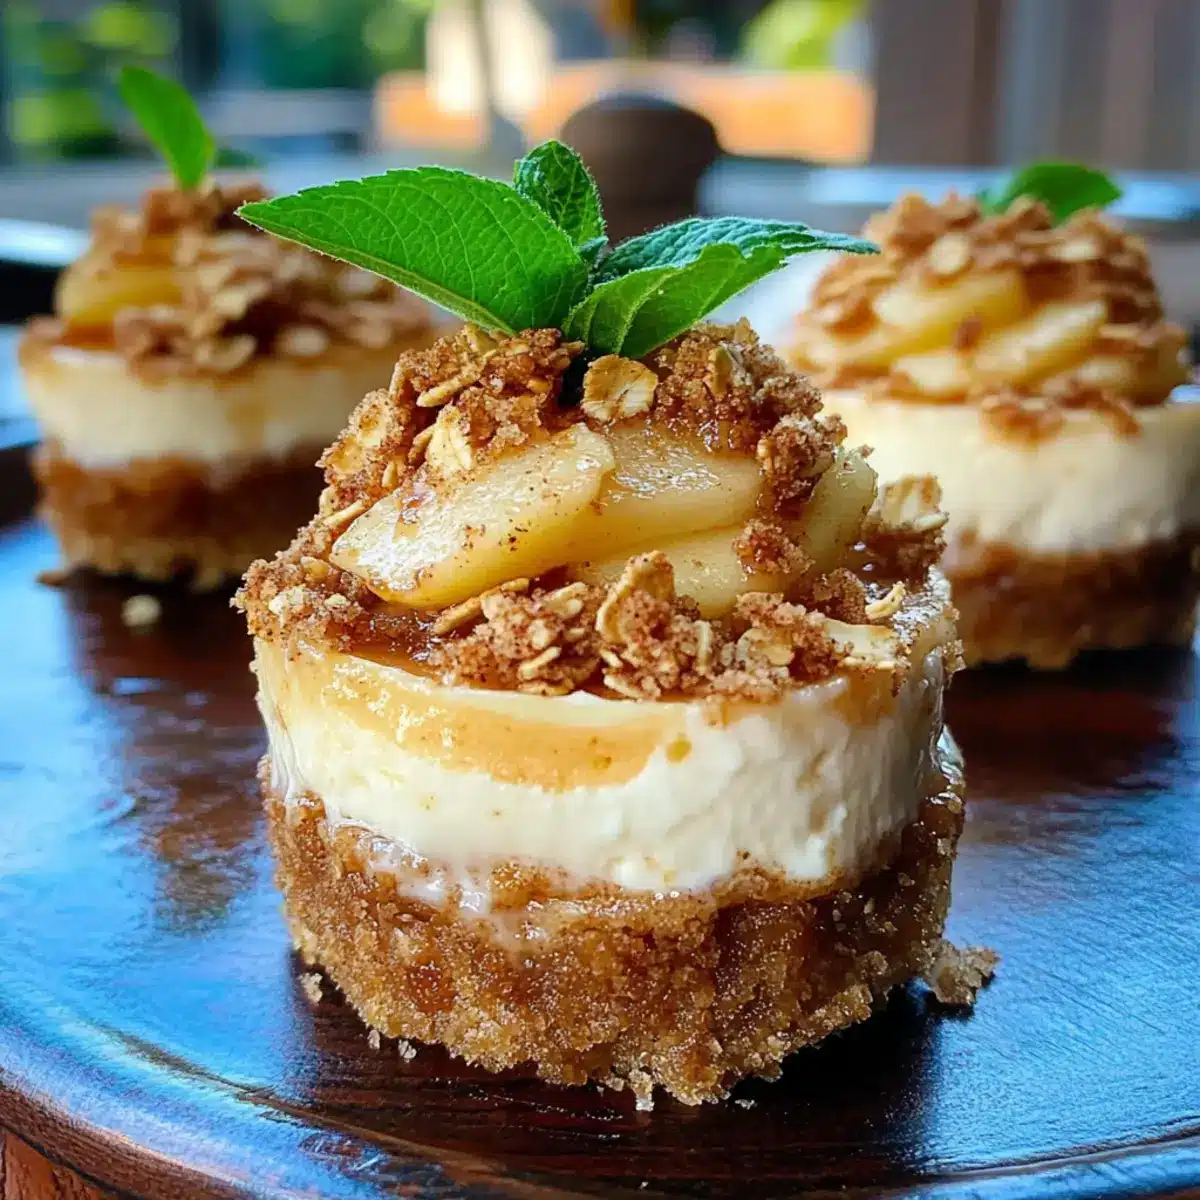
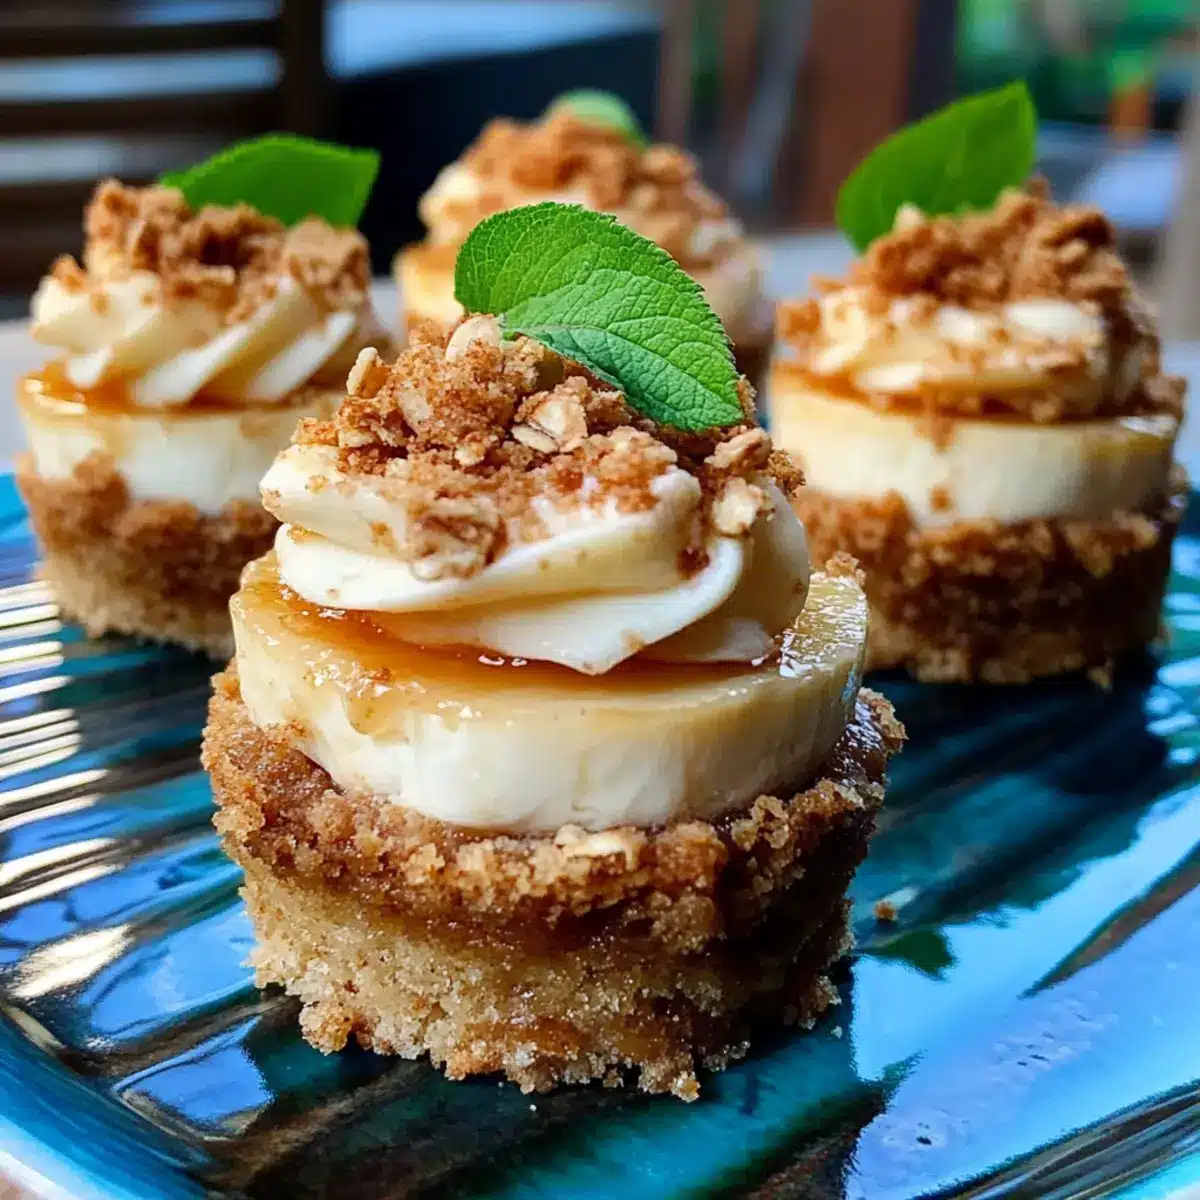
As I was rummaging through my kitchen pantry one rainy afternoon, I stumbled upon a half-eaten box of graham crackers and a few crisp apples just waiting to be transformed. That inspired me to whip up something delightful and cozy: Apple Crisp Mini Cheesecakes! These little bites of joy blend a buttery oat topping with creamy cheesecake and tender apple chunks, making them the perfect quick dessert that can be on your table in under 30 minutes. Not only are they a fantastic crowd-pleaser, but they also come with a gluten-free option, ensuring everyone can indulge. Whether it’s a weeknight dinner or a festive gathering, these mini cheesecakes are sure to impress. Ready to dive into a slice of happiness? Let’s bake!
Why Are Mini Cheesecakes So Irresistible?
Quick Preparation: You can whip up these Apple Crisp Mini Cheesecakes in under 30 minutes, making them a perfect choice for last-minute gatherings or cozy evenings.
Crowd-Pleasing Delight: With a mix of creamy cheesecake and sweet apples topped with a crunch, they cater to sweet cravings while tantalizing everyone’s taste buds.
Gluten-Free Option: Everyone can join in the fun with easy substitutions for gluten-sensitive guests. Consider trying these with gluten-free graham crackers!
Versatile Flavor: Feel free to mix in other fruits or nuts for personalized twists that suit your taste preferences, just like my favorite Honeycrisp Apple Broccoli salad.
Storage Savvy: Make ahead and store these mini delights in the fridge for a quick sweet treat whenever you need one, just like my go-to Apple Cider Chicken for savory meals.
Perfect for Sharing: Their bite-size nature makes it easy to serve at parties, allowing everyone to enjoy a little indulgence without guilt!
Apple Crisp Mini Cheesecakes Ingredients
For the Crust
• Graham Cracker Crumbs – Provides the base structure and crunch for the cheesecake crust. Substitution: Use gluten-free graham cracker crumbs for a gluten-free option.
• Granulated Sugar – Adds sweetness to both the crust and the cheesecake filling. Note: Adjust for sweetness preference.
• Unsalted Butter – Binds the crumb mixture for the crust, adding richness. Substitution: Coconut oil can be used for a dairy-free alternative.
For the Cheesecake Filling
• Cream Cheese – The key ingredient for the rich, creamy cheesecake filling. Note: Ensure it’s softened for easier blending.
• Large Eggs – Acts as a stabilizer in the cheesecake filling. Tip: Beat until pale yellow to ensure a smooth texture.
• Vanilla Extract – Adds a warm, sweet flavor to the filling. Substitution: Almond extract for an alternate flavor profile.
• Sour Cream – Contributes to the cheesecake’s creaminess and tang. Substitution: Greek yogurt can be used for a healthier option.
• Diced Apples – Provides a burst of freshness and contrasting texture in each bite. Note: Best to use a mix of sweet and tart apples like Granny Smith and Gala.
For the Apple Topping
• All-Purpose Flour – Thickens the apple mixture and stabilizes the top layer. Substitution: Use a gluten-free flour blend for gluten-sensitive diets.
• Cinnamon – Enhances the warmth and seasonal flavor profile. Tip: Freshly grated cinnamon for a more robust flavor.
• Nutmeg – Adds an additional layer of warmth; use sparingly. Note: Optional for those who may prefer a milder taste.
Step‑by‑Step Instructions for Apple Crisp Mini Cheesecakes
Step 1: Preheat the Oven
Begin by preheating your oven to 325°F (165°C). While the oven warms up, prepare a mini muffin tin by lining it with paper liners to ensure easy removal of the mini cheesecakes. This step sets the stage for perfectly baked Apple Crisp Mini Cheesecakes that are both delicious and visually appealing.
Step 2: Make the Crust
In a mixing bowl, combine graham cracker crumbs with granulated sugar, stirring them together until well mixed. Pour in melted butter, mixing until the crumb mixture resembles wet sand. This is the base layer of your Apple Crisp Mini Cheesecakes, providing that delightful crunch when baked.
Step 3: Bake the Crust
Press a small amount of the crumb mixture firmly into the bottom of each muffin cup, creating a solid crust base. Place the muffin tin in the preheated oven and bake for 5 minutes. Once done, the crust should be lightly golden. Remove the tin from the oven and let it cool while preparing the cheesecake filling.
Step 4: Prepare the Cheesecake Filling
In another bowl, beat the softened cream cheese until smooth and creamy, which should take about 2-3 minutes. Add granulated sugar and mix well until fully combined, creating a sweet foundation for the filling. The texture should be silky and lump-free, promising a dreamy cheesecake experience.
Step 5: Incorporate Wet Ingredients
Add the eggs one at a time, beating until the mixture is pale and thick after each addition. Next, blend in vanilla extract, sour cream, and diced apples. This combination provides rich flavor and texture. Your filling should look creamy and well-mixed, with chunks of apple visible throughout.
Step 6: Fill the Muffin Cups
Pour the cheesecake batter into each muffin cup, filling them about three-quarters full to allow room for rising. The batter should be smooth and evenly distributed. This step is crucial for ensuring your Apple Crisp Mini Cheesecakes bake uniformly and maintain their lovely shape.
Step 7: Bake the Cheesecakes
Place the muffin tin in the oven and bake for 12 minutes. Watch for the edges to be set while the centers remain slightly jiggly. This balance is essential for a creamy texture. After baking, remove from the oven and let them cool for a few moments while preparing the topping.
Step 8: Prepare the Apple Topping
In a small bowl, mix together granulated sugar, all-purpose flour, cinnamon, and nutmeg. This combination will create a delicious, crunchy topping for your Apple Crisp Mini Cheesecakes. Once mixed, sprinkle this mixture evenly over the tops of the cheesecakes for an added layer of flavor.
Step 9: Final Baking for Topping
Return the mini cheesecakes to the oven for an additional 2-3 minutes, or until the topping is golden brown and fragrant. This final bake allows the topping to crisp up beautifully, enhancing the entire dessert experience. Your kitchen will be filled with a delightful aroma that hints at the cozy flavors to come.
Step 10: Cool and Serve
Once baked, allow the cheesecakes to cool completely in the muffin tin to set their shape. This usually takes about 15-20 minutes. Once cooled, gently remove them from the tin and serve chilled or at room temperature. Your Apple Crisp Mini Cheesecakes are now ready to be savored!
Expert Tips for Apple Crisp Mini Cheesecakes
Room Temperature Cream Cheese: Ensure your cream cheese is at room temperature for smoother blending. Cold cream cheese can lead to lumps in your filling.
Avoid Overbaking: Keep an eye on the cheesecakes; they should be slightly jiggly in the center when you remove them. Overbaking can result in a dry texture.
Mix Up the Fruits: Try using different fruits like pears or berries for unique flavor combinations in your Apple Crisp Mini Cheesecakes. Get creative!
Chill Before Serving: Allow the cheesecakes to chill thoroughly in the fridge for at least an hour after cooling. This helps the flavors meld beautifully.
Watch Your Apple Sizes: Dice apples into uniform pieces for even distribution within the filling. This ensures every bite has a lovely apple taste.
Utilize Toppings Wisely: Be generous with the topping mixture for added crunch, but sprinkle it lightly to keep it from overpowering the cheesecake flavor.
Make Ahead Options
These Apple Crisp Mini Cheesecakes are a fantastic choice for meal prep-savvy cooks! You can prepare the crust and filling up to 24 hours in advance. Simply make the crust and press it into the muffin tin, then prepare the cheesecake filling and store it in an airtight container in the refrigerator. When you’re ready to bake, just pour the filling over the crust and follow the baking instructions. To maintain their creamy texture and prevent them from becoming soggy, ensure they are cooled completely before refrigerating. These mini cheesecakes can also be stored in the fridge for up to 3 days after baking, making them a delightful treat ready for last-minute indulgence!
What to Serve with Apple Crisp Mini Cheesecakes?
Indulge in a sweet harmony of flavors and textures that make your meal memorable and inviting.
-
Whipped Cream: A dollop of lightly sweetened whipped cream adds a luxurious touch, enhancing the creamy cheesecake experience.
-
Cinnamon Ice Cream: The warm spice complements the apple and cinnamon flavors beautifully, creating a delightful contrast with the coolness of the ice cream.
-
Fresh Berries: Juicy strawberries or raspberries offer a tart freshness that balances the sweetness of the mini cheesecakes, making each bite invigorating.
-
Honey Drizzle: A few splashes of pure honey over the top provide a luscious sweetness that pairs perfectly with the creamy filling.
-
Spiced Chai Tea: A steaming cup of spiced chai tea elevates the cozy feel of the dessert, allowing the flavors to blossom beautifully.
-
Caramel Sauce: Drizzling warm caramel on top brings an indulgent, gooey sweetness that invites enjoyment with every bite.
These pairings will create an unforgettable dessert experience, ensuring every guest leaves with a smile and a full heart!
Apple Crisp Mini Cheesecakes Variations
Feel free to get creative with these Apple Crisp Mini Cheesecakes and customize them to suit your tastes or dietary needs!
-
Gluten-Free: Substitute regular graham cracker crumbs with gluten-free ones for a deliciously inclusive treat. It’s just as satisfying without missing out on flavor.
-
Dairy-Free: Use coconut oil instead of unsalted butter and vegan cream cheese for a completely dairy-free version. Your tastebuds won’t even know the difference!
-
Fruit Mix-Up: Swap out diced apples for other fruits like juicy pears or ripe blueberries. Each fruit brings its own unique sweetness and character, ensuring every bite is a surprise!
-
Nutty Crunch: Add chopped walnuts or pecans to the topping mixture for an extra layer of crunch and nutty flavor. Imagine that delightful crunch with every creamy bite!
-
Spice It Up: For a bit more warmth, sprinkle in some ground ginger or cardamom along with the cinnamon and nutmeg. It enhances the cozy essence of these mini cheesecakes, perfect for those chilly fall evenings.
-
Chocolate Lovers: Drizzle a bit of melted dark chocolate over the top before serving for a rich twist. This decadent addition complements the apples beautifully.
-
Extra Creaminess: Incorporate a bit of mascarpone cheese along with the cream cheese to create an even richer filling. This variation adds an elegant touch that elevates the entire cheesecake experience.
Why not pair these delightful treats with a refreshing side like my favorite Bang Salmon Bites? The balance of flavors will surely delight your guests!
How to Store and Freeze Apple Crisp Mini Cheesecakes
Fridge: Keep your Apple Crisp Mini Cheesecakes in an airtight container in the fridge for up to 5 days. This helps maintain their creamy texture and flavor.
Freezer: For longer storage, freeze the mini cheesecakes in a single layer on a baking sheet until solid. Then transfer to a freezer-safe container, where they can last for up to 2 months.
Thawing: To enjoy later, simply thaw in the fridge overnight or allow them to sit at room temperature for about 1 hour before indulging.
Reheating: If desired, warm your cheesecakes in the microwave for about 10-15 seconds on low power. Just be careful not to overheat, as they can lose their creamy perfection!
Apple Crisp Mini Cheesecakes Recipe FAQs
What type of apples are best for this recipe?
The best apples for these Apple Crisp Mini Cheesecakes include a combination of sweet and tart varieties, such as Granny Smith and Gala. This mix not only provides a delightful balance of flavors but also a pleasing texture, enhancing each bite. If you’re feeling adventurous, try incorporating Honeycrisp apples for their natural sweetness!
How should I store leftover mini cheesecakes?
To keep your mini cheesecakes fresh, store them in an airtight container in the refrigerator for up to 5 days. This method preserves their creamy texture and delicious flavor. If you want to enjoy them later, consider freezing them!
Can I freeze Apple Crisp Mini Cheesecakes?
Absolutely! To freeze them, place the mini cheesecakes in a single layer on a baking sheet until solid. Once firm, transfer them to a freezer-safe container or wrap them individually in plastic wrap. They can be stored in the freezer for up to 2 months. When you’re ready to enjoy, simply thaw in the refrigerator overnight or at room temperature for about an hour.
What should I do if my crust is too crumbly?
If your crust seems too crumbly, it might be due to a lack of moisture. Try adding a bit more melted butter to the mixture, a tablespoon at a time, until it holds together when pressed. Another option is to slightly reduce the amount of graham cracker crumbs to maintain a good binding consistency.
Is there a gluten-free option for this recipe?
Yes! To make these Apple Crisp Mini Cheesecakes gluten-free, simply substitute regular graham cracker crumbs with gluten-free graham crackers and use a gluten-free flour blend for thickening the apple topping. This ensures everyone can enjoy this delicious dessert without any worries!
Apple Crisp Mini Cheesecakes for Cozy Fall Evenings
Ingredients
Equipment
Method
- Preheat your oven to 325°F (165°C) and line a mini muffin tin with paper liners.
- In a mixing bowl, combine graham cracker crumbs with sugar and then add melted butter, mixing until it resembles wet sand.
- Press the crumb mixture into the bottom of each muffin cup and bake for 5 minutes.
- Beat softened cream cheese until smooth, add sugar and mix until creamy.
- Add eggs one at a time, then blend in vanilla extract, sour cream, and diced apples.
- Fill each muffin cup about three-quarters full with the cheesecake batter.
- Bake the cheesecakes for 12 minutes, until edges are set and centers slightly jiggle.
- Mix together sugar, flour, cinnamon, and nutmeg for the topping; sprinkle it over the baked cheesecakes.
- Return the cheesecakes to the oven for an additional 2-3 minutes until the topping is golden.
- Allow to cool completely in the muffin tin for 15-20 minutes before serving.
Leave a Reply