
As I cracked open a box of Nilla Wafers, the sweet, buttery aroma whisked me back to my childhood days, where banana pudding was a staple at every family gathering. Today, I’m excited to share my spin on an old favorite: the Banana Pudding Cheesecake. This delightful dessert combines the luscious creaminess of cheesecake with the nostalgic flavors of traditional banana pudding, topped with a fluffy whipped layer that’s impossible to resist. Best of all, it’s a no-bake treat, making it a perfect option for anyone looking to impress without spending hours in the kitchen. Whether you’re hosting a casual get-together or just craving something sweet, this luscious combination is sure to become a beloved addition to your recipe collection. Curious to see how easy it is to whip up this creamy delight? Let’s dive in!
Why Is This Cheesecake So Irresistible?
Easy Preparation: The no-bake method makes this cheesecake a breeze to assemble—perfect for anyone pressed for time.
Nostalgic Flavor: Combining classic banana pudding elements with rich cheesecake provides a delightful taste that tugs at your heartstrings.
Visual Appeal: With its fluffy whipped topping and crushed Nilla Wafer garnish, this dessert is as stunning as it is delicious, guaranteed to impress your guests.
Versatile Options: Feel free to swap Nilla Wafers for graham crackers or add a drizzle of caramel sauce for a twist—it’s all about making it your own!
Perfect for Gatherings: Whether it’s a birthday, picnic, or casual dinner, this Banana Pudding Cheesecake will steal the show and leave everyone asking for seconds!
Elevate your dessert game further by checking out our Graveyard Pudding Cookie for spooky fun or the luxurious Pistachio Mushroom Cheesecake for a unique twist!
Banana Pudding Cheesecake Ingredients
For the Crust
• Nilla Wafers – These create a buttery crust that perfectly complements the cheesecake filling; substitute with graham crackers for a different flavor.
• Brown Sugar – Adds a deep sweetness to the crust; white sugar can be used in a pinch.
• Unsalted Butter – Melted to bind the crust ingredients together effectively; ensure it’s warm for easy mixing.
For the Cheesecake Filling
• Cream Cheese – The key to a rich, creamy cheesecake; opt for full-fat for the best texture and flavor.
• Granulated Sugar – Sweetens the filling beautifully; consider a sugar alternative if desired, but the texture may vary.
• Pure Vanilla Extract – Elevates the flavor profile; always choose real vanilla for best results.
• Bananas – Ripe ones add natural sweetness and delightful flavor; the more speckled, the better for mashing!
• Sour Cream – Provides creaminess and a hint of tang; Greek yogurt is a healthier substitute.
• Heavy Cream – Essential for richness in both the cheesecake and whipped topping; chilled heavy cream whips up beautifully.
• Eggs – Helps provide structure and stability; using them at room temperature ensures better incorporation.
• Crushed Nilla Wafers – Folded into the filling for added texture; feel free to swap with crushed graham crackers if you prefer.
For the Topping
• Instant Vanilla Pudding – Forms the creamy topping; be sure to use a 3.4 oz. package for the right consistency.
• Milk – Mixes with the pudding for a smooth finish; whole milk contributes to a richer flavor.
• Whipped Topping – Adds lightness to your cheesecake; for a perfect texture, use it immediately after preparing.
Get ready to indulge in the deliciousness of this Banana Pudding Cheesecake!
Step‑by‑Step Instructions for Banana Pudding Cheesecake
Step 1: Make the Crust
Preheat your oven to 325°F. In a food processor, blend Nilla Wafers until they resemble fine crumbs. Combine the crumbs with brown sugar and melted unsalted butter, then mix until well combined. Press this mixture firmly into the bottom and halfway up the sides of a prepared springform pan. Bake for 11 minutes, then let it cool completely.
Step 2: Prepare the Filling
In a large mixing bowl, beat together cream cheese and granulated sugar until smooth and creamy. Add in the ripe mashed bananas, pure vanilla extract, sour cream, and chilled heavy cream, mixing well until fully combined. Finally, incorporate the eggs, mixing on low speed just until blended; this will help keep the filling light and airy for the Banana Pudding Cheesecake.
Step 3: Layering the Cheesecake
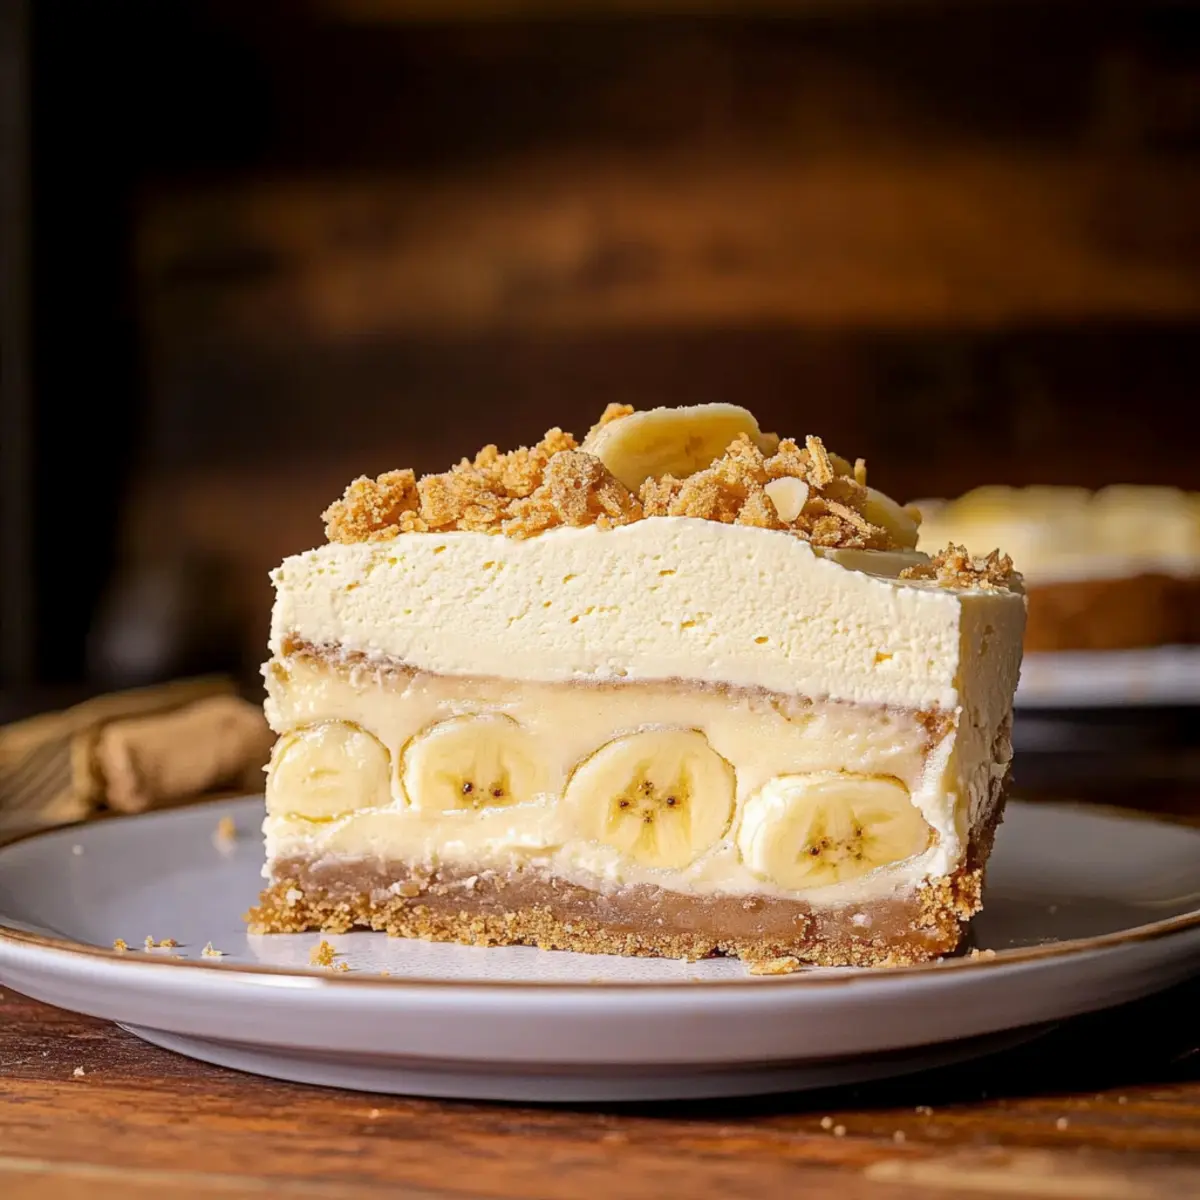
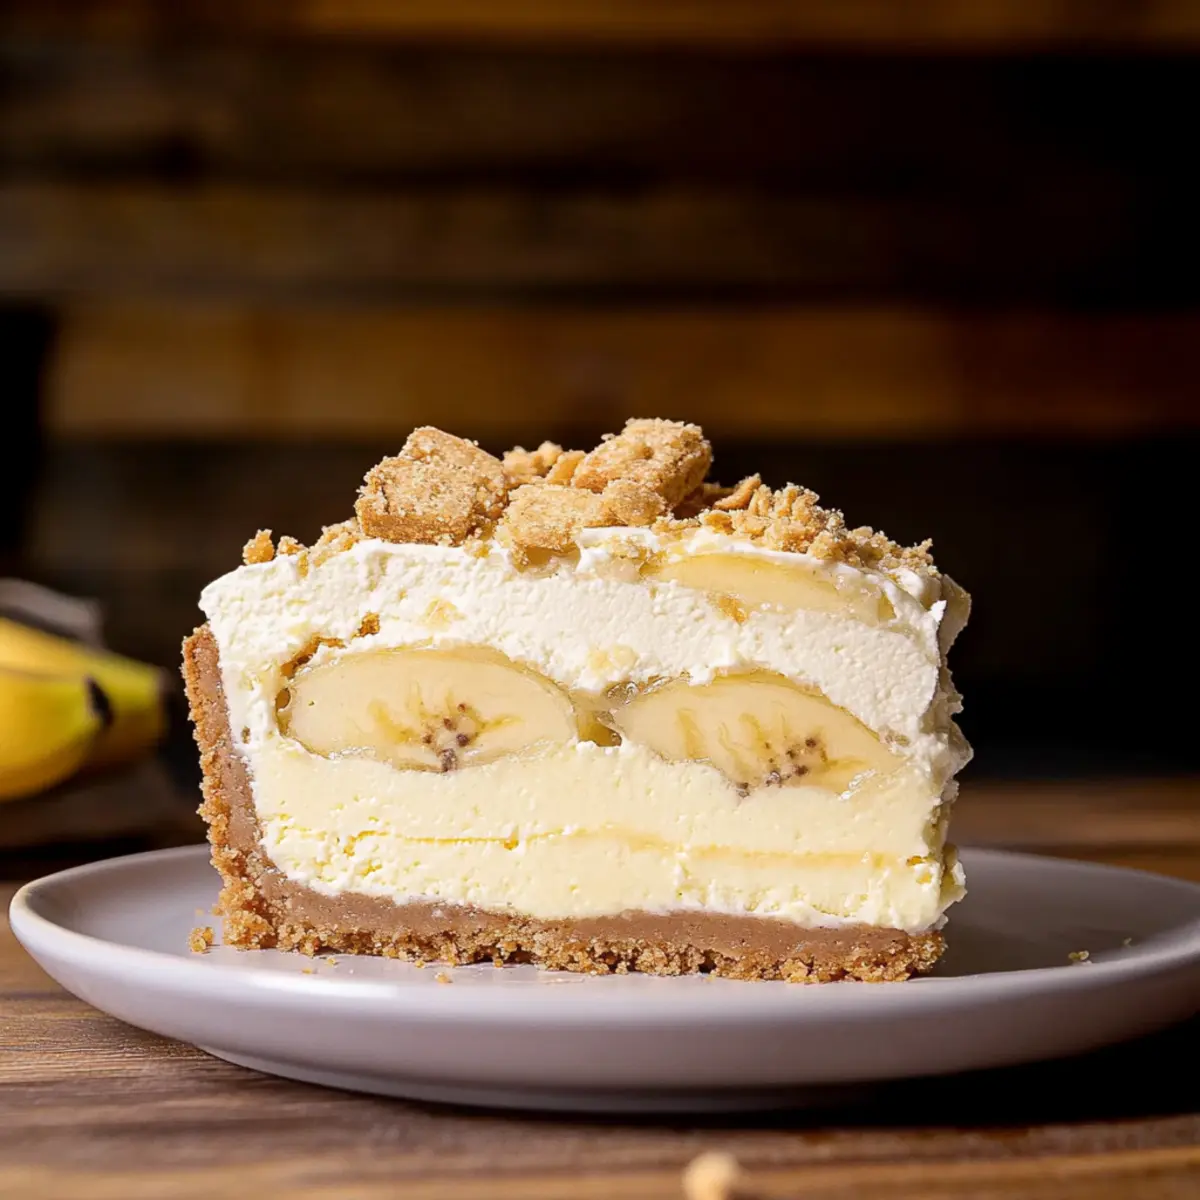
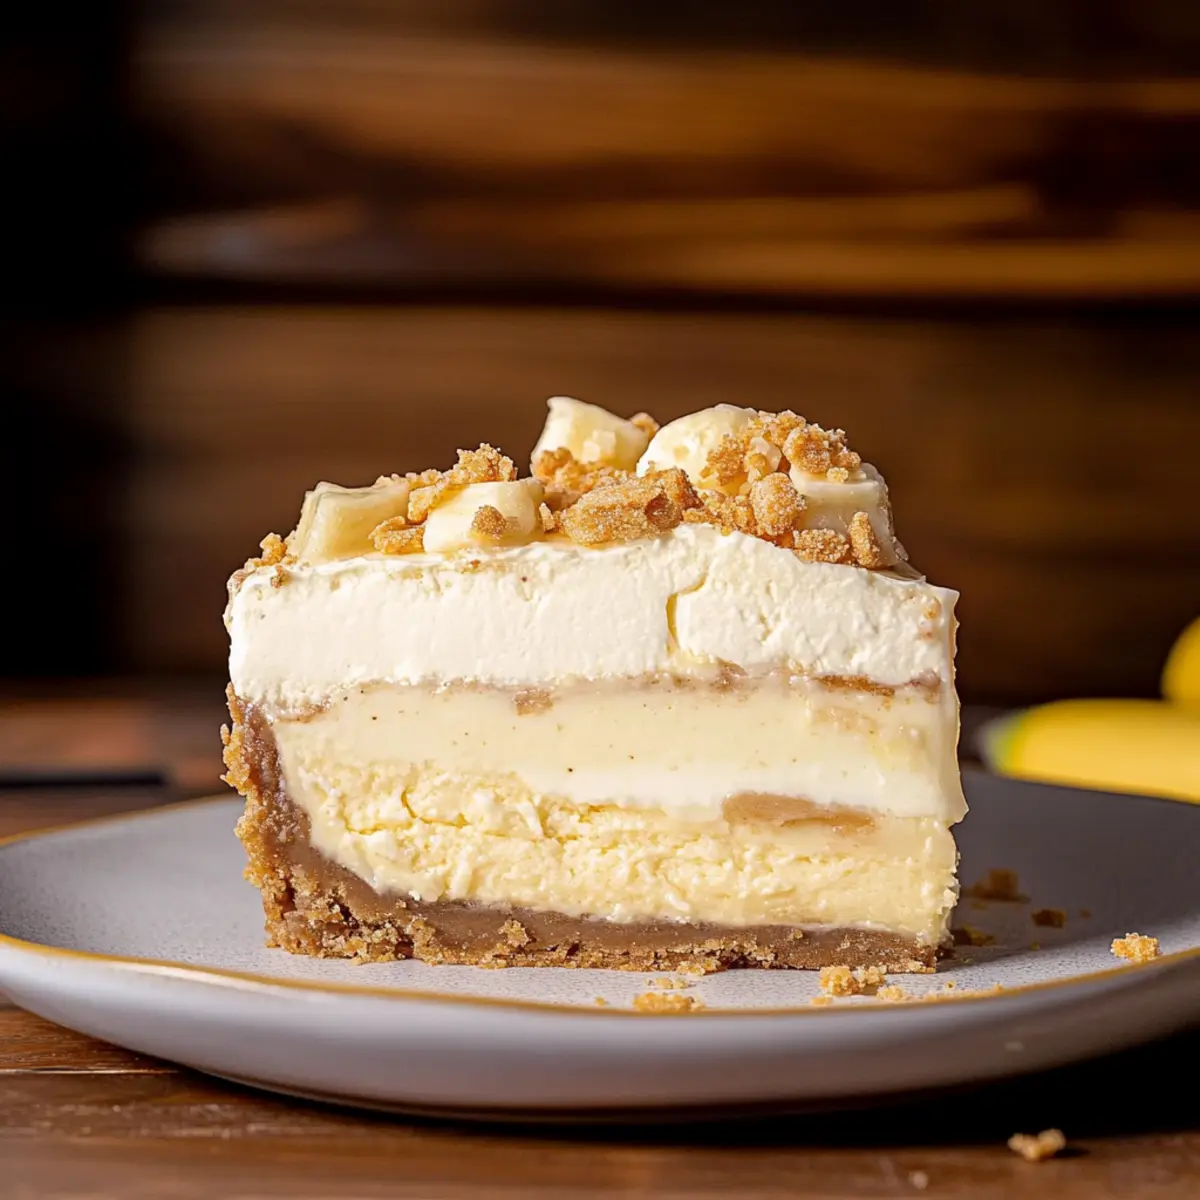
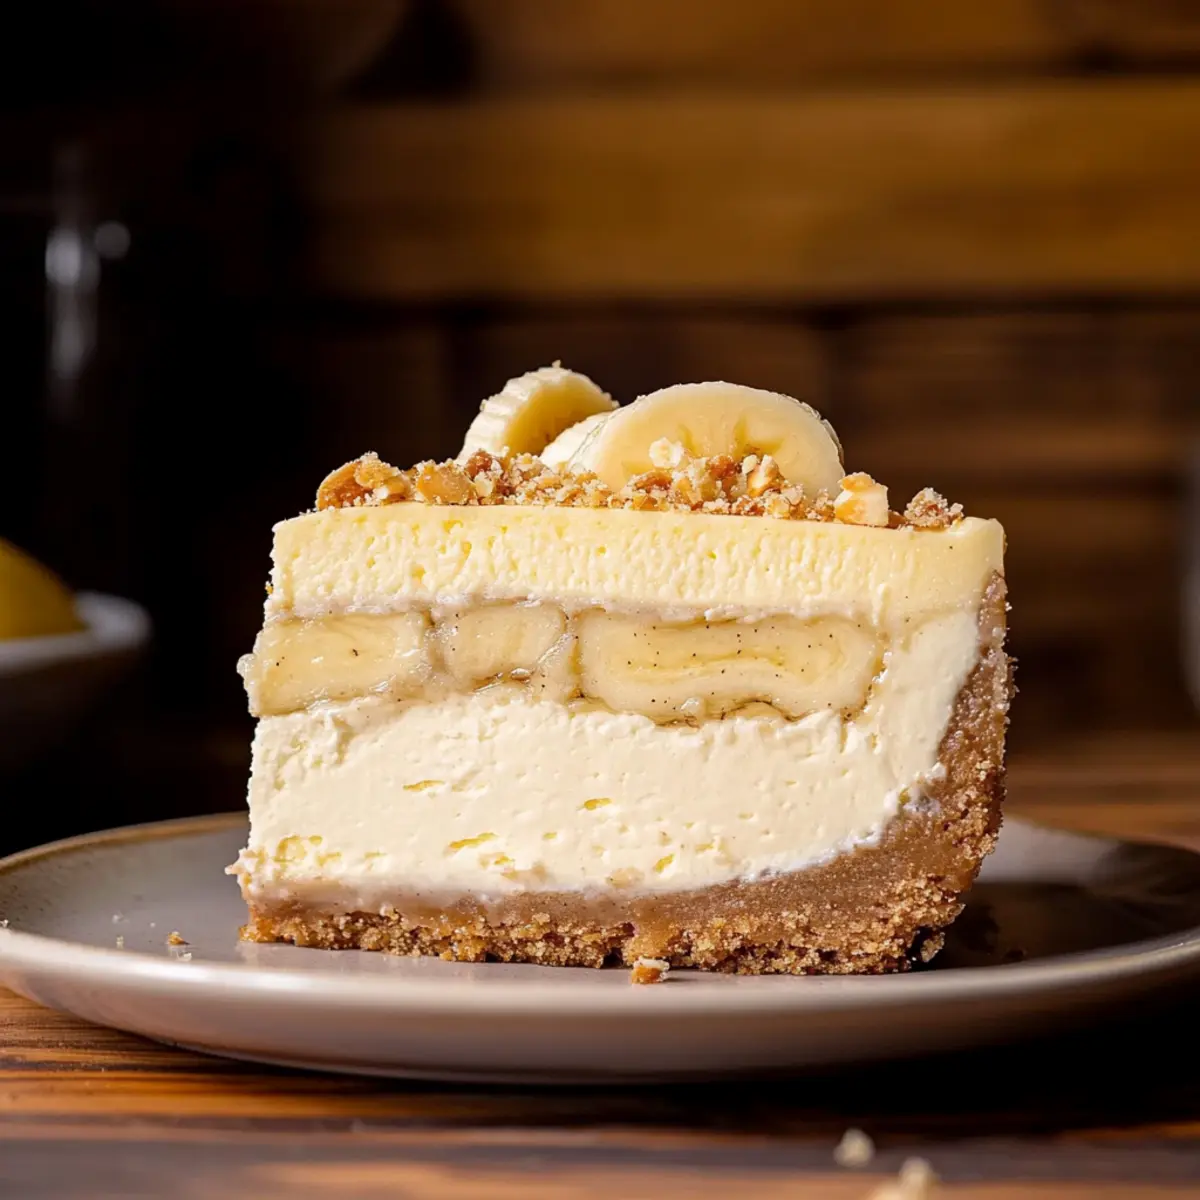
Pour half of the cheesecake filling into the cooled crust, spreading it evenly. Next, layer sliced bananas and crushed Nilla Wafers on top for added texture and flavor. Finally, pour the remaining filling over the top, making sure it covers the layers beneath, creating a delightful surprise when you cut into the Banana Pudding Cheesecake.
Step 4: Baking the Cheesecake
To prevent cracking, set up a water bath by placing the springform pan in a larger baking dish filled with hot water. Bake in the preheated oven for 80-90 minutes, or until the center is slightly jiggly but set. After baking, turn off the oven, leave the door slightly ajar, and let the cheesecake cool gradually for 30 minutes.
Step 5: Cool and Chill
Once cooled, transfer the cheesecake to a wire rack to reach room temperature completely. Wrap it tightly and refrigerate for at least 6 hours, but overnight is best for allowing the flavors to meld beautifully. This chilling time is crucial for achieving a perfectly set structure in your Banana Pudding Cheesecake.
Step 6: Make the Whipped Topping
In a mixing bowl, whip the chilled heavy cream with vanilla extract until stiff peaks form, creating a light and fluffy texture. Carefully fold this whipped cream into the prepared instant vanilla pudding until well combined. This topping adds a luscious layer on top of your chilled banana pudding cheesecake.
Step 7: Final Touch
Spread the whipped topping generously over the cooled cheesecake. For an appealing finish, decorate with additional crushed Nilla Wafers or fresh banana slices as desired. Your beautifully assembled Banana Pudding Cheesecake is now ready for serving, promising delightful and nostalgic flavors!
Expert Tips for Banana Pudding Cheesecake
• Perfect Bananas: Choose ripe, speckled bananas for rich flavor and easy mashing, ensuring the best taste in your Banana Pudding Cheesecake.
• Room Temperature Eggs: Always use room temperature eggs for easier incorporation, creating a smoother filling and preventing lumps.
• Water Bath Wisdom: Utilize a water bath to maintain moisture during baking, resulting in a creamy texture and avoiding cracks on your cheesecake’s surface.
• Chill Thoroughly: Allow your cheesecake to chill in the fridge for at least 6 hours, or overnight if possible, for the best flavor development and proper setting.
• Avoid Overmixing: Be gentle when mixing the filling; overmixing can introduce air, causing the cheesecake to rise and crack during baking.
• Whipped Topping Timing: Use your whipped topping immediately after making it for a light and fluffy texture; it’s best fresh on your Banana Pudding Cheesecake!
Banana Pudding Cheesecake Variations
Feel free to get creative with your Banana Pudding Cheesecake and tailor it to your taste buds!
-
Graham Cracker Crust: Swap Nilla Wafers for graham crackers to add a different flavor profile and texture to your crust.
-
Caramel Surprise: Drizzle a layer of caramel sauce between the banana slices for a sweet, decadent twist that elevates each bite.
-
Chocolate Delight: Use chocolate pudding mix instead of vanilla for the topping to create a rich chocolate-banana combination that chocolate lovers will adore.
-
Nutty Crunch: Fold in crushed nuts like pecans or walnuts into the filling for an extra crunch that pairs beautifully with the creamy texture.
-
Fruity Variation: Add a layer of fresh strawberries or blueberries along with the bananas for a colorful twist that adds a fruity burst in every slice.
-
Spiced Up: Stir in a teaspoon of cinnamon or nutmeg into the cheesecake filling for a warm, cozy flavor that gives a nod to fall desserts.
-
Vegan Version: Substitute cream cheese with a cashew-based cheese and use coconut whipped cream for a delicious vegan-friendly alternative that still packs flavor.
-
Mini Cheesecakes: Make individual-sized portions by baking in muffin tins for delightful banana pudding cheesecakes that are perfect for parties or give it as a personal treat!
If you’re looking for even more creativity, don’t miss our delightful Graveyard Pudding Cookie for a spooky twist or the unforgettable layers of our Velvet Oreo Cheesecake!
How to Store and Freeze Banana Pudding Cheesecake
• Fridge: Keep your Banana Pudding Cheesecake stored in an airtight container or wrapped in plastic wrap for up to 5 days to maintain its delicious creaminess.
• Freezer: For longer storage, freeze the cheesecake without the topping for up to 2 months. Make sure it’s tightly wrapped in plastic wrap and foil to prevent freezer burn.
• Thawing: To enjoy frozen cheesecake, move it to the fridge and allow it to thaw overnight before serving.
• Reheating: There’s no need to reheat; serve chilled for the best taste and texture. Enjoy!
Make Ahead Options
Preparing the Banana Pudding Cheesecake ahead of time is a fantastic way to save yourself precious minutes on hectic days! You can create the crust and filling up to 24 hours in advance and store them separately in the refrigerator to maintain freshness. Simply bake the crust, then chill it while preparing the filling, which can be combined and refrigerated until you’re ready to assemble. When it’s time to serve, layer the filling over the chilled crust, bake, and chill for at least 6 hours or preferably overnight for the best texture. This thoughtful prep ensures your cheesecake stays just as delicious and impressive, allowing you to enjoy your gathering without all the last-minute rush!
What to Serve with Decadent Banana Pudding Cheesecake
As you prepare to indulge in this creamy delight, let’s rethink how to elevate your dessert experience with some delightful companions.
-
Fresh Fruit Salad: A mix of seasonal fruits adds a refreshing burst of flavor and balances the richness of the cheesecake. Bright colors and juicy textures create a festive presentation too.
-
Whipped Cream: A cloud of freshly whipped cream takes this decadent dessert over the top, adding a lightness that complements the dense cheesecake beautifully.
-
Chocolate Drizzle: A drizzle of warm chocolate sauce introduces a rich contrast to the sweet banana flavors. Who can resist that delightful blend of chocolate and banana?
-
Crispy Biscotti: Crunchy biscotti offers a satisfying textural contrast and pairs perfectly with a cup of coffee or tea after enjoying your cheesecake.
-
Light Vanilla Ice Cream: A scoop of creamy vanilla ice cream melts beautifully on each slice, enhancing the banana pudding elements while adding an extra layer of indulgence.
-
Espresso or Coffee: Enjoying a robust cup of espresso or rich coffee alongside the cheesecake heightens the flavors, creating a perfect balance between the sweetness and the warmth of the drink.
Adding these delightful complements when serving your Banana Pudding Cheesecake will elevate the entire experience, leaving your guests happily satisfied!
Banana Pudding Cheesecake Recipe FAQs
What bananas should I use for this recipe?
Absolutely! Ripe bananas are essential for the best flavor and texture in your Banana Pudding Cheesecake. Look for bananas with plenty of brown spots; they’re sweeter and mash more easily, helping to create that rich banana flavor you desire.
How should I store leftover cheesecake?
Very simple! Ensure your Banana Pudding Cheesecake is stored in an airtight container or tightly wrapped in plastic wrap to keep it fresh in the fridge for up to 5 days. This keeps the creamy texture intact while you enjoy each delightful slice.
Can I freeze Banana Pudding Cheesecake?
Absolutely! You can freeze your cheesecake without the whipped topping for up to 2 months. Wrap it securely in plastic wrap and then foil to prevent freezer burn. When ready to enjoy, simply thaw it in the refrigerator overnight before serving.
What should I do if my cheesecake cracks while baking?
No worries! If your Banana Pudding Cheesecake cracks, it’s often due to overmixing the filling or baking at a high temperature. To prevent this, ensure you use a water bath during baking for moisture and check that you’re not overmixing the ingredients, especially after adding the eggs. If cracks do happen, simply top them with whipped cream or extra crushed Nilla Wafers for a beautiful disguise!
Is this cheesecake safe for people with allergies?
It’s important to consider! This Banana Pudding Cheesecake contains dairy and gluten (from the Nilla Wafers), so anyone with allergies to these ingredients should take care. If necessary, you can use gluten-free cookies for the crust and check for dairy-free alternatives for the cream cheese and whipped topping. Always double-check ingredient labels for peace of mind.
Can I prepare this cheesecake in advance?
Absolutely! This cheesecake is perfect for making ahead of time. You can prepare it a day or even two before you need to serve it. Just be sure to include the whipped topping shortly before serving to keep it airy and fresh!
Irresistible Banana Pudding Cheesecake for Easy Indulgence
Ingredients
Equipment
Method
- Preheat your oven to 325°F. In a food processor, blend Nilla Wafers until they resemble fine crumbs. Combine the crumbs with brown sugar and melted unsalted butter, then mix until well combined. Press this mixture firmly into the bottom and halfway up the sides of a prepared springform pan. Bake for 11 minutes, then let it cool completely.
- In a large mixing bowl, beat together cream cheese and granulated sugar until smooth and creamy. Add in the ripe mashed bananas, pure vanilla extract, sour cream, and chilled heavy cream, mixing well until fully combined. Finally, incorporate the eggs, mixing on low speed just until blended.
- Pour half of the cheesecake filling into the cooled crust, spreading it evenly. Next, layer sliced bananas and crushed Nilla Wafers on top for added texture and flavor. Finally, pour the remaining filling over the top.
- To prevent cracking, set up a water bath by placing the springform pan in a larger baking dish filled with hot water. Bake for 80-90 minutes, or until the center is slightly jiggly but set. After baking, turn off the oven, leave the door slightly ajar, and let the cheesecake cool gradually for 30 minutes.
- Once cooled, transfer the cheesecake to a wire rack to reach room temperature completely. Wrap it tightly and refrigerate for at least 6 hours, preferably overnight.
- In a mixing bowl, whip the chilled heavy cream with vanilla extract until stiff peaks form. Carefully fold this whipped cream into the prepared instant vanilla pudding.
- Spread the whipped topping generously over the cooled cheesecake. For an appealing finish, decorate with additional crushed Nilla Wafers or fresh banana slices as desired. Your Banana Pudding Cheesecake is now ready for serving.
Leave a Reply