
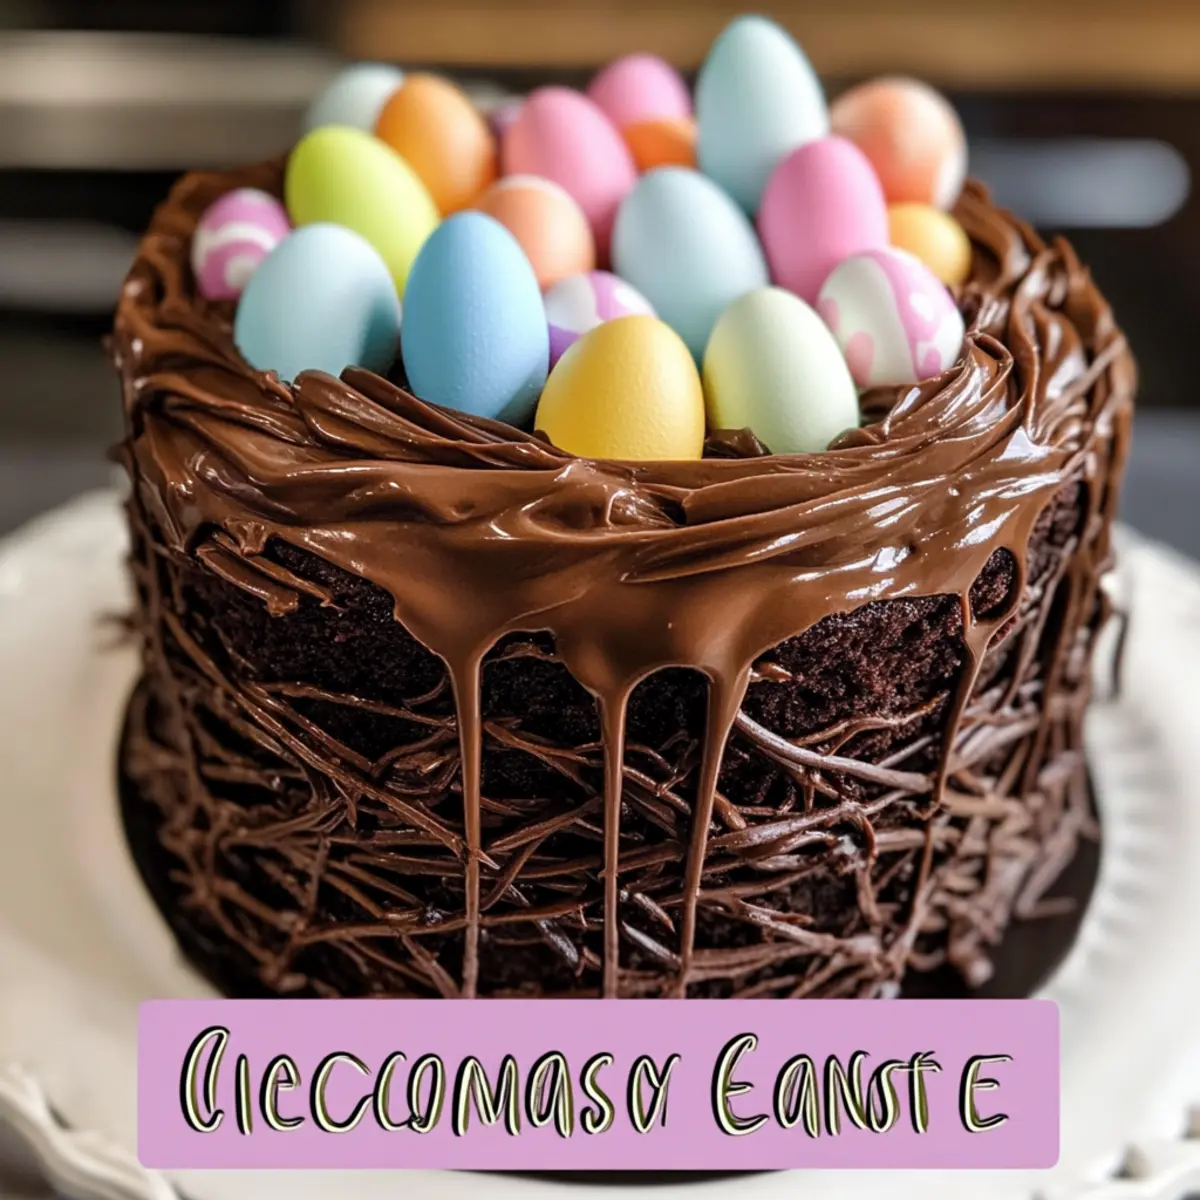
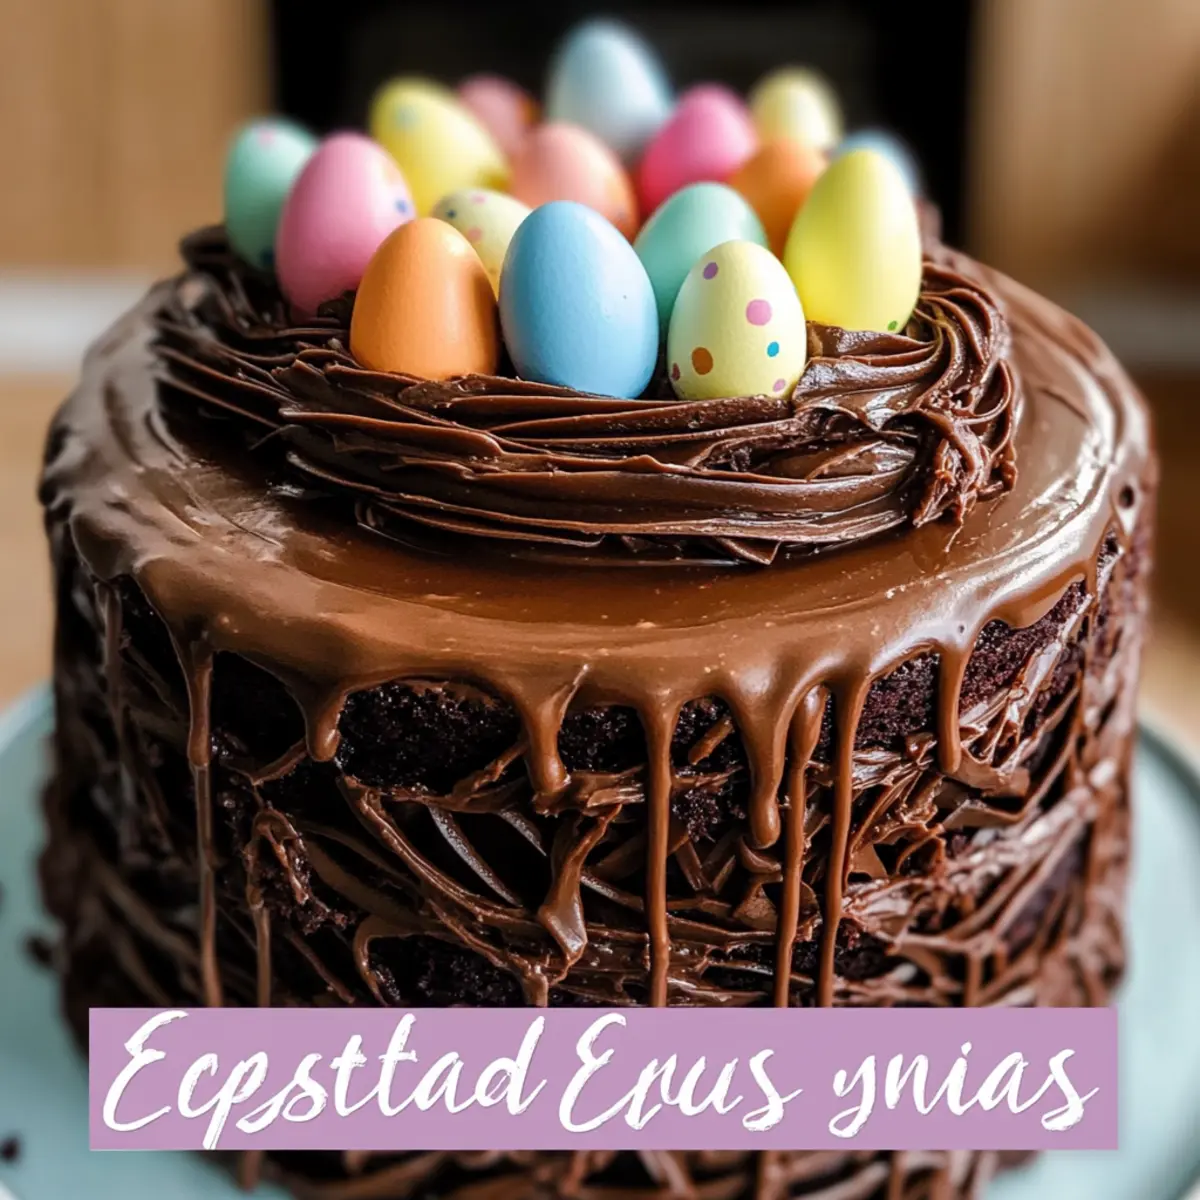
What’s sweeter than a visit from the Easter Bunny? A homemade Chocolate Easter Egg Nest Cake that brings the whole family together! This playful dessert not only looks stunning with its glossy ganache and delightful chocolate nests, but it also boasts a moist crumb enriched by coffee that elevates each indulgent bite. With so many variations available, like gluten-free and vegan options, this cake is perfect for anyone wanting to ditch the fast-food routine and celebrate the joys of homemade cooking. Whether it’s a festive gathering or a cozy family dinner, this Chocolate Easter Egg Nest Cake is sure to become a beloved centerpiece on your table. Curious about how to create this masterpiece and surprise your loved ones this season? Let’s dive in!
Why make a Chocolate Easter Egg Nest Cake?
Delightful Presentation: The stunning visual of chocolate nests filled with colorful eggs makes this cake a true showstopper for any gathering.
Irresistible Flavor: Rich chocolate flavor paired with coffee creates a depth that’s hard to resist, offering a comforting indulgence perfect for spring.
Dietary Friendly: With variations for everyone, from gluten-free to vegan, this recipe ensures that no guest feels left out at your celebrations.
Easy to Prepare: Simple instructions allow you to craft this masterpiece without hassle, giving you more time to enjoy with family and friends.
Memorable Moments: Sharing this cake will create lasting memories, as it’s designed to make every occasion feel special and festive.
Why settle for fast food when you can impress your loved ones with this homemade delight? For those who love simplicity with flair, this Chocolate Easter Egg Nest Cake is a must-try!
Chocolate Easter Egg Nest Cake Ingredients
For the Cake
• All-Purpose Flour – Provides the cake’s structure; swap with gluten-free flour for a gluten-free option.
• Cocoa Powder – Delivers rich chocolate flavor; unsweetened cocoa is best for optimal taste.
• Granulated Sugar – Adds sweetness; feel free to use brown sugar for a deeper flavor.
• Buttermilk – Ensures moisture and tenderness; use dairy-free milk mixed with lemon juice for a vegan alternative.
• Vegetable Oil – Contributes fat for moisture; melted coconut oil offers a unique twist in flavor.
• Eggs – Acts as a binding agent; substitute with flax eggs for a vegan version (1 tbsp ground flaxseed + 2.5 tbsp water per egg).
• Vanilla Extract – Acts as a flavor enhancer; opt for pure vanilla for best results.
• Hot Coffee – Enhances the chocolate’s depth; replace with hot water for a milder option.
For the Ganache
• Heavy Cream – Used for the ganache; coconut cream can be substituted for a dairy-free version.
• Dark Chocolate – The star ingredient for the glossy ganache topping; semi-sweet or white chocolate are good alternatives.
For Decoration
• Mini Chocolate Eggs – Adds a fun, colorful touch; feel free to use any small candies for a playful finish.
Step‑by‑Step Instructions for Chocolate Easter Egg Nest Cake
Step 1: Preheat the Oven
Begin by preheating your oven to 350°F (175°C) and greasing a deep 9-inch round cake pan with non-stick spray or butter. This ensures easy removal of your Chocolate Easter Egg Nest Cake once baked. As the oven heats, gather your mixing bowls and whisk to be ready for the subsequent steps.
Step 2: Mix the Dry Ingredients
In a spacious mixing bowl, whisk together 1 ¾ cups all-purpose flour, ¾ cup unsweetened cocoa powder, and 1 ½ cups granulated sugar until fully combined. This blend creates the foundation for your cake, adding both structure and rich chocolate flavor. Set the bowl aside while you prepare the wet ingredients.
Step 3: Combine the Wet Ingredients
In a separate bowl, combine 1 cup of buttermilk, ½ cup vegetable oil, 2 large eggs, and 2 teaspoons vanilla extract. Whisk vigorously until the mixture is smooth and slightly frothy. The incorporation of these wet ingredients will bring moisture and richness to your Chocolate Easter Egg Nest Cake, enhancing its tender crumb.
Step 4: Blend the Mixtures
Gradually add the wet mixture into the bowl of dry ingredients, stirring gently with a spatula until just combined—be careful not to overmix. Next, pour in 1 cup of hot coffee to the batter; this key ingredient deepens the chocolate flavor. The batter should be thin but well-combined, achieving a silky smooth consistency.
Step 5: Bake the Cake
Pour the cake batter into the prepared pan, making sure to spread it evenly. Bake in the preheated oven for 30-35 minutes, or until a toothpick inserted into the center comes out clean. This ensures a moist, tender interior without being undercooked. Allow the cake to cool in the pan for a few minutes before transferring it to a wire rack.
Step 6: Prepare the Ganache
While the cake cools, heat 1 cup of heavy cream in a small saucepan over medium heat until it is steaming, but not boiling. Once ready, pour the hot cream over 8 ounces of chopped dark chocolate in a bowl. Allow it to sit for a few minutes, then stir until smooth and glossy. This ganache will be a delightful topping for your finished cake.
Step 7: Coat the Cake
Ensure the Chocolate Easter Egg Nest Cake is completely cool before pouring the ganache over the top. This prevents melting the cake and helps achieve a beautiful, glossy finish. Use a spatula to spread the ganache evenly, letting it drip down the sides for an appealing presentation.
Step 8: Create the Chocolate Nests
To make the decorative nests, melt additional chocolate and pipe it into freeform strands onto a sheet of parchment paper. Aim for circular shapes with overlapping strands to mimic nests. Refrigerate the nests until set, which typically takes about 15-20 minutes, allowing your creative decorations to take shape.
Step 9: Decorate the Cake
Once the ganache has set firmly, place the chocolate nests on top of the cake and fill each nest with vibrant mini chocolate eggs. This final touch adds a festive and cheerful appearance, perfect for your spring celebrations. Slice and serve, making sure to share this delightful Chocolate Easter Egg Nest Cake with loved ones!

Variations & Substitutions for Chocolate Easter Egg Nest Cake
Feel free to get creative with this delightful cake and make it your own, crafting unique flavors to enchant your guests!
-
Gluten-Free: Substitute all-purpose flour with a 1:1 gluten-free flour blend for a deliciously inclusive treat. This adjustment ensures that everyone at your table can enjoy the cake without missing out.
-
Vegan: Use flax eggs instead of traditional eggs (1 tbsp ground flaxseed + 2.5 tbsp water per egg) to make this cake vegan-friendly. This swap maintains that lovely texture and moisture you crave.
-
Dairy-Free: Replace buttermilk with dairy-free milk mixed with a tablespoon of lemon juice or vinegar for a smooth, creamy alternative. Don’t forget to use coconut cream in your ganache too!
-
Keto-Friendly: Swap out sugar for a low-carb sweetener like erythritol or monk fruit sweetener to enjoy this cake while sticking to your dietary goals. You’ll be amazed at how delicious it can still be!
-
Nut-Free: If you’re looking to avoid nuts, ensure your vegetable oil is safe and use nut-free chocolate for the ganache. There are plenty of tasty options on the market that fit the bill.
-
Flavor Boost: Stir in a splash of espresso or coffee liqueur into the batter for an extra punch of deep flavor. The added richness will have everyone coming back for seconds.
-
Texture Twist: Add crushed cookies or graham crackers into the nest for a delightful crunch and unexpected surprise. This subtle change adds a playful texture that complements the softness of the cake beautifully.
-
Spice It Up: For an exciting twist, incorporate a pinch of cayenne pepper or chili powder into the cake batter. This surprising addition creates a unique depth of flavor and a touch of warmth, taking your dessert to the next level.
While you’re exploring these variations, consider pairing this delectable cake with fresh berries or a scoop of vanilla ice cream for a complete experience! If you’re craving more chocolate creativity, check out my recipes for Decadent Chocolate Peanut or Chocolate Mousse Cake for extra inspiration!
Make Ahead Options
These Chocolate Easter Egg Nest Cakes are perfect for meal prep enthusiasts looking to save time during busy spring festivities! You can prepare the cake itself up to 3 days in advance; simply bake, cool, and wrap it tightly in plastic wrap before refrigerating. The ganache can also be made up to 24 hours ahead and stored in an airtight container at room temperature. For the chocolate nests, create them ahead of time as well, refrigerating until needed to maintain their crispness. When you’re ready to serve, pour the ganache over the cake and top with the nests filled with mini chocolate eggs, yielding a stunning and impressive dessert with minimal last-minute effort!
Storage Tips for Chocolate Easter Egg Nest Cake
Room Temperature: Keep your Chocolate Easter Egg Nest Cake in an airtight container for up to 2 days at room temperature to maintain its moist texture.
Fridge: If you’d like to extend its freshness, refrigerate the cake for up to 5 days. Wrap it well to prevent it from drying out.
Freezer: For longer storage, freeze slices of the cake in an airtight container for up to 2 months. Wrap each slice individually for easy serving later.
Reheating: To enjoy leftovers, gently reheat the cake in the microwave for 10-15 seconds, or let it come to room temperature before serving to maintain its delicious flavor and texture.
Expert Tips for Chocolate Easter Egg Nest Cake
-
Choose the Right Pan: Ensure you use a deep enough pan (at least 2.5 inches tall) to prevent overflow while baking your Chocolate Easter Egg Nest Cake.
-
Gelatin-Free Ganache: Let ganache cool slightly before pouring it over the cake to maintain its shape and prevent it from melting the cake beneath.
-
Texture Troubleshooting: If your cake batter seems too thin, consider baking it in two pans or making cupcakes instead for individual servings.
-
Nest Assembly: Store the chocolate nests separately from the cake to retain their shape—this keeps your Chocolate Easter Egg Nest Cake looking pristine until serving.
-
Make-Ahead Option: For convenience, you can prepare the cake a day in advance. Assemble and decorate it with nests and candy just before serving for the freshest look.
What to Serve with Chocolate Easter Egg Nest Cake?
Indulging in a slice of this rich and festive cake opens up a world of delightful pairing options that enhance its decadent charm.
-
Fresh Berries:
Juicy strawberries or raspberries provide a refreshing contrast, brightening up the rich chocolate experience. -
Vanilla Ice Cream:
A scoop of creamy vanilla ice cream perfectly complements the cake’s textures while adding a soothing, sweet element. -
Chocolate Sauce:
Drizzling extra chocolate sauce over a slice elevates the dessert indulgence, offering an extra layer of blissful richness. -
Mint Chocolate Chip Milkshake:
A minty milkshake adds a fun, playful touch, harmonizing with the chocolate while providing a delightful sipping experience. -
Espresso or Coffee:
Serve with a cup of strong coffee to deepen the chocolate flavors, drawing out the rich nuances in every bite. -
Coconut Macaroons:
The chewy texture and sweet coconut flavor of macaroons contrast beautifully with the cake’s softness, creating a delightful bite. -
Chocolate-Covered Strawberries:
These elegant treats add a luscious bite, marrying chocolate with fruity freshness that your guests will adore. -
Lemon Sorbet:
The tangy sorbet offers a refreshing palate cleanser and a bright twist, balancing the sweetness of the cake beautifully. -
Decorative Fruit Tart:
A colorful fruit tart provides an artistic flair to your dessert table, encapsulating the spirit of spring with its vibrant colors.

Chocolate Easter Egg Nest Cake Recipe FAQs
What kind of flour is best for the Chocolate Easter Egg Nest Cake?
For the light and fluffy texture of the Chocolate Easter Egg Nest Cake, I recommend using all-purpose flour. If you need a gluten-free version, you can easily substitute it with a gluten-free flour blend. Just ensure it’s a 1:1 replacement to maintain the cake’s moisture and structure.
How should I store the Chocolate Easter Egg Nest Cake for freshness?
To keep your Chocolate Easter Egg Nest Cake fresh, store it in an airtight container at room temperature for up to 2 days. If you plan on saving it longer, refrigerate it for up to 5 days. Just be sure to wrap it well to prevent it from drying out!
Can I freeze leftover cake?
Absolutely! You can freeze slices of your Chocolate Easter Egg Nest Cake for up to 2 months. Wrap each slice individually in plastic wrap or foil before placing them in an airtight container or freezer bag. When you’re ready to enjoy, just take out a slice and let it come to room temperature or microwave it for about 10–15 seconds.
What if my cake batter is too thin?
If your cake batter seems too thin, don’t worry! This can be easily remedied by dividing the batter into two round pans or even making cupcakes instead. Baking the batter in smaller portions also ensures even cooking and can create delightful individual servings!
Are there any dietary considerations for this recipe?
Yes, definitely! This Chocolate Easter Egg Nest Cake can be tailored for various dietary needs. For a vegan option, replace the eggs with flax eggs (1 tbsp ground flaxseed + 2.5 tbsp water per egg) and use a dairy-free milk alternative in place of buttermilk. It’s suitable for those needing nut-free options as well, just select products that are certified nut-free.
How do I make the ganache without it melting my cake?
To ensure your ganache doesn’t melt the Chocolate Easter Egg Nest Cake when you pour it on, let the ganache cool slightly before application. This way, it’ll be warm enough to spread smoothly but not so hot that it compromises the cake’s structure. This little tip ensures a beautiful glossy finish on your cake that everyone will adore!
Decadent Chocolate Easter Egg Nest Cake for Spring Celebrations
Ingredients
Equipment
Method
- Preheat your oven to 350°F (175°C) and grease a deep 9-inch round cake pan with non-stick spray or butter.
- In a mixing bowl, whisk together the dry ingredients: all-purpose flour, cocoa powder, and granulated sugar.
- In another bowl, combine the wet ingredients: buttermilk, vegetable oil, eggs, and vanilla extract, whisking until smooth.
- Gradually add the wet mixture into the dry ingredients, stirring gently. Then, pour in the hot coffee and mix until smooth.
- Pour the batter into the prepared pan and bake for 30-35 minutes or until a toothpick comes out clean.
- While the cake cools, heat heavy cream in a saucepan until steaming, then pour over chopped dark chocolate and stir until smooth.
- Once the cake is cool, pour the ganache over the top evenly.
- To make chocolate nests, melt additional chocolate and pipe freeform strands on parchment paper. Refrigerate until set.
- Place the chocolate nests on the cooled cake and fill with mini chocolate eggs before serving.
Leave a Reply