
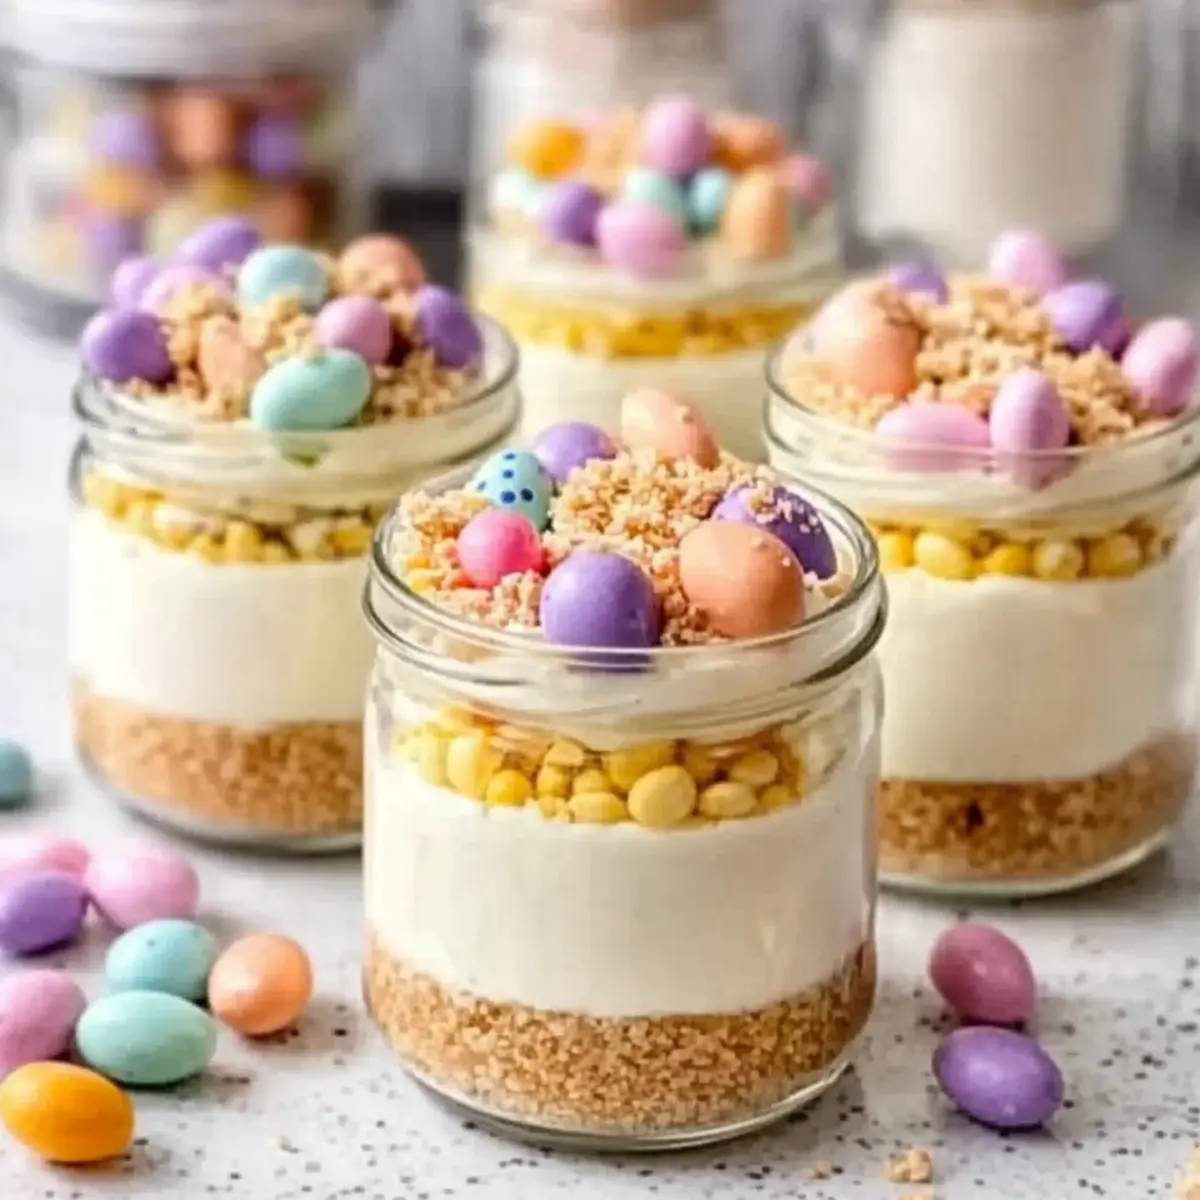
Spring has a magical way of stirring excitement, and nothing encapsulates that joy quite like these delightful No-Bake Mini Easter Cheesecake Jars! The creamy, fluffy cheesecake filling rests on a crunchy, buttery base, happily paired with playful toppings that evoke the essence of Easter. These jars aren’t just a feast for the eyes; they’re also the ultimate make-ahead dessert, perfect for gatherings with family and friends. What I love most is how easily customizable they are—whether you prefer pastel colors or vibrant candies, you can tailor these treats to your own taste. Plus, their kid-friendly nature keeps everyone smiling and satisfied at any gathering. Ready to impress your loved ones with this festive dessert? Let’s dive into the recipe and create some sweet memories together!
Why Are Mini Cheesecake Jars Irresistible?
Simplicity at its best: These Mini Easter Cheesecake Jars require no baking, making them a low-stress choice for any home cook. Customizable toppings and colors let you express your creativity—perfect for personalizing each jar! Kid-friendly components ensure that children can help assemble these treats while having fun. Make-ahead convenience means you can whip them up a day in advance, freeing up time for you to enjoy with loved ones. Plus, if you’re a fan of rich desserts, these jars deliver a delicious balance of creamy filling and crunchy crust, reminiscent of the best cheesecakes. For more delightful variations, check out our Pistachio Mushroom Cheesecake or Velvet Oreo Cheesecake.
Mini Easter Cheesecake Jars Ingredients
-
For the Crust
-
Graham Cracker Crumbs – This gives the crust its delightful crunch and structure. Substitution: Digestive biscuits can be used in place of graham crackers for a different flavor.
-
Unsalted Butter – Binds the crust together and adds richness. Substitution: Coconut oil for a dairy-free option.
-
Sugar – Sweetens the crust perfectly. Substitution: Coconut sugar for a healthier alternative.
-
Pinch of Salt – Enhances the overall flavor of the crust.
-
For the Filling
-
Cream Cheese – The star ingredient that provides creaminess to the filling. Substitution: Neufchâtel cheese for a lighter version.
-
Powdered Sugar – Adds sweetness and smooth texture to the filling. Note: Can reduce to 1/3 cup for less sweetness.
-
Vanilla Extract – Delivers a lovely flavor base for the cheesecake.
-
Lemon Juice – Adds acidity for balance and brightness.
-
Heavy Whipping Cream – Makes the filling light and airy when whipped.
-
Optional and Decorative Elements
-
Gel Food Coloring – Use this to create a festive, pastel look for your cheesecake layers.
-
Toppings (Mini chocolate eggs, jelly beans, pastel sprinkles, shredded coconut) – These are delightful decorative and flavorful components. Note: Choose gluten-free options when necessary.
Get ready to dive into a world of flavors and colors with these delightful Mini Easter Cheesecake Jars! Perfect for festive gatherings, they are a treat that everyone will adore.
Step‑by‑Step Instructions for Mini Easter Cheesecake Jars
Step 1: Prepare the Crust
In a medium bowl, combine the graham cracker crumbs, sugar, and a pinch of salt. Pour in the melted unsalted butter and mix until the crumbs are evenly moist. Divide the mixture into small jars, pressing down firmly with the back of a spoon to create a solid base. Aim for a height of about 1/2 inch for optimal texture in your Mini Easter Cheesecake Jars.
Step 2: Whip the Cream
Chill a large mixing bowl to ensure the heavy whipping cream whips up nicely. Once chilled, pour in the cream and beat with an electric mixer on medium speed until medium-stiff peaks form, about 3-5 minutes. The peaks should hold their shape but still have a slight softness. Set the whipped cream aside to maintain its airy texture for your cheesecake filling.
Step 3: Make the Filling
In another bowl, beat the softened cream cheese, powdered sugar, vanilla extract, and lemon juice together using an electric mixer on medium speed until the mixture is smooth and creamy, approximately 2-3 minutes. Scrape down the sides as needed to ensure everything is well blended. This creamy filling is the heart of your Mini Easter Cheesecake Jars.
Step 4: Combine the Mixtures
Gently fold the whipped cream into the cream cheese mixture in two batches, using a rubber spatula to maintain the airiness of the filling. Mix until just combined; you should see swirls of the whipped cream within the cheesecake base. This step is crucial for achieving a light and fluffy texture in your Mini Easter Cheesecake Jars.
Step 5: Colorize (Optional)
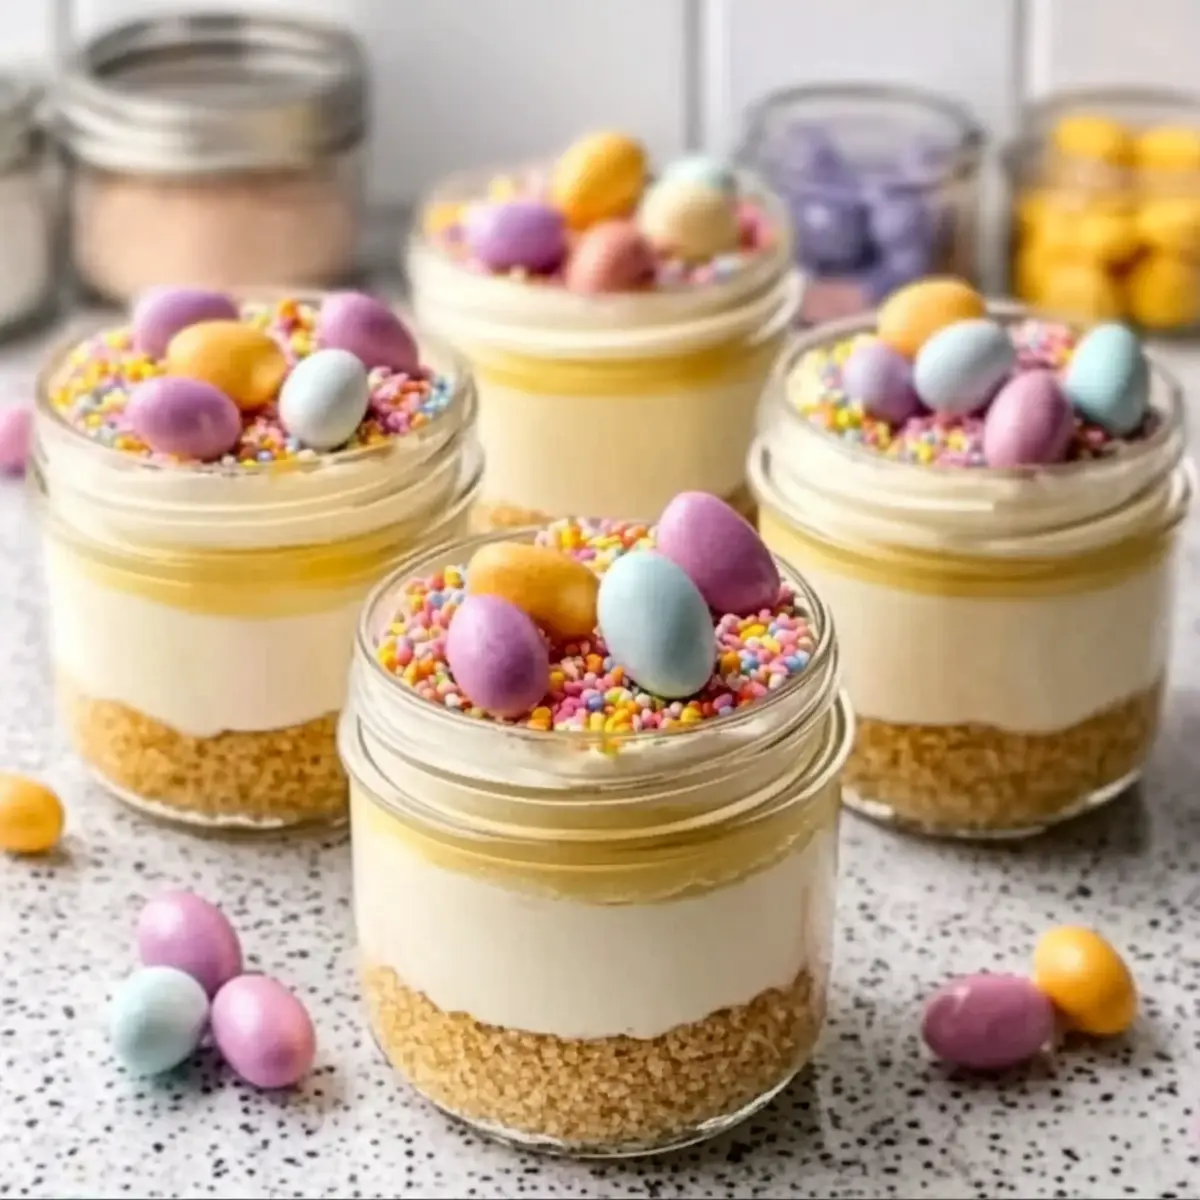
If desired, separate the filling into different bowls and add a few drops of gel food coloring to each, mixing gently until you achieve the pastel colors you want. This step transforms the filling into a colorful delight, ideal for Easter celebrations. Feel free to experiment with various shades for a fun, festive look in your Mini Easter Cheesecake Jars.
Step 6: Layer the Filling
Using a piping bag or a spoon, carefully layer the colorful cheesecake filling over the prepared crust in each jar. Leave some space at the top for toppings. Ensure even distribution as you fill the jars, forming a delightful visual treat that showcases the beautiful layers of your Mini Easter Cheesecake Jars.
Step 7: Chill
Cover the filled jars with lids or plastic wrap, then place them in the refrigerator. Let them chill for a minimum of 2 hours, but for best results, chill for up to 24 hours. This time allows the flavors to meld and the filling to set, giving you the ultimate creamy consistency for your Mini Easter Cheesecake Jars.
Step 8: Decorate
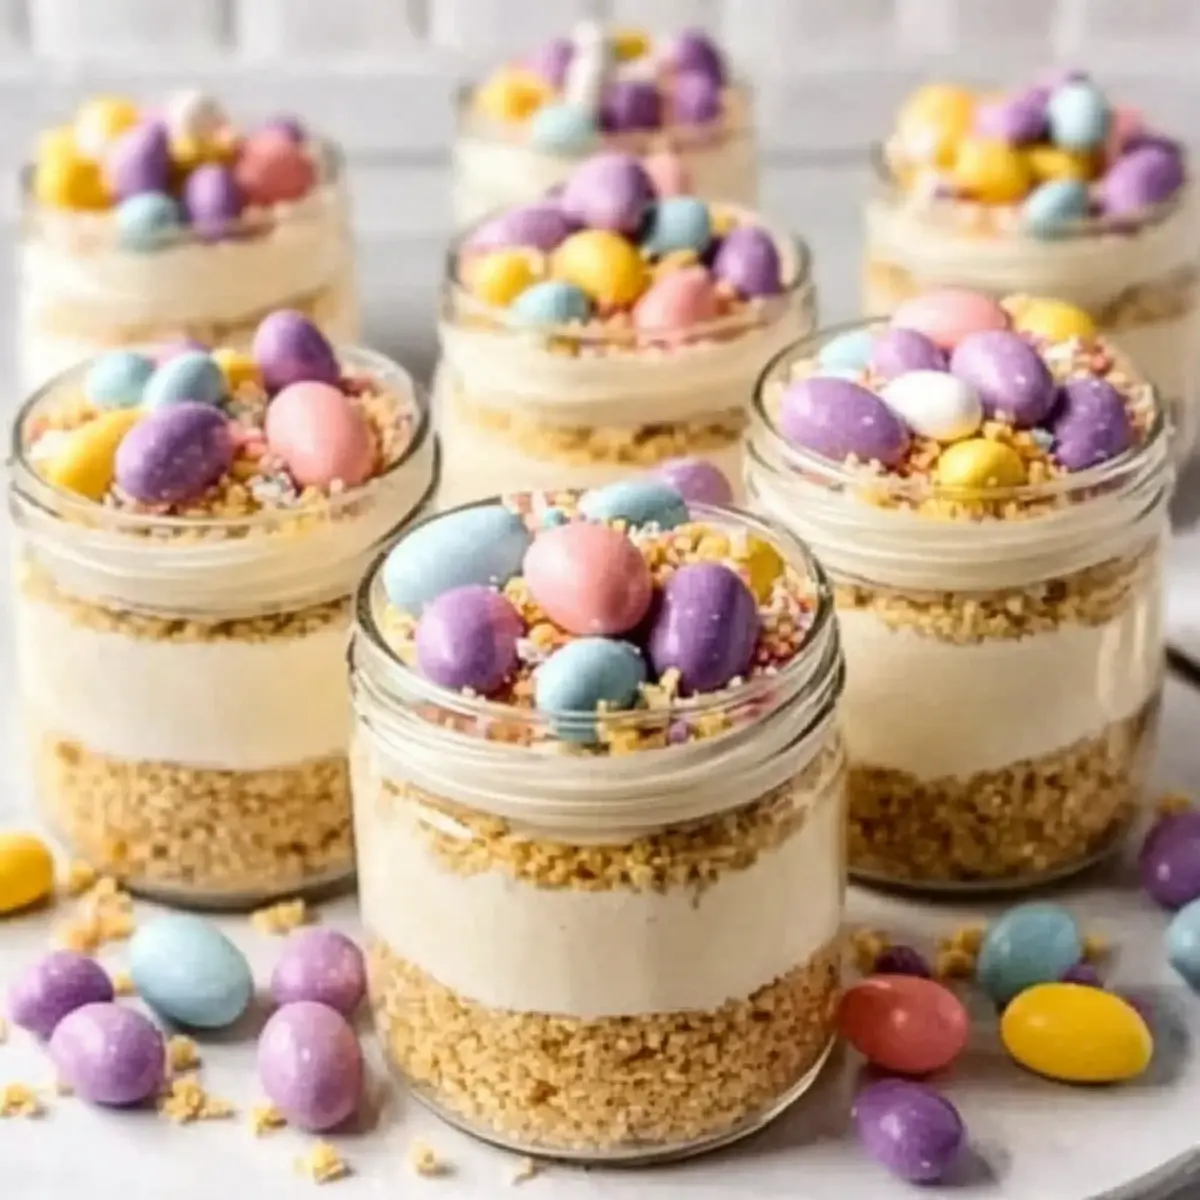
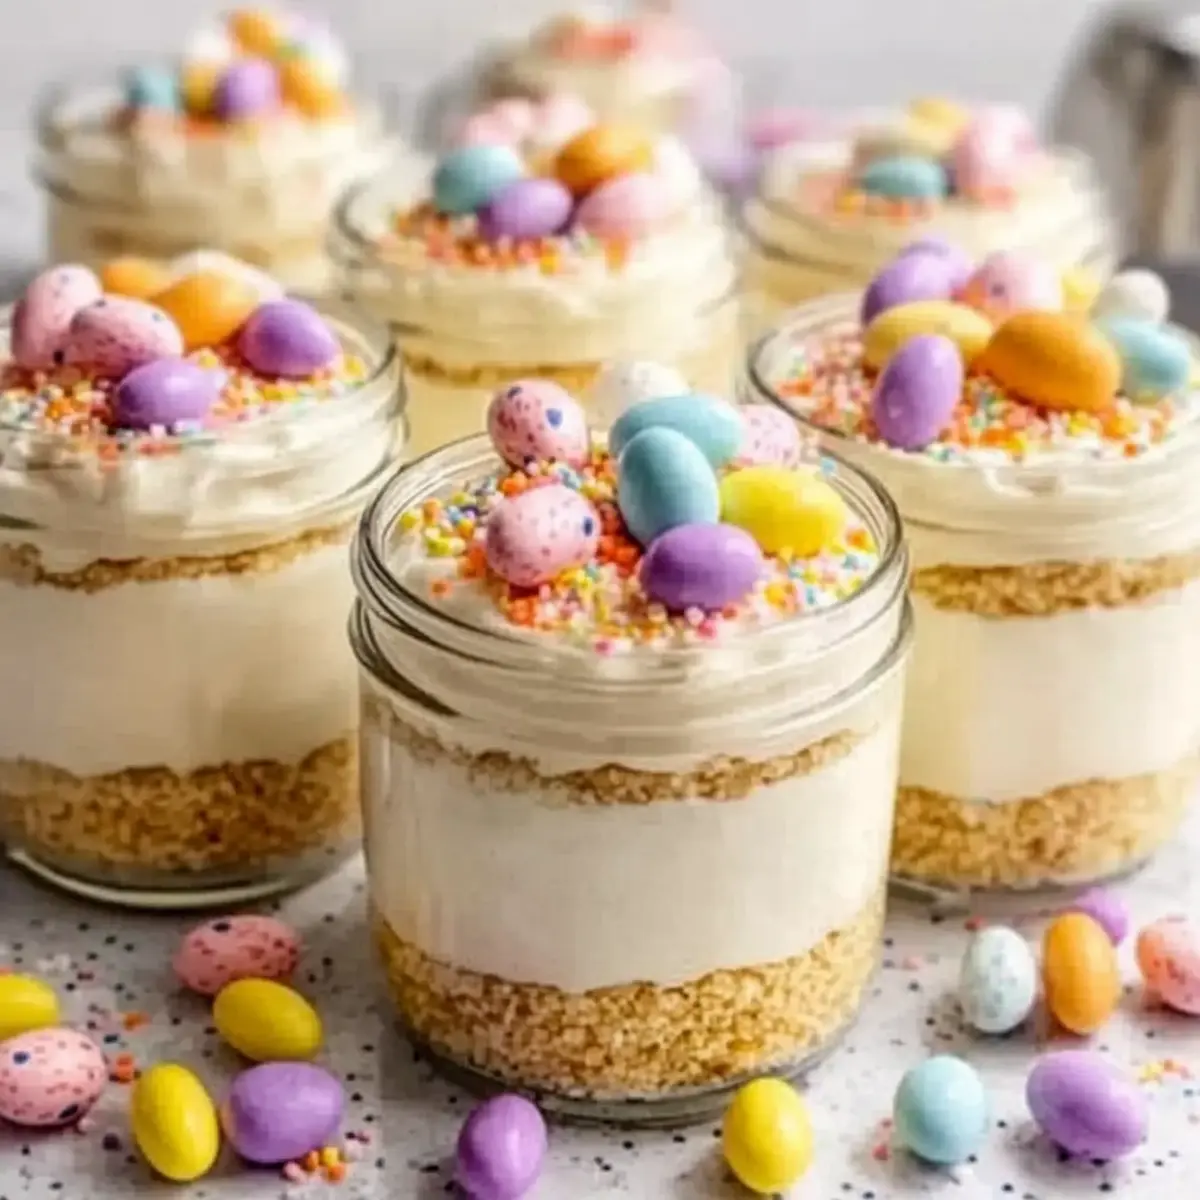
Right before serving, remove the jars from the refrigerator and add your desired toppings such as mini chocolate eggs, jelly beans, pastel sprinkles, or shredded coconut on top. This final touch adds a whimsical flair and visual appeal to your Mini Easter Cheesecake Jars, making each one irresistible!
What to Serve with Mini Easter Cheesecake Jars
Spring is in the air, and creating a festive spread to accompany these vibrant treats will surely elevate your gathering.
- Fresh Fruit Salad: A mix of juicy berries and citrus adds a refreshing contrast to the creamy cheesecake—perfect for cleansing the palate!
- Minty Pea Salad: This textural salad combines crisp peas with a zesty vinaigrette that complements the sweetness of your jars, adding a light touch.
- Lemonade Spritzers: The fizzy, citrusy drink provides a refreshing balance, enhancing the festive flavor of the cheesecake without overpowering it.
- Chocolate-Covered Strawberries: These sweet bites mirror the playful toppings and add a romantic flair, perfect for an Easter dessert table.
- Carrot Cake Muffins: A moist, spiced muffin echoes the Easter theme, while their comforting flavors pair beautifully with the cheesecake’s creaminess.
- Miniature Quiches: Savory quiches bring variety to your menu, offering a flavorful contrast to the sweet jars that kids and adults alike will love.
- Coffee or Tea: These warm beverages beautifully round off the meal, perfect for enhancing the flavors of the cheesecake while offering cozy comfort.
- Pistachio Butter Cookies: These nutty treats would be a fabulous pairing—they add a delightful crunch and flavor that echoes the cheesecake vibe.
Mini Easter Cheesecake Jars Variations
Feel free to unleash your creativity and make these delightful jars even more your own!
- Citrus Twist: Swap vanilla extract for lemon extract for a zesty kick, bringing a bright flavor to the cheesecake.
- Nutty Delight: Add pistachio paste to the filling for a unique flavor, then top with crushed pistachios for added crunch. The resulting nutty richness pairs beautifully with the creamy base.
- Berry Bliss: Layer in your favorite fruit compote between the crust and filling for a burst of fruity flavors. Fresh berries can also be used as a delightful topping.
- Chocolate Lovers: Mix cocoa powder into the filling for a chocolatey twist, or alternate layers of chocolate and vanilla cheesecake for a beautiful stripe effect.
- Healthier Option: Use Greek yogurt instead of cream cheese for a lighter filling that still remains deliciously creamy. This swaps in extra protein while keeping the dessert enjoyable.
- Spiced Up: Add a dash of cinnamon or nutmeg to the crust to create a warm, spice-infused flavor. These aromatic hints elevate the sweetness and bring wonderful warmth.
- Gluten-Free: Substitute the graham crackers with ground almonds or gluten-free cookies to cater to dietary needs while preserving the beautiful texture of the crust.
- Tropical Vibes: Infuse the filling with coconut cream for a silky, tropical flavor that takes you to sunny beaches, perfect for a unique take on your cheesecakes.
For more delightful options, consider exploring our Pistachio Mushroom Cheesecake or indulge in a slice of our delectable Velvet Oreo Cheesecake. Enjoy personalizing your dessert journey!
Tips for the Best Mini Easter Cheesecake Jars
-
Cream Cheese Temperature: Always use cream cheese at room temperature to ensure a smooth and creamy filling. Cold cream cheese can lead to lumps.
-
Whipping Cream Peaks: Aim for medium-stiff peaks when whipping the cream. This structure keeps your filling light and airy, which is essential for the Mini Easter Cheesecake Jars.
-
Gentle Folding: Be sure to fold the whipped cream into the cream cheese mixture gently. Overmixing can deflate the airy texture crucial for these jars.
-
Chill Time Matters: Allow your jars to chill for at least 2 hours, but up to 24 hours is best. This resting period improves flavor and texture greatly.
-
Decorate Last Minute: Add your toppings just before serving to keep them fresh and visually appealing. This prevents any sogginess that could occur in the Mini Easter Cheesecake Jars.
Make Ahead Options
These Mini Easter Cheesecake Jars are perfect for meal prep, allowing you to enjoy a stress-free dessert experience! You can prepare the crust and filling up to 24 hours in advance, allowing the flavors to meld beautifully. Simply make the crust and layer it in the jars, then prepare the cheesecake filling and fill the jars, leaving space for toppings. Cover tightly and refrigerate; they will stay fresh for up to 3 days. When you’re ready to serve, just add your favorite toppings like mini chocolate eggs or sprinkles right before enjoying to maintain their vibrant look and texture. With this make-ahead approach, you’ll have a delightful treat ready to impress, even on busy weeknights!
Storage Tips for Mini Easter Cheesecake Jars
-
Fridge: Store your Mini Easter Cheesecake Jars in the refrigerator for up to 3 days. Ensure each jar is tightly covered with a lid or plastic wrap to maintain freshness.
-
Freezer: You can freeze the jars without toppings for up to 1 month. To preserve flavor and texture, wrap each jar securely in plastic wrap followed by aluminum foil.
-
Thawing: When ready to enjoy, gently thaw the frozen jars in the refrigerator overnight. Add your favorite toppings right before serving to keep them looking and tasting their best.
-
Reheating: There’s no need to reheat these no-bake dessert jars! Simply serve them chilled for the perfect creamy treat.
Mini Easter Cheesecake Jars Recipe FAQs
What type of graham crackers should I use for the crust?
Absolutely, you can use classic graham cracker crumbs for that perfect crunchy base! If you’re looking for a different flavor profile, digestive biscuits work beautifully as a substitute, adding a slightly sweeter note to your crust.
How should I store my Mini Easter Cheesecake Jars?
To maintain their deliciousness, store your Mini Easter Cheesecake Jars in the refrigerator, tightly covered with lids or plastic wrap. They’ll stay fresh for up to 3 days, perfect for snacking or dessert any day of the week!
Can I freeze these cheesecake jars?
Very much so! If you want to prepare them ahead of time, you can freeze the jars without any toppings for up to 1 month. Just wrap each jar securely in plastic wrap, followed by a layer of aluminum foil to prevent freezer burn. When you’re ready to enjoy, thaw them overnight in the refrigerator!
What should I do if my cheesecake filling is too runny?
If your filling turns out runny, don’t worry! First, ensure that your cream cheese is at room temperature before mixing—this prevents lumps. Next, if it’s too late and your filling is already made, chill it in the refrigerator for an hour to help it firm up. Gently folding the whipped cream into the mixture instead of mixing vigorously can also help maintain its airiness, leading to a thicker consistency.
Are Mini Easter Cheesecake Jars suitable for people with dietary restrictions?
Absolutely! You can easily adapt this recipe for various dietary needs. For a dairy-free version, use coconut oil in the crust and substitute cream cheese with dairy-free alternatives like cashew cream. To make them gluten-free, simply use gluten-free graham cracker crumbs or digestive biscuits. Always check your toppings to avoid any allergen ingredients and personalize your jars to suit your guests!
Mini Easter Cheesecake Jars for a Delightful Spring Treat
Ingredients
Equipment
Method
- In a medium bowl, combine the graham cracker crumbs, sugar, and a pinch of salt. Pour in the melted unsalted butter and mix until the crumbs are evenly moist. Divide the mixture into small jars, pressing down firmly to create a solid base.
- Chill a large mixing bowl, then pour in the heavy whipping cream and beat with an electric mixer on medium speed until medium-stiff peaks form, about 3-5 minutes.
- In another bowl, beat the softened cream cheese, powdered sugar, vanilla extract, and lemon juice together until smooth and creamy, about 2-3 minutes.
- Gently fold the whipped cream into the cream cheese mixture in two batches, mixing until just combined.
- If desired, separate the filling into bowls and add gel food coloring to achieve pastel colors, mixing gently.
- Layer the colorful cheesecake filling over the prepared crust in each jar, leaving space for toppings.
- Cover the jars and refrigerate for at least 2 hours, preferably up to 24 hours.
- Before serving, add toppings like mini chocolate eggs, jelly beans, or shredded coconut.
Leave a Reply