
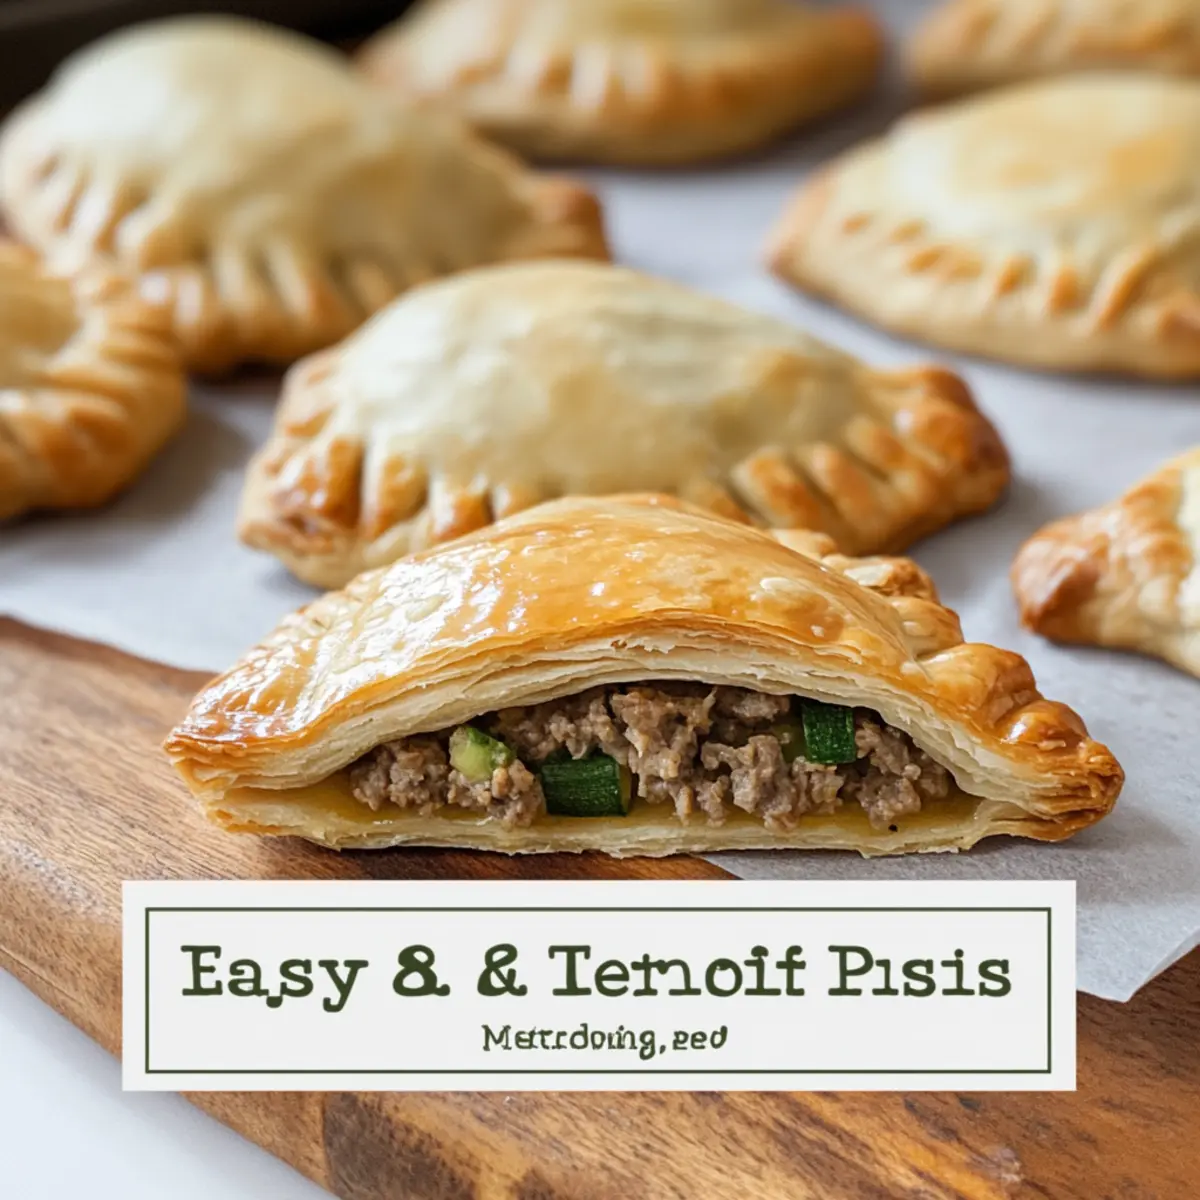
Imagine stepping into a cozy kitchen on a chilly evening, the aroma of savory meats and fresh herbs dancing through the air. That warmth is exactly what you’ll find in my Easy & Delicious Traditional Northern Irish Pasties. These delightful pockets of comfort are not just a meal; they’re a canvas for your culinary creativity. With a buttery, flaky crust and a filling crafted from minced meat and fresh vegetables, they make a satisfying dish for any occasion. Not only are these pasties a go-to option for busy weeknights—where you can prepare them ahead of time—but they also adapt easily to whatever ingredients are at hand. Ready to dive into this comforting Irish classic? Let’s roll up our sleeves and get started!
Why Love Traditional Northern Irish Pasties?
Heartwarming Comfort: Imagine the delightful warmth these pasties bring, perfect for chilly evenings shared with loved ones.
Savory Satisfaction: Indulge in a rich filling combining tender meat and vibrant veggies for a balanced meal.
Versatile Cooking: Customize your pasties with whatever ingredients you have on hand—from different meats to additional herbs—making them truly your own.
Make-Ahead Friendly: Save time on busy weeknights by preparing these pasties in advance, allowing for quick reheating later.
Crowd-Pleasing: Serve these tasty treats at gatherings, and watch them disappear as friends and family savor every bite!
Traditional Northern Irish Pasties Ingredients
-
For the Dough
• Butter – adds richness and moisture to the pastry; don’t skip it for the best texture.
• Lard – helps create a flaky crust; you can substitute with additional butter if needed.
• Flour – the base for your dough; all-purpose flour is perfect for this recipe.
• Boiling Water – activates the fats, making the dough easier to work with and ensuring a tender crust. -
For the Filling
• Cubed Stew Meat – use tender cuts for juicy bites; ground beef or pork work as substitutes.
• Yellow Potatoes – creates a creamy texture in the filling; russet potatoes can be used instead.
• Onions – adds essential flavor; caramelize for extra sweetness and depth.
• Carrots – offers natural sweetness and a vibrant touch; feel free to omit if you prefer less sweetness.
• Parsley & Thyme – brings traditional Irish flavors; other herbs like rosemary can substitute or omit if you wish.
• Salt & Pepper – essential for enhancing all ingredients; adjust to taste for the perfect seasoning. -
For Baking
• Cream – brush on before baking for a golden crust; regular butter can also be used if cream is unavailable.
These Traditional Northern Irish Pasties invite creativity, ensuring you can make them your own with different ingredient choices.
Step‑by‑Step Instructions for Traditional Northern Irish Pasties
Step 1: Prepare the Dough
In a large bowl, mix 1 cup of boiling water with ½ cup of diced butter and ½ cup of lard until melted. Gradually add 4 cups of all-purpose flour, mixing until a dough forms. Knead lightly, then wrap the dough in plastic wrap and chill in the refrigerator for at least one hour to firm up.
Step 2: Cook the Filling
While the dough chills, heat 2 tablespoons of butter in a skillet over medium heat. Sauté 1 chopped onion until caramelized and golden, about 5-7 minutes. In a bowl, combine the caramelized onions with chopped potatoes, diced carrots, cubed stew meat, parsley, thyme, salt, and pepper, mixing well for a flavorful Traditional Northern Irish Pasties filling.
Step 3: Assemble the Pasties
Once the dough is chilled, divide it into eight equal balls and roll each into an 8-inch circle on a floured surface. Place approximately 1½ cups of filling on half of each dough circle, topping the filling with a small pat of butter. Moisten the edges with water, fold the dough over, and press firmly to seal, ensuring no filling escapes.
Step 4: Bake the Pasties
Preheat your oven to 350°F (175°C). Place the assembled pasties on a lined baking sheet, making 1-2 small slits on the top of each for steam release. Bake in the preheated oven for 30 minutes, then brush the tops with cream for a golden crust before returning to bake for an additional 30 minutes, or until the pasties are golden brown and the filling reaches 165°F.
Step 5: Serve and Enjoy
Once baked, remove the Traditional Northern Irish Pasties from the oven and let them cool slightly for about 5 minutes. Serve these savory delights warm, perhaps alongside a fresh salad or chips, to deepen the comfort of this hearty meal. Enjoy the rich flavors and flaky texture that make these pasties truly special!
Traditional Northern Irish Pasties Variations
Feel free to tailor these pasties to your taste preferences and pantry staples for a delightful twist!
- Dairy-Free: Use plant-based butter or olive oil in the dough and omit cream for a vegan-friendly option.
- Spicy Kick: Add diced jalapeños or red pepper flakes to the filling for a savory heat that elevates your pasties. A little spice can transform the flavors!
- Flavor Boost: Mix in some grated cheese, like cheddar or mozzarella, for a rich, gooey surprise in your filling. This luscious addition makes each bite extra comforting.
- Vegetarian Delight: Swap the meat for hearty lentils or chickpeas, packed with spices and flavors to create a filling that’s both robust and satisfying.
- Mixed Veggies: Incorporate seasonal vegetables such as spinach, bell peppers, or zucchini to brighten the filling with color and texture. Fresh ingredients can make your pasties sing!
- Herb Variations: Experiment with herbs like sage or basil in the filling for a different flavor profile, showcasing the versatility of these traditional pasties.
- Sweet Twist: Consider adding fruits like diced apples or dried cranberries to the filling for a surprising sweet-and-savory contrast. It’s a fun way to switch things up!
- Gluten-Free: Use a gluten-free flour blend for the dough, ensuring you can still enjoy these pasties with a flavorful crust.
Experiment with these variations and discover new favorites in every bite! If you’re interested in exploring more recipes with unique twists, check out my ideas for Easy Homemade Ketchup or discover delicious Savory Caramelized Onion Recipes.
Make Ahead Options
These Traditional Northern Irish Pasties are perfect for meal prep, allowing you to enjoy a homemade meal even on the busiest nights! You can prepare the dough up to 24 hours in advance; just wrap it tightly in plastic wrap and refrigerate to maintain its freshness. The filling can also be made ahead and kept in the fridge for up to 3 days; simply sauté the veggies and meat, let it cool, then store it in an airtight container. When you’re ready to enjoy your pasties, roll out the dough, fill and seal them, then bake as directed. This way, you’ll have restaurant-quality results with minimal last-minute effort!
How to Store and Freeze Traditional Northern Irish Pasties
- Room Temperature: Best enjoyed fresh, but you can leave cooked pasties out for up to 2 hours. Store any leftovers in the fridge if not consumed.
- Fridge: Keep your cooked pasties in an airtight container in the refrigerator for up to 3-4 days, ensuring they stay moist and flavorful.
- Freezer: For longer storage, freeze uncooked pasties for up to 3 months. Wrap individually in plastic wrap and then in foil to prevent freezer burn.
- Reheating: When ready to enjoy, reheat baked pasties in an oven at 350°F for about 10-15 minutes, until warmed through and the crust is crispy.
Expert Tips for Traditional Northern Irish Pasties
- Dough Chilling: Ensure you chill the dough for at least an hour; this helps to create that beautiful flaky crust and makes it easier to handle.
- Even Filling: Don’t overfill each pasty; about 1½ cups of filling is ideal. Overfilling can cause leaks during baking.
- Steam Release: Remember to make slits on top of each pasty before baking. This allows steam to escape and prevents sogginess, preserving the delightful texture of your Traditional Northern Irish Pasties.
- Golden Finish: For that perfect golden crust, brush the tops with cream or melted butter just before the final baking stage. It truly elevates the look and flavor!
- Customization: Feel free to get creative! Swap in seasonal vegetables or your preferred type of meat for a unique twist on the traditional filling.
What to Serve with Traditional Northern Irish Pasties
Imagine sinking your teeth into those warm, flaky pasties, surrounded by flavors that embrace you like a cozy hug.
- Homemade Ketchup: A tangy accompaniment that brings out the savory richness of the meat and vegetables in your pasties.
- Traditional Chips: Crispy and golden fries offer a delightful crunch alongside the soft, savory filling of the pasties, creating a satisfying contrast.
- Fresh Garden Salad: A bright mix of greens, cucumbers, and tomatoes adds a refreshing crispness, balancing the rich flavors beautifully.
- Colcannon: This creamy Irish potato dish, made with cabbage, adds a traditional touch that enhances the Irish flair of your meal.
- Steamed Green Beans: Lightly seasoned, tender green beans provide a simple yet elegant side that complements the hearty pasties without overshadowing their flavors.
- Guinness Beer: The rich, dark notes of this classic Irish beer pair perfectly with the buttery pastry, creating a fulfilling dining experience.
- Apple Tart: A warm slice of apple tart or pie gives a sweet, fruity finish to your meal, rounding it out on a comforting note.
- Irish Cream Liqueur: Sipping on this sweet liqueur after your meal adds a cozy touch, echoing the warmth of the pasties while delighting your taste buds.

Traditional Northern Irish Pasties Recipe FAQs
What type of potatoes should I use for the filling?
Absolutely! I recommend using yellow potatoes for their creamy texture, but you can easily substitute them with russet potatoes if that’s what you have on hand.
How should I store leftover pasties?
Very simple! Place any cooked pasties in an airtight container in the refrigerator, where they will stay fresh for up to 3-4 days. This way, you can savor them later!
Can I freeze Traditional Northern Irish Pasties?
Absolutely! To freeze, wrap each uncooked pasty individually in plastic wrap and then in foil to prevent freezer burn. They can be frozen for up to 3 months. When you’re ready to bake, simply bake them from frozen, adding a few extra minutes to the baking time!
What can I do if my pasties are leaking during baking?
If your pasties are leaking, it may be due to overfilling. Be sure to fill each pasty with about 1½ cups of filling and seal the edges tightly with a firm press. Additionally, make sure to create steam vents on the tops to allow moisture to escape.
Are these pasties suitable for people with dietary restrictions?
While they contain meat and butter, you can easily adapt these Traditional Northern Irish Pasties! Substitute the meat with a plant-based alternative and use a dairy-free butter option. Always check the labels to ensure they fit your dietary needs!
Savory Traditional Northern Irish Pasties You’ll Love
Ingredients
Equipment
Method
- In a large bowl, mix boiling water with diced butter and lard until melted. Gradually add flour, mixing until a dough forms. Knead lightly, wrap in plastic wrap, and chill in refrigerator for at least one hour.
- Heat butter in a skillet over medium heat. Sauté chopped onion until caramelized, about 5-7 minutes. Combine caramelized onions with potatoes, carrots, meat, parsley, thyme, salt, and pepper for filling.
- Divide chilled dough into eight balls, rolling each into an 8-inch circle. Place filling on half of each circle, top with a small pat of butter, moisten edges, fold over, and press to seal.
- Preheat oven to 350°F (175°C). Place pasties on lined baking sheet, make small slits on top for steam release, and bake for 30 minutes. Brush tops with cream, then bake for an additional 30 minutes until golden brown.
- Remove from oven, let cool slightly for about 5 minutes, then serve warm with salad or chips.
Leave a Reply