
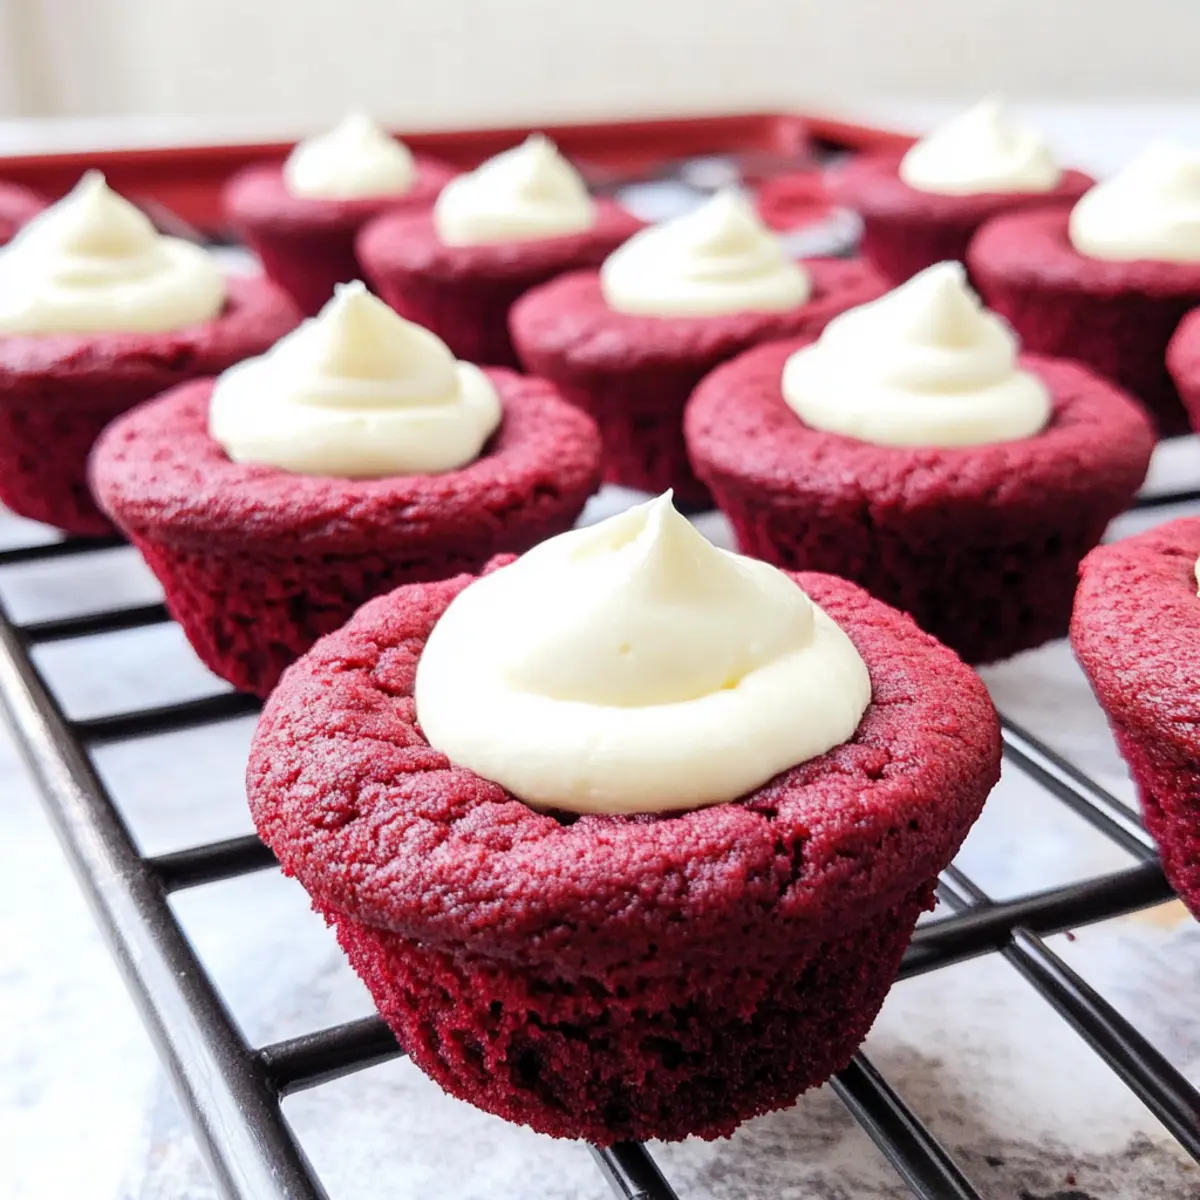
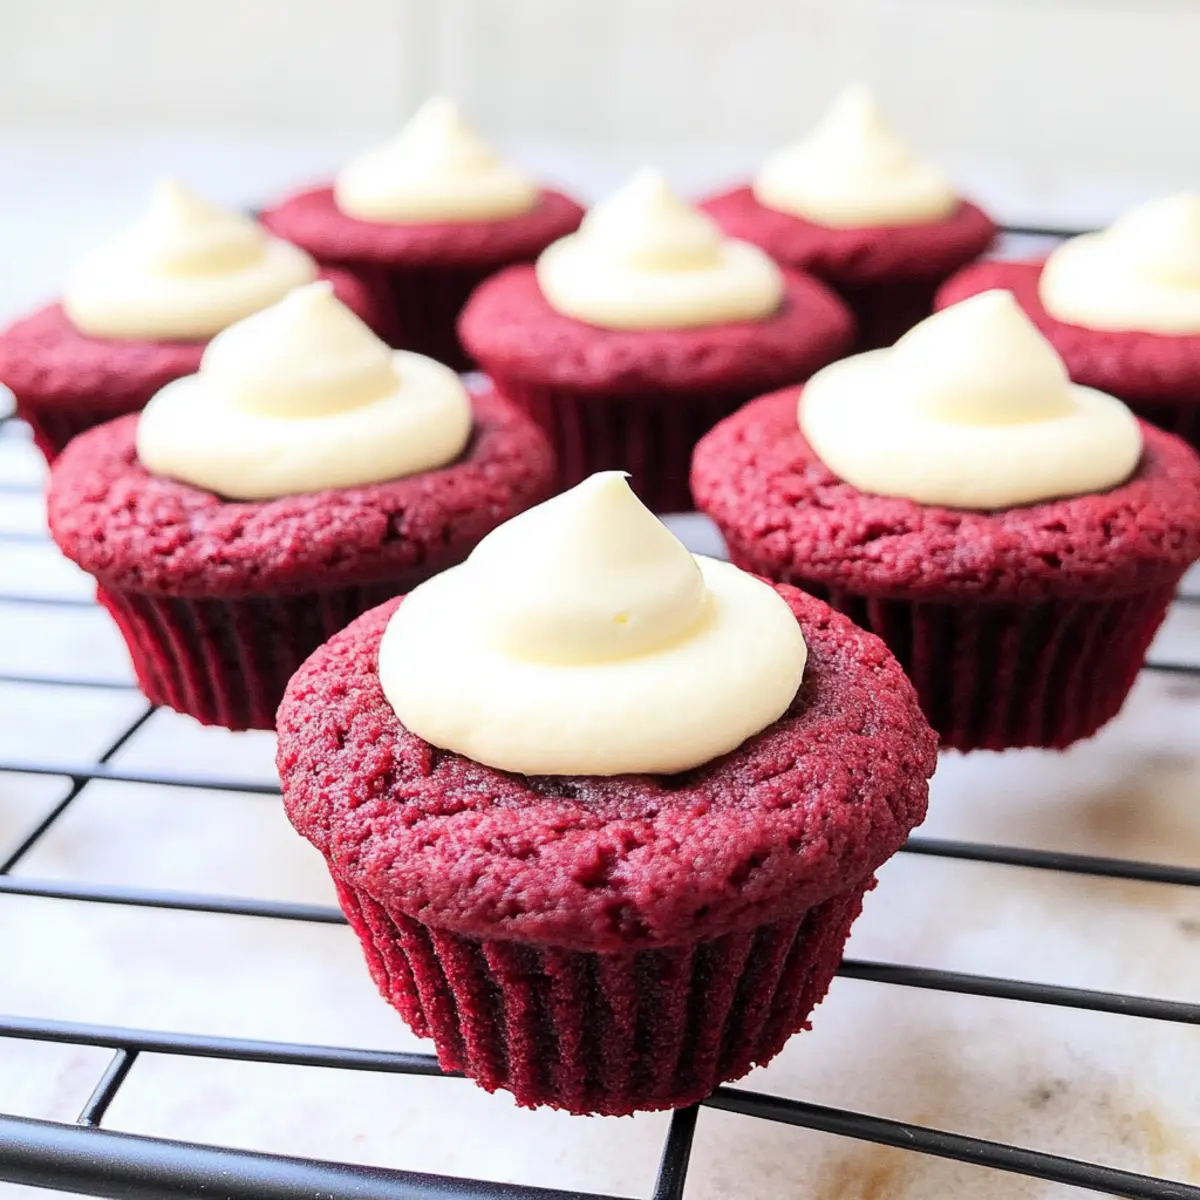
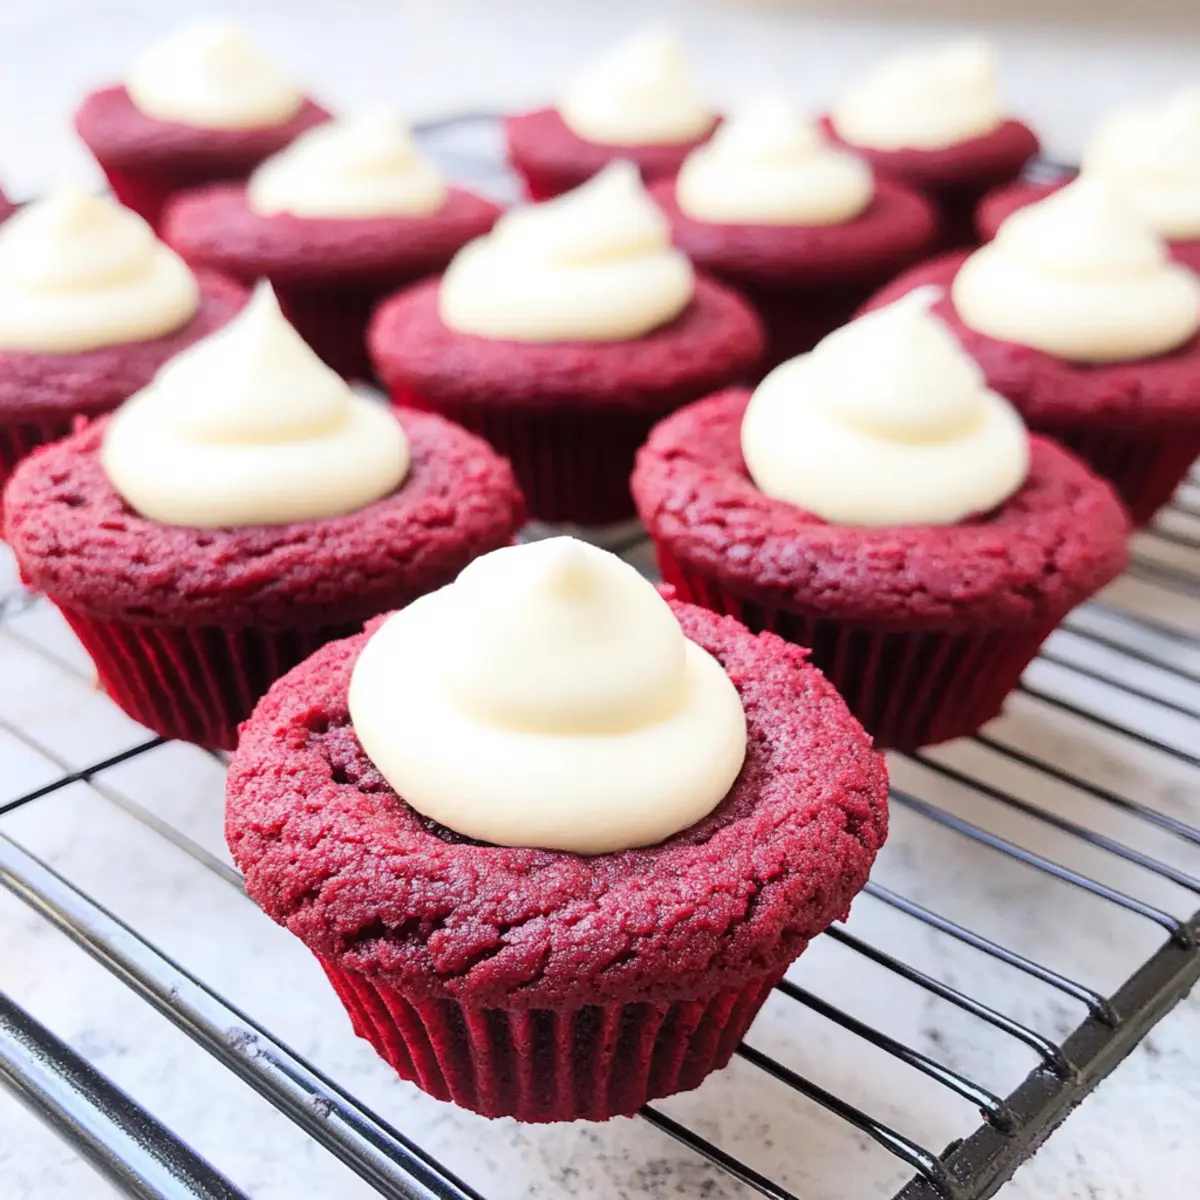
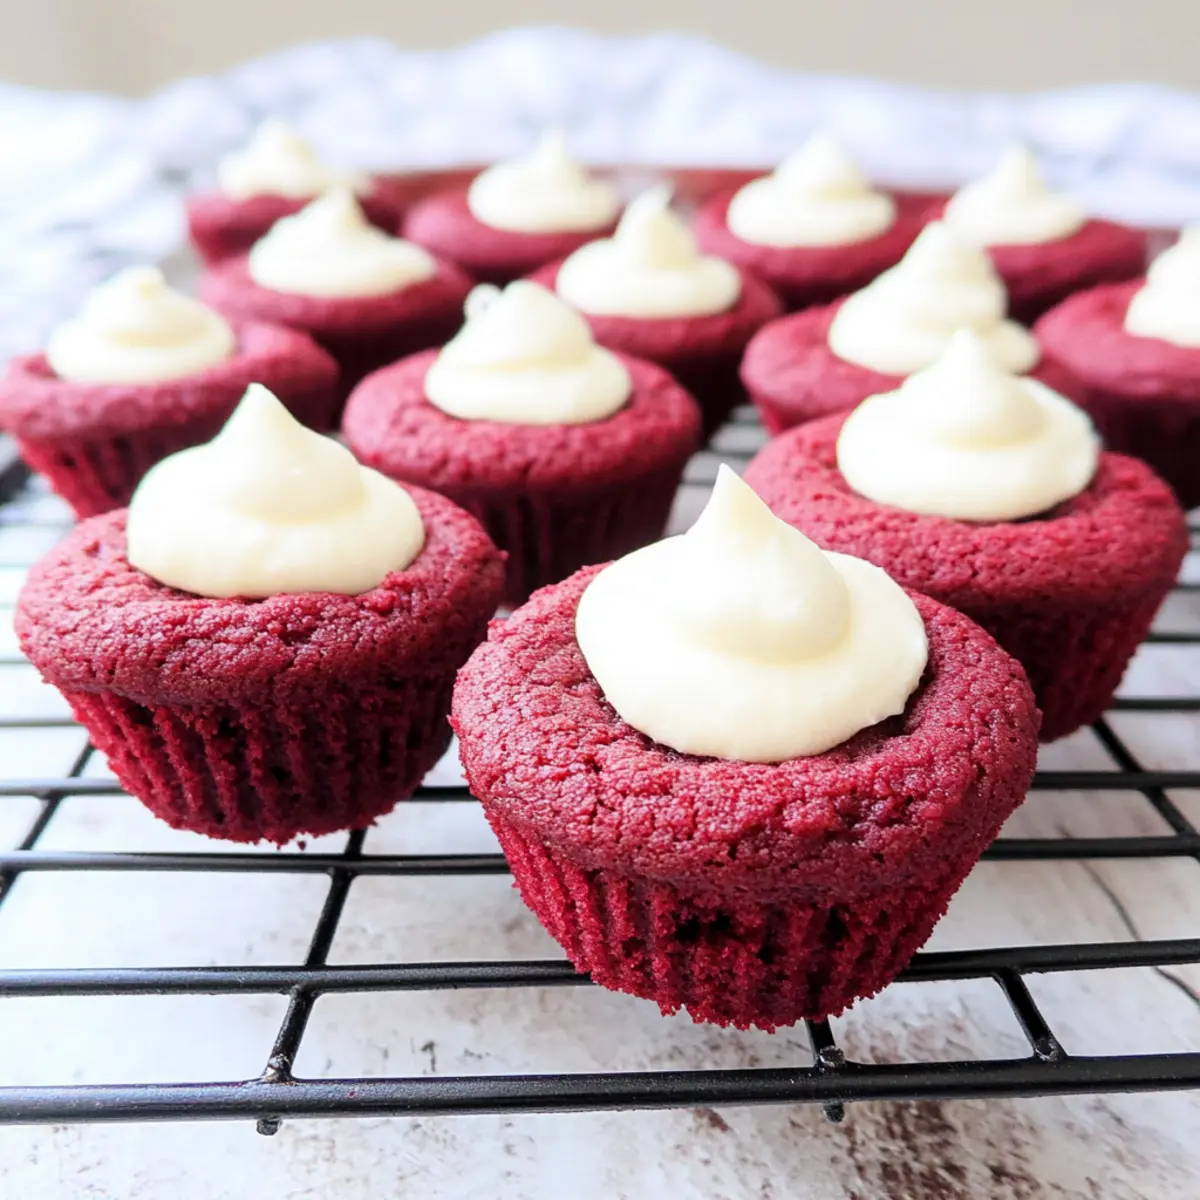
As the aroma of freshly baked cookies fills the kitchen, I can’t help but smile—there’s nothing quite like the warmth and joy that a batch of Red Velvet Cookie Cups brings to a gathering. These eye-catching little treats are a fun twist on classic favorites, not only delivering a delightful red velvet flavor but also coming to life with a luscious cream cheese frosting that’s simply irresistible. Whether you’re planning a Valentine’s Day surprise or just want to brighten a regular day, this easy baking recipe offers a soft and chewy experience that’s bound to impress family and friends alike. Plus, they make for a charming centerpiece at parties, making every celebration a little bit sweeter. Ready to dive into this delicious adventure? Let’s get baking!
Why Are These Cookie Cups So Irresistible?
Unforgettable Flavor: The rich, red velvet taste combined with velvety cream cheese frosting creates a dessert explosion that everyone adores.
Easy to Make: With straightforward steps, even beginner bakers can create these delightful treats with confidence.
Perfect for Celebrations: Ideal for special occasions like Valentine’s Day or birthdays, these cookie cups are sure to steal the show.
Versatile Twist: Feel free to experiment! Add chocolate chips or swap the frosting for vanilla buttercream for a fun variation.
Instant Crowd-Pleaser: They look stunning and taste fantastic, making them a hit at any gathering. If you’re in the mood for more sweet inspiration, check out these Twix Cookies Taste or Cinnamon Roll Cookies.
Red Velvet Cookie Cups Ingredients
• Discover the perfect components for your heavenly Red Velvet Cookie Cups!
For the Cookie Cups
- Flour – Provides structure; all-purpose flour is recommended for the best texture.
- Unsweetened Cocoa – Adds a rich chocolate flavor without added sweetness; dark cocoa gives a deeper taste.
- Kosher Salt – Enhances overall flavor; if using table salt, reduce the amount slightly.
- Baking Soda – Acts as a leavening agent for the cookie cups; make sure it’s fresh for best rising.
- Butter (softened) – Creates a rich and tender cookie; can be substituted with margarine for a dairy-free version.
- Granulated Sugar – Sweetens the cookie; consider replacing some with brown sugar for extra depth in flavor.
- Brown Sugar – Adds moisture and a slight chewiness; either light or dark brown sugar will work beautifully.
- Egg – Binds the ingredients together; for a vegan alternative, use a flax or chia egg.
- Red Food Coloring – Gives that iconic vibrant color; you can omit for a delicious chocolate cookie alternative.
- Vanilla Extract – Infuses rich flavor; use pure vanilla for the best results.
- White Vinegar – Reacts with baking soda to help the cookies rise; lemon juice can be a suitable substitute.
For the Cream Cheese Frosting
- Cream Cheese (softened) – The star of the frosting, providing a tangy flavor and creamy texture; a vegan alternative is also available.
- Powdered Sugar – Sweetens the frosting and gives it a dreamy texture; no suitable substitutes for the frosting.
- Additional Butter (softened) – Enhances creaminess; can be replaced with margarine for a dairy-free option.
Unleash the joy of baking with these delightful Red Velvet Cookie Cups and impress all who indulge!
Step‑by‑Step Instructions for Red Velvet Cookie Cups
Step 1: Preheat the Oven
Begin by preheating your oven to 350°F (175°C). This ensures that the Red Velvet Cookie Cups start baking at the right temperature, which is crucial for that soft, chewy texture. Prepare two 24-cup mini muffin tins by greasing them lightly with cooking spray or butter to prevent sticking, setting the stage for perfectly shaped cookie cups.
Step 2: Prepare the Dry Ingredients
In a small bowl, whisk together the all-purpose flour, unsweetened cocoa powder, kosher salt, and baking soda. This mixture is key to giving the cookie cups their structure and rich flavor. Set it aside, allowing the ingredients to meld while you prepare the wet components for the Red Velvet Cookie Cups.
Step 3: Cream the Butter and Sugars
In a large mixing bowl, combine the softened butter with granulated sugar and brown sugar. Use an electric mixer to cream them together on medium speed until the mixture is light and fluffy, about 3-4 minutes. This process incorporates air, providing tenderness to your cookie cups. The delightful aroma will fill your kitchen, signaling that you’re on the right path!
Step 4: Add the Wet Ingredients
To the creamed mixture, add the egg, red food coloring, vanilla extract, and white vinegar. Mix these together until fully combined, which should take about 1-2 minutes. The vibrant hue will start to emerge, creating the classic red color of your cookie cups, and the vinegar will react with the baking soda later for a perfect rise.
Step 5: Combine Wet and Dry Mixtures
Gradually add the dry ingredients to the wet mixture, mixing gently until just combined to avoid overworking the dough. Overmixing can lead to tough cookie cups, so stop as soon as you see no dry flour. The dough will be thick yet smooth, ready to be spooned into the muffin tins for baking.
Step 6: Fill the Muffin Tins
Spoon the cookie dough into the prepared mini muffin tins, filling each cup about three-quarters full. This allows enough room for the cookies to rise while baking without overflowing. Use a small cookie scoop or two spoons for even portions, ensuring your Red Velvet Cookie Cups turn out beautifully consistent in size.
Step 7: Bake the Cookie Cups
Place the muffin tins in the preheated oven and bake for 13 minutes, or until the edges are set, but the centers remain slightly soft. Keep an eye on them; they should look puffy and have a lovely sheen when ready. Remove from the oven and immediately use the end of a spatula or a spoon to create an indentation in the center of each cookie cup for the frosting.
Step 8: Cool the Cookie Cups
Allow the cookie cups to cool in the tin for 5 minutes, then carefully transfer them to wire racks to cool completely. This step is essential to ensure they hold their shape and are not too hot when you frost them. You’ll see the beautiful red color and slight crisp edges once they cool down properly.
Step 9: Prepare the Cream Cheese Frosting
For the frosting, beat together softened cream cheese and additional softened butter in a bowl until well combined and creamy. Gradually add the powdered sugar, mixing until the frosting is smooth and fluffy. Finally, introduce the vanilla extract to infuse even more flavor. This creamy frosting will crown your Red Velvet Cookie Cups in delightful sweetness.
Step 10: Frost the Cookie Cups
Using a large ziplock bag with one corner cut off, pipe the cream cheese frosting into the cooled cookie cups. Fill each indentation generously for a beautiful presentation. The combination of the soft, chewy red velvet cup and the rich, creamy frosting will create an irresistible treat that’s perfect for any occasion.
How to Store and Freeze Red Velvet Cookie Cups
Room Temperature: Store these delightful Red Velvet Cookie Cups in an airtight container at room temperature for up to 3 days to keep them fresh and tasty.
Fridge: If you want to extend their life, refrigerate the cookie cups in an airtight container for up to a week. Just serve at room temperature for the best flavor.
Freezer: To freeze, wrap the cookie cups tightly in plastic wrap and then foil, ensuring no air can enter, for up to 2 months. Thaw in the fridge before serving for a perfect treat.
Reheating: For a cozy experience, gently reheat the cookie cups in a microwave for about 10-15 seconds, ensuring they remain soft and chewy.
What to Serve with Red Velvet Cookie Cups
Savor the joy of creating a complete spread that enhances your delightful cookie cups, making every occasion extra special.
-
Creamy Vanilla Ice Cream: The cool, velvety texture of vanilla ice cream contrasts beautifully with the warm, rich cookie cups, creating a comforting dessert duo. Serve a scoop alongside for an indulgent treat that melts in your mouth.
-
Fresh Berries: The tartness of strawberries or raspberries cuts through the sweetness of the cookies and frosting, adding a refreshing balance to each bite. A simple garnish, these juicy morsels elevate your dessert presentation beautifully.
-
Chocolate Ganache: Drizzling or dolloping warm chocolate ganache on top adds a rich, decadent layer to the cookies. This irresistible combination marries well with the red velvet flavor, giving guests an extra treat to savor.
-
Sparkling Wine: A lovely glass of sparkling wine or champagne pairs perfectly for celebrations, enhancing the festive feel of your dessert table. The bubbles and acidity work wonderfully with the rich sweetness of the cookie cups.
-
Homemade Whipped Cream: Light and airy whipped cream complements the density of the cookie cups perfectly, adding a fluffy contrast. Consider a hint of vanilla or almond extract in your whipped cream to tie the flavors together.
-
Chocolate-Covered Strawberries: These elegant bites not only add a stunning visual to your dessert spread but also provide a delightful sweet contrast to the cream cheese frosting. They’re perfect for snacking between bites of your cookie cups!
-
Coffee or Espresso: A warm cup of coffee or espresso brings out the flavors in your Red Velvet Cookie Cups, creating a blissful pairing that’s perfect for intimate gatherings. The bitterness of coffee balances the sweetness beautifully.
-
Cheesecake Flavored Dip: A luscious cheesecake dip with graham cracker crumbs can serve as a delightful accompaniment. It’s a fun, interactive way to elevate the cookie experience, inviting guests to dip and enjoy.
Make Ahead Options
These Red Velvet Cookie Cups are fantastic for meal prep, allowing busy home cooks to enjoy sweet treats without the last-minute rush! You can prepare the cookie dough up to 24 hours in advance; simply cover and refrigerate it until you’re ready to bake. Additionally, the cream cheese frosting can be made up to 3 days ahead—store it in an airtight container in the fridge. When you’re ready to serve, bake the cookie cups and let them cool completely before frosting. This method not only saves time but also ensures your treats are just as delicious and fresh, making every bite a joy!
Expert Tips for Red Velvet Cookie Cups
- Room Temperature Ingredients: Ensure all ingredients are at room temperature before mixing; this will help create the perfect texture in your Red Velvet Cookie Cups.
- Avoid Overmixing: Mix the dough just until combined; overmixing can lead to tough cookie cups. Gentle folding is key for that soft, chewy texture.
- Cool Before Frosting: Let the cookie cups cool completely before frosting. This prevents the cream cheese frosting from melting and maintains its beautiful appearance.
- Indention Technique: Use the end of a spatula immediately after baking to create a deep enough indention for frosting. This helps hold the perfect swirl of cream cheese frosting in place.
- Batch Baking Tips: If baking in batches, keep the remaining dough refrigerated while the first batch cools; this keeps the dough manageable and helps maintain a consistent texture.
Red Velvet Cookie Cups Variations
Feel free to get creative with these delicious Red Velvet Cookie Cups—there’s plenty of room for personalization!
- Natural Coloring: Replace red food coloring with all-natural beet juice for a vibrant, healthier hue. It not only colors but adds a hint of earthiness too.
- Nutty Delight: Incorporate half a cup of chopped walnuts or pecans into the dough for a delightful crunch. The nutty flavor pairs beautifully with red velvet!
- Chocolate Chips: Add a handful of chocolate chips into the cookie dough for an extra layer of sweetness and texture. This irresistible combination will have everyone asking for seconds.
- Coconut Cream Frosting: Swap out cream cheese frosting for coconut cream frosting for a tropical twist. Simply whip coconut cream until fluffy and sweeten as desired.
- Vegan Option: Use a flax or chia egg, along with vegan butter and cream cheese, to create a fully plant-based treat. Your vegan friends will love joining in the indulgence!
- Fruity Burst: Mix in dried cranberries or cherries for a fruity accent that complements the rich chocolate flavor. They add a pop of color and a touch of tartness!
- Spicy Kick: Add a dash of cayenne pepper or cinnamon to the cookie dough for a warm touch. This subtle heat offers an unexpected and delightful contrast!
- Different Frostings: Try topping with a fluffy whipped cream or a vanilla buttercream instead of cream cheese frosting for a light and airy dessert that’s equally delightful.
If you’re looking for more inspiration, you might enjoy making Cinnamon Roll Cookies or try your hand at 3-Ingredient Easy Sugar Cookies for another easy baking adventure!
Red Velvet Cookie Cups Recipe FAQs
How do I choose the best ingredients for Red Velvet Cookie Cups?
Absolutely! It’s essential to select high-quality ingredients for the best flavor. Use fresh all-purpose flour, unsweetened cocoa powder, and fresh baking soda to ensure proper rising and taste. For the butter, make sure it’s softened at room temperature, as this helps create the right texture. When it comes to the red food coloring, a gel or liquid food coloring works well; opt for brand name products for vibrant results!
How should I store my Red Velvet Cookie Cups?
These delicious cookie cups can be stored in an airtight container at room temperature for up to 3 days. If you want to keep them longer, refrigerate them for up to a week. Remember to let them sit out for a bit before serving; that way, you’ll be ready to treat your family or guests to their delightful texture!
Can I freeze the Red Velvet Cookie Cups?
The more, the merrier! You can absolutely freeze these cookie cups. To do so, wrap each one tightly in plastic wrap and then in aluminum foil, ensuring no air enters. This will help them stay fresh for up to 2 months. When you’re ready to enjoy them, simply thaw them in the fridge overnight or at room temperature for a lovely, soft treat.
What should I do if my cookie cups turn out flat?
If your Red Velvet Cookie Cups are flat, don’t worry—it happens! First, double-check that your baking soda is fresh; old baking soda won’t give the cookies the lift they need. Additionally, ensure that you didn’t overmix the dough, as this can lead to dense cookies. Also, avoid too much butter melting out during baking by not skipping the chilling process for the dough if it’s too soft.
Are Red Velvet Cookie Cups suitable for people with dietary restrictions?
Yes, indeed! You can easily adapt this recipe. For a dairy-free version, substitute the butter with margarine or a non-dairy alternative and use a vegan cream cheese for the frosting. If you’re looking for a vegan option altogether, replace the egg with a flax egg (1 tablespoon of ground flaxseed mixed with 3 tablespoons of water, let it sit until thickened) and follow the other substitutions. Always check for any allergens related to specific ingredients!
Can pets safely eat Red Velvet Cookie Cups?
It’s best not to share these cookie cups with your pets. Ingredients like chocolate (from the cocoa) and sugar aren’t good for them. If you want to treat your furry friends, consider making them a pet-safe treat instead!
Irresistible Red Velvet Cookie Cups with Creamy Frosting
Ingredients
Equipment
Method
- Preheat the oven to 350°F (175°C) and grease two 24-cup mini muffin tins.
- In a bowl, whisk together flour, cocoa powder, salt, and baking soda.
- Cream softened butter with granulated and brown sugar until light and fluffy.
- Add egg, red food coloring, vanilla extract, and vinegar to the mixture and mix until combined.
- Gradually add dry ingredients to the wet mixture until just combined.
- Spoon the dough into muffin tins, filling each about three-quarters full.
- Bake for 13 minutes or until edges are set and centers are soft; create an indentation in the center.
- Cool in the tin for 5 minutes before transferring to wire racks to cool completely.
- Beat cream cheese and butter until creamy, then mix in powdered sugar and vanilla extract.
- Pipe the cream cheese frosting into the cooled cookie cups and enjoy!
Leave a Reply