
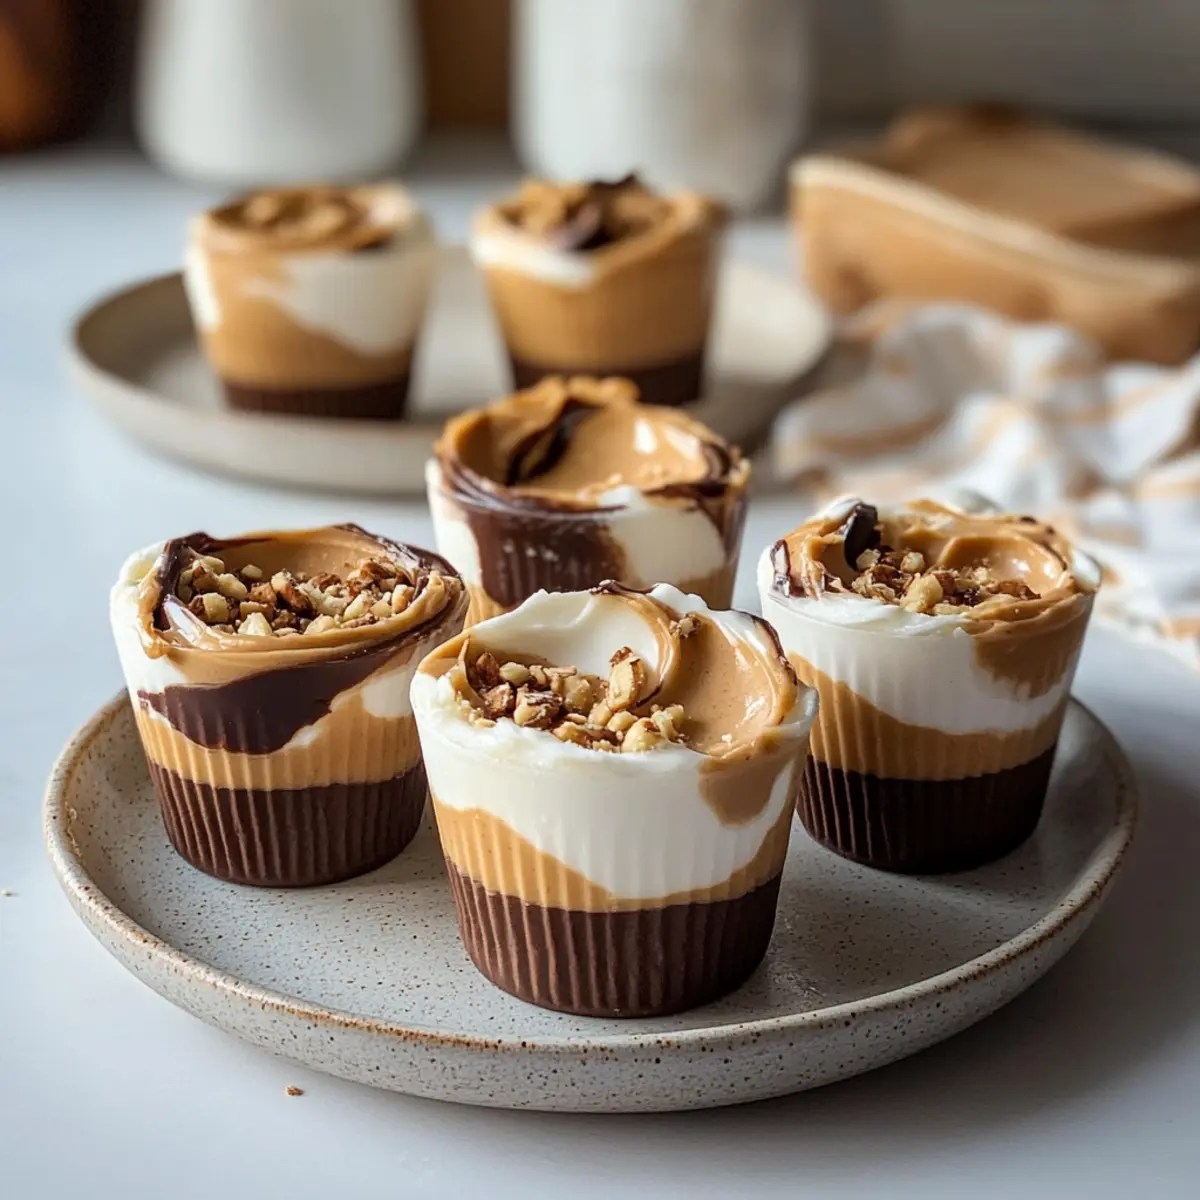
Standing in my kitchen on a sweltering summer afternoon, I reached for something simple yet satisfying to cool me down. That’s when I whipped up these Frozen Peanut Butter Greek Yogurt Cups—a delicious blend of tangy Greek yogurt and creamy peanut butter that’s not just easy to make but also a protein-packed treat. Whether you’re looking for a guilt-free dessert or a quick pick-me-up, the customizable toppings let you get creative, making each bite your own. As the sun beat down outside, these little cups reminded me that healthy snacking doesn’t have to be boring. So, why not take a moment to elevate your snacking game? Curious about how to create these delightful cups that will quickly become your go-to summer treat? Let’s dive in!
Why Make Peanut Butter Greek Yogurt Cups?
Customizable flavors: Mix and match toppings to suit your taste—try crushed nuts or a sprinkle of cocoa!
Quick and Easy: With no baking required and just a few ingredients, whipping these up is a breeze, perfect for busy days.
Protein-Packed: They offer a healthy dose of protein from Greek yogurt and peanut butter, fueling your body and curbing cravings.
Perfect for All Occasions: Whether you need a post-workout snack or a refreshing dessert on a hot day, these cups fit the bill!
For a fun twist, consider serving them alongside some Pudding Cookie Cups or mix in a bit of flavors inspired by our Cajun Seafood Boil to bring excitement to your summer meals. Enjoy this delicious treat and elevate your snack game today!
Peanut Butter Greek Yogurt Cups Ingredients
For the Yogurt Base
• Greek Yogurt – Offers creaminess and a tangy flavor; substitute with dairy-free yogurt for a vegan treat.
• Peanut Butter – Adds rich flavor and protein; try almond or sunflower butter for different tastes and dietary needs.
• Honey or Maple Syrup – Provides natural sweetness; agave syrup is a great vegan alternative.
For the Optional Toppings
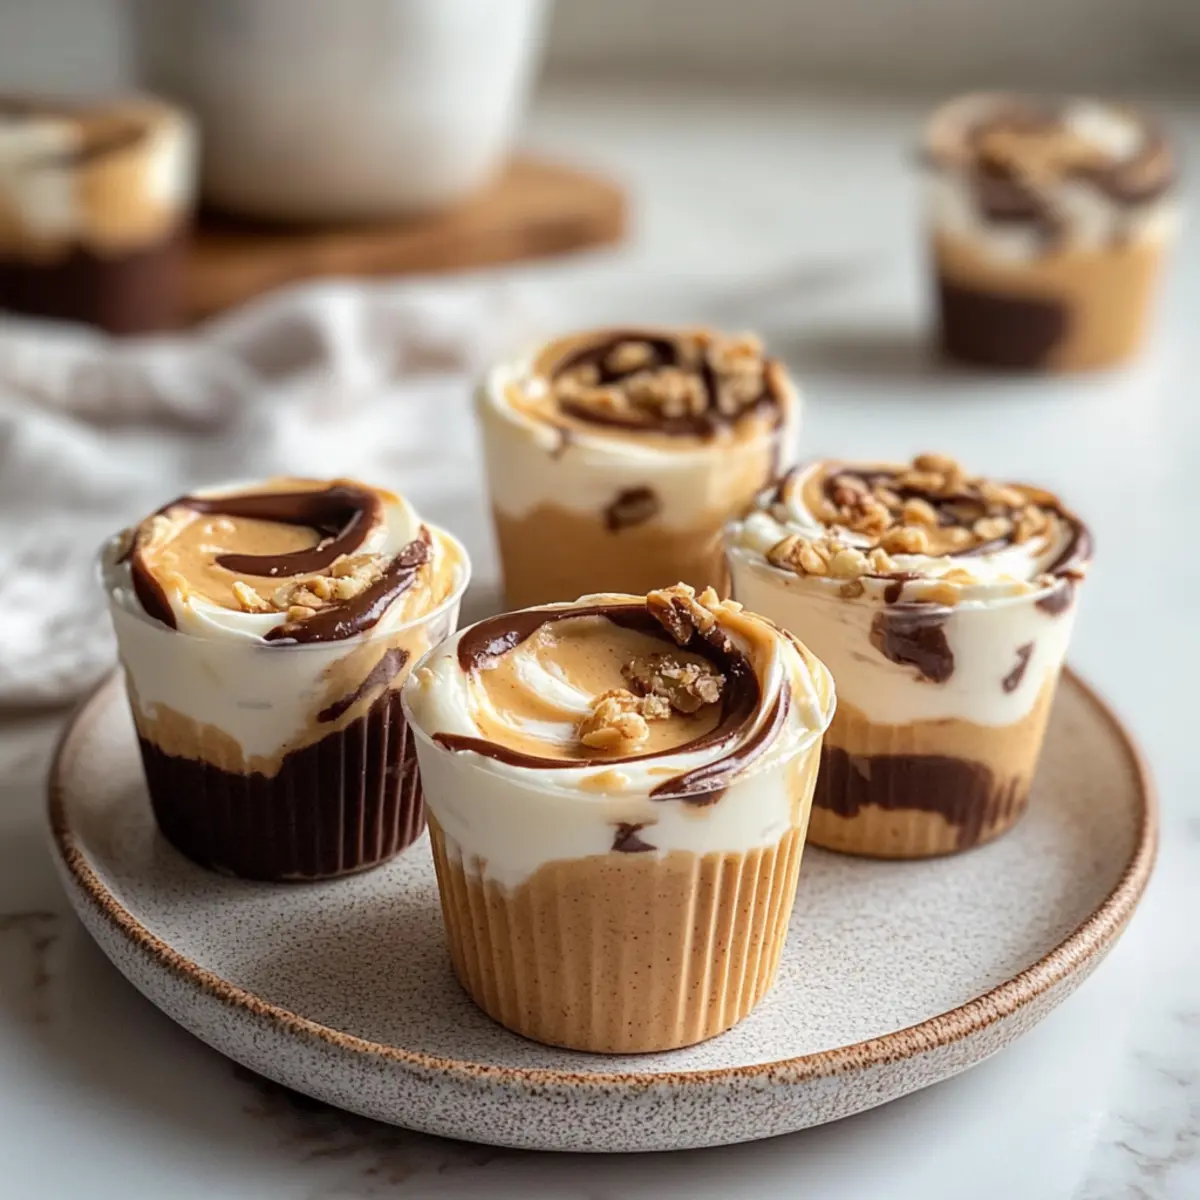
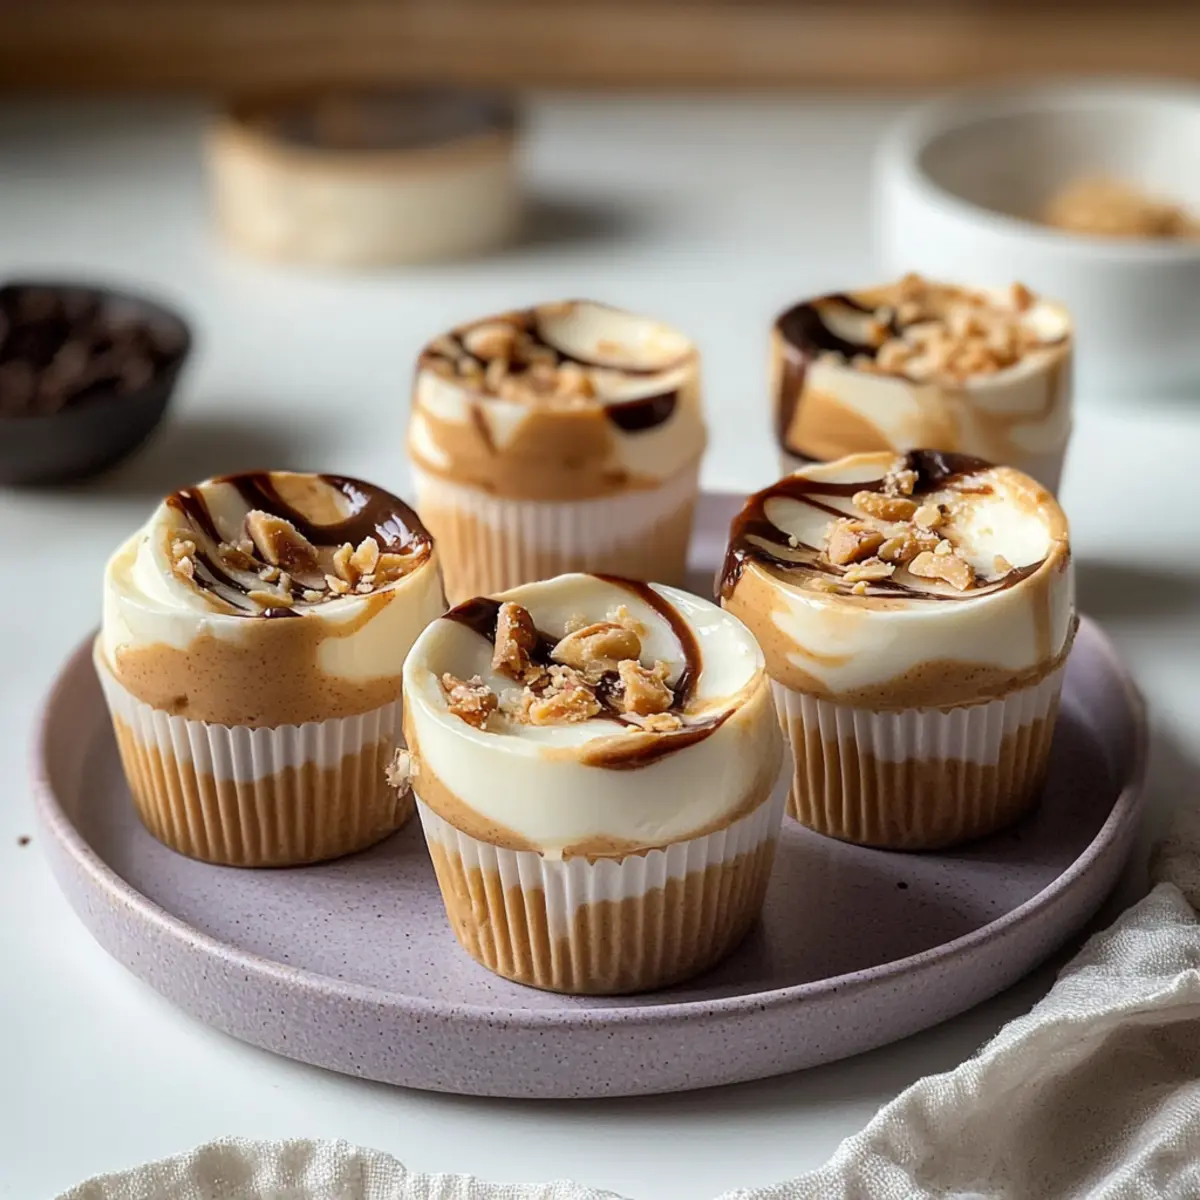
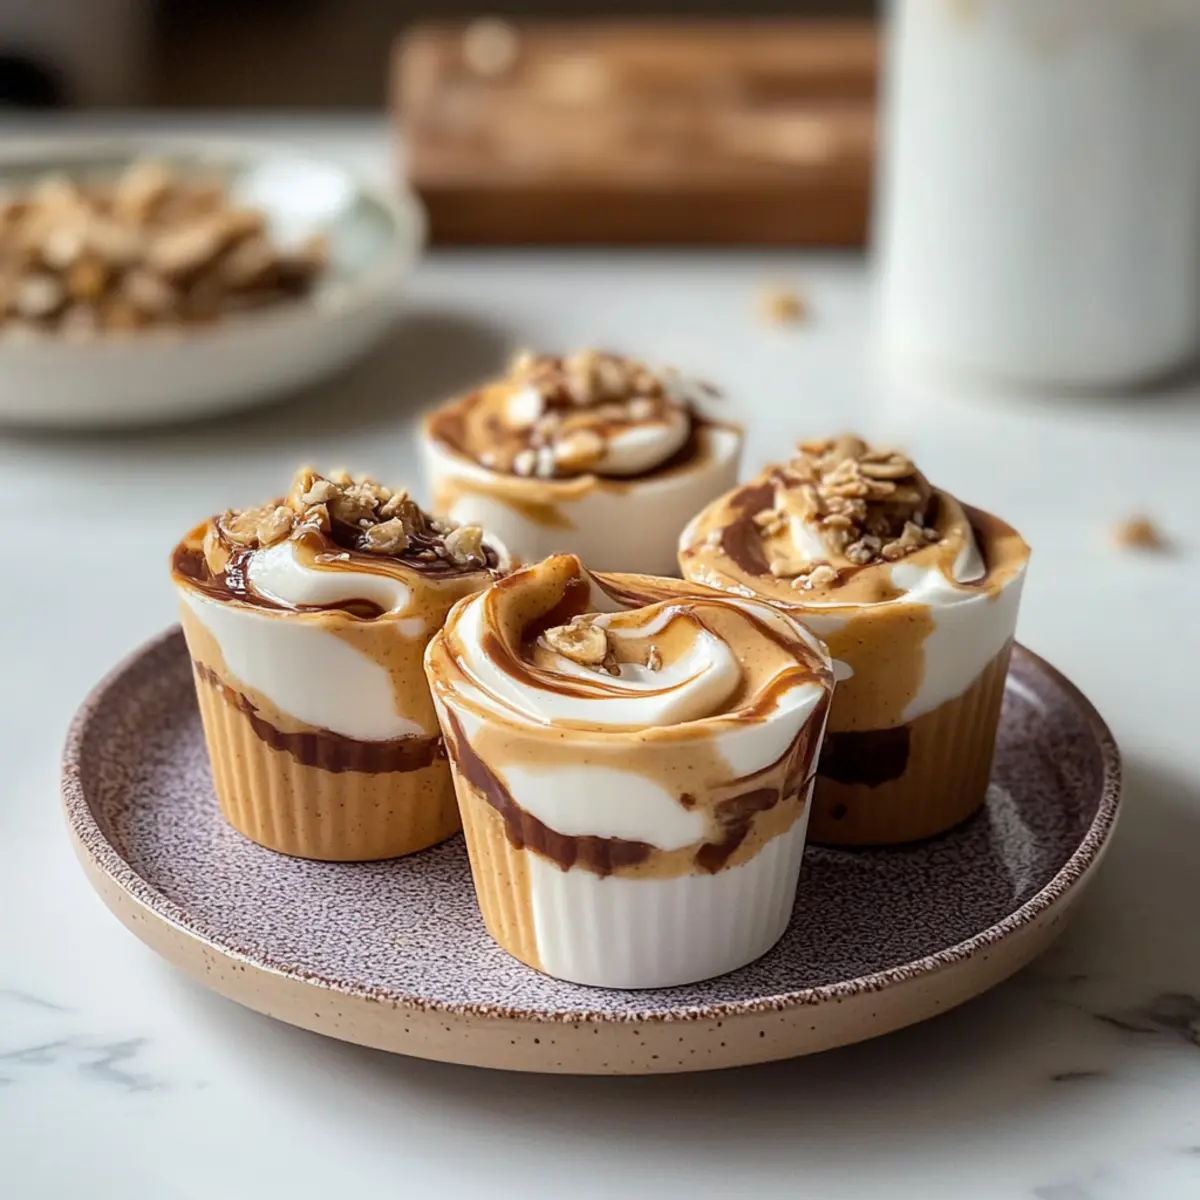
• Crushed Nuts – Adds a delightful crunch; mix in your favorites for added texture.
• Granola – Enhances flavor and crunch—add before freezing to retain the crispiness.
• Cocoa Powder – A pinch can bring a chocolatey twist to your peanut butter Greek yogurt cups!
Get ready to enjoy a healthier snack that’s both delicious and customizable!
Step‑by‑Step Instructions for Peanut Butter Greek Yogurt Cups
Step 1: Mix the Base
In a medium-sized bowl, combine 1 cup of creamy Greek yogurt and 1/2 cup of peanut butter. Stir well with a spatula until the mixture is smooth and fully combined. This should take about 2-3 minutes. Add in 2 tablespoons of honey or maple syrup, and blend again until cohesive. The end result should be a luscious, creamy base ready for your Peanut Butter Greek Yogurt Cups.
Step 2: Prepare the Cups
Gather your silicone molds or paper cups, preparing each one by lightly greasing them if using paper. Using a spoon, carefully fill each cup with the peanut butter Greek yogurt mixture, ensuring an even distribution. Aim for about three-quarters full to allow space for toppings. Smooth the tops with your spatula for an appealing finish, making them look irresistible even before freezing.
Step 3: Add Toppings
If desired, sprinkle your choice of toppings over the yogurt mixture in each cup. Consider using crushed nuts, granola, or a dusting of cocoa powder to personalize your Peanut Butter Greek Yogurt Cups. Press the toppings gently into the mixture to ensure they adhere and won’t fall off during freezing. This step is crucial for adding texture and flavor, enhancing these delightful treats.
Step 4: Freeze the Cups
Carefully place the filled molds into the freezer. Allow them to freeze for at least 4 hours, or until completely solid. Check by lightly pressing the top of one cup; it should feel rock hard and maintain its shape. The freezing process is what transforms your creamy mixture into a delightful frozen treat, perfect for a hot day.
Step 5: Remove from Molds
Once the cups are correctly frozen, take them out of the freezer. If using silicone molds, gently flex them to release the cups; if using paper cups, let them sit at room temperature for about 5 minutes. This will help the cups slip out easily. Reveal those beautifully formed Peanut Butter Greek Yogurt Cups, ready to enjoy!
Step 6: Store the Cups
To maintain freshness, transfer the cups into an airtight container and store them back in the freezer. They will last for up to one month, although I’m sure they’ll be too delicious to last that long! Whenever you’re ready for a quick and healthy snack or dessert, simply pull one from the freezer and enjoy the creamy peanut butter goodness.
Storage Tips for Peanut Butter Greek Yogurt Cups
Fridge: If you plan to consume them within a few days, store the cups in the fridge, covered, for up to 3 days.
Freezer: For longer storage, keep the cups in an airtight container in the freezer. They will maintain their best quality for up to one month.
Removal: If you ever struggle to remove them from their molds, let the cups sit at room temperature for a few minutes to soften slightly, allowing for easy release.
Enjoying Later: To savor these Peanut Butter Greek Yogurt Cups, simply take them out of the freezer and enjoy straight away, or let them thaw for a bit for a softer texture.
What to Serve with Frozen Peanut Butter Greek Yogurt Cups
Transform your delightful dessert into a full meal with these wonderful pairing ideas that elevate the enjoyment of your healthy treat.
-
Fresh Fruit Salad: A medley of seasonal fruits adds brightness and freshness, balancing the creaminess of the yogurt cups for a refreshing bite.
-
Nutty Granola Bars: These bars provide an extra crunch and chewy texture, perfect for dipping into yogurt cups for a delightful snack combination.
-
Chocolate Protein Smoothie: Blend together some cocoa, protein powder, and almond milk for a creamy dip that perfectly complements the peanut butter flavor.
-
Chilled Herbal Tea: A refreshing iced herbal tea with hibiscus or mint brings a soothing element to your dessert experience, ideal for warm afternoons.
-
Mini Rice Cakes: Light and crunchy, mini rice cakes serve as the perfect vessel for enjoying the yogurt cups—a fun and satisfying way to add some crunch!
-
Yogurt Parfait: Layer additional Greek yogurt and fruits in a glass with your homemade yogurt cups for a beautiful and indulgent dessert that impresses.
-
Dark Chocolate Dipped Pretzels: The sweet and salty combination heightens the enjoyment of your yogurt cups, creating a delightful contrast in flavors.
-
Homemade Whipped Cream: A dollop of lightly sweetened whipped cream can turn your cups into a more decadent dessert, making every bite feel like a special treat.
Make Ahead Options
These Frozen Peanut Butter Greek Yogurt Cups are perfect for meal prep enthusiasts! You can mix the yogurt base (1 cup of Greek yogurt, 1/2 cup of peanut butter, and 2 tablespoons of honey or maple syrup) up to 24 hours in advance; simply store it in the refrigerator until you’re ready to scoop it into molds. The optional toppings, such as crushed nuts or granola, can also be prepped ahead by keeping them in separate containers to maintain their freshness and crunch. Once you’re ready to enjoy, just fill your cups, freeze for at least 4 hours, and your healthy snack is ready to satisfy your cravings with minimal effort!
Helpful Tricks for Peanut Butter Greek Yogurt Cups
-
Mix Thoroughly: Ensure the yogurt and peanut butter are blended well to prevent any separation during freezing, which helps achieve a smooth texture.
-
Cup Preparation: If using paper cups, lightly grease them to make removal easier. This trick saves time and avoids a messy presentation.
-
Freezing Time: Be patient with the freezing process! Let the cups freeze for at least 4 hours. Undercooking can lead to a soft, unformed treat.
-
Toppings Mastery: Sprinkle toppings lightly on top after filling to prevent them from sinking. For extra crunch, add toppings before freezing!
-
Temperature Check: Before removing from molds, let the cups sit out for a few minutes. This helps them release easily and looks great when served.
Remember, these Peanut Butter Greek Yogurt Cups are customizable, so feel free to experiment with different toppings and flavors!
Peanut Butter Greek Yogurt Cups Variations
Feel free to get creative and make these Peanut Butter Greek Yogurt Cups truly yours with simple swaps and exciting twists!
-
Dairy-Free: Substitute Greek yogurt with coconut yogurt for a creamy, vegan treat that still delivers on flavor.
-
Nut-Free: Use sunflower butter instead of peanut butter for a nut-free option—it’s just as rich and delicious!
-
Sweetness Level: Scale back on sweeteners or use mashed bananas to naturally sweeten for a healthier alternative.
-
Flavor Boost: Add a teaspoon of vanilla extract to the mix for a hint of warmth and a comforting aroma with every bite.
-
Fruity Finish: Top with fresh berries or sliced bananas for an extra burst of freshness and natural sweetness—perfect for summertime!
-
Chocolate Lover’s Twist: Mix in cocoa powder for a chocolate variation and top with mini chocolate chips for a satisfying crunch.
-
Spicy Kick: A dash of cayenne pepper can elevate the flavor profile, perfect for those who love a little heat in their sweets!
-
Crunchy Delight: Use crispy rice cereal instead of granola for an exciting crunch that adds a unique texture to your treats.
If you’re looking for more ways to indulge, consider mixing in flavors inspired by our delightful Chocolate Peanut Butter treat or try a nostalgic twist with some crushed ingredients from our Cowboy Butter Chicken recipe. The possibilities are endless!
Peanut Butter Greek Yogurt Cups Recipe FAQs
What type of yogurt is best for Peanut Butter Greek Yogurt Cups?
Absolutely, Greek yogurt is the star of this recipe! It gives a rich and creamy texture that you won’t get from regular yogurt. If you need a dairy-free option, you can use coconut yogurt or any plant-based yogurt alternative that you prefer.
How should I store my Peanut Butter Greek Yogurt Cups?
For optimal freshness, store the cups in an airtight container in the freezer where they’ll last up to one month. If you plan to eat them within a few days, you can cover and refrigerate them for up to 3 days.
Can I freeze these cups for a long time?
Yes! You can freeze your Peanut Butter Greek Yogurt Cups for up to 3 months. Just make sure they’re in an airtight container to prevent freezer burn. When you’re ready to enjoy, take one out and let it sit for a couple of minutes—this makes removal from the container easier!
What do I do if my cups are difficult to remove from the molds?
If you find yourself struggling, no worries! Let the cups sit at room temperature for about 5 minutes. This softens the edges slightly, making it much easier to pop them out. If you used paper cups, lightly greasing them beforehand can also help avoid this issue.
Are there any dietary considerations I should keep in mind?
Definitely! These cups can easily accommodate various dietary requirements. For vegan options, substitute Greek yogurt with dairy-free yogurt and use agave syrup instead of honey. Always keep an eye on nut allergies, so feel free to replace peanut butter with sunflower butter or another nut-free option.
Can I customize the toppings on my Peanut Butter Greek Yogurt Cups?
The more the merrier! You can mix in fun toppings like crushed nuts, granola, or even a sprinkle of cocoa powder. The key is to add toppings before freezing and gently press them into the mixture, ensuring they stick when you enjoy your refreshing treat.
Healthy Peanut Butter Greek Yogurt Cups You’ll Love
Ingredients
Equipment
Method
- In a medium-sized bowl, combine 1 cup of creamy Greek yogurt and 1/2 cup of peanut butter. Stir well with a spatula until smooth, about 2-3 minutes. Add in 2 tablespoons of honey or maple syrup and blend until cohesive.
- Gather your silicone molds or paper cups. Lightly grease them if using paper. Fill each cup with the mixture, about three-quarters full, and smooth the tops.
- Sprinkle toppings of choice over the yogurt mixture in each cup, pressing gently to adhere.
- Place the filled molds into the freezer. Freeze for at least 4 hours until completely solid.
- To remove from molds, flex silicone molds gently or let paper cups sit at room temperature for 5 minutes.
- Transfer cups into an airtight container and store back in the freezer, lasting up to one month.
Leave a Reply