
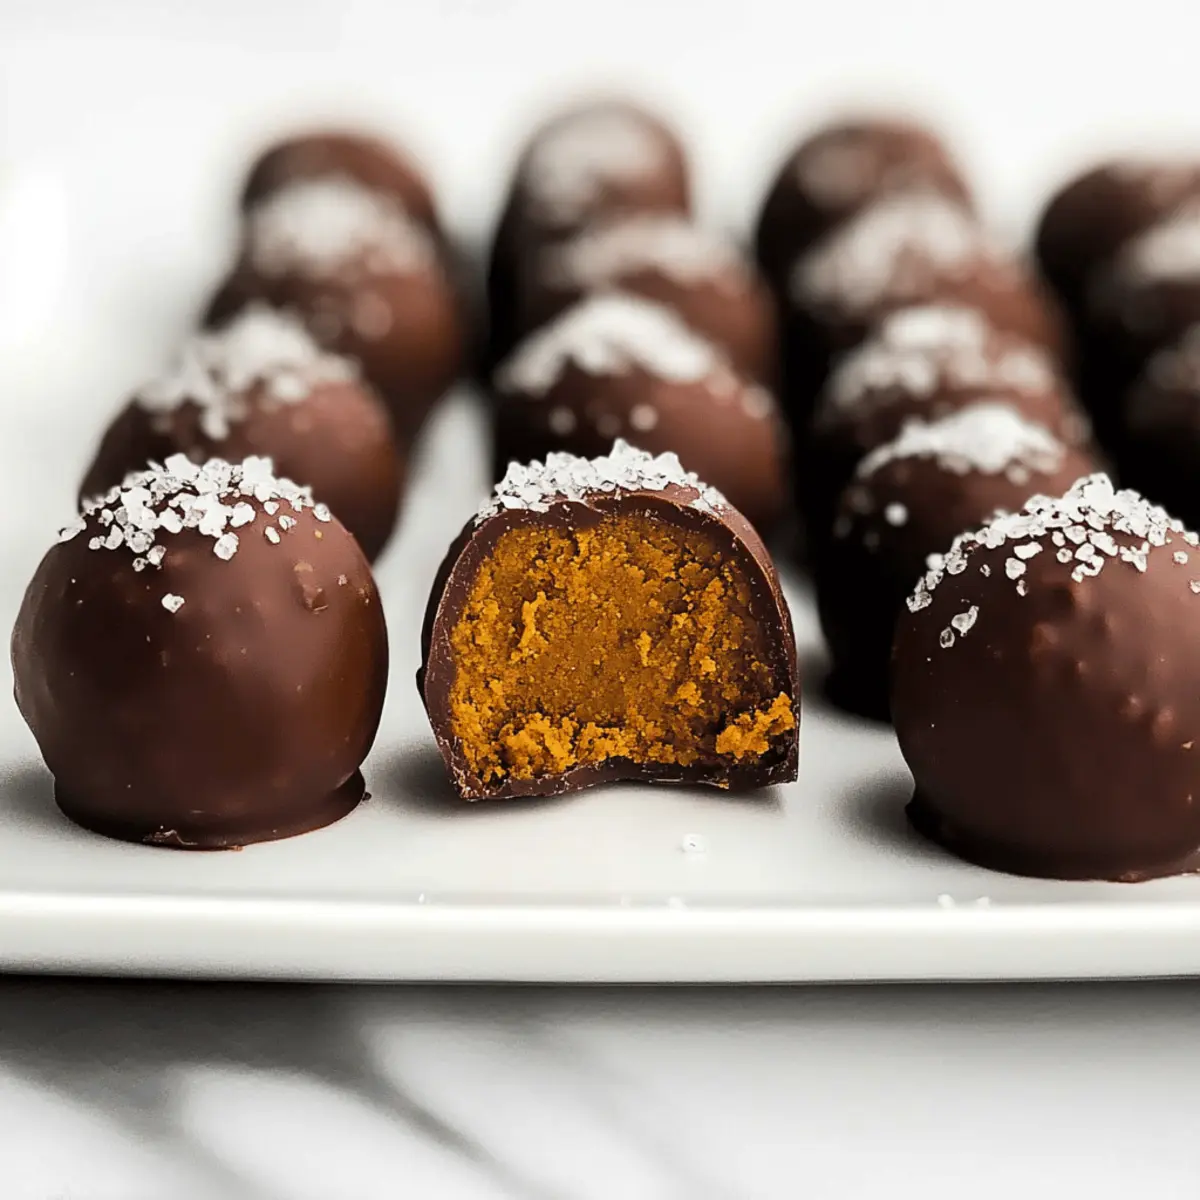
As I reached for my favorite spice jar, the warm aroma of nutmeg and cinnamon transported me to cozy autumn days filled with laughter and pumpkin patches. Today, I’m thrilled to share my recipe for Healthy Pumpkin Truffles—a treat that captures all the joy of fall while being a guilt-free indulgence. These delectable bites are not only vegan and gluten-free, but they also deliver a delightful flavor reminiscent of miniature pumpkin pies, all wrapped in rich dark chocolate. With just a few simple ingredients, you can whip up these truffles in no time, making them a perfect addition to any gathering or a satisfying snack for yourself. Curious about how to make these scrumptious morsels that are both satisfying and wholesome? Let’s dive into the recipe!
Why are Healthy Pumpkin Truffles amazing?
Decadent flavor, but without the guilt! These pumpkin truffles provide the perfect balance of rich chocolate and spiced pumpkin goodness that you crave during fall. Quick and easy, you can whip up a batch in under 30 minutes, making them ideal for busy days. Versatile options allow you to experiment with sweeteners and flours, tailoring them to your dietary needs. Crowd-pleaser alert! They’re perfect for any gathering, sure to impress friends and family alike. Storage-friendly, these truffles can last up to 5 days in the fridge, so you can enjoy them throughout the week!
Healthy Pumpkin Truffles Ingredients
For the Truffle Base
- Pumpkin Purée – must use pure pumpkin to ensure rich moisture and flavor.
- Homemade Pumpkin Spice – offers warm spices that elevate the taste, making it feel just like fall!
- Salt – a pinch is essential to balance the sweetness in these healthy pumpkin truffles.
- Liquid Stevia – perfect for a no-calorie sweetener; adjust to your taste preferences.
- Oat Flour – provides structure; it’s important to measure accurately to avoid a dry mixture.
For the Coating
- Dark Chocolate – recommended quality bars melt smoothly for the best truffle experience.
- Flaky Sea Salt (optional) – a sprinkle adds a lovely contrast and enhances the overall flavor!
Step‑by‑Step Instructions for Healthy Pumpkin Truffles
Step 1: Prepare the Baking Tray
Start by lining a baking tray with wax or parchment paper to prevent the truffles from sticking. This method provides a smooth surface for the truffles once dipped in chocolate. Make sure the paper is secure and lays flat to ensure easy placement of the finished treats.
Step 2: Mix the Truffle Base
In a medium-sized mixing bowl, combine pumpkin purée, homemade pumpkin spice, salt, and liquid stevia. Stir until the mixture is smooth and well-blended. Gradually add the oat flour into the mixture, stirring gently until it’s just combined. You want a pliable dough consistency that can easily be formed into spheres without being too sticky.
Step 3: Form the Truffles
Using your hands, roll the mixture into bite-sized balls, approximately one inch in diameter. You should yield about 24 truffles from this recipe. To prevent the mixture from sticking to your hands, lightly coat them with neutral oil before rolling the balls. This technique keeps your hands clean and your truffles perfectly round.
Step 4: Melt the Dark Chocolate
In a microwave-safe bowl, add high-quality dark chocolate and melt it at medium power in 30-second intervals. Stir the chocolate after each interval until it’s completely smooth and melted, which should take about 1-2 minutes in total. Keep the melted chocolate warm as you dip the truffles, ensuring a smooth coating that adheres well.
Step 5: Dip in Chocolate
Take each truffle and dip it into the melted dark chocolate using two forks for the best coverage. Swirl it around to ensure an even coating, then gently lift it out, allowing excess chocolate to drip off. Place the chocolate-covered truffles on the prepared baking tray, ensuring they don’t touch, creating space for drying.
Step 6: Garnish and Chill
Before the chocolate sets, lightly sprinkle the top of each truffle with flaky sea salt for an added burst of flavor. Once all truffles are coated and garnished, refrigerate them for about 30 minutes, or until the chocolate is firm to the touch, securing the delicious outer layer that wraps your Healthy Pumpkin Truffles.
What to Serve with Healthy Pumpkin Truffles?
These delightful truffles are not only a treat on their own but can also elevate your fall gatherings with perfect pairings.
-
Creamy Coconut Whipped Cream: Light and fluffy, this adds a rich and tropical contrast to the spiced pumpkin flavor in the truffles.
-
Chai Tea Latte: The warm spices in chai beautifully echo the truffles, creating a cozy, comforting drink to enjoy together.
-
Apple Slices with Almond Butter: Crisp apple slices provide a crunchy texture and sweet freshness that complements the smoothness of the truffles.
-
Roasted Pumpkin Soup: A savory soup can balance out the sweetness of the truffles, making for a well-rounded fall-inspired meal.
-
Dark Chocolate Hot Cocoa: Rich and luxurious, this drink enhances the chocolatey experience while keeping everything snug and inviting.
-
Spiced Nut Mix: A crunchy blend of nuts spiced with cinnamon and salt adds an enjoyable texture and subtle flavor contrast to the soft truffles.
-
Ginger Cookies: These will bring an extra zing of spice, harmonizing beautifully with the pumpkin truffles for a complete holiday-themed treat.
-
Vanilla Almond Milkshake: A creamy shake with a hint of vanilla and almond gives a sweet, cold accompaniment, ideal for those seeking a cool treat.
Make Ahead Options
These Healthy Pumpkin Truffles are perfect for meal prep enthusiasts! You can mix the truffle base up to 24 hours in advance, covering it tightly and refrigerating, which allows the flavors to deepen beautifully. Once you’re ready to serve, simply roll the mixture into balls and dip them in melted dark chocolate. The truffles can also be fully assembled and stored in the refrigerator for up to 5 days in an airtight container, ensuring they remain just as delicious. Just remember to sprinkle with flaky sea salt right before serving for that extra touch of flavor. Meal prep has never tasted so good!
How to Store and Freeze Healthy Pumpkin Truffles
Fridge: Store your healthy pumpkin truffles in an airtight container in the refrigerator for up to 5 days. This keeps them fresh and delicious, perfect for snacking throughout the week.
Room Temperature: If you’re planning to enjoy the truffles within a day, you can leave them uncovered at room temperature. However, be cautious of heat, as it may melt the chocolate coating.
Freezer: For longer storage, freeze the truffles in a single layer on a parchment-lined tray until solid. Then, transfer them to an airtight container or a freezer-safe bag for up to 3 months. Thaw in the fridge before enjoying.
Reheating: There’s no need to reheat these truffles! Enjoy them straight from the fridge, or let them sit at room temperature for a few minutes to soften slightly before indulging in your healthy pumpkin truffles.
Expert Tips for Healthy Pumpkin Truffles
-
Measure Flour Accurately: Measuring oat flour with precision prevents a dry mixture; too much flour results in crumbly truffles. Use a kitchen scale for the best results.
-
Warm Chocolate: Keeping melted dark chocolate warm during the dipping process is crucial; consider using a warming plate to maintain the ideal temperature for smooth coating.
-
Avoid Chip Stabilizers: Steer clear of chocolate chips for coating; they often contain stabilizers that prevent smooth melting. Use quality chocolate bars instead for a better texture.
-
Uniform Size: For evenly-sized truffles, flatten the filling in the bowl before cutting it into sections; this ensures uniformity when rolling into balls.
-
Allow Chilling Time: Don’t skip refrigeration! Chilling the truffles allows the chocolate coating to set properly, giving your Healthy Pumpkin Truffles the perfect finish.
Healthy Pumpkin Truffles Variations
Feel free to get creative with these Healthy Pumpkin Truffles to make them uniquely yours!
-
Nut-Free: Swap oat flour with finely ground sunflower seed flour for a nut-free option that still delivers on texture and taste.
This twist keeps your truffles safe for those with nut allergies while maintaining that rich pumpkin flavor we all love. -
Sweetener Options: Use maple syrup or coconut sugar instead of liquid stevia for a different sweetness profile.
Remember to adjust the oat flour accordingly to avoid a mixture that’s too wet or dry! -
Extra Spice: Add a dash of cayenne pepper or ground ginger for a little kick.
This subtle heat complements the sweetness of the pumpkin beautifully, turning your truffles into a delightfully spicy treat! -
Rich Chocolate Alternative: Use white chocolate or a dairy-free chocolate topping for a different flavor experience.
While dark chocolate offers deep richness, white chocolate provides a creamy, sweet balance that can’t be missed. -
Vanilla Bliss: Incorporate a teaspoon of vanilla extract to enhance the overall flavor.
Adding vanilla will not only make your truffles taste richer but also encourages a heartwarming, cozy aroma when you take a whiff. -
Pumpkin Pie Crust Flavor: Blend in crushed graham crackers or nuts (if not nut-free) into the mixture to mimic a pie crust.
This variation gives your truffles added texture, making every bite a mini pumpkin pie experience! -
Protein Boost: Mix in a scoop of your favorite protein powder to the truffle mixture for an extra nutritional punch.
It transforms your dessert into a post-workout snack, satisfying both your sweet tooth and your fitness goals.
For more ideas on how to use pumpkin in delightful ways, check out Pumpkin Beef Bolognese or get creative with Pumpkin Feta Pasta. Enjoy your adventure in these variations and make them your own!
Healthy Pumpkin Truffles Recipe FAQs
What type of pumpkin purée should I use?
Absolutely! For the best results, use pure pumpkin purée rather than pumpkin pie filling. This ensures that the truffles have the right moisture and flavor profile without added sugars or spices that could throw off the balance of your healthy pumpkin truffles.
How should I store leftover pumpkin truffles?
I recommend storing your healthy pumpkin truffles in an airtight container in the refrigerator. They should stay fresh for up to 5 days! Keeping them in the fridge not only preserves their delicious flavors but also maintains the firmness of the chocolate coating.
Can I freeze healthy pumpkin truffles?
Yes, you can! For longer storage, lay the truffles in a single layer on a parchment-lined baking tray and freeze until solid. This should take about 1-2 hours. After that, transfer them into an airtight container or a freezer-safe bag, and they’ll keep well for up to 3 months. When you’re ready to enjoy, simply thaw them in the refrigerator overnight.
What if my truffle mixture is too dry?
Very good question! If you find that your truffle mixture is crumbly or too dry, it may be due to using too much oat flour. Try adding a teaspoon of pumpkin purée at a time until it reaches a workable consistency. Also, ensuring you measure the oat flour accurately is key, as excess flour can lead to a dry mixture.
Are these truffles safe for people with allergies?
Great inquiry! These healthy pumpkin truffles are gluten-free and vegan, making them suitable for people with certain dietary restrictions. However, always check ingredient labels for potential allergens, especially if you’re using alternative sweeteners or flours. If you or a guest have a nut allergy, opt for oat flour or another nut-free alternative.
Healthy Pumpkin Truffles that Boost Your Fall Mood
Ingredients
Equipment
Method
- Prepare the Baking Tray: Line a baking tray with wax or parchment paper to prevent truffles from sticking.
- Mix the Truffle Base: In a mixing bowl, combine pumpkin purée, homemade pumpkin spice, salt, and liquid stevia, then add oat flour until combined.
- Form the Truffles: Roll the mixture into one-inch balls, yielding about 24 truffles. Coat your hands lightly with oil to prevent sticking.
- Melt the Dark Chocolate: Melt dark chocolate in a microwave-safe bowl at medium power in 30-second intervals until smooth.
- Dip in Chocolate: Use forks to dip each truffle in the melted chocolate, ensuring an even coating, then place on the tray to dry.
- Garnish and Chill: Before chocolate sets, sprinkle truffles lightly with flaky sea salt, and chill in the fridge for about 30 minutes.
Leave a Reply