
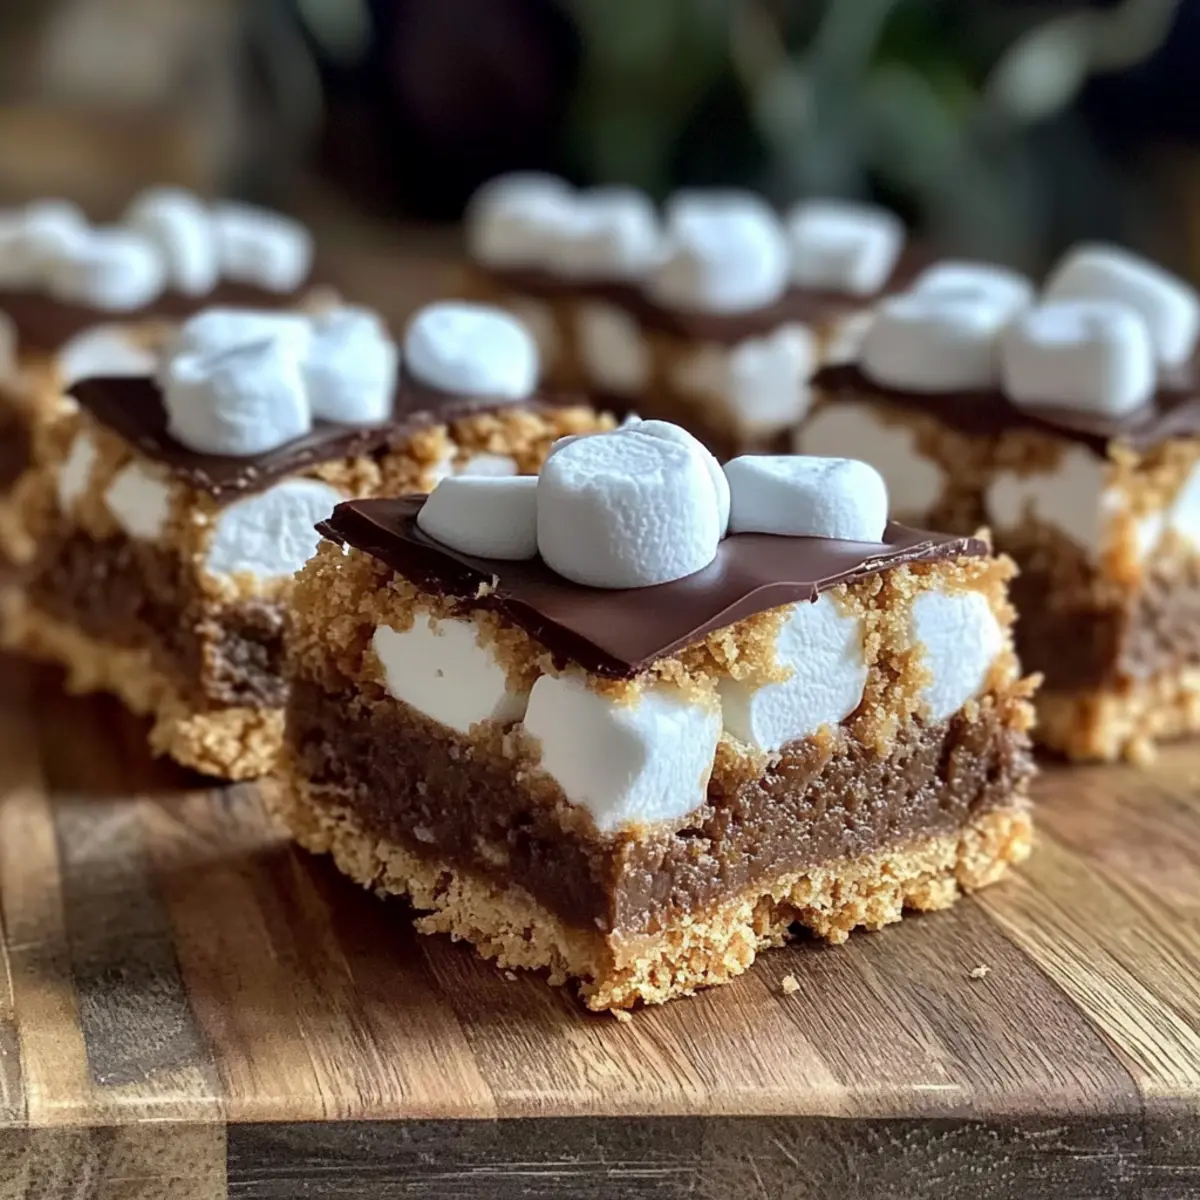
As I stood in my kitchen, the scent of melted chocolate and sweet marshmallows wafting through the air, I couldn’t help but smile at the thought of my childhood camping adventures. These Easy No-Bake S’mores Bars capture that whimsical nostalgia perfectly. With a crispy graham cracker crust, gooey filling, and no baking required, this recipe is not only a quick and delightful treat but also offers gluten-free and dairy-free options for everyone to enjoy. Whether you’re looking to whip up a fast snack for the kids or impress guests at your next gathering, these bars are the ideal solution. Curious to discover how easy it is to bring campfire magic right to your kitchen? Let’s dive in!
Why are No-Bake S’mores Bars a Must-Try?
Easy and Quick: These delightful bars come together in no time, making them the perfect last-minute snack for any occasion.
Adaptable for Everyone: With simple swaps, you can create gluten-free or dairy-free versions, ensuring everyone can enjoy them.
Kid-Friendly Fun: Kids will love helping mix and layer the ingredients, making it a fantastic family activity that brings laughter and joy into the kitchen.
No Mess, All Flavor: Enjoy the classic taste of s’mores without the hassle of a campfire cleanup—simply mix, chill, and serve!
Looking for a delectable treat that’s as easy as it is delicious? Try these alongside my Oreo Dirt Dessert for a double dose of sweet satisfaction.
No-Bake S’mores Bars Ingredients
• Get ready to create a delightful treat!
For the Crust
- Graham Crackers – Offers a crispy base; switch to gluten-free graham crackers if needed.
- Unsalted Butter – Binds the crust together; can be substituted with coconut oil for a dairy-free version.
For the Filling
- Mini Marshmallows – Provides the gooey texture; using mini ensures even melting throughout.
- Chocolate Chips – Delivers the sweet chocolate flavor; opt for dairy-free chocolate chips for a suitable alternative.
Optional Add-Ins
- Chopped Nuts – Adds a lovely crunch; consider walnuts or almonds for added richness.
- Pretzels – A fun twist that contributes a salty contrast; crush them for a delightful mix-in.
- Dried Fruit – Enhances flavor and texture; cranberries or cherries can add a fruity burst!
Step‑by‑Step Instructions for Easy No-Bake S’mores Bars
Step 1: Prepare the Crust
Begin by crushing about 2 cups of graham crackers until they resemble fine crumbs, using either a food processor or a plastic bag and rolling pin. Melt ½ cup of unsalted butter in a microwave-safe bowl for about 30 seconds until fully melted. Combine the graham cracker crumbs with the melted butter, mixing until well blended. Press this mixture firmly into the bottom of a greased 8×8 inch pan, ensuring it’s packed tightly for a sturdy crust.
Step 2: Melt the Filling
In a microwave-safe bowl, combine 2 cups of mini marshmallows and 1 cup of chocolate chips. Heat the mixture in the microwave in 30-second intervals, stirring after each, until everything is melted and smooth. This process should take about 1 to 2 minutes total. Make sure to stir well to achieve a uniform, gooey consistency, perfect for our no-bake s’mores bars.
Step 3: Combine and Spread
Once your marshmallow-chocolate mixture is gooey and fully melted, pour it over the prepared graham cracker crust in the pan. Use a spatula to spread the mixture evenly, making sure to cover all the corners. The warm filling will blend beautifully with the crust, creating a delightful base for your Easy No-Bake S’mores Bars.
Step 4: Chill to Set
Place the pan in the refrigerator and allow the mixture to chill for about 2 hours, or until it has completely set. This chilling time ensures that your bars will hold together when cut. After approximately 2 hours, check the firmness by gently pressing on the top; it should feel solid without any give.
Step 5: Cut and Serve
Once the bars are set, remove the pan from the fridge. Use a sharp knife to cut into 12 equal squares for serving, warming the knife under hot water for cleaner cuts. Enjoy your Easy No-Bake S’mores Bars chilled or at room temperature, and watch them disappear at your next gathering!
No-Bake S’mores Bars Variations
Customize your No-Bake S’mores Bars to match your taste preferences and dietary needs with these delightful twists!
- Gluten-Free: Use gluten-free graham crackers or crushed gluten-free cookies for a similar crunch without the gluten.
- Dairy-Free: Swap regular chocolate chips for dairy-free options and replace unsalted butter with coconut oil for a delightful alternative.
- Nutty Flavor: Substitute almond butter for butter in the crust, creating a nutty twist that pairs beautifully with the chocolate.
- Add Texture: Include crushed pretzels or chopped nuts for an exciting crunch that brings a salty contrast to the sweetness.
- For a Chocolatey Boost: Try using dark chocolate instead of milk chocolate; it will add a rich depth that chocolate lovers will adore.
- Add a Fruity Flavor: Incorporate dried fruits like cranberries or cherries into the filling for a hint of tartness amidst the sweetness.
- Coconut Flake Twist: Mix unsweetened shredded coconut into the marshmallow-chocolate layer for an exotic tropical flair.
- Peanut Butter Delight: Blend in some peanut butter with the chocolate filling for a deliciously creamy, dreamy treat.
These variations can bring new life to your recipe. And consider pairing your S’mores Bars with my delightful Oreo Dirt Dessert for an unforgettable dessert spread!
Expert Tips for No-Bake S’mores Bars
• Room Temperature Butter: Using room temperature butter helps achieve a well-combined crust that holds together better.
• Firmly Press Crust: To avoid a crumbly base, be sure to press the crust firmly into the pan—this ensures your no-bake s’mores bars have a sturdy foundation.
• Watch the Melting: When melting marshmallows and chocolate, heat in short bursts to prevent burning. Stir often for a smooth, gooey filling.
• Chill Completely: Allow bars to chill thoroughly before cutting. This will ensure clean cuts and that they hold their shape.
• Mind Ingredient Swaps: If substituting ingredients, like using coconut oil instead of butter, be mindful that it may alter the texture and flavor of your no-bake s’mores bars.
Storage Tips for No-Bake S’mores Bars
Fridge: Store your no-bake s’mores bars in an airtight container in the refrigerator for up to 5 days to maintain freshness and flavor.
Freezer: For longer storage, wrap the bars tightly in plastic wrap or foil and freeze for up to 2 months. Thaw overnight in the fridge before serving.
Cutting Tips: When ready to enjoy, use a sharp knife warmed under hot water for cleaner cuts straight from the fridge or freezer.
Serving: These delightful treats are best served chilled or at room temperature, ensuring the gooey filling is irresistible.
Make Ahead Options
These Easy No-Bake S’mores Bars are perfect for meal prep if you’re looking to save some time during busy weeks! You can prepare the crust up to 24 hours in advance—just crush the graham crackers and mix with melted butter, then press it into your pan. The filling can be made ahead as well; refrigerate it separately and simply pour it over the crust when you’re ready to chill the bars. To maintain quality, store the crust and filling in airtight containers in the fridge. Once everything is combined and set, your bars can be chilled for up to 3 days for optimal freshness. Simply cut and serve, and enjoy this delightful treat anytime!
What to Serve with Easy No-Bake S’mores Bars?
Indulging in these delectable treats opens up a world of playful pairings to create the perfect dessert spread.
-
Creamy Ice Cream: A scoop of vanilla or chocolate ice cream brings a delightful contrast to the chewy s’mores bars, enhancing the chocolatey richness.
-
Fresh Fruit Salad: A refreshing mix of berries or citrus cuts through the sweetness, adding a bright, tangy note that balances the flavors beautifully.
-
Chocolate-Dipped Strawberries: Extend the chocolate theme with these elegant bites; they add a romantic touch and a burst of juicy freshness beside the bars.
-
Nutty Trail Mix: A crunchy blend of nuts and seeds offers a satisfying texture contrast, elevating the snack experience with wholesome energy.
-
Chilled Milk or Almond Milk: A cold glass of milk complements the bars perfectly, helping to wash down the sweetness while evoking nostalgic childhood memories.
-
Caramel Sauce Drizzle: A warm drizzle of caramel adds a luxurious touch, creating an indulgent experience that pairs wonderfully with the bars’ gooey marshmallow center.
-
Hot Chocolate: For a cozy treat, serve these bars alongside a rich cup of hot cocoa for the ultimate comfort dessert combo, evoking memories of fireside snacking.
-
Mini Marshmallow Skewers: Keep the s’mores theme alive by offering mini marshmallows on skewers for guests to enjoy as they savor the bars.
Each of these delightful pairings offers a unique twist, transforming your no-bake treat into a full sweet feast!
Easy No-Bake S’mores Bars Recipe FAQs
How do I choose the best graham crackers?
For the crust, opt for fresh graham crackers without any dark spots or a stale appearance. If you’re making a gluten-free version, look for gluten-free graham crackers or try crushed gluten-free cookies. I recommend checking the ingredients for added sugars or preservatives for a more authentic flavor.
How should I store the No-Bake S’mores Bars?
Store your no-bake s’mores bars in an airtight container in the refrigerator for up to 5 days. This helps keep them fresh and prevents them from absorbing any odors. If you want to keep them longer, wrap them tightly in plastic wrap or foil and place them in the freezer for up to 2 months. Just remember to thaw them overnight in the fridge before serving!
Can I freeze No-Bake S’mores Bars?
Absolutely! To freeze, wrap each bar individually in plastic wrap or aluminum foil, then place them in a freezer-safe bag. This helps avoid freezer burn. When you’re ready to enjoy, simply let them thaw in the fridge overnight. They’ll maintain their delicious texture and flavor!
What should I do if my filling is too sticky?
If your filling turns out overly sticky, it may be due to overcooking the marshmallows or not using enough chocolate. In this case, try to melt your marshmallows and chocolate in shorter bursts while stirring well. If you’ve already made the bars, consider sprinkling a bit of powdered sugar over the top to reduce stickiness when serving.
Are there any dietary restrictions I should consider?
Yes! For gluten-free options, use gluten-free graham crackers. To make them dairy-free, be sure to select dairy-free chocolate chips and swap out butter for coconut oil. Always check labels for allergies, and feel free to adjust the ingredients based on your family’s dietary preferences.
How long does it take for No-Bake S’mores Bars to set?
Typically, allow your bars to chill in the refrigerator for about 2 hours until they are firm. This cooling period is crucial for achieving the right consistency. You’ll know they’re ready when they feel solid to the touch—perfect for slicing into the classic s’mores bar shape!
Irresistible No-Bake S'mores Bars for Easy Family Fun
Ingredients
Equipment
Method
- Begin by crushing about 2 cups of graham crackers until they resemble fine crumbs and melt ½ cup of unsalted butter in a microwave-safe bowl. Combine crumbs with melted butter and press into a greased 8x8 inch pan.
- In a microwave-safe bowl, combine 2 cups of mini marshmallows and 1 cup of chocolate chips. Heat in 30-second intervals, stirring until melted and smooth.
- Pour the melted marshmallow-chocolate mixture over the graham cracker crust and spread evenly with a spatula.
- Place the pan in the refrigerator and chill for about 2 hours or until set. Check firmness before cutting.
- Once set, cut into 12 squares and enjoy chilled or at room temperature.
Leave a Reply