
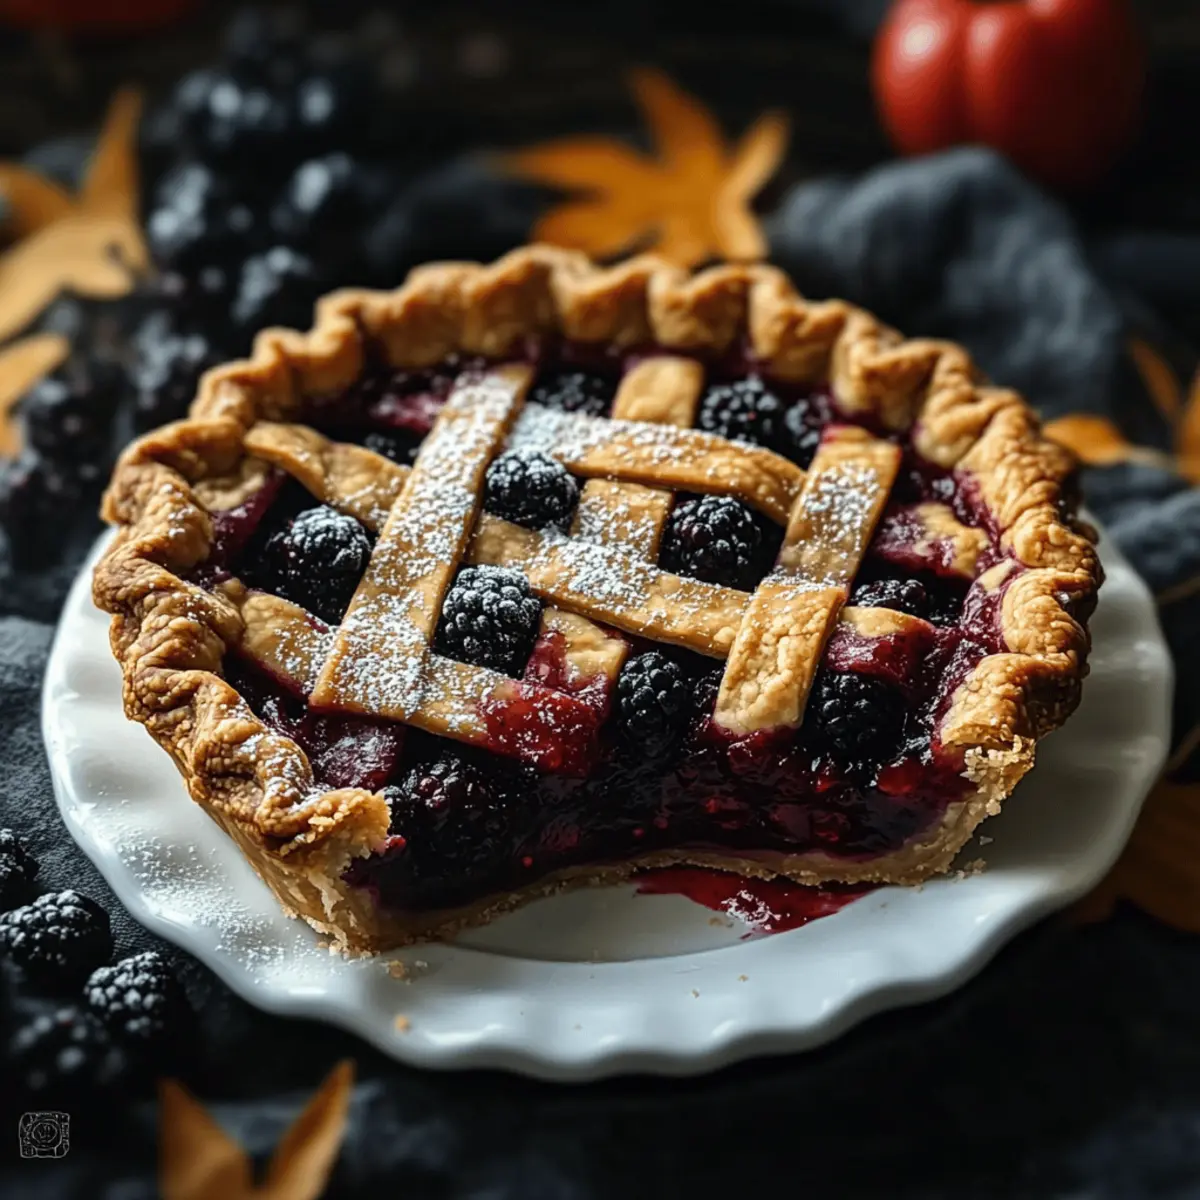
As I prepared my kitchen for Halloween, I realized something was missing—a dessert that would thrill and chill! Enter the Zombie Berry Pie, a spine-tingling delight perfect for those seeking a homemade touch to their spooky celebrations. This vibrant treat features a rich, mixed berry filling that oozes with flavor, all nestled within a flaky crust crowned with a whimsical, zombie-style lattice. Not only is this pie a true showstopper on any dessert table, but it also offers the convenience of using fresh or frozen berries, making it a quick crowd-pleaser you can whip up in no time. Ready to stir up some Halloween magic in your own kitchen? Let’s dive into the delicious details!
Why is Zombie Berry Pie a Must-Make?
Spooky Fun: This pie is the ultimate Halloween showpiece that will have your guests talking! Flexible Ingredients: Use your favorite mixed berries—whether fresh or frozen, this recipe allows you to customize it to your taste. A Flavor Explosion: The balance of sweet and tart berries combined with a buttery crust guarantees every bite is a delight. Quick to Prepare: With easy-to-follow steps, you can have this eerie treat ready for the table in no time. Serve it Warm: Pair it with ice cream for an irresistible dessert that feels like a warm hug. Whether you’re looking for something to impress or simply want to enjoy a taste of Halloween, this Zombie Berry Pie is guaranteed crowd-pleaser!
Zombie Berry Pie Ingredients
• Prepare to create a spine-tingling treat that your guests won’t forget!
-
For the Filling
-
Mixed Berries – 5 cups. Essential for flavor; can use a combination of black raspberries, gooseberries, and blackberries. Use either fresh or thawed frozen berries for your Zombie Berry Pie.
-
Orange Juice – 1 tbsp. Adds citrus brightness to balance berry sweetness. Freshly squeezed is preferable for the best flavor.
-
Lemon Juice – 1 tbsp. Enhances acidity and flavor depth.
-
Granulated Sugar – 1 cup. Sweetens the filling. Adjust based on berry sweetness to suit your taste.
-
Clearjel Starch or Tapioca Starch – ⅓ cup. Thickens the filling to prevent sogginess. Can substitute with cornstarch if necessary.
-
Salt – Dash. Enhances overall flavor.
-
For the Crust
-
All-Purpose Flour – 2 cups. Forms the pie crust.
-
Salt – 1 tsp. Adds flavor to the crust.
-
Sugar – 1–2 tbsp. Sweetens the crust. Adjust based on your taste preference for sweetness.
-
Baking Powder – ⅛ tsp. Helps create a flaky texture.
-
Shortening – 1 cup. Provides tenderness to the crust. Can be substituted with butter for a richer taste.
-
Cold Water – ½ cup. Helps bind the dough together.
-
For the Egg Wash
-
Egg + Water – 1 egg + 1 tbsp water. Provides a golden finish to the crust. Optional for a decorative look.
Step‑by‑Step Instructions for Zombie Berry Pie
Step 1: Prepare the Crust
In a large mixing bowl, combine 2 cups of all-purpose flour, 1 tsp of salt, and 1-2 tbsp of sugar. Cut in 1 cup of shortening until the mixture resembles coarse crumbs. Gradually add ½ cup of cold water, mixing until a dough forms. Divide the dough into two discs, wrap them in plastic wrap, and refrigerate for at least 30 minutes to make rolling easier.
Step 2: Make the Filling
While the dough chills, prepare the filling for the Zombie Berry Pie. In a large bowl, toss together 5 cups of mixed berries with 1 cup of granulated sugar, ⅓ cup of Clearjel starch, a dash of salt, 1 tbsp of orange juice, and 1 tbsp of lemon juice until the berries are evenly coated. Allow this mixture to sit so the juices can meld together beautifully.
Step 3: Assemble the Pie
Preheat your oven to 375°F (190°C). On a floured surface, roll out one disc of chilled dough to fit a 9-inch pie dish, ensuring it hangs slightly over the edges. Pour the berry filling into the crust, mounding it slightly in the center. Roll out the second dough disc and cut it into strips to create a whimsical lattice pattern on top of the filling. Press the edges together to seal.
Step 4: Add the Finishing Touches
For a lovely golden crust on your Zombie Berry Pie, whisk together 1 egg and 1 tbsp of water to create an egg wash. Brush the lattice top and exposed crust edges with the egg wash. Sprinkle a bit of sugar over the lattice for a sweet touch, and don’t forget to cut a few small slits in the crust to allow steam to escape during baking.
Step 5: Bake the Pie
Place your assembled pie on a baking sheet to catch any bubbling juice, and then transfer it to the preheated oven. Bake for 45–50 minutes or until the crust turns a beautiful golden brown and the filling is bubbling through the lattice top. Keep an eye on it, and if the edges start browning too quickly, cover them with foil.
Step 6: Cool and Serve
Once the Zombie Berry Pie is done baking, remove it from the oven and let it cool on a wire rack for at least 20 minutes. This cooling period allows the filling to set slightly for easier slicing. Serve the pie warm, perhaps with a scoop of vanilla ice cream for extra delight, and enjoy the burst of flavors that will captivate your Halloween guests!

What to Serve with Zombie Berry Pie?
To complete your Halloween celebration, let this pie take center stage while a carefully curated selection of sides and drinks enhance its festive spirit.
-
Vanilla Ice Cream: A scoop of creamy vanilla ice cream rounds out the tangy berry flavor, providing a delightful contrast in temperature.
The ice cream slowly melts into the warm pie, creating a delicious and irresistible combination. -
Whipped Cream: Light and fluffy whipped cream adds a touch of sweetness to your pie. Each dollop can turn your dessert into a decadently luxurious treat.
-
Ginger Snap Cookies: Their spicy, crispy texture complements the pie’s softness, making for a fun contrast in both flavor and texture.
These cookies can also serve as a good addition for guests to nibble on during the festivities! -
Chilled Apple Cider: Serve this warm beverage spiced with cloves and cinnamon alongside your Zombie Berry Pie for a seasonal drink full of comforting flavors.
The warmth of the cider will enhance the fruitiness of the pie, creating a cozy atmosphere. -
Pumpkin Spice Cake: A slice of pumpkin spice cake pairs wonderfully with the pie’s fruity notes, bridging the flavors of fall while keeping your dessert table intriguing.
The fragrant spices will be a welcome addition that guests will love! -
Chocolate Drizzle: A rich chocolate sauce drizzled on top will elevate the pie’s sweetness, adding a decadent touch that makes every bite feel indulgent.
-
Fresh Berries: A simple serving of fresh berries balances the sweetness of the pie and offers a refreshing bite. Their vibrant colors will also make the dessert spread pop!
-
Spicy Hot Chocolate: For a bold drink pairing, consider serving spicy hot chocolate. The warmth and richness of chocolate complements the berries while offering an unexpected twist to the dessert experience.
-
Petite Fruit Tarts: These bite-sized delights bring extra layers of flavor and a contrasting texture, creating a tempting spread that offers something for everyone.
-
Burnt Almond Fudge Brownies: The fudgy texture of brownies can be a delightful contrast to the flaky pie, and their nutty flavor brings a welcome depth to your dessert options.
Expert Tips for Zombie Berry Pie
-
Chill the Dough: Ensure your pie crust dough is well-chilled before rolling; this prevents sticking and helps achieve clean edges.
-
Berry Preparation: If using frozen berries, always thaw and strain them first to avoid excess juice that can lead to a soggy filling in your Zombie Berry Pie.
-
Aesthetic Touches: For a creepy flair, consider using uneven edges or cutting out spooky shapes in the crust.
-
Prevent Over-browning: Cover the edges of the pie with foil halfway through baking to keep them from burning while the inside finishes cooking.
-
Adjust Sweetness: Taste your filling mixture before baking; the sweetness might need adjusting based on the tartness of your berries.
Zombie Berry Pie Variations & Substitutions
Feel free to personalize your Zombie Berry Pie and make it truly your own with these easy variations!
-
Graham Cracker Crust: Swap the traditional crust for a graham cracker crust for a delightful twist. It adds a sweet crunch that complements the berries beautifully.
-
Seasonal Spices: Add warmth by mixing in spices like cinnamon or cloves into your berry filling. The comforting aroma will fill your kitchen as it bakes, making it feel like a cozy autumn treat.
-
Dairy-Free: Replace shortening with coconut oil or dairy-free butter to craft a luscious dairy-free crust. This substitution adds a subtle coconut flavor that pairs wonderfully with mixed berries.
-
Fruit Combinations: Experiment by incorporating other fruits like ripe peaches or pears for a refreshing twist. A blend of berries and stone fruits will elevate your pie with an extra layer of sweetness.
-
Lower Sugar: For a healthier option, reduce the sugar in the filling, or substitute with honey or maple syrup. This allows the natural sweetness of the fruit to shine through even more.
-
Chocolate Drizzle: For an extra special touch, drizzle melted dark chocolate over your baked pie before serving. The rich chocolate will add a decadent contrast to the tartness of the berries.
-
Spiked Filling: Add a splash of rum or brandy to the berry filling for an adult twist. This beautiful addition transforms the pie into an elegant, boozy dessert perfect for Halloween gatherings.
-
Zest Boost: Incorporate lemon or orange zest into the filling for a pop of citrus flavor that brightens up the pie beautifully. It will awaken all your taste buds with its bright, zesty aroma.
You might also enjoy serving it alongside a scoop of vanilla ice cream or a drizzle of raspberry syrup, reminiscent of my delightful Pumpkin Pie Twists, which are a crowd favorite!
How to Store and Freeze Zombie Berry Pie
Refrigerator: Store the Zombie Berry Pie in an airtight container or tightly wrapped in plastic wrap for up to 3 days. This keeps the crust from becoming soggy while retaining its delicious flavor.
Freezer: If you want to keep it longer, freeze slices of the pie for up to 3 months. Wrap each slice in plastic wrap and place them in a freezer-safe container to prevent freezer burn.
Reheating: When you’re ready to enjoy, reheat individual slices in the oven at 350°F (175°C) for about 10-15 minutes. This helps restore the crust’s flaky texture while warming the berry filling.
Make-Ahead: Both the crust and filling can be made a day in advance. Store them separately in the refrigerator until ready to assemble the Zombie Berry Pie.
Make Ahead Options
These Zombie Berry Pies are perfect for meal prep enthusiasts! You can prepare both the crust and filling up to 24 hours in advance. Start by making the crust; after chilling, wrap the dough in plastic wrap and refrigerate. For the filling, combine the mixed berries with sugar, starch, and juices, and store it in an airtight container in the refrigerator. When you’re ready to bake, simply roll out the chilled crust, assemble the pie with the prepared filling, and follow the baking instructions for a delightful dessert that’s just as delicious as fresh! This makes it an excellent choice for busy weeknights or festive gatherings!
Zombie Berry Pie Recipe FAQs
What type of berries work best for the Zombie Berry Pie?
Absolutely! You can use a delightful mix of berries such as black raspberries, gooseberries, and blackberries. I often recommend using both fresh and thawed frozen berries to enhance flavor and maintain the pie’s vibrant color.
How should I store the Zombie Berry Pie?
The pie can be stored in the refrigerator for up to 3 days. Just make sure to wrap it tightly in plastic wrap or keep it in an airtight container to prevent the crust from becoming soggy while maintaining its delicious flavor.
Can I freeze Zombie Berry Pie?
Yes, you can freeze your Zombie Berry Pie! Wrap individual slices in plastic wrap, then place them in a freezer-safe container. This prevents freezer burn and preserves the flavor, allowing you to enjoy it for up to 3 months. When you’re ready to eat, reheat slices in the oven at 350°F (175°C) for about 10-15 minutes to regain that lovely flaky texture.
What if my filling is runny?
Very good question! If your filling turns out runny, it may be due to using juicier berries or not enough thickening agent. To troubleshoot, you can transfer the berry mixture to a saucepan after mixing it, then cook it on medium heat while stirring for about 5 minutes until it thickens. This step ensures a perfectly set filling for your Zombie Berry Pie!
Can I adjust the sugar for dietary preferences?
Absolutely! If you want to lower the sugar content, feel free to reduce the granulated sugar in both the filling and crust. Remember to taste as you go, especially with the berry filling, to ensure the balance of sweet and tart is just right for everyone’s diet!
Are there any allergens to be aware of in this recipe?
Yes, those with allergies should be aware that this recipe contains gluten (from the all-purpose flour) and possible allergens from berries (like strawberries or blackberries for those with specific fruit allergies). If you’re looking for a gluten-free option, consider using a gluten-free flour blend instead!
Deliciously Spooky Zombie Berry Pie for Your Halloween Table
Ingredients
Equipment
Method
- In a large mixing bowl, combine all-purpose flour, salt, and sugar. Cut in shortening until mixture resembles coarse crumbs. Gradually add cold water until a dough forms. Divide into two discs, wrap in plastic wrap, and refrigerate for at least 30 minutes.
- In another bowl, toss mixed berries with granulated sugar, Clearjel starch, salt, orange juice, and lemon juice until evenly coated. Allow to sit to meld flavors.
- Preheat oven to 375°F (190°C). Roll out one disc of dough and fit into a pie dish. Pour berry filling into the crust, mound it in the center. Roll out second disc and cut into strips for a lattice pattern on top. Seal edges.
- Whisk egg and water for egg wash. Brush over the lattice top and crust edges. Sprinkle sugar over lattice. Cut slits in the crust for steam to escape.
- Place pie on a baking sheet and bake for 45-50 minutes or until the crust is golden and filling is bubbling. Cover edges with foil if browning too quickly.
- Cool pie on a wire rack for at least 20 minutes before serving. Serve warm, preferably with a scoop of vanilla ice cream.
Leave a Reply