
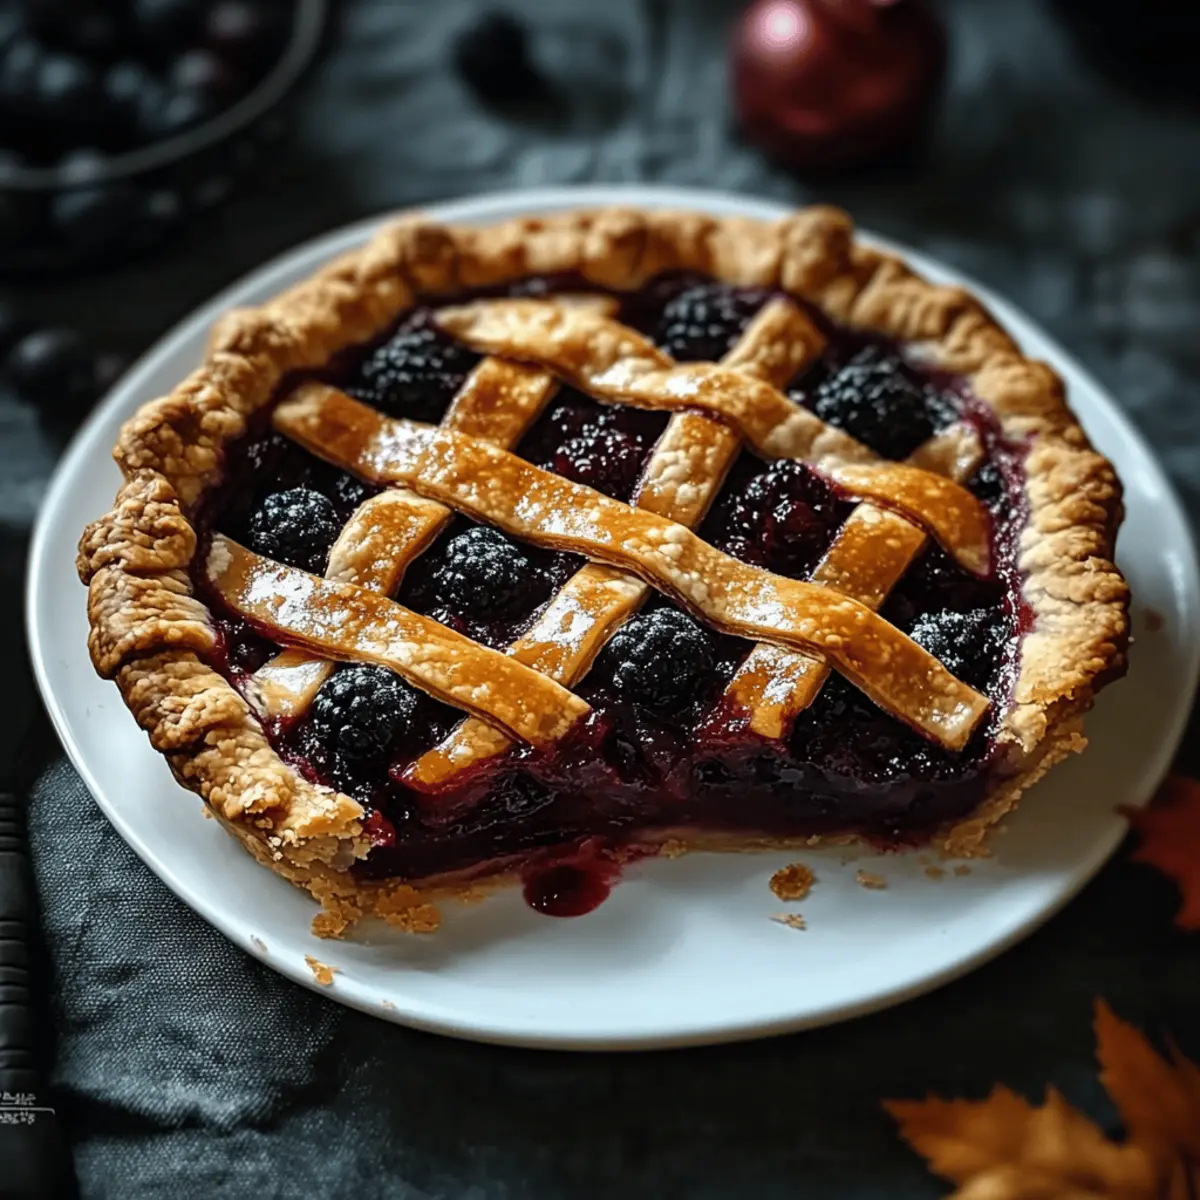
As I rummaged through my fridge, a mischievous thought struck me: why not elevate my Halloween dessert game this year? Enter the Zombie Berry Pie, a delightfully eerie creation that’s as fun to make as it is to devour. This pie features a luscious filling of mixed berries, cloaked in an invitingly flaky homemade crust. With its playful zombie-style lattice topping, it’s bound to be the star of any spooktacular gathering. Plus, it’s surprisingly simple and adaptable—perfect for using up whatever berries you have on hand, whether they’re black raspberries, blueberries, or even ghostly gooseberries. Not only does this pie please the palate, but it also adds a touch of ghoulish charm to your dessert table. Are you ready to create a masterpiece that will haunt your guests long after the last slice?
Why will you love this Zombie Berry Pie?
Simplicity at Its Best: This Halloween treat is not just a showstopper but also an easy recipe to follow, making it great for both novice bakers and seasoned chefs alike.
Flavor Explosion: A delightful blend of fresh berries creates a vibrant filling that bursts with juicy goodness—ideal for satisfying your sweet tooth!
Creepy Aesthetic: The whimsical zombie-style lattice topping adds a fun and spooky twist, making it an attractive centerpiece for your Halloween festivities.
Versatile Ingredients: You can customize this pie with any mixed berries you have in your fridge, whether it be blackberries or blueberries—you can even mix in pears for an unexpected twist.
Irresistible Pairings: Serve it warm with a scoop of vanilla ice cream or drizzle it with raspberry syrup to elevate this dessert even further.
Make-Ahead Friendly: Prepare components in advance, allowing you to focus on other Halloween fun without any last-minute stress. This pie is designed to impress while keeping your kitchen time minimal!
Zombie Berry Pie Ingredients
• Get ready to whip up some Halloween magic!
For the Filling
- Mixed Berries – 5 cups; essential for flavor; you can use a combination of black raspberries, gooseberries, and blackberries. Use either fresh or thawed frozen berries.
- Orange Juice – 1 tbsp; adds citrus brightness to balance the berry sweetness. Freshly squeezed is preferable.
- Lemon Juice – 1 tbsp; enhances acidity and flavor depth.
- Granulated Sugar – 1 cup; sweetens the filling. Adjust based on berry sweetness.
- Clearjel Starch or Tapioca Starch – ⅓ cup; thickens the filling to prevent sogginess. Can substitute with cornstarch.
- Salt – Dash; enhances overall flavor.
For the Crust
- All-Purpose Flour – 2 cups; forms the pie crust.
- Salt – 1 tsp; adds flavor to the crust.
- Sugar – 1-2 tbsp; sweetens the crust. Adjust based on taste preference.
- Baking Powder – ⅛ tsp; helps create a flaky texture.
- Shortening – 1 cup; provides tenderness to the crust. Can be substituted with butter for a richer taste.
- Cold Water – ½ cup; helps bind the dough together.
- Egg + Water (for Egg Wash) – 1 egg + 1 tbsp water; provides a golden finish to the crust. Optional for a decorative look.
Embrace the Halloween spirit and create this enchanting Zombie Berry Pie that will be the highlight of your celebration!
Step‑by‑Step Instructions for Zombie Berry Pie
Step 1: Prepare the Crust
In a large mixing bowl, combine 2 cups of all-purpose flour, 1 tsp of salt, 1-2 tbsp of sugar, and ⅛ tsp of baking powder. Cut 1 cup of shortening into the mixture using a pastry cutter until it resembles coarse crumbs. Gradually add ½ cup of cold water, mixing until a dough forms. Divide the dough in half, shape into discs, wrap in plastic, and chill in the refrigerator for at least 30 minutes.
Step 2: Make Filling
While the crust chills, prepare the filling for your Zombie Berry Pie. In a bowl, toss together 5 cups of mixed berries with 1 cup of granulated sugar, ⅓ cup of Clearjel or tapioca starch, a dash of salt, and 1 tbsp each of orange and lemon juices. Stir until evenly coated and let the mixture sit for about 10 to 15 minutes, allowing the berries to release their juices.
Step 3: Assemble Pie
Preheat your oven to 375°F (190°C). Roll out one chilled dough disc on a floured surface to fit a 9-inch pie pan. Carefully transfer the rolled dough into the pan, pouring in the berry mixture evenly. Roll out the second dough disc and create a whimsical lattice design on top, sealing the edges. Brush the lattice with an egg wash made from 1 egg mixed with 1 tbsp water, then sprinkle with sugar for a sweet finish.
Step 4: Bake
Place your assembled Zombie Berry Pie in the preheated oven for 45 to 50 minutes. You’ll know it’s done when the crust turns a lovely golden brown and the filling bubbles through the lattice. Rotate the pie halfway through baking for even browning. If the edges begin to darken too quickly, cover them with foil to prevent burning.
Step 5: Cool and Serve
Once your pie is beautifully baked, remove it from the oven and let it cool on a wire rack for about 20 to 30 minutes. This cooling time allows the filling to set slightly, ensuring easy slicing. Serve slices warm or at room temperature, and consider pairing your Zombie Berry Pie with a scoop of vanilla ice cream for an extra delicious treat!
Expert Tips for Zombie Berry Pie
-
Chill Your Dough: Keep your pie crust dough chilled before rolling it out. This helps achieve a flakier texture and prevents it from becoming tough.
-
Berry Adjustments: Pay attention to the sweetness of your mixed berries when adding sugar. Certain berries might need more or less sugar to balance the flavors perfectly.
-
Thickening Choices: If using frozen berries, thaw and strain them to avoid a soggy filling. Cook down the reserved juice with sugar and starch until it thickens for the best results.
-
Creepy Designs: Get creative with your lattice! Uneven edges or skull and bone cutouts can enhance the eerie aesthetic of your Zombie Berry Pie, making it a centerpiece for Halloween.
-
Watch the Edges: Protect the crust’s edges from burning by covering them with foil halfway through baking, ensuring your pie looks as good as it tastes.
Zombie Berry Pie Variations
Feel free to let your creativity flow as you customize this spooky treat to suit your palate!
-
Different Berries: Use any combination of berries you love, like strawberries or blueberries, to create a unique flavor profile. Each berry offers its own twist, adding delightful complexity to the pie’s filling.
-
Graham Cracker Crust: Substitute the traditional crust with a graham cracker crust for a sweet and crunchy alternative. This adds a fun flavor and complements the berry filling beautifully.
-
Seasonal Spices: Add a pinch of cinnamon or nutmeg into the berry mixture for a warm and cozy depth. These spices evoke the comforts of fall and balance the tartness of the berries, transforming your pie into a seasonal celebration.
-
Fruit Fusion: Blend in diced pears or peaches with the mixed berries for a scrumptious twist. The juicy sweetness from these fruits will enhance the overall flavor, creating a delicious medley in every bite.
-
Vegan Option: Use coconut oil instead of shortening and substitute the egg wash with a plant-based option like almond milk or aquafaba. This keeps your pie delightful while catering to vegan diets.
-
Chocolate Drizzle: Just before serving, drizzle some melted chocolate over the top of the pie for a decadent touch. This unexpected flavor pairing will surprise and delight your guests!
-
Heat It Up: If you enjoy a kick, sprinkle in some cayenne pepper or a dash of chili powder to the mixed berry filling. This subtle heat will add a new layer of complexity to your Zombie Berry Pie.
Why not take a journey into flavor and try a few variations? And when you do, don’t forget to pair your pie with a scoop of vanilla ice cream or explore other delicious recipes like Chicken Pot Pie for your next gathering!
What to Serve with Zombie Berry Pie?
Imagine a table bursting with warm, inviting flavors and delightful textures that will enchant your guests alongside your Halloween masterpiece.
- Vanilla Ice Cream: A scoop of creamy vanilla ice cream melts perfectly with the warm pie, creating a rich and indulgent treat. The contrast of temperatures brings out the berry flavors beautifully.
- Whipped Cream: Light and fluffy, whipped cream adds a touch of sweetness that complements the tartness of the berry filling, ensuring every bite is a memorable experience.
- Caramel Drizzle: A drizzle of warm caramel sauce adds an extra layer of sweetness, blending beautifully with the mixed berries, and enhancing the spooky dessert theme.
- Chocolate Sauce: For a devilishly decadent addition, chocolate sauce offers a rich contrast to the tart berries, creating a delightful fusion of flavors. This pairing is also visually stunning!
- Pumpkin Spice Cookies: Soft and spiced cookies provide a lovely contrast in texture and flavor, echoing the autumn theme and keeping your guests happily munching.
- Fresh Fruit Salad: Bright, fresh fruit salad with seasonal fruits like oranges and apples would cut through the richness and add a refreshing note to the dessert spread.
- Mulled Cider: A warm cup of spiced apple cider enhances the cozy fall vibe, making it the perfect drink companion for your Zombie Berry Pie.
- Gingerbread Cookies: The warmth of ginger and spices from gingerbread cookies creates a delightful pairing that resonates with the Halloween spirit.
- Hot Chocolate: Consider serving creamy, rich hot chocolate to add warmth to your dessert experience—perfect for gathering family around the table!
These thoughtful pairings will elevate your Halloween dessert extravaganza, ensuring that your Zombie Berry Pie shines even brighter!
Storage Tips for Zombie Berry Pie
Fridge: Store your Zombie Berry Pie in the refrigerator for up to 3 days, covered with plastic wrap or aluminum foil to keep it fresh and prevent drying out.
Freezer: If you want to save some slices for later, freeze the pie for up to 2 months. Wrap it tightly in plastic wrap, then foil, for optimal protection against freezer burn.
Reheating: To maintain the crust’s crispy texture, reheating in the oven at 350°F (175°C) for about 15-20 minutes is recommended, rather than using the microwave.
Make-Ahead: Both the crust and filling can be prepared a day in advance and stored separately in the refrigerator, making assembly and baking a breeze on Halloween!
Make Ahead Options
These Zombie Berry Pies are perfect for busy home cooks looking to save time! You can prepare the crust and filling up to 24 hours in advance. To do this, prepare the crust as directed, divide it into discs, wrap in plastic, and refrigerate. For the filling, combine the mixed berries with sugar, starch, and juices, then store in an airtight container in the refrigerator. This way, on baking day, all you need to do is roll out the crust, assemble the pie, and pop it in the oven. By prepping ahead, you’ll ensure that your Zombie Berry Pie is just as delicious and captivating, freeing you up to enjoy the festivities!

Zombie Berry Pie Recipe FAQs
What types of berries can I use for the Zombie Berry Pie?
Absolutely! You can mix and match your favorite berries to create a delicious filling. I often recommend using a combination of black raspberries, blackberries, and gooseberries. If you’re feeling adventurous, blueberries or even raspberries can add a lovely twist. The more the merrier when it comes to berry selection!
How should I store my Zombie Berry Pie?
Store your pie in the refrigerator, covered with plastic wrap or aluminum foil, for up to 3 days. This keeps it fresh while preventing drying out. If you want to enjoy it later, you can freeze the pie for up to 2 months—just wrap it tightly in plastic wrap, followed by foil to protect against freezer burn.
Can I make the crust in advance?
Absolutely! Preparing both the crust and filling a day ahead is a fantastic idea. Just keep each part stored separately in the refrigerator. This not only saves you time on Halloween but guarantees that when you’re ready to bake, everything is fresh and ready to go!
What do I do if my filling is too runny?
If you find your berry filling is a bit too loose, don’t worry! You can thicken it by cooking down any excess juice. Just combine the reserved juice with a bit more sugar and a dash of starch in a saucepan over medium heat until it thickens. Stir in the berries afterward for a perfect filling!
Can I use frozen berries instead of fresh?
Very! Frozen berries work well for this Zombie Berry Pie and are a great way to enjoy this dessert year-round. Just remember to thaw and strain the berries before using them. This helps remove excess liquid and ensures a thick, delicious filling!
Is this recipe suitable for those with dietary restrictions?
While this pie is primarily made with berries and standard pie ingredients, be cautious of allergies. For gluten-free options, you can substitute all-purpose flour with a gluten-free blend. Check labels for any additional ingredients, like the egg wash or starch, if someone has specific dietary concerns.
Zombie Berry Pie: A Spook-tacular Treat for Your Halloween!
Ingredients
Equipment
Method
- In a large mixing bowl, combine 2 cups of all-purpose flour, 1 tsp of salt, 1-2 tbsp of sugar, and ⅛ tsp of baking powder. Cut 1 cup of shortening into the mixture using a pastry cutter until it resembles coarse crumbs. Gradually add ½ cup of cold water, mixing until a dough forms. Divide the dough in half, shape into discs, wrap in plastic, and chill in the refrigerator for at least 30 minutes.
- While the crust chills, prepare the filling by tossing together 5 cups of mixed berries with 1 cup of granulated sugar, ⅓ cup of Clearjel or tapioca starch, a dash of salt, and 1 tbsp each of orange and lemon juices. Stir until evenly coated and let sit for about 10 to 15 minutes.
- Preheat your oven to 375°F (190°C). Roll out one chilled dough disc to fit a 9-inch pie pan. Transfer the rolled dough into the pan and pour in the berry mixture. Roll out the second dough disc and create a lattice design on top, sealing the edges. Brush the lattice with an egg wash and sprinkle with sugar.
- Bake for 45 to 50 minutes until the crust is golden brown and the filling bubbles through the lattice. Rotate the pie halfway through baking. Cover the edges with foil if they darken too quickly.
- After baking, let the pie cool on a wire rack for about 20 to 30 minutes before slicing. Serve warm or at room temperature, optionally with vanilla ice cream.
Leave a Reply