
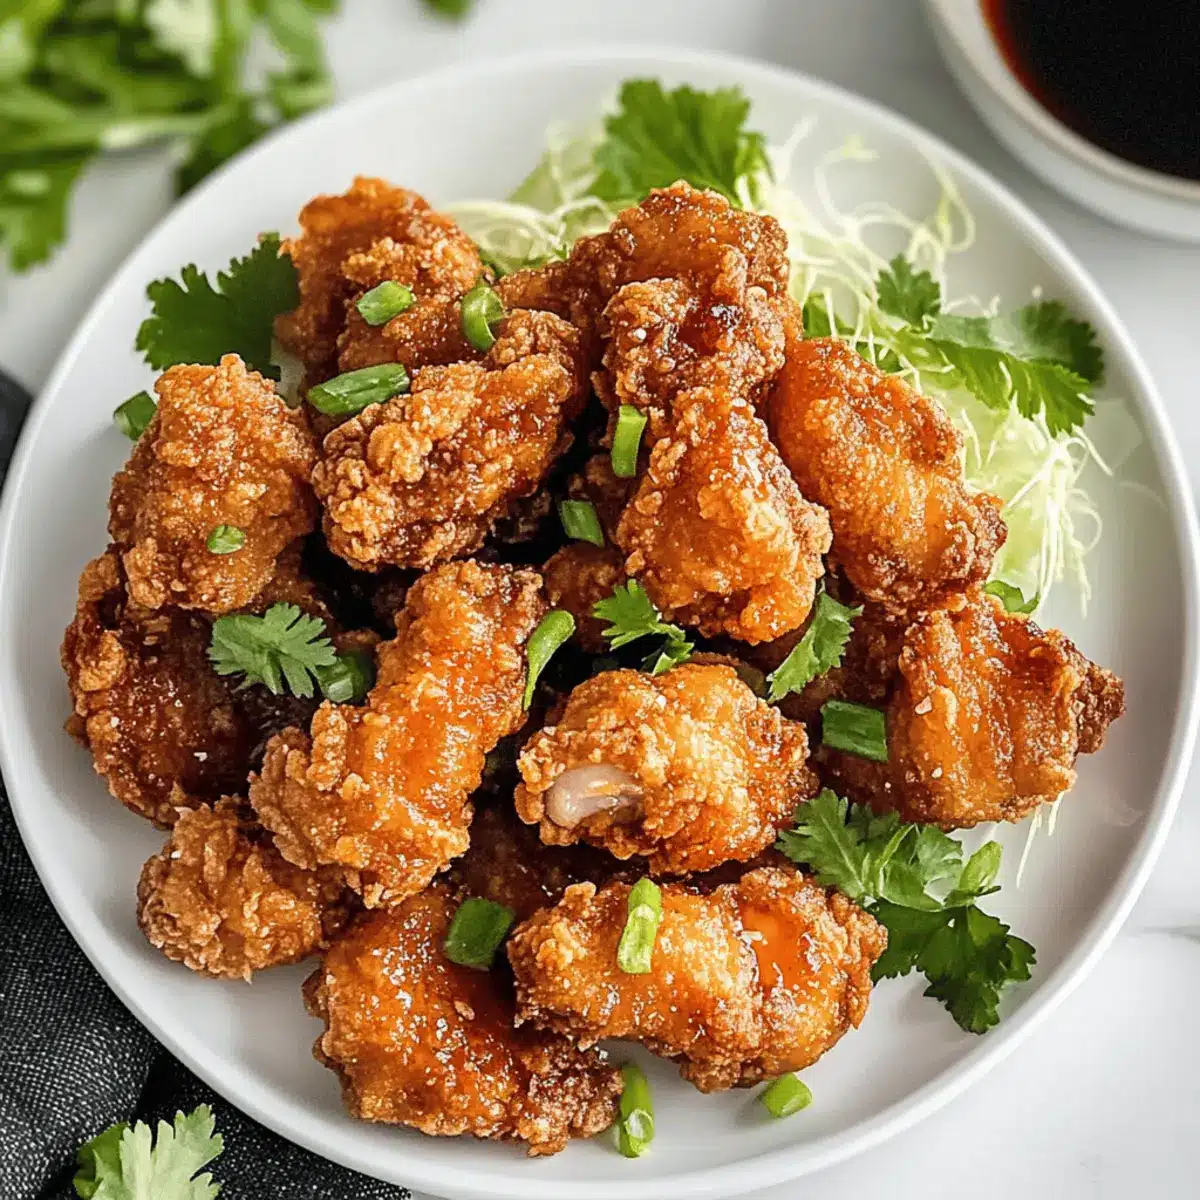
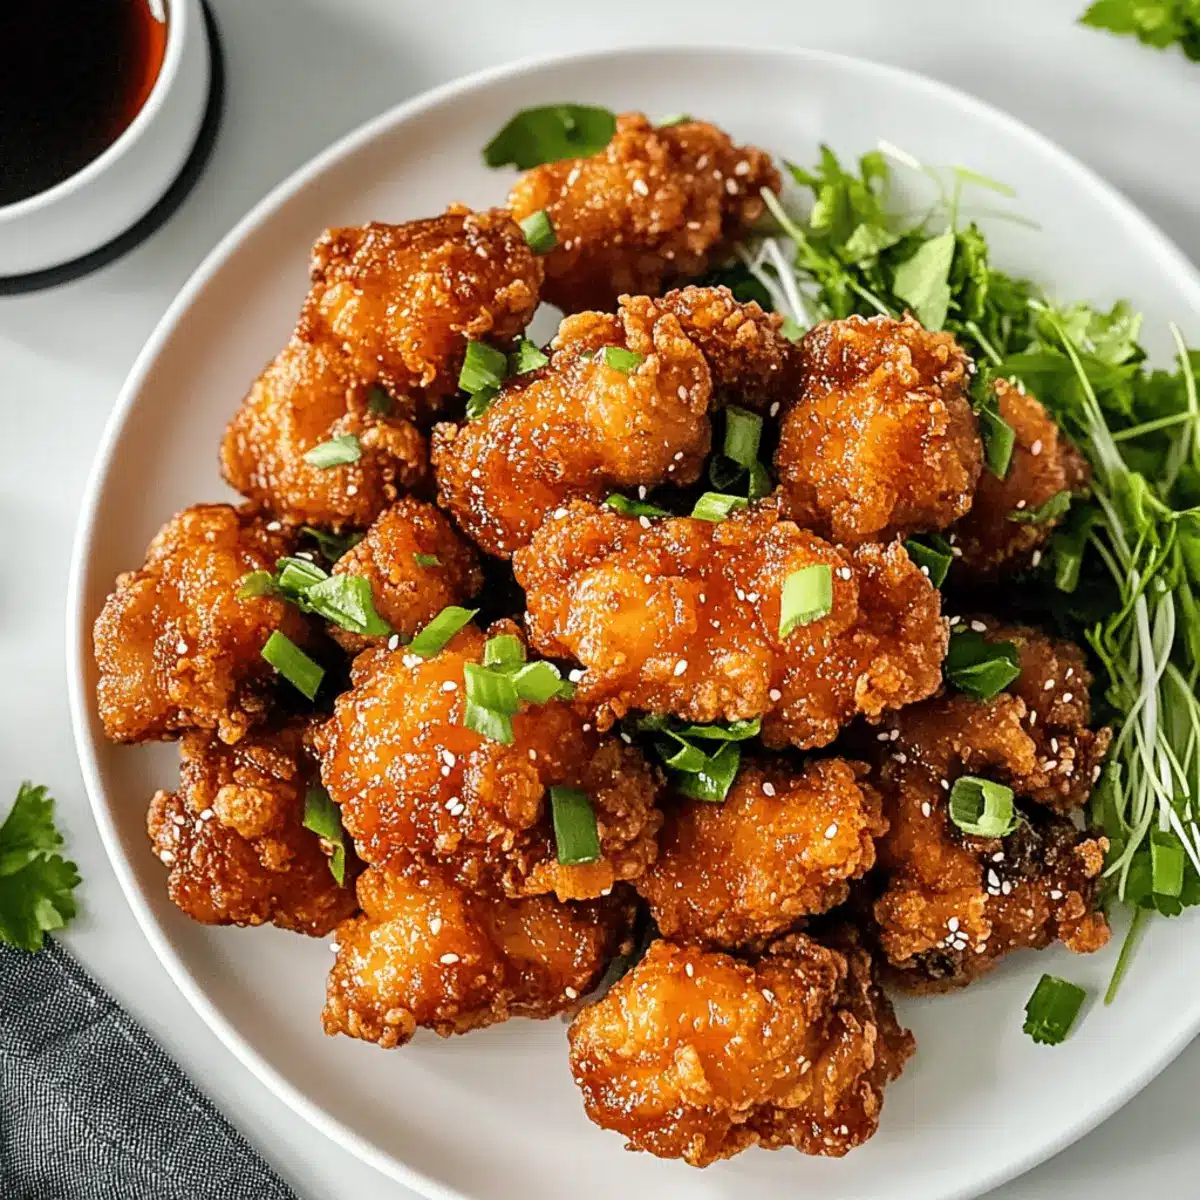
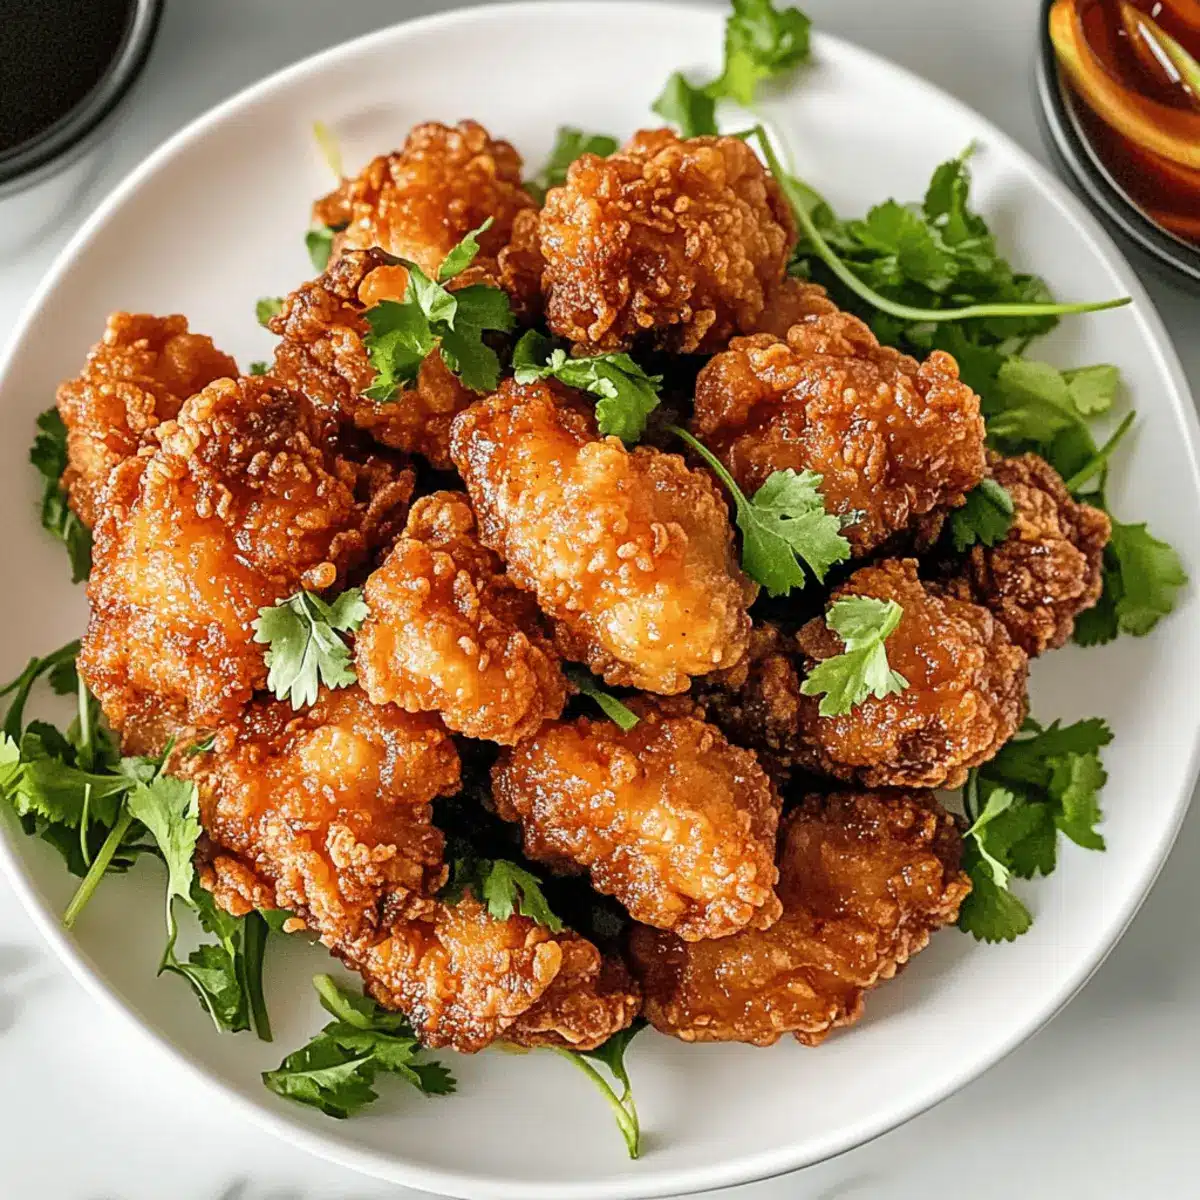
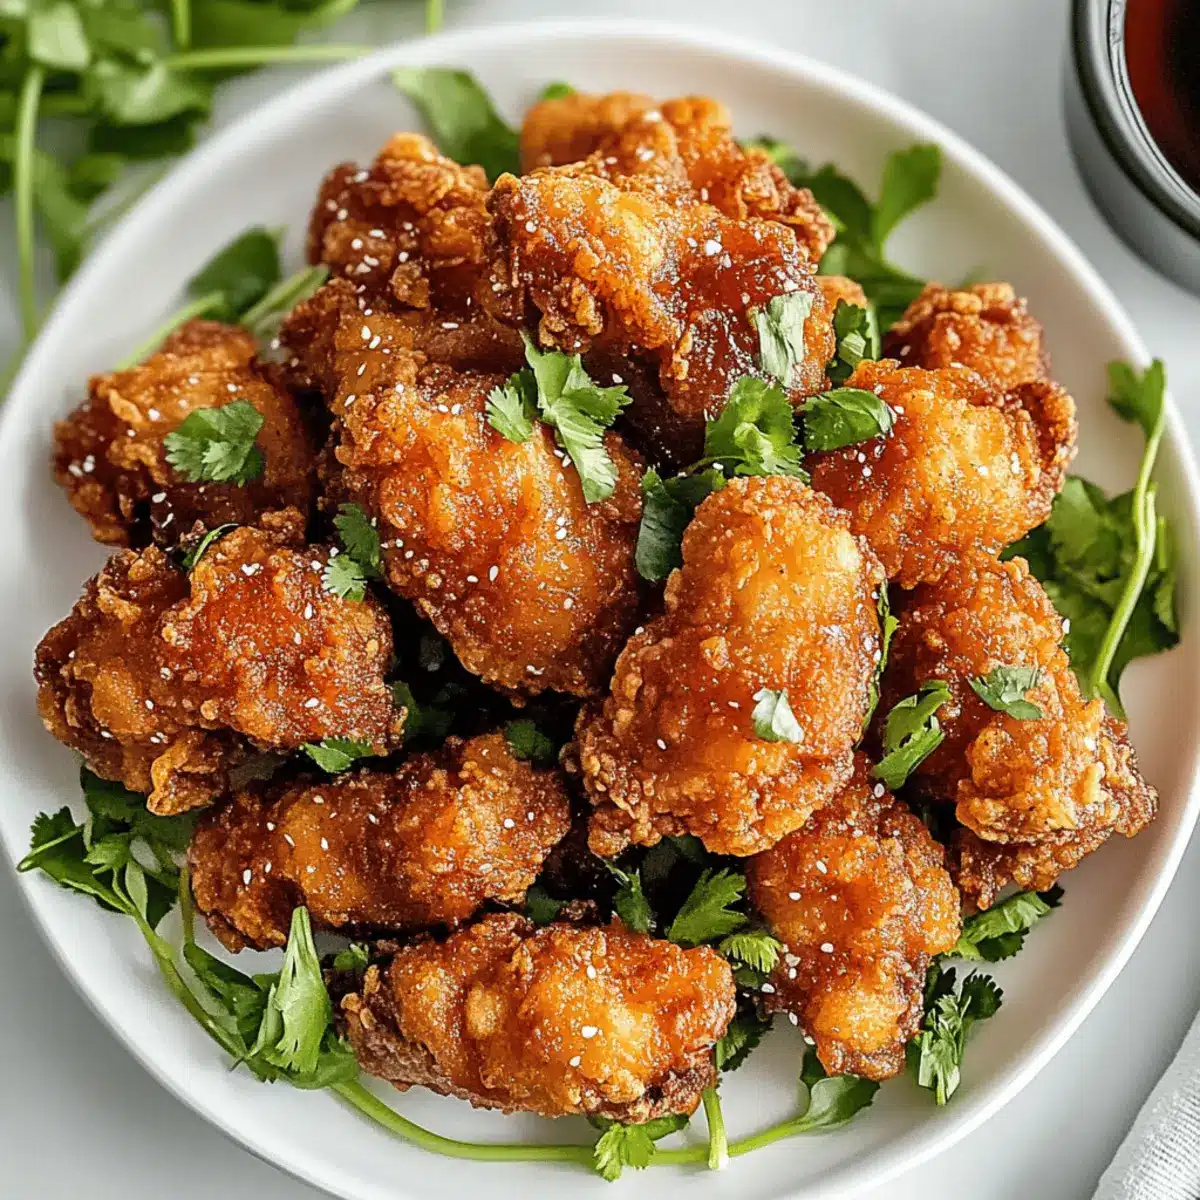
As I gazed at the golden-brown chicken sizzling in the oil, I couldn’t help but feel a rush of excitement. This Perfectly Crispy Karaage Chicken recipe takes traditional Japanese fried chicken to new heights, ensuring each bite is a crisp delight paired with a juicy center. It’s no surprise that this dish is a favorite in my home—perfect for quick dinners after a long day or as a showstopper at gatherings. With a savory marinade elevating the umami flavors, and a double-fry technique guaranteeing a crunch, you’ll find this recipe becomes a go-to in your kitchen. Plus, it’s meal prep-friendly, allowing you to enjoy homemade goodness without the stress. Are you ready to master the art of Karaage Chicken? Let’s dive in!
Why Is This Karaage Chicken So Amazing?
Unmatched Crispiness: The double-fry method guarantees each piece is irresistibly crunchy, elevating your fried chicken experience.
Savory Marinade: A blend of soy sauce, ginger, and mirin brings delicious umami flavors that will leave your taste buds dancing.
Meal Prep Friendly: Ready in under an hour, it’s perfect for quick dinners or impressing guests without stress.
Versatile Pairing: Enjoy your Karaage Chicken with a refreshing side salad or pair it with steamed vegetables and rice for a complete meal.
Crowd-Pleasing Flavor: Whether you’re hosting friends or just treating yourself, this dish is a guaranteed hit, reminiscent of your favorite takeout without the guilt. Discover more delightful chicken options like Sweet Chili Chicken or the comforting Garlic Parmesan Chicken!
Karaage Chicken Ingredients
For the Marinade
• Cooking Sake – Adds depth of flavor and helps tenderize the chicken; substitute with white wine if unavailable.
• Soy Sauce – Provides umami and saltiness; tamari can be used for a gluten-free option.
• Freshly Grated Ginger – Adds spice and aroma; use garlic for a different flavor profile.
• Mirin – Sweetness and complexity balance the savory elements; honey can be a substitute for sweetness.
For the Chicken
• Chicken Thigh Fillets – Juicier than breast, making for a more flavorful dish; chicken breast can be used for a leaner option.
• Corn Flour/Cornstarch – Creates a crispy coating for frying; all-purpose flour may work, but the crispness will vary.
For Frying
• Vegetable Oil – Essential for deep frying to achieve the desired crispiness; canola or peanut oil are good alternatives.
For Garnish
• Sprigs of Parsley – Adds color and freshness.
• Shredded Lettuce or Cabbage – Complements the dish visually and provides a crunchy texture.
This Karaage Chicken recipe will surely impress with its delectable flavors and satisfying crunch. Enjoy the journey of creating this clucking good dish!
Step‑by‑Step Instructions for Perfectly Crispy Karaage Chicken Recipe
Step 1: Prepare Chicken
Start by patting the chicken thigh fillets dry with paper towels. This step is crucial as it helps the marinade adhere better and ensures the Karaage Chicken achieves that perfect crispiness during frying. Cut the chicken into bite-sized pieces to enhance the marinade absorption and cooking time.
Step 2: Marinade Chicken
In a ziplock bag or bowl, combine cooking sake, soy sauce, freshly grated ginger, and mirin to create a savory marinade. Add the chicken pieces and massage the mixture to coat every piece evenly. Let the marinated chicken rest for 30 minutes to 1 hour in the refrigerator, allowing flavors to deepen and tenderize the meat.
Step 3: Heat Oil
In a deep pot, pour vegetable oil to a depth of about 3-4 cm and heat until it reaches 160°C (320°F). Use a thermometer to ensure the temperature is accurate; the oil should shimmer but not smoke. This optimal frying temperature is essential for achieving that signature crunchiness.
Step 4: Drain Chicken
Remove the chicken from the marinade, allowing excess liquid to drip off. Place the marinated pieces on paper towels to absorb any moisture. This step is vital as excess marinade can create soggy Karaage instead of the crispy texture you desire during frying.
Step 5: Coat Chicken
In a separate bowl, add corn flour or cornstarch. Take each piece of chicken and coat it evenly, ensuring all surfaces are covered. This coating will create the crunchy exterior when fried. Shake off any excess flour to avoid clumping in the frying oil.
Step 6: First Frying
Carefully add chicken pieces to the hot oil in batches, ensuring there’s space between each piece to prevent sticking. Fry for about 2.5-3 minutes or until the chicken develops a light golden color. Avoid overcrowding the pot to maintain the oil temperature for proper frying.
Step 7: Rest Chicken
Once the first frying is complete, use a slotted spoon to remove the chicken from the oil and place it on paper towels. Allow the chicken to rest for 3-4 minutes. This rest period helps retain moisture while preparing for the crucial second fry that will enhance the crispiness.
Step 8: Increase Oil Temperature
After resting the fried chicken, skim any crumbs from the oil to keep it clean. Increase the heat to get the oil temperature up to 190-200°C (374-392°F). This high heat is necessary for the second frying, which will give the Karaage Chicken its final crispy finish.
Step 9: Second Frying
Fry the rested chicken pieces again for an additional 30 seconds to 1 minute, or until they are deeply golden and crispy. This quick fry will lock in juiciness while creating that irresistible crunch everyone loves with Karaage Chicken.
Step 10: Serve
Once crispy, remove the Karaage Chicken from the oil, letting any excess oil drip off. Serve immediately with a garnish of parsley and a side of shredded lettuce or cabbage for freshness. This delicious dish is perfect for sharing or enjoying solo, bringing authentic Japanese flavors to your table.
Karaage Chicken Recipe Variations
Feel free to get creative and personalize your Karaage Chicken experience with these delightful variations!
-
Heat Levels: Spice things up by adding chili flakes or minced fresh chili to the marinade for a fiery kick! Your taste buds will thank you.
-
Gluten-Free Twist: Substitute soy sauce with tamari and use gluten-free corn flour for a completely gluten-free dish without sacrificing flavor. Enjoy the crunch without worry!
-
Baking Alternative: For a lighter version, marinate and bake the chicken on a lined tray. Broil for the last few minutes for that extra crunch—delicious and guilt-free!
-
Flavor Infusion: Add citrus zest, like lime or yuzu, to the marinade for a bright and refreshing flavor twist. The aromatic citrus notes will elevate your dish beautifully.
-
Crispy Panko Coating: Instead of corn flour, use panko breadcrumbs for an ultra-crispy finish. This lovely texture delivers an amazing crunch with every bite.
-
Herb-Infused Marinade: Toss in fresh herbs like basil or cilantro into the marinade for an aromatic twist. It adds a unique layer of flavor that makes this dish extra special.
-
Sweet Element: For a sweeter take, mix a little honey or maple syrup into the marinade for a balance of savory and sweet, creating an unforgettable taste experience.
If you’re looking for even more mouthwatering chicken recipes, consider trying the Flavor Packed Chicken or the delectable Korean Spicy Chicken Stir Fry. Happy cooking!
How to Store and Freeze Karaage Chicken
Fridge: Store leftover Karaage Chicken in an airtight container for up to 3 days. Reheating in the oven helps restore its crispy texture.
Freezer: To freeze, wrap individual pieces tightly in plastic wrap and then place in a freezer-safe bag. It can be stored for up to 2 months.
Reheating: For best results, reheat frozen Karaage Chicken directly from frozen in the oven at 375°F (190°C) for about 15-20 minutes until heated through and crispy.
Room Temperature: Avoid leaving cooked Karaage Chicken at room temperature for more than 2 hours to ensure food safety.
What to Serve with Perfectly Crispy Karaage Chicken?
Elevate your indulgent Karaage Chicken experience by pairing it with flavorful sides and refreshing accompaniments.
- Cucumber Radish Salad: A light, tangy salad that adds crunch and freshness, balancing the rich flavors of the chicken perfectly.
- Steamed Rice: Fluffy and plain, this staple absorbs the savory juices, making every bite a delightful combination of flavors.
- Sweet Soy Dipping Sauce: A perfect complement to your Karaage Chicken, offering a delicious blend of sweetness and umami to enhance each crispy piece.
- Garlic Edamame: Lightly salted and bursting with flavor, these tender beans offer a delightful and nutritious contrast to the crunchy chicken.
- Miso Soup: A warm bowl of this classic soup provides umami depth, making it a comforting addition to your meal that honors Japanese cuisine.
- Pickled Vegetables: These tangy, vibrant bites not only cleanse the palate but also add an exciting burst of color and texture to your meal.
- Beer or Sake: Enjoy with a cold beer or a glass of chilled sake to enhance the umami notes of the Karaage Chicken, making for a delightful dining experience.
- Green Tea Ice Cream: For dessert, this creamy treat complements the flavors of your meal while providing a refreshing finish after the delicious main course.
Expert Tips for Karaage Chicken
-
Oil Temperature Check: Always monitor the oil temperature with a thermometer to maintain perfect frying conditions, ensuring your Karaage Chicken is crispy, not soggy.
-
Marinade Time: Don’t rush the marinating process. Allowing the chicken to soak for at least 30 minutes enhances its flavor and tenderness.
-
Batch Frying: Fry the chicken in small batches to keep the oil temperature from dropping, which is crucial for achieving that delightful, crunchy texture.
-
Resting Period: Don’t skip the resting period after the first fry; it’s key to allowing the chicken to retain moisture before the second fry.
-
Coating Technique: Make sure each piece is evenly coated in corn flour. Shake off excess to ensure a light, crispy layer instead of a heavy one.
-
Experiment with Marinade: Feel free to adapt the marinade by adding garlic or chili for a unique spin on your classic Karaage Chicken recipe.
Make Ahead Options
These crispy Karaage Chicken pieces are perfect for busy home cooks looking to save time during the week! You can marinate the chicken up to 24 hours in advance, allowing the flavors to fully penetrate the meat. Simply prepare the marinade, combine it with the chicken in a ziplock bag, and refrigerate. For best results, coat the chicken with corn flour just before frying to maintain its crispy texture. You can also fry the chicken in batches and store the cooked pieces in an airtight container for up to 3 days. When you’re ready to serve, simply reheat in the oven to regain that delightful crunch. Enjoy restaurant-quality Karaage Chicken with minimal effort, even on your busiest nights!
Karaage Chicken Recipe FAQs
How do I choose ripe ingredients for my Karaage Chicken?
Absolutely! For the best flavor, choose fresh chicken thighs that are firm to the touch with no dark spots visible. Look for ingredients like ginger that are fragrant and firm, while soy sauce should be good quality for a more robust umami flavor.
What’s the best way to store leftover Karaage Chicken?
After enjoying your meal, let any leftover Karaage Chicken cool down. Store it in an airtight container in the fridge for up to 3 days. For a crispier reheat, place it in the oven at 375°F (190°C) for about 10-15 minutes before serving again!
Can I freeze my Karaage Chicken? If so, how?
Yes, you can freeze leftover Karaage Chicken! Wrap individual pieces tightly in plastic wrap, then place them in a freezer-safe bag. It’s best to consume them within 2 months for optimal flavor. When ready to enjoy, preheat your oven to 375°F (190°C) and bake them directly from frozen for about 15-20 minutes.
What if my Karaage Chicken isn’t crispy enough?
Very! If your chicken isn’t as crispy as you’d like, it might be due to oil temperature. Make sure the oil is properly heated to 160°C (320°F) for the first fry and 190-200°C (374-392°F) for the second one. Also, avoid overcrowding the pan during frying to maintain heat.
Are there dietary restrictions I should consider for Karaage Chicken?
Definitely! If you’re serving guests, keep an eye out for allergies. Use tamari instead of soy sauce for those who are gluten-sensitive. Similarly, ensure listeners with alcohol restrictions swap out cooking sake with white wine or omit it altogether.
Can I make Karaage Chicken in advance?
Absolutely! Marinate the chicken the night before and store it in the fridge. When you’re ready, just fry it up for a quick meal. It’s a fantastic way to save time and still enjoy that crispy, delicious Karaage Chicken you crave!
Crispy Karaage Chicken Recipe That Will Wow Your Taste Buds
Ingredients
Equipment
Method
- Pat the chicken thigh fillets dry with paper towels, then cut into bite-sized pieces.
- Combine cooking sake, soy sauce, ginger, and mirin to create the marinade. Add chicken and massage to coat evenly.
- Heat vegetable oil in a deep pot until it reaches 160°C (320°F).
- Remove chicken from marinade, allow excess liquid to drip off, and rest on paper towels.
- Coat each chicken piece with corn flour/cornstarch evenly.
- Fry chicken in batches for 2.5-3 minutes until light golden.
- Remove fried chicken and let it rest for 3-4 minutes.
- Increase oil temperature to 190-200°C (374-392°F).
- Fry the chicken pieces again for 30 seconds to 1 minute until deeply golden and crispy.
- Serve immediately with garnish of parsley and a side of lettuce or cabbage.
Leave a Reply