
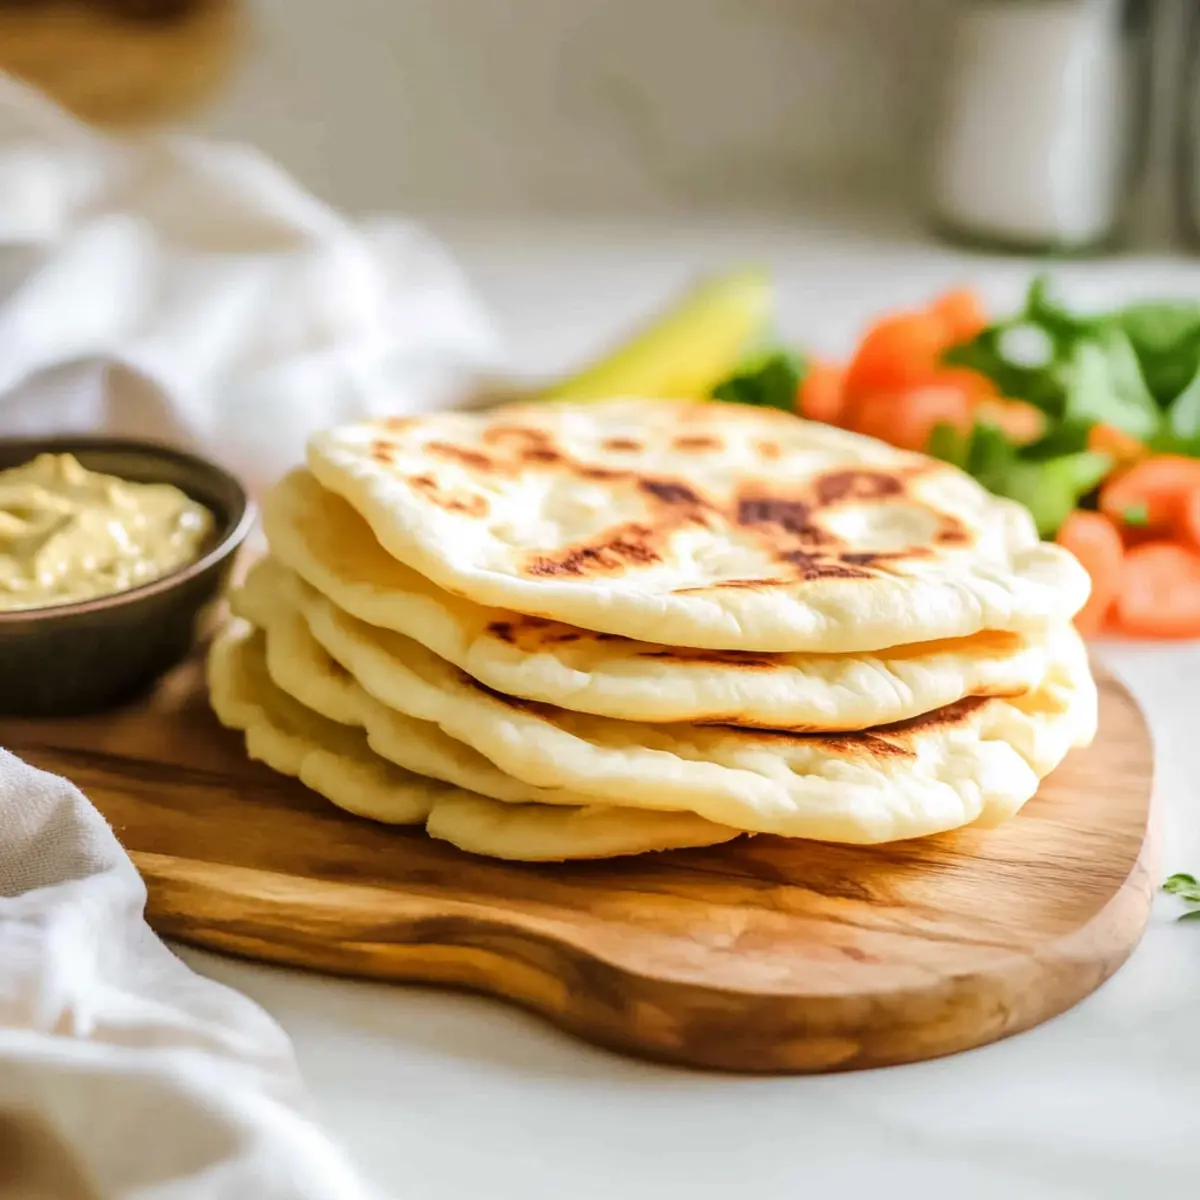
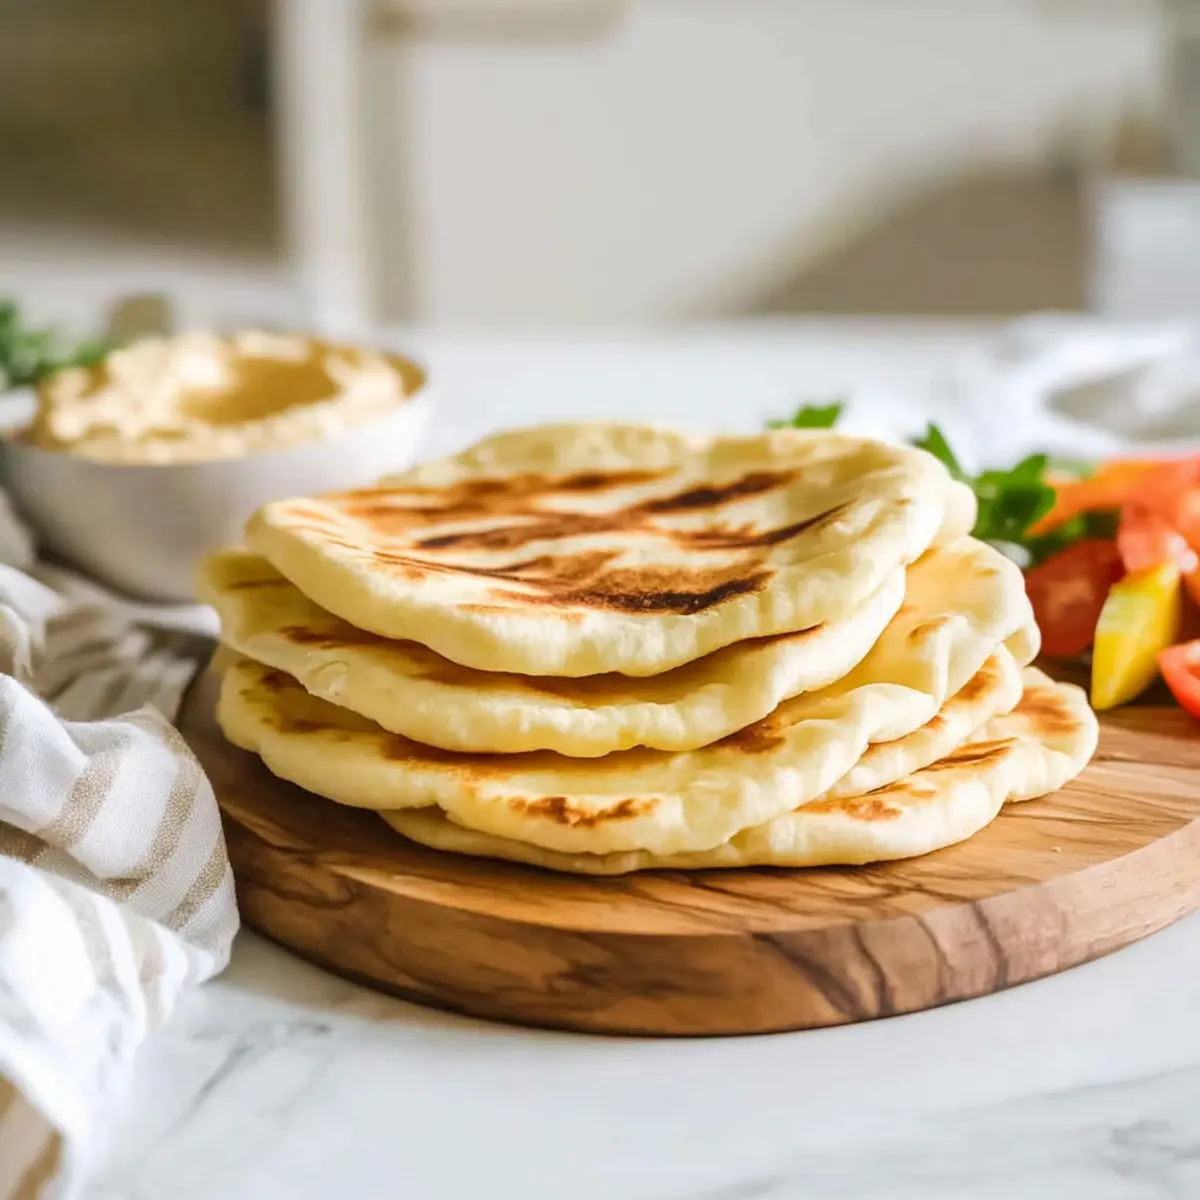
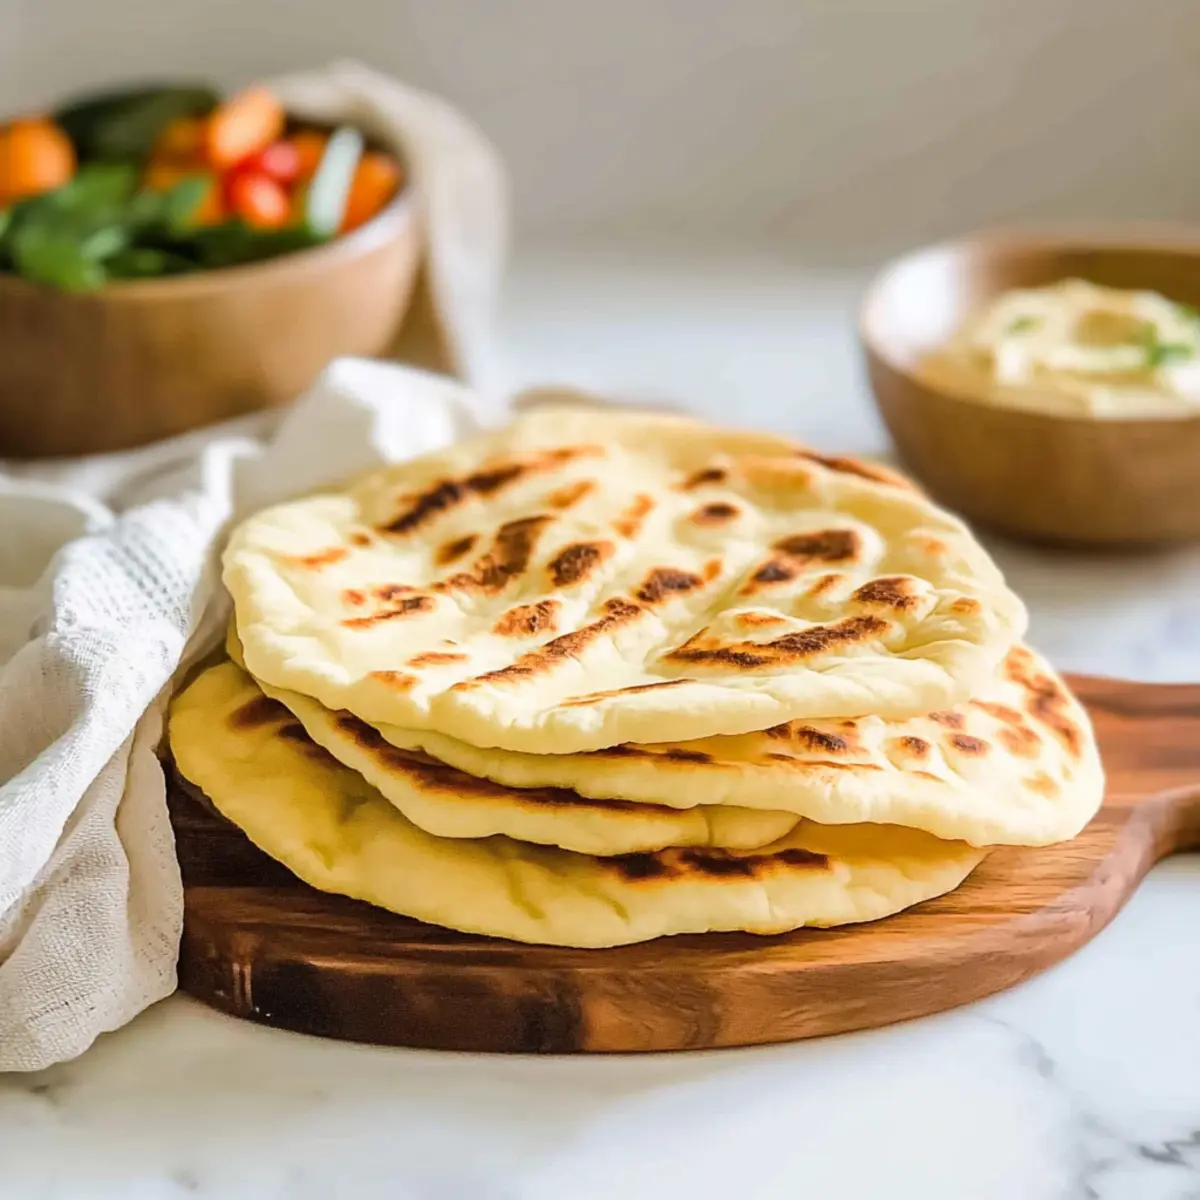
The moment the warm, fluffy dough hits the skillet, a delightful sizzle fills the air, transporting me straight to the sun-kissed shores of Greece. This Greek Pita recipe offers a simple yet rewarding experience—perfect for anyone looking to elevate their meals without excessive fuss. Not only does it serve as a versatile base for your favorite Mediterranean dishes, but each pita also puffs up beautifully, creating an inviting pocket that can hold anything from juicy meats to crisp salads. Whether you’re dipping it into creamy hummus for an afternoon snack or wrapping it around grilled chicken for dinner, this easy pita recipe will delight your taste buds and impress your guests. Are you ready to fill your kitchen with the enticing aroma of homemade bread? Let’s dive in!
Why Make Your Own Greek Pita?
Freshness, there’s nothing quite like the aroma of homemade pita wafting through your kitchen. Versatile, these pitas are perfect for wrapping grilled meats, fresh veggies, or your favorite dips like hummus or tzatziki. Easy to make, this recipe requires minimal ingredients and effort, making it accessible for everyone. Customizable, you can add herbs or spices to elevate the flavor, and even opt for a gluten-free version with a simple flour swap. Impress your guests with warm, fluffy pitas at your next gathering—this easy pita recipe will surely steal the show! Want to try pairing them with Chewy Chocolate Chip for dessert? You won’t be disappointed!
Greek Pita Ingredients
For the Dough
• All-Purpose Flour – Provides the structure and texture of the pita; substitute with a 1:1 gluten-free flour blend for gluten-free pitas.
• Active Dry Yeast – Leavens the dough, making it rise; ensure yeast is fresh to achieve the best results.
• Kosher Salt – Enhances flavor while strengthening the gluten structure in the dough.
• Warm Milk – Adds moisture and richness; can be replaced with plant-based milk for a vegan option.
• Warm Water – Activates yeast and helps create a supple dough; ensure it’s warm to avoid killing the yeast.
• Olive Oil – Adds flavor and elasticity to the dough; extra is also needed for cooking and greasing.
Optional Garnish
• Garlic and Herb Butter – Brush over cooked pitas for added flavor; it’s perfect for enhancing your Greek pita experience.
Step‑by‑Step Instructions for Greek Pita
Step 1: Combine Dry Ingredients
In a large mixing bowl, whisk together 3 cups of all-purpose flour, 2 teaspoons of active dry yeast, and 1 teaspoon of kosher salt. Ensure the yeast is fresh and the mixture is well-combined to promote even rising. This dry blend sets the foundation for your delightful Greek pita.
Step 2: Add Wet Ingredients
Gradually pour in 1 cup of warm milk and 1 cup of warm water, stirring gently until the mixture begins to come together. The liquids should feel warm to the touch, which helps activate the yeast. Continue mixing until a shaggy dough forms, appearing slightly sticky yet cohesive.
Step 3: Knead the Dough
Drizzle in 2 tablespoons of olive oil, then turn the dough out onto a lightly floured surface. Knead for about 8–10 minutes until it becomes smooth and elastic. Your Greek pita dough should be slightly tacky but not overly sticky; when done, it should spring back when pressed.
Step 4: Let Dough Rise
Lightly grease a separate bowl with olive oil, placing the kneaded dough inside. Cover it tightly with plastic wrap and let it rise in a warm place for about 1 hour or until it doubles in size. You’ll know it’s ready when the dough has puffed up and feels billowy.
Step 5: Portion the Dough
Once the dough has risen, lightly dust a surface with flour and gently turn out the dough. Cut it into 8 equal pieces using a sharp knife, ensuring you have manageable portions for your Greek pita. Each piece will be formed into a round, so keep them covered to prevent drying.
Step 6: Shape and Roll
Take each piece of dough and roll it into a smooth ball between your palms. Using a rolling pin, flatten each ball into a circle about 1/4 inch thick and 7-8 inches in diameter. Aim for even thickness to ensure proper puffing during cooking; the more uniform, the better!
Step 7: Cook the Pitas
Preheat a cast iron skillet over high heat. Add a teaspoon of olive oil, ensuring it’s hot before placing the first pita in the skillet. Cook each pita for about 1-2 minutes on one side, keeping an eye out for puffing and a light golden-brown color, then flip to cook the other side.
Step 8: Finish and Serve
Once all pitas are cooked, you can optionally brush them with melted garlic and herb butter for added flavor. Serve your fluffy Greek pitas warm, perfect for dipping or wrapping, as their inviting aroma fills your home and brings a taste of Greece to your table.
Make Ahead Options
These Greek Pita breads are perfect for meal prep enthusiasts looking to save time during busy weeknights! You can prepare the dough up to 24 hours in advance by following Steps 1-4, then refrigerate it in the greased bowl covered with plastic wrap to keep it fresh and prevent drying. When you’re ready to enjoy, simply let the dough come to room temperature for about 30 minutes, then proceed with Steps 5-8 for perfectly puffed pitas. For longer storage, you can freeze the cooked pitas—just make sure to wrap them in foil or plastic wrap to maintain their softness. Reheat them gently in the skillet or oven before serving, and they’ll taste just as delightful!
Tips for the Best Greek Pita
• Check Your Yeast: Ensure your active dry yeast is fresh. Expired yeast won’t rise the dough properly, resulting in flat pitas.
• Right Temperature: Use warm, not hot, water and milk. Too hot can kill the yeast, so always test with your finger for warmth.
• Knead Until Smooth: Knead the dough for about 8–10 minutes until it’s smooth and elastic. A well-kneaded dough will puff beautifully while cooking.
• Uniform Thickness: Roll pitas to 1/4 inch thick for even cooking. Inconsistent thickness can lead to some pitas puffing and others staying flat.
• Heat Adjustment: Ensure your skillet is hot and adjust the heat as needed. If pitas aren’t puffing, your pan may not be hot enough.
• Wrap for Freshness: Store any leftover Greek pita in foil or an airtight container. Reheat them on a skillet for that just-made feel before serving again!
What to Serve with Fluffy Greek Pita Bread?
Imagine bursting flavors and comforting textures dancing on your plate, making your meal an unforgettable experience.
-
Tzatziki Sauce: This cool, creamy cucumber-yogurt dip perfectly balances the warm, fluffy pitas and enhances their Mediterranean charm.
-
Grilled Chicken Skewers: Tender, marinated chicken pairs beautifully, giving your meal a hearty protein boost that’s irresistible when wrapped in pita.
-
Falafel Bites: These crispy, spiced chickpea balls offer a delightful crunch and pair wonderfully with the soft pita for a satisfying vegetarian option.
-
Tabbouleh Salad: This vibrant, herbaceous salad is refreshing and light, delivering a burst of flavor that complements the rich pitas.
-
Spicy Roasted Vegetables: Roasted peppers, zucchini, and eggplant add a savory, caramelized sweetness, making each bite a festival of flavors.
-
Hummus Trio: Mixing different hummus flavors, like classic, roasted red pepper, and garlic, serves as a delightful dip that lures everyone in for more.
Pairing these delicious options with your homemade Greek pita creates a feast that promises to banish fast food boredom and inspire culinary creativity in your own kitchen!
Greek Pita Variations & Substitutions
Feel free to get creative and personalize your Greek pita experience with these exciting variations!
-
Garlic-Infused: Add 2 tablespoons of minced garlic to the dough for an aromatic twist. The whole family will savor the rich, inviting flavor!
-
Whole Wheat: Substitute half of the all-purpose flour with whole wheat flour for a nutty taste and a slightly denser texture. It’s a healthier choice that doesn’t skimp on flavor.
-
Herb Delight: Mix in 1-2 tablespoons of dried oregano or thyme into the dough for a fragrant herbal note. This little addition will transport your pitas straight to the Mediterranean!
-
Spicy Kick: Add a teaspoon of chili powder or paprika to the dough for a hint of spice. It’s perfect to wake up your taste buds, especially when paired with creamy dips.
-
Savory Cheese: Incorporate shredded feta cheese directly into the dough for a cheesy version. Imagine biting into a warm pita with gooey feta melting in your mouth!
-
Coconut Milk: Swap the warm milk for coconut milk for a subtly sweet and tropical flavor! This delightful twist is perfect for pairing with exotic spreads.
-
Zesty Citrus: Add the zest of one lemon or orange to the dough for a refreshing citrusy brightness. It complements savory fillings beautifully and brings a pop of flavor.
-
Gluten-Free: Use a 1:1 gluten-free flour blend in place of all-purpose flour for a gluten-free version. You won’t even miss the gluten when you taste these fluffy pitas!
As you explore these variations, don’t forget to serve your fresh pitas with some delicious homemade dips like Chewy Chocolate Chip for dessert to round out your meal. Happy cooking!
How to Store and Freeze Greek Pita
Room Temperature: Keep cooked Greek pitas in a cool, dry place, wrapped in a clean cloth for up to 1 day. This helps maintain their softness without causing moisture build-up.
Fridge: Store pitas in an airtight container or wrapped in foil for up to 3 days in the refrigerator. This will keep them fresh and ready for your next meal.
Freezer: For longer storage, freeze the pitas in a single layer on a baking sheet before transferring them to a freezer-safe bag. They can be frozen for up to 3 months.
Reheating: To reheat, place pitas directly on a skillet over medium heat for 1-2 minutes per side, or wrap in foil and heat in a low oven. This restores their delightful fluffiness!
Greek Pita Bread Recipe FAQs
How do I know if my yeast is fresh?
Absolutely! To ensure your active dry yeast is fresh, you can perform a simple test. Just combine 1 teaspoon of yeast with 1 teaspoon of sugar and 1/4 cup of warm water (about 110°F). Let it sit for about 5 to 10 minutes; if it bubbles and froths, it’s fresh and ready to use!
What’s the best way to store Greek pita?
You can store cooked Greek pitas in an airtight container or wrapped in foil in the refrigerator for up to 3 days. This keeps them soft and ready for your next meal. If you’d like to keep them longer, consider freezing them!
Can I freeze Greek pita? How?
Yes, you can freeze Greek pitas! First, allow them to cool completely after cooking. Then, place them in a single layer on a baking sheet and freeze for about 1 hour. Once frozen, transfer them to a freezer-safe bag and store for up to 3 months. When you’re ready to enjoy, simply reheat in a skillet or wrap them in foil and warm them in the oven.
What should I do if my pitas don’t puff up?
If your pitas don’t puff up while cooking, it could be a couple of things! First, ensure your skillet is hot enough; if it’s not sizzling when you add the pita, it won’t puff. Also, check that you’re rolling the dough to the correct thickness of about 1/4 inch. If they still don’t puff, knead the dough a little longer next time for better elasticity.
Are Greek pitas safe for people with gluten allergies?
You can make gluten-free Greek pitas by using a 1:1 gluten-free flour blend! Be sure to check that all other ingredients, such as your yeast and any added spices, are also gluten-free. That way, everyone can enjoy these delightful pitas!
How can I enhance the flavor of my Greek pita?
The more the merrier when it comes to flavor! You can add some minced garlic or herbs directly into the dough for a delicious twist. Additionally, brushing the cooked pitas with melted garlic and herb butter adds an extra layer of taste that complements the fluffy texture beautifully. Enjoy experimenting!

Homemade Greek Pita: Soft, Fluffy, and So Easy to Make
Ingredients
Equipment
Method
- In a large mixing bowl, whisk together 3 cups of all-purpose flour, 2 teaspoons of active dry yeast, and 1 teaspoon of kosher salt.
- Gradually pour in 1 cup of warm milk and 1 cup of warm water, stirring gently until the mixture begins to come together.
- Drizzle in 2 tablespoons of olive oil, then knead the dough on a lightly floured surface for about 8–10 minutes until smooth and elastic.
- Lightly grease a bowl with olive oil, place the dough inside, cover, and let it rise in a warm place for 1 hour.
- Once risen, dust a surface with flour, turn out the dough, and cut it into 8 equal pieces.
- Roll each piece into a smooth ball, then flatten into a circle about 1/4 inch thick and 7-8 inches in diameter.
- Preheat a cast iron skillet over high heat, add a teaspoon of olive oil, and cook each pita for 1-2 minutes per side.
- Optionally brush with melted garlic and herb butter before serving warm.
Leave a Reply