
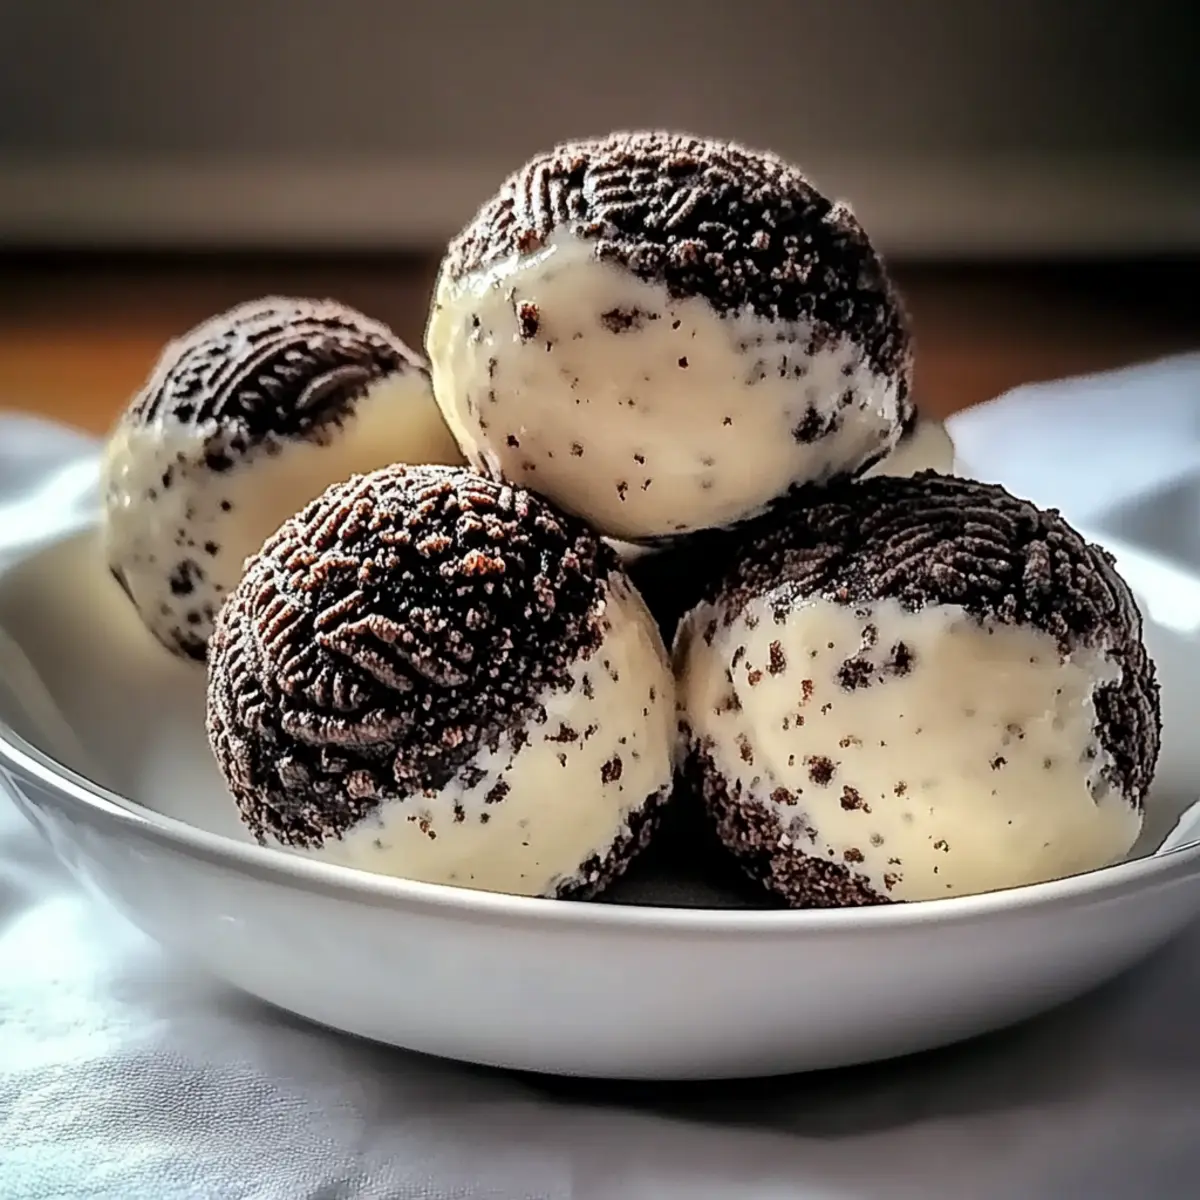
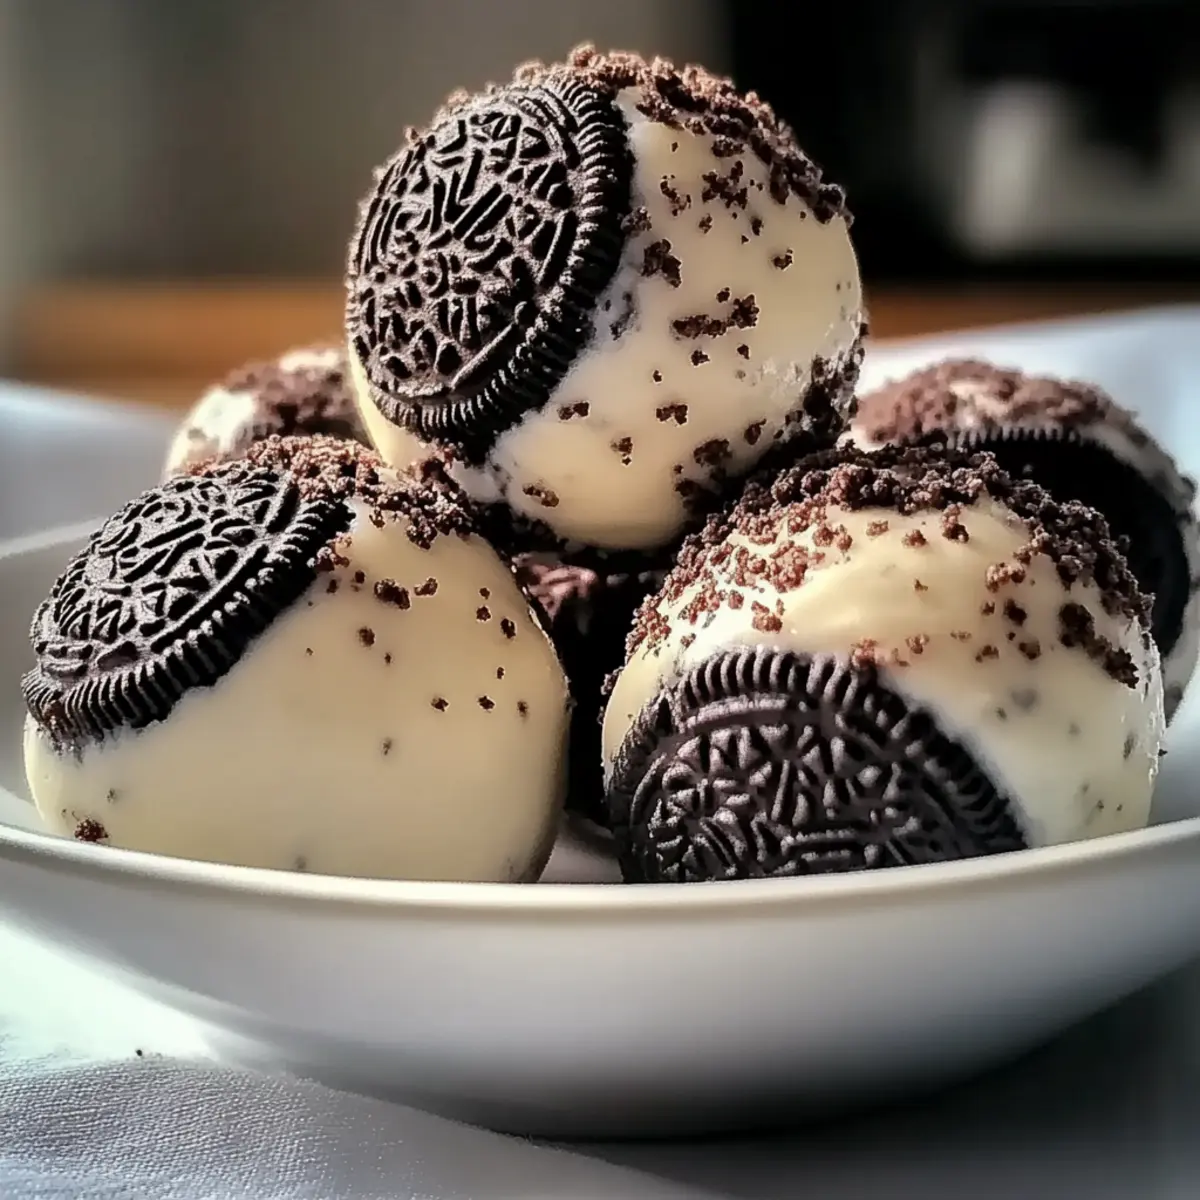
As I stood in my kitchen, surveying the remnants of a hectic week, a light bulb went off: I needed a sweet treat that wouldn’t derail my healthy eating goals. Enter the Cream Cheese Oreo Protein Balls—a delightful blend of creamy indulgence and cookie crunch, packed with a satisfying 8 grams of protein per bite. Not only are these no-bake snacks ready in just 15 minutes, but they also make for a guilt-free indulgence that’s perfect for meal prepping or fueling up post-workout. With endless variations to suit different dietary needs, from vegan to nut-free, this recipe is your ticket to impress at gatherings while keeping your cravings in check. Curious about how to whip up these protein-packed delights? Let’s dive in!
Why Try Cream Cheese Oreo Protein Balls?
Guilt-Free Indulgence: These snacks allow you to indulge without the guilt, satisfying sweet cravings while promoting your fitness goals.
Quick Prep Time: With only 15 minutes to prepare, they fit easily into your busy lifestyle—perfect for last-minute get-togethers!
Endless Variations: Customize these balls with flavors like chocolate chips or fruity bursts—great for all dietary needs!
Protein Power: Each ball packs a nutritious punch with 8g of protein, making them ideal for meal prep or post-workout recovery.
Crowd-Pleasing Treats: Impress friends and family at gatherings; who wouldn’t love a delicious protein snack? Try them alongside an Oreo Dirt Dessert for an extra sweet offering!
Cream Cheese Oreo Protein Balls Ingredients
For the Base
• Cream Cheese – Provides a creamy texture and richness; use full-fat for the best flavor, reduced-fat can also work.
• Oreo Cookie Crumbs – Adds sweetness and crunch; substitute with gluten-free Oreos for a gluten-free option.
• Protein Powder – Increases protein content; use your favorite type, whether whey, casein, or plant-based.
For the Mixture
• Milk – Adjusts the mixture’s consistency for shaping; start with ¼ cup, adding more if needed for the right texture.
• Vanilla Extract – Enhances flavor; feel free to omit if you prefer less sweetness.
With these ingredients, you’re on the way to making delicious Cream Cheese Oreo Protein Balls that transform your snacking into a guilt-free treat!
Step‑by‑Step Instructions for Cream Cheese Oreo Protein Balls
Step 1: Blend the Base Mixture
In a large mixing bowl, combine softened cream cheese, crushed Oreo cookie crumbs, protein powder, milk, and vanilla extract. Use a hand mixer or a spatula to blend the ingredients together until the mixture is smooth and well-combined, approximately 2–3 minutes. As you mix, look for a creamy texture that holds together but is not runny—this will be the base for your Cream Cheese Oreo Protein Balls.
Step 2: Adjust Consistency
If your mixture feels too dry and crumbly, gradually add more milk, a tablespoon at a time, until you achieve a dough-like consistency. The goal is to create a mixture that easily holds together when shaped but isn’t overly sticky. This process should take about 2 more minutes, allowing you to monitor the texture closely.
Step 3: Shape the Protein Balls
Once the mixture is at the right consistency, use a cookie scoop or your hands to portion out 1-inch pieces of the dough. Roll each portion between your palms to form smooth, round balls. The final size should be uniform to ensure even chilling. Place the formed Cream Cheese Oreo Protein Balls on a clean surface as you work through the mixture.
Step 4: Prepare for Chilling
Line a baking sheet with parchment paper, ensuring it’s large enough to accommodate all the protein balls without crowding. Carefully place each rolled ball onto the prepared sheet, leaving some space between them to allow for any slight expansion. This will also make it easier to handle them later.
Step 5: Chill the Protein Balls
Refrigerate the baking sheet with the Cream Cheese Oreo Protein Balls for at least 30 minutes. This step is crucial as it firms up the balls, enhancing their texture and making them more enjoyable to eat. When ready, they should be slightly firm to the touch but still maintain a soft, chewy interior.
Step 6: Serve or Store
After chilling, remove the protein balls from the fridge. They can be served immediately or stored in an airtight container. If you choose to store them, they will keep well in the refrigerator for up to a week. For longer storage, consider freezing them for up to three months. Enjoy your Cream Cheese Oreo Protein Balls chilled for the best taste!

What to Serve with Cream Cheese Oreo Protein Balls
These delightful, no-bake snacks are a perfect addition to any meal or gathering, complementing a variety of flavors and textures.
- Fresh Fruit Platter: Juicy strawberries and crisp apple slices provide a refreshing contrast to the rich, creamy protein balls, making them a vibrant addition.
- Greek Yogurt Dip: A smooth and tangy dip adds creaminess while balancing sweetness, perfect for dipping your protein balls for an extra treat.
- Nutty Granola Bars: The crunchy texture and wholesome flavors of granola bars make a satisfying pairing, creating a delicious snack duo.
- Chocolate-Covered Strawberries: The lush sweetness of chocolate-covered strawberries pairs beautifully with the rich Oreo flavors, making for a decadent dessert spread.
- Coffee or Espresso: A warm cup of coffee enhances the sweet and creamy flavors of the protein balls, creating a comforting combination for relaxing moments.
- Sweetened Coconut Flakes: Rolling your protein balls in coconut flakes adds a chewy texture and tropical flair that amplifies the dessert experience.
- Mini Cheesecakes: Complement the creamy indulgence with mini cheesecakes, a delightful bite-size treat that echoes the flavors of your protein balls.
- Smoothie Bowl: Serve your protein balls atop a smoothie bowl filled with fruits and nuts for a nutritious and visually appealing snack.
Cream Cheese Oreo Protein Balls Variations
Feel free to let your creativity shine and customize these delicious treats to match your taste and dietary preferences!
- Nut-Free: Replace protein powder with oat flour for a safe and delicious option. This swap ensures a similar texture without the nuts!
- Plant-Based: Use dairy-free cream cheese and vegan protein powder for a fully vegan version that’s just as creamy and satisfying.
- Chocolate Lovers: Stir in mini chocolate chips or drizzle dark chocolate on top for an added cocoa boost. Your sweet tooth will thank you!
- Cookie Dough Twist: Toss in raw edible cookie dough pieces to give these protein balls a nostalgic twist that brings back memories of baking with loved ones.
- Fruity Version: Fold in dried cranberries or blueberries for a refreshing hint of fruitiness in every bite—perfect for those who love a balance of flavors.
- Tropical Flavor: Roll the finished protein balls in shredded coconut for a delightful tropical twist that adds chewiness and pizzazz.
- Spicy Kick: Add a pinch of cinnamon or even a dash of cayenne for those adventurous taste buds looking for a spicy surprise!
- High-Protein Boost: Consider swapping in a double scoop of protein powder for an extra jolt of nutrition, especially perfect for post-workout recovery.
These variations not only breathe new life into your Cream Cheese Oreo Protein Balls but also allow you to play around with flavors. Be sure to serve them alongside something equally delightful, like an Oreo Dirt Dessert or even a rich Bourbon Garlic Cream sauce if you’re feeling adventurous!
Make Ahead Options
These Cream Cheese Oreo Protein Balls are perfect for busy home cooks looking to save time during the week! You can prepare the mixture up to 24 hours in advance; simply blend the ingredients and shape the balls, but don’t chill them just yet. Store the rolled balls in an airtight container in the refrigerator to maintain their freshness. If you want to prepare even further ahead, these protein balls can be frozen for up to three months; just freeze them on a baking sheet first, then transfer to a container. When you’re ready to enjoy, simply thaw them in the fridge for a few hours before serving, and they’ll be just as delicious and satisfying!
How to Store and Freeze Cream Cheese Oreo Protein Balls
Fridge: Store your Cream Cheese Oreo Protein Balls in an airtight container in the refrigerator for up to one week, ensuring they stay fresh and delicious.
Freezer: For longer storage, freeze the protein balls in a single layer on a baking sheet for about an hour, then transfer them to a freezer-safe bag or container. They can be frozen for up to three months.
Thawing: To enjoy your frozen balls, simply transfer them to the fridge for a few hours or leave them at room temperature for about 30 minutes before serving.
Reheating: There’s no need to heat these no-bake treats! Serve them chilled for the best taste and texture experience.
Expert Tips for Cream Cheese Oreo Protein Balls
- Mix with Care: Avoid overmixing your ingredients to ensure the right consistency. Blend just until combined for the perfect texture.
- Milk Measurement: Start with ¼ cup of milk. Gradually add more if needed, ensuring the mixture isn’t too wet or too dry.
- Uniform Sizes: Roll your protein balls into uniform sizes for consistent chilling and bites. This helps each one achieve the desired texture.
- Chill Well: Refrigerate the balls for at least 30 minutes. This step is crucial for achieving that satisfying firmness while keeping a chewy center.
- Storage Place: Store your Cream Cheese Oreo Protein Balls in an airtight container in the fridge for up to a week or freeze them for longer shelf life.
Cream Cheese Oreo Protein Balls Recipe FAQs
What type of Oreos should I use for the best flavor?
I recommend using classic Oreo cookies to achieve that signature taste. But if you have dietary restrictions, gluten-free Oreos work great too! Just look for a gluten-free label on the packaging.
How should I store Cream Cheese Oreo Protein Balls?
Store your Cream Cheese Oreo Protein Balls in an airtight container in the refrigerator for up to one week. This helps maintain their fresh and creamy texture while keeping them ready for snacking whenever you need a guilt-free treat.
Can I freeze these protein balls?
Absolutely! To freeze, place the rolled protein balls in a single layer on a baking sheet for about an hour. Once firm, transfer them to a freezer-safe bag or container. They can be frozen for up to three months. When you’re ready to enjoy them, just leave them to thaw in the fridge for a few hours.
What should I do if my mixture is too dry?
If your mixture feels crumbly, simply add more milk gradually, one tablespoon at a time. Mix in between additions until you achieve a dough-like consistency. Aim for a texture that easily holds together without being too sticky.
Are these protein balls safe for people with allergies?
For those with nut allergies, you can substitute the protein powder with oat flour to make them nut-free. Also, if you have dairy allergies, choose dairy-free cream cheese and a plant-based protein powder. Always check labels to ensure they’re safe for dietary needs!
What are some tasty variations for these protein balls?
You have so many delicious options! Try adding mini chocolate chips for a chocolatey boost, or incorporate dried cranberries for a fruity version. If you’re looking for a tropical twist, rolling them in shredded coconut can add a delightful texture!

Cream Cheese Oreo Protein Balls for Guilt-Free Indulgence
Ingredients
Equipment
Method
- In a large mixing bowl, combine softened cream cheese, crushed Oreo cookie crumbs, protein powder, milk, and vanilla extract. Blend until smooth and well-combined, about 2-3 minutes.
- If the mixture is too dry, gradually add more milk until you achieve a dough-like consistency, about 2 more minutes.
- Using a cookie scoop or hands, portion out 1-inch pieces and roll them into smooth, round balls.
- Line a baking sheet with parchment paper and place the balls on it, leaving space between each.
- Refrigerate for at least 30 minutes to firm up the balls.
- Serve immediately or store in an airtight container in the fridge for up to a week.
Leave a Reply