
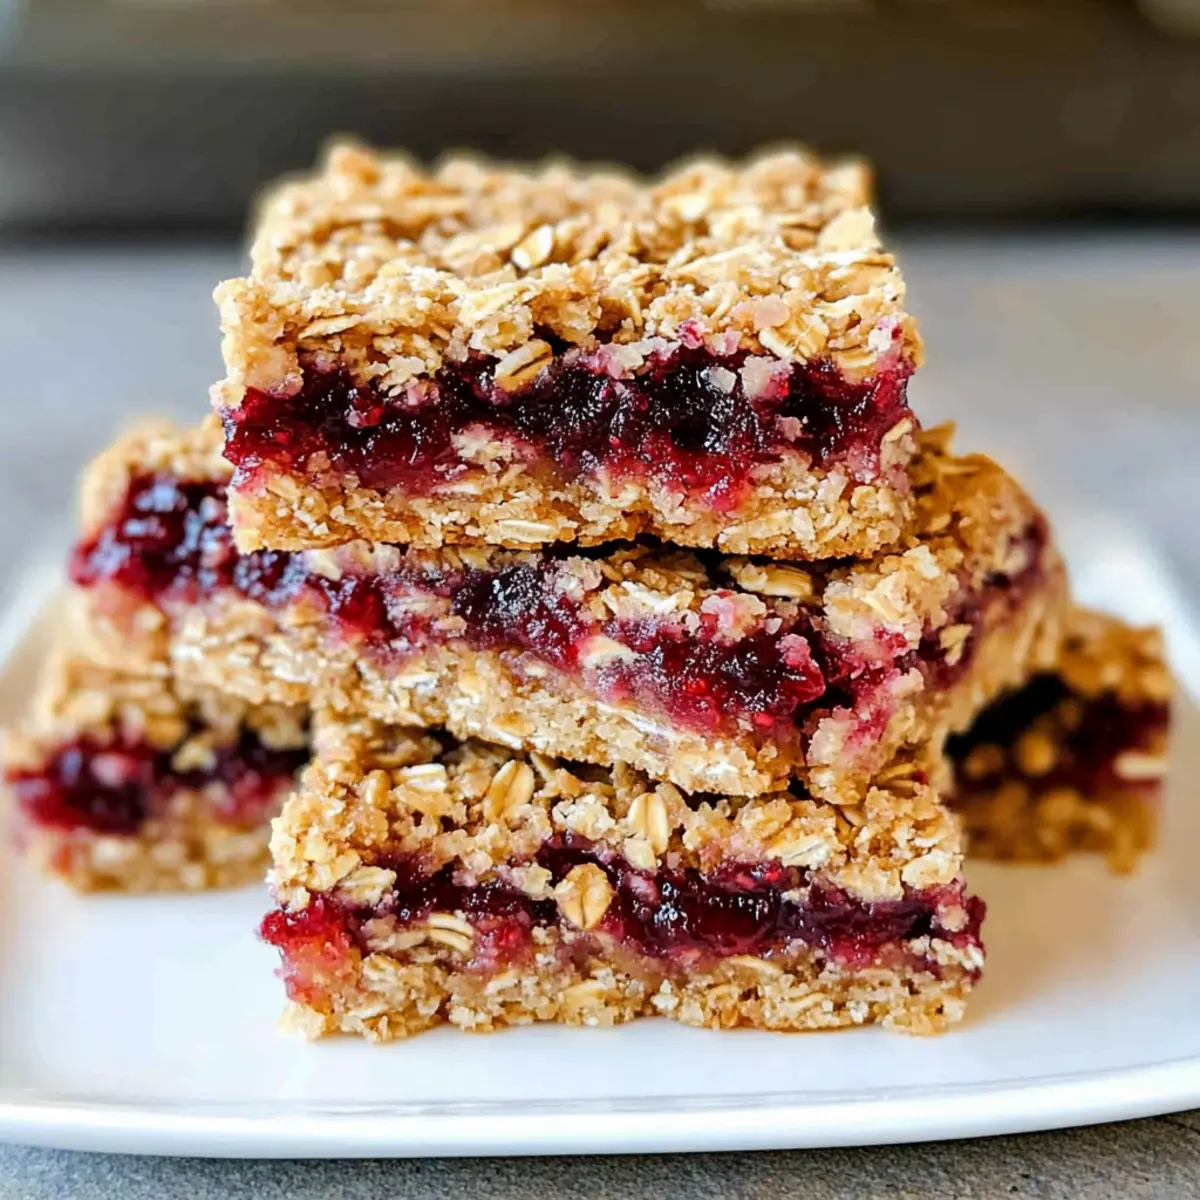
Stepping into my kitchen today, I was met with the sweet aroma of berries mingling with the warm scent of freshly baked oats—pure bliss! It got me thinking about how often we rush through our mornings, grabbing unhealthy options instead of savoring something homemade and wholesome. That’s where these Healthy Berry Oat Bars come in, perfect for a quick breakfast or a delightful snack. In just under 30 minutes, you can whip up these chewy bars, naturally sweetened with maple syrup and coconut sugar. Not only are they gluten-free and free from refined sugars, but they’re also versatile, allowing you to customize with your favorite berries or nut butters. Trust me, you’ll want to keep this recipe handy in your rotation. Ready to indulge in a guilt-free treat that satisfies both your cravings and your busy schedule? Let’s dive into the recipe!
Why are these Berry Oat Bars a must-try?
Deliciously Healthy: A wholesome snack that satisfies cravings while being gluten-free and free from refined sugars.
Quick to Make: Prep and bake in under 30 minutes—perfect for busy mornings!
Customizable: Easily swap in your favorite berries or nut butters to make these bars your own.
Family Favorite: Packed with flavor, they’re sure to be a hit with everyone, from kids to adults.
Guilt-Free Snacking: Indulge without remorse, knowing these bars are made with natural sweeteners like maple syrup.
Try pairing them with some yogurt or fresh fruit for a complete meal, or simply enjoy them on their own!
Berry Oat Bars Ingredients
For the Base
• Coconut Oil – Adds moisture and richness; substitute with butter or a neutral oil for non-vegan versions.
• All-Purpose Flour or Gluten-Free Substitute – Provides structure; for gluten-free, use a 1:1 gluten-free flour blend.
• Quick Oats – Key for texture and chewiness; rolled oats can be substituted for a heartier bar.
• Maple Syrup – Acts as a natural sweetener; honey or agave syrup can serve as substitutes, but expect a slight flavor change.
• Coconut Sugar or Granulated Sugar – Adds sweetness and caramel notes; regular granulated sugar is a suitable alternative.
For the Baking
• Baking Powder – Helps the bars rise slightly; ensure freshness for optimal results.
• Salt – Enhances overall flavors; essential for balancing the sweetness.
For the Filling
• Raspberry Preserves – Provides moisture and fruitiness; feel free to swap for any fruit preserves or fresh fruit.
These berry oat bars are perfect for lifting your spirits and satisfying your snack cravings!
Step‑by‑Step Instructions for Berry Oat Bars
Step 1: Preheat the Oven
Begin by preheating your oven to 350°F (175°C). While the oven heats, lightly grease an 8×8-inch baking pan using coconut oil or cooking spray to ensure your berry oat bars won’t stick. You’ll want to get the pan ready to help streamline the assembly process once your mixture is ready.
Step 2: Mix the Wet Ingredients
In a large mixing bowl, combine melted coconut oil, coconut sugar, and maple syrup. Whisk the mixture until it’s smooth, then crack in one egg at a time, mixing vigorously between additions to form a cohesive batter. Incorporating these ingredients well will contribute to the rich flavor and moisture of your berry oat bars.
Step 3: Combine Dry Ingredients
Add your all-purpose or gluten-free flour, quick oats, baking powder, and a pinch of salt to the wet mixture. Stir everything together until just combined, making sure there are no dry streaks. The dough will be thick but sticky, and it should begin to resemble a chunky cookie dough texture—this is what keeps your bars deliciously chewy!
Step 4: Form the Base Layer
Carefully press two-thirds of your oat mixture evenly into the prepared baking pan, ensuring it forms a smooth and compact base. Use your fingers or the back of a spatula to create an even layer that covers the bottom well. This step is important to prevent your berry oat bars from crumbling later, so take your time!
Step 5: Add the Fruit Filling
Spread the raspberry preserves generously over the pressed oat layer, leaving a small ½-inch border around the edges. This will prevent the preserves from burning during baking and will create a delightful fruit layer within your berry oat bars. Aim for an even layer so every bite has that burst of berry flavor!
Step 6: Crumble the Top Layer
Crumble the remaining oat mixture over the raspberry preserves, covering them evenly. Gently press down on the crumbles with your hands or a spatula to secure them in place. This top layer adds an appealing texture and a crunchy contrast to the moist filling in your delicious berry oat bars.
Step 7: Bake the Bars
Place the baking pan in your preheated oven and bake for 25–30 minutes, or until the top is lightly golden and firm to the touch. You’ll know they’re done when the edges start to pull away slightly from the pan. The enticing aroma will fill your kitchen as they cook—such a treat!
Step 8: Cool and Slice
Once baked, remove the pan from the oven and let it cool in the pan for at least 15 minutes. This allows the bars to set, making them easier to slice later. After cooling, transfer to a cutting board and cut into squares. Each piece promises a delightful chew, perfect for snacking or breakfast—that’s the magic of your berry oat bars!
How to Store and Freeze Berry Oat Bars
Room Temperature: Store the bars in an airtight container at room temperature for up to 5 days. This keeps them chewy and fresh for your snacking pleasure.
Fridge: For longer freshness, place the berry oat bars in the refrigerator for up to 8 days. Wrap them individually or in a container to prevent drying out.
Freezer: Freeze the bars in a single layer on a baking sheet, then transfer to an airtight container or freezer bag for up to 3 months. This way, you’ll have a convenient, healthy snack ready anytime.
Reheating: To enjoy a warm treat, simply microwave the bars for 15-20 seconds. This will bring back their lovely texture and make them even more delicious!
What to Serve with Healthy Berry Oat Bars
These delightful bars are the perfect starting point for a wholesome and satisfying meal.
-
Greek Yogurt: Smooth and creamy, Greek yogurt adds protein and a tangy flavor that pairs wonderfully with the sweetness of berry oat bars. Top with fresh fruit for added texture.
-
Fresh Fruit Salad: A bright medley of seasonal fruits was a fresh complement to these chewy bars, enhancing their berry flavor while adding a burst of juiciness you can’t resist.
-
Nut Butter: Drizzle or spread almond or peanut butter over the bars for an extra layer of richness and a satisfying crunch that contrasts beautifully with the chewy oats.
-
Smoothie Bowl: Blend your favorite fruits with yogurt for a nutritious smoothie bowl. Serve with the berry oat bars on the side for a delightful combo that energizes your mornings.
-
Chia Seed Pudding: This silky pudding is an elegant partner for berry oat bars, creating a delightful balance of textures and flavors while enhancing the health benefits of your meal.
-
Herbal Tea: A warm, soothing cup of herbal tea can bring comfort to your snack time. The gentle flavors will complement the berries and enhance the overall experience.
-
Dark Chocolate Treats: For a sweet finale, serve dark chocolate pieces alongside the bars. The rich chocolate adds a decadent element your taste buds will love without overwhelming the healthy vibe.
Make Ahead Options
These Healthy Berry Oat Bars are perfect for meal prep, making your mornings a breeze! You can mix the wet ingredients and dry ingredients separately and refrigerate them for up to 24 hours. This way, all you need to do is combine them and bake when you’re ready to indulge. Additionally, you can also prepare the oat mixture in advance and store it in an airtight container for up to 3 days, just be sure to keep the preserves separate to prevent sogginess. When you’re ready to bake, simply layer the mixture and preserves, and pop it in the oven. Rest assured, your berry oat bars will come out just as delicious as if they were made fresh!
Berry Oat Bars Customization Ideas
Let your creativity shine as you adapt these berry oat bars to suit your taste buds!
-
Nutty Delight: Mix in 1 tablespoon of your favorite nut butter or ground flaxseed for an extra nutritional boost.
-
Fruit Fusion: Swap raspberry preserves for blueberry, strawberry, or mixed berry jam to explore new fruity flavor profiles. Dive into different combinations—each will bring a unique twist!
-
Tropical Twist: Add shredded coconut or replace the raspberry preserves with mango puree for a sunny flair that transports you to the tropics.
-
Chocolate Lover: Stir in mini chocolate chips or cocoa powder to the mixture for a rich chocolatey experience that’s irresistible.
-
Heat it Up: If you’re feeling adventurous, add a pinch of cayenne or a dash of chili powder to the mix for a surprising yet delightful kick of heat that marries well with sweetness.
-
Baking Spice: Enhance the flavor by incorporating cinnamon or nutmeg to the dry ingredients for a warm, comforting aroma that enhances the overall character of these bars.
-
Skip the Sugar: For a truly no-sugar-added option, substitute maple syrup and coconut sugar with mashed bananas or unsweetened applesauce—your bars will still be delightful!
For more delicious variations, check out these No Bake Chocolate Oat Bars or create a decadent texture with these White Chocolate Raspberry delights!
Your taste preferences are the limit, so feel free to experiment and make these bars uniquely yours!
Expert Tips for Berry Oat Bars
• Press Firmly: Ensure to press the base layer down firmly when forming it. This prevents the berry oat bars from crumbling and gives them a solid structure.
• Cool Completely: Allow the bars to cool completely in the pan before slicing. This helps them set properly and makes cutting into neat squares much easier.
• Avoid Edge Touch: When spreading the raspberry preserves, leave a small border around the edges. This prevents scorching during baking and keeps the filling intact.
• Ingredient Substitutions: Don’t hesitate to experiment with ingredients! Mix in different preserves or nut butters for new flavors while keeping the essence of the berry oat bars intact.
• Check Freshness: Ensure your baking powder is fresh for the best rise. Old baking powder can lead to dense bars that don’t hold their shape well.
Enjoy making your own berry oat bars, and let these tips guide you in achieving the perfect chewy texture and delightful flavor!
Berry Oat Bars Recipe FAQs
How do I choose the right berries for my oat bars?
Absolutely! When selecting berries, look for those that are rich in color and free from blemishes or dark spots. Fresh berries like raspberries, blueberries, or strawberries work beautifully, but you can also use frozen berries which are often picked at peak ripeness. Just ensure to thaw and drain any excess liquid before adding them to your mixture.
How should I store my berry oat bars?
Very good question! Keep your berry oat bars in an airtight container at room temperature for up to 5 days and in the refrigerator for up to 8 days. This method will help them retain their chewy texture. If you notice them getting a little dry, try wrapping them in a slightly damp paper towel for a few minutes to revive them.
Can I freeze berry oat bars for later?
The more the merrier! To freeze, first, cool the baked bars completely. Then, slice them into squares and place them in a single layer on a baking sheet. Freeze until solid, about 1-2 hours, then transfer them to an airtight container or freezer bag. They can be frozen for up to 3 months. When you’re ready to enjoy them, just take out a piece and microwave it for 15-20 seconds for a warm, chewy treat.
What if my bars come out crumbly?
Don’t worry, it’s an easy fix! If your bars are crumbly, it could be due to not pressing down firmly enough on the base layer. Next time, ensure to really pack it down to create a sturdy foundation, and allow them to cool completely before slicing. If they still crumble, serving them in parfaits with yogurt and fruits can be a delicious way to enjoy the flavors!
Are these berry oat bars suitable for those with allergies?
Definitely! This recipe can be adapted for various dietary needs. For gluten-free options, simply use a 1:1 gluten-free flour blend. If you have nut allergies, feel free to omit any nut butters or flaxseeds. Just keep in mind to check the labels for any potential allergens based on your specific needs. I often make them nut-free and they turn out delightful!
Can I use other fruits instead of raspberry preserves?
Absolutely! You can swap raspberry preserves for any fruit preserves or fresh fruits like blueberries or strawberries. Just remember to leave a small border when spreading the filling to avoid scorching. You can even mix and match flavors to discover your family’s favorites!
Delicious Berry Oat Bars for Guilt-Free Snacking
Ingredients
Equipment
Method
- Preheat your oven to 350°F (175°C) and lightly grease an 8x8-inch baking pan.
- In a large mixing bowl, combine melted coconut oil, coconut sugar, and maple syrup, then whisk until smooth. Add eggs one at a time, mixing well.
- Combine dry ingredients (flour, oats, baking powder, salt) into the wet mixture, stirring until just combined.
- Press two-thirds of the oat mixture into the bottom of the greased baking pan to form the base layer.
- Spread raspberry preserves over the oat layer, leaving a small border around the edges.
- Crumble the remaining oat mixture over the preserves and gently press down.
- Bake in the preheated oven for 25-30 minutes until the top is golden. Let cool for 15 minutes in the pan.
- Transfer to a cutting board, slice into squares, and enjoy.
Leave a Reply