
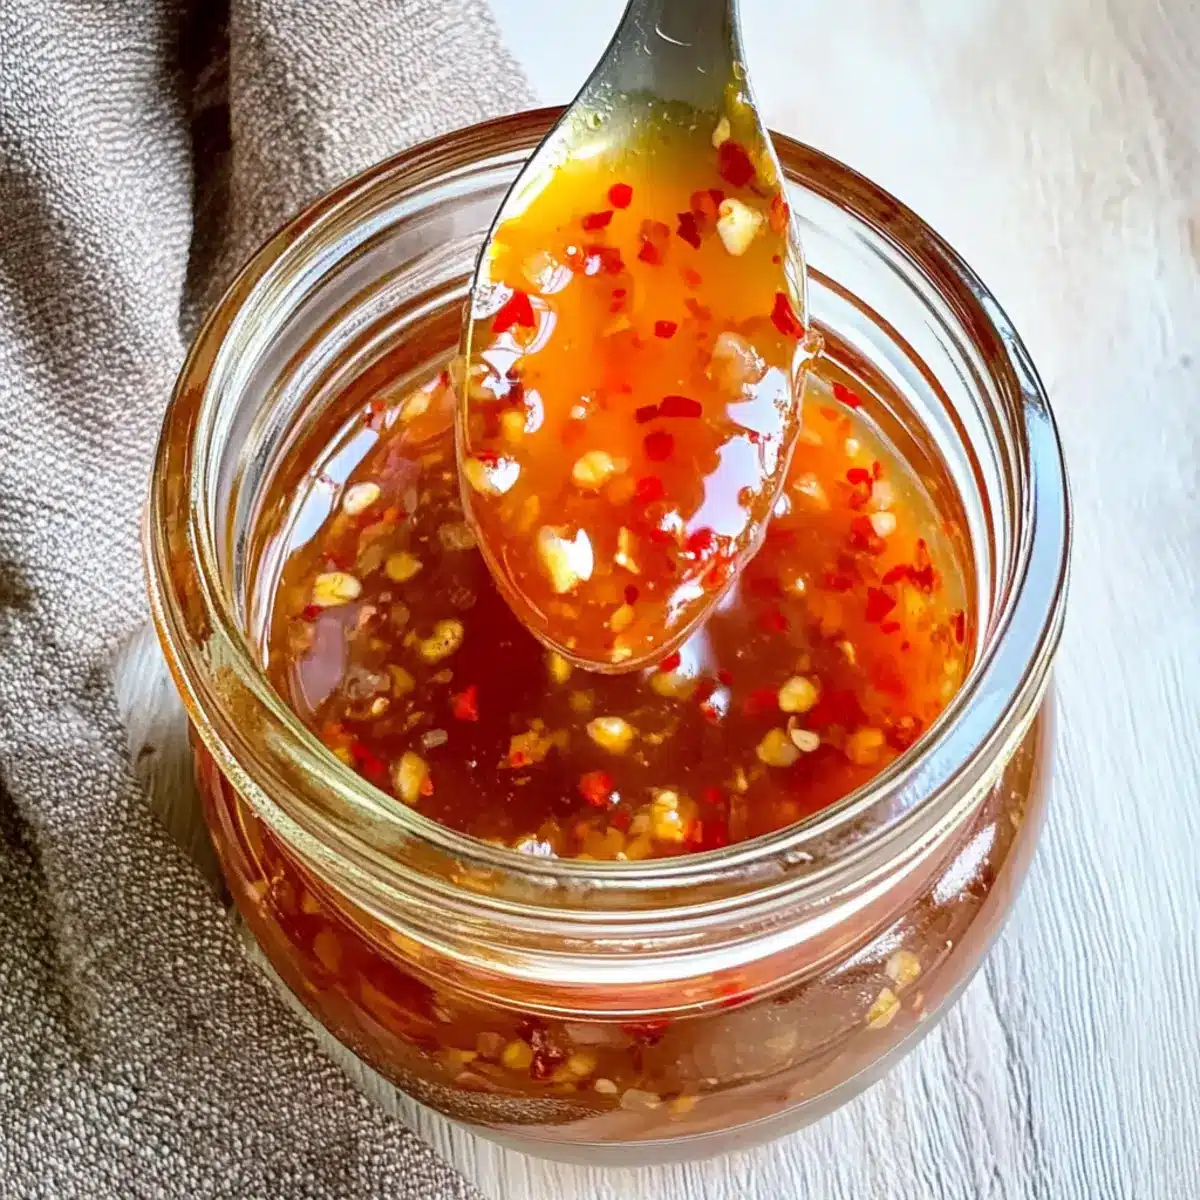
In just ten minutes, you can create a culinary gem that takes your meals from ordinary to extraordinary. This Honey-Sweetened Easy Thai Sweet Chili Sauce is my happy little secret, a versatile delight that perfectly balances a touch of sweetness and a kick of spice. Not only is it quick and easy to whip up, but it’s also a healthier alternative to store-bought sauces, giving you control over sugar levels while still packing a flavorful punch. Whether you’re dunking spring rolls, drizzling it over stir-fried veggies, or adding a splash to rice bowls, this sauce elevates every dish with minimal effort. Curious to find out how simple it is to make this savory-sweet masterpiece? Let’s dive into the recipe!
Why is Homemade Sauce Better?
Quick and Easy: In just 10 minutes, you can whip up this flavorful sauce with minimal effort.
Healthier Twist: By using honey instead of refined sugar, you’re crafting a guilt-free condiment that’s gluten-free and low in calories.
Versatile Flavor: Perfect for dipping, drizzling, or mixing, this sauce elevates everything from spring rolls to grilled chicken.
Customizable Heat: With adjustable chili flakes, you can control the spice level, making this ideal for everyone at the table.
Impress Your Guests: Homemade sauces always have that “wow” factor, and this one is sure to leave your friends and family asking for the recipe! Check out more ideas like the Crockpot Thai Coconut for your next meal.
Thai Sweet Chili Sauce Ingredients
• Get ready to create your own delicious, Thai Sweet Chili Sauce!
For the Sauce
- Dried Chili Flakes – Provides the signature heat; adjust quantity to control spiciness.
- Minced Garlic – Adds depth of flavor; about 3 large cloves or substitute with 1 teaspoon of garlic powder.
- Rice Vinegar – Balances sweetness with acidity; white vinegar can be a quick substitute.
- Honey – The sweetener for the sauce; maple syrup may also work for a different flavor profile.
- Water – Adjusts the sauce’s consistency; you’ll need 3/4 cup plus 2 tablespoons for thickening.
- Salt – Enhances overall flavor; can be adjusted or omitted for low-sodium diets.
- Potato Starch or Cornstarch – Used for thickening; mix with cold water before adding to the sauce.
Let’s make your meals extraordinary with this sweet and spicy Thai Sweet Chili Sauce!
Step‑by‑Step Instructions for Honey-Sweetened Easy Thai Sweet Chili Sauce
Step 1: Combine Ingredients
In a medium saucepan, combine 1 tablespoon of dried chili flakes, 3 minced garlic cloves, 1/2 cup of rice vinegar, 1/4 cup of honey, 3/4 cup of water, and a pinch of salt. Place the saucepan over medium-high heat and bring the mixture to a boil, stirring gently. This should take about 2-3 minutes, and you’ll see bubbles starting to form.
Step 2: Simmer the Sauce
Once the mixture comes to a boil, reduce the heat to medium and let it simmer for 1 minute. As it cooks, the aroma will enhance, and the sauce will start to thicken slightly. Keep stirring occasionally to prevent any ingredients from sticking to the bottom of the pan. This step allows the flavors of the Thai Sweet Chili Sauce to meld beautifully.
Step 3: Prepare the Thickening Agent
In a small bowl, mix 1 tablespoon of potato starch or cornstarch with 2 tablespoons of cold water to create a slurry. Stir until smooth and evenly blended. This will ensure that your sauce thickens beautifully without any lumps when added to the hot mixture.
Step 4: Thicken the Sauce
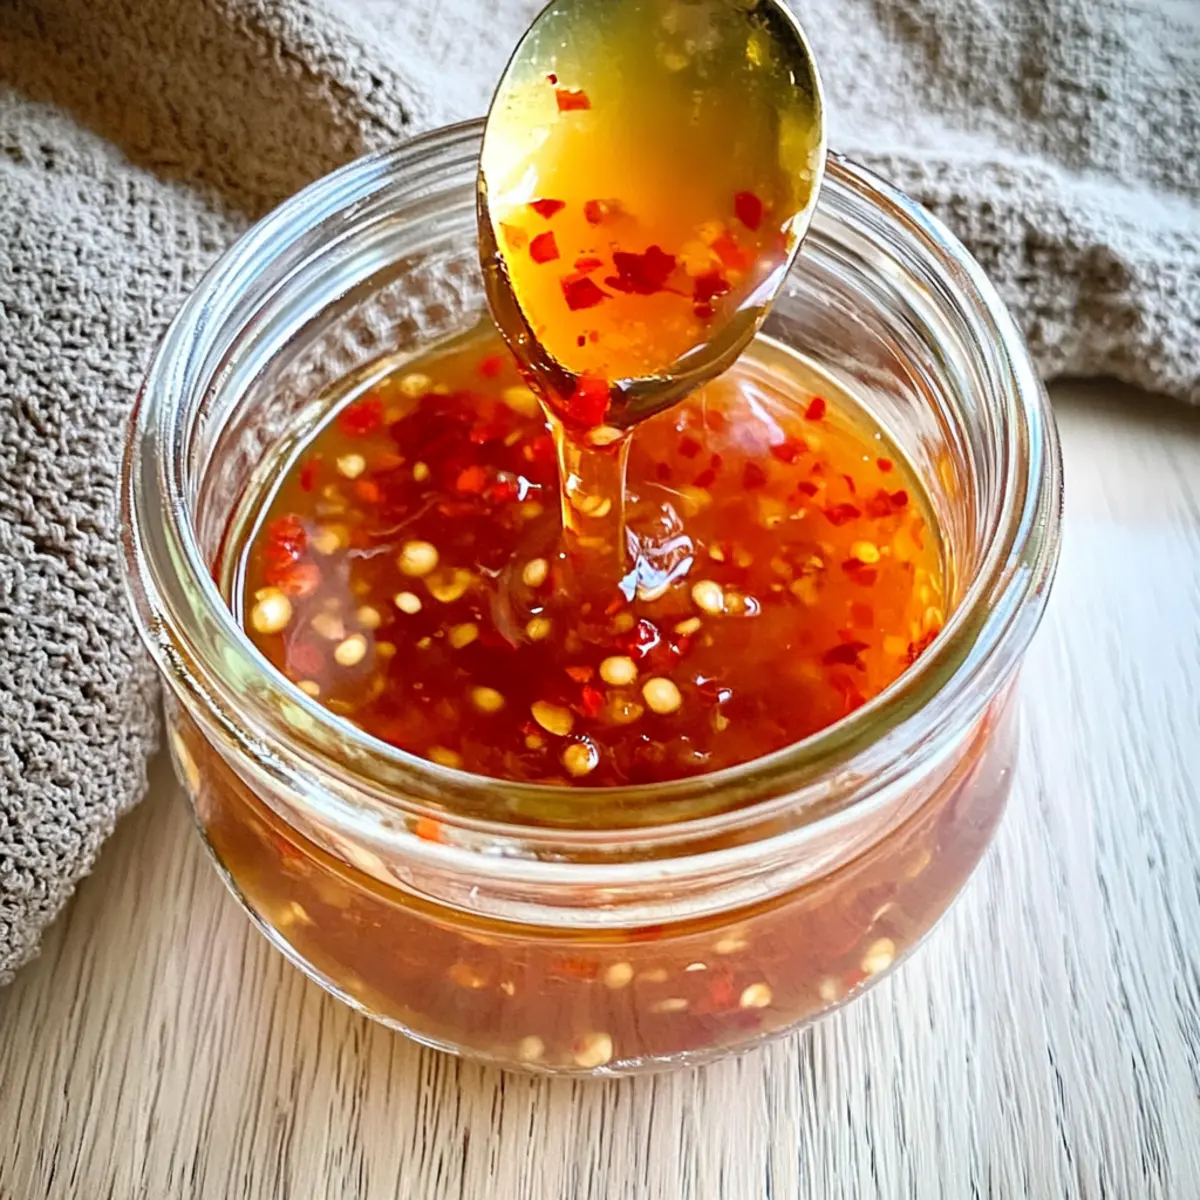
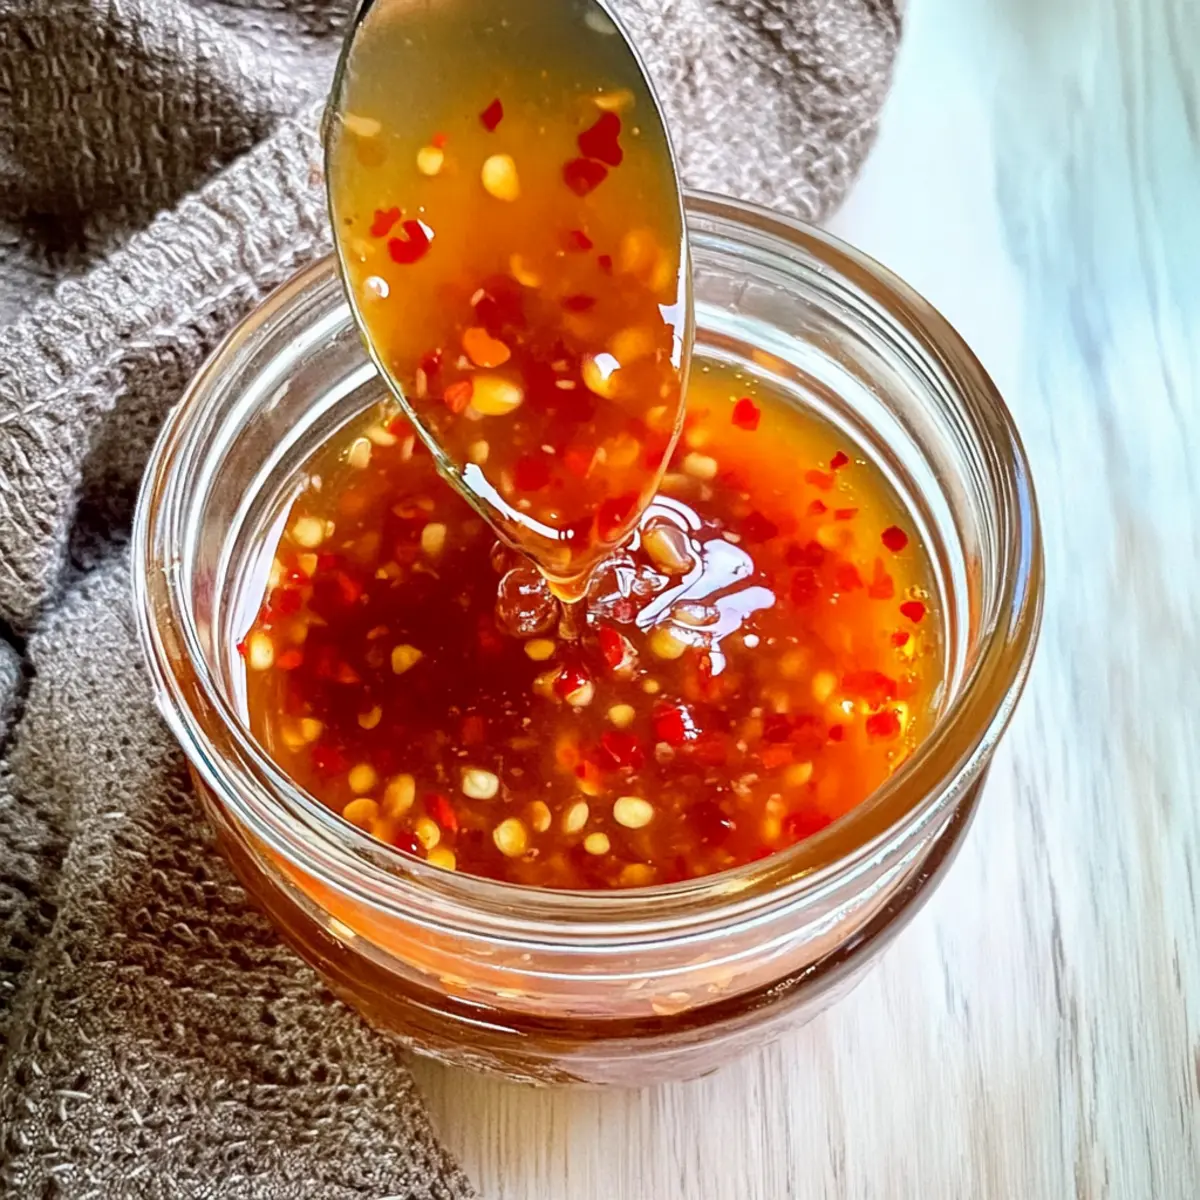
Gradually pour the slurry into the simmering sauce while continuously stirring. You’ll notice the sauce thickening within 30 seconds to a minute. Keep stirring until it reaches a nice syrupy consistency that clings to the back of a spoon. This is the perfect thickness for your homemade Thai Sweet Chili Sauce.
Step 5: Cool and Store
Remove the saucepan from heat and allow the sauce to cool for about 10 minutes. The sauce will thicken slightly more as it cools. Once cooled, carefully transfer it to a glass jar. Make sure to seal it tightly and label with the date, as your delightful Thai Sweet Chili Sauce can be refrigerated for up to three weeks.
Step 6: Enjoy Your Creation
Now that your Honey-Sweetened Easy Thai Sweet Chili Sauce is ready, you can drizzle it over grilled veggies, use it as a dipping sauce for spring rolls, or stir it into your favorite rice bowls. This homemade sauce provides a delightful, healthier alternative to store-bought options, helping you to elevate your meals with loving care.
Make Ahead Options
These Honey-Sweetened Easy Thai Sweet Chili Sauce is perfect for busy cooks looking to streamline meal prep! You can prepare the sauce up to 3 days in advance, which allows the flavors to meld beautifully. Simply follow the recipe’s steps, store the cooled sauce in a sealed glass container, and refrigerate. Keep in mind, the sauce may thicken slightly when chilled, so just give it a gentle stir or reheat briefly before serving to restore its lovely consistency. This way, you’ll have a delicious, homemade sauce ready to elevate your meals with no extra effort when it’s time to serve. Enjoy that precious time you save for more family moments!
Thai Sweet Chili Sauce Variations
Feel free to play with this recipe and discover your own favorite flavors and substitutions!
- Spicy Twist: Increase chili flakes for an extra kick. Add a pinch at first and taste as you go for just the right heat level.
- Ginger Boost: Mix in some freshly grated ginger for aromatic depth. The warm spice will brighten the sauce and add a delightful zing.
- Agave Alternative: Swap honey for agave syrup to keep it vegan. This change slightly alters the flavor but is equally delicious!
- Herb Infusion: Add a touch of fresh cilantro or basil for a fresh finish. It brings a burst of freshness that contrasts wonderfully with the sweetness.
- Citrus Kick: Squeeze in a bit of lime juice for a citrusy zing. The acidity enhances the sauce’s balance, making it even more refreshing.
- Creamy Addition: Stir in a tablespoon of peanut butter for a unique flavor. It adds creaminess and pairs beautifully with Thai dishes, reminiscent of satay sauce.
- Asian Influence: Incorporate a splash of soy sauce for a savory umami depth. Just a tiny bit goes a long way, and it can make every bite even more flavorful!
- Smoky Flavor: Add a dash of smoked paprika to infuse a subtle smokiness. This variation gives your Thai Sweet Chili Sauce a whole new character, perfect for grilled dishes.
Whether you’re looking to turn up the heat or add unique flavors, your homemade Thai Sweet Chili Sauce can be tailored to fit any occasion! And if you enjoy exploring new flavors, consider trying out the Garlic Parmesan Sweet Potato Wedges alongside your delicious sauce for a truly memorable meal.
How to Store and Freeze Thai Sweet Chili Sauce
Fridge: Store your homemade Thai Sweet Chili Sauce in an airtight glass container for up to three weeks. Make sure to label it with the date for easy tracking.
Freezer: For longer storage, freeze the sauce for 2-3 months in freezer-safe containers. Leave some space at the top for expansion, and remember to thaw in the fridge overnight before use.
Reheating: After freezing, gently reheat the sauce on low heat, stirring frequently, to regain its syrupy consistency. It may thicken slightly upon cooling, so a splash of water can help adjust the texture if needed.
Room Temperature: It’s best not to store Thai Sweet Chili Sauce at room temperature; always refrigerate or freeze to maintain freshness and flavor.
What to Serve with Honey-Sweetened Easy Thai Sweet Chili Sauce
Elevate your meals by pairing this delightful sauce with dishes that bring out its sweet and spicy charm.
-
Crispy Spring Rolls: A classic combination, these crunchy delights perfectly complement the sauce’s bold flavors and offer a satisfying contrast in texture.
-
Grilled Chicken Skewers: Drizzled over tender chicken, the sauce adds a burst of sweetness and a hint of spice, making each bite irresistible.
-
Stir-Fried Vegetables: Bright and fresh, tossed veggies soak up the sauce, enhancing their natural flavors while introducing a delightful zing.
-
Savory Rice Bowls: Add a splash of this sauce to your rice bowls for an instant upgrade; it ties together proteins and veggies beautifully.
-
Baked Tofu: The sauce caramelizes as it bakes, lending a rich sweetness that pairs wonderfully with the tofu’s soft texture.
-
Coconut Rice: The creamy coconut balances the sweet heat of the sauce, creating a delicious harmony that transports your taste buds to Thailand.
-
Chilled Shrimp Salad: Refreshing and light, the cool shrimp contrasted with the warm sauce creates a lovely balance that tantalizes the palate.
-
Sparkling Ginger Drink: A zesty drink alongside your meal enhances the experience, with ginger echoing the heat from the sauce while keeping it refreshing.
-
Vanilla Ice Cream: For dessert, a drizzle of this sauce over vanilla ice cream brings a surprising yet enjoyable sweet-spicy twist to the finish of your meal.
Expert Tips for Thai Sweet Chili Sauce
-
Adjusting Spice Level: Start with just a pinch of dried chili flakes if you’re sensitive to heat. You can always add more later to your homemade Thai Sweet Chili Sauce.
-
Flavor Deepening: Sauté the minced garlic in the saucepan for a few seconds before adding other ingredients. This extra step enhances the overall flavor profile of your sauce.
-
Storing Right: Allow the sauce to cool completely before sealing it in a glass container. This prevents condensation, which can dilute the flavor over time.
-
Versatile Sweeteners: If you run out of honey, feel free to substitute with maple syrup or agave for a different taste, but remember that sweetness levels may vary in your Thai Sweet Chili Sauce.
-
Thickening Tips: Make sure to fully dissolve the potato starch or cornstarch in cold water before adding to the hot mixture to avoid lumps. Stir constantly for a smooth texture!

Honey-Sweetened Easy Thai Sweet Chili Sauce Recipe FAQs
What type of chili flakes should I use?
I recommend using dried red chili flakes for that classic spicy kick! If you’re looking for a milder flavor, consider starting with a smaller amount and adjust according to your taste. You can also experiment with other varieties like crushed red pepper if you prefer a different spice profile.
How should I store my homemade Thai Sweet Chili Sauce?
After allowing the sauce to cool completely, transfer it to an airtight glass container. It can be refrigerated for up to three weeks. Just remember to label it with the date, making it easier to track its freshness!
Can I freeze this sauce for later use?
Absolutely! Your Thai Sweet Chili Sauce can be frozen for 2-3 months. Simply pour it into a freezer-safe container, making sure to leave a bit of space at the top for expansion. When you’re ready to use it, thaw it in the fridge overnight. For best results, reheat gently on low heat and stir frequently to restore its syrupy texture.
What if my sauce is too thick or too thin?
If you find your sauce is too thick after cooling, you can whisk in a little warm water to achieve your preferred consistency. If it’s too thin, you can thicken it by mixing a little more cornstarch or potato starch with cold water, then adding it back to a simmering sauce until it thickens. Just keep stirring to avoid lumps!
Is this sauce suitable for people with dietary restrictions?
Yes! This sauce is naturally gluten-free and can be made healthier by substituting honey with agave syrup for a vegan option. Just double-check that your sweetener and all other ingredients align with any specific dietary needs or allergies you may have. Enjoy cooking with peace of mind!
Sweet and Spicy Thai Sweet Chili Sauce Made with Honey
Ingredients
Equipment
Method
- In a medium saucepan, combine 1 tablespoon of dried chili flakes, 3 minced garlic cloves, 1/2 cup of rice vinegar, 1/4 cup of honey, 3/4 cup of water, and a pinch of salt. Place the saucepan over medium-high heat and bring the mixture to a boil, stirring gently. This should take about 2-3 minutes.
- Once the mixture comes to a boil, reduce the heat to medium and let it simmer for 1 minute, stirring occasionally.
- In a small bowl, mix 1 tablespoon of potato starch or cornstarch with 2 tablespoons of cold water to create a slurry.
- Gradually pour the slurry into the simmering sauce while continuously stirring, until it thickens.
- Remove the saucepan from heat and allow the sauce to cool for about 10 minutes before transferring to a glass jar.
- Use the sauce over grilled veggies, as a dipping sauce for spring rolls, or stir into rice bowls.
Leave a Reply