
As I pulled open the fridge, the cool air hit me like a gentle reminder of just how comforting a well-made dessert can be. The allure of Old-Fashioned Homemade Banana Pudding wafted through my kitchen, transporting me back to family gatherings where laughter mingled with the fragrant aroma of ripe bananas and creamy vanilla custard. This Southern classic features layers of smooth, sweet pudding, crispy vanilla wafers, and perfectly sliced bananas—creating a nostalgic dessert that’s not only easy to whip up but also a staunch crowd-pleaser. Plus, with no baking required, it’s perfect for those busy days when you crave something delightful without the fuss. Love a make-ahead dessert? This pudding shines even brighter when chilled overnight, allowing the flavors to meld beautifully. Are you ready to indulge in a dessert that brings people together? Let’s dive into this timeless recipe!
Why is this pudding a must-try?
Comforting, this Old-Fashioned Homemade Banana Pudding delivers a wave of nostalgia with every spoonful. No-Bake Delight: Effortlessly prepare this luscious dessert without turning on the oven, ideal for busy days. Crowd-Pleasing: Perfect for gatherings, it’s a treat that brings smiles to everyone’s faces. Customizable: Whether you prefer adding mashed bananas or trying different cookies, the options are endless. Chill Factor: Allow it to sit overnight for flavors that truly shine—your patience will be rewarded! Try it alongside our Graveyard Pudding Cookie Cups for a fun dessert spread.
Old-Fashioned Homemade Banana Pudding Ingredients
For the Pudding
• Sugar – Provides sweetness to the pudding; try substituting with brown sugar for a hint of caramel flavor.
• Flour – Acts as a thickening agent; using all-purpose flour will give you that classic pudding texture.
• Salt – Enhances the sweetness; a fine sea salt works best to balance the flavors.
• Milk – The creamy base; whole milk delivers the richest results, but 2% works too for a lighter version.
• Eggs – Adds richness; remember to use large eggs to maintain accurate proportions.
• Vanilla Extract – Infuses a sweet aroma; opt for pure vanilla extract for the best flavor.
For the Layers
• Vanilla Wafers – Provides texture and sweetness; about 8 oz. can be swapped with graham crackers for a twist.
• Bananas – Essential for flavor; use 4 ripe bananas, sliced—mash one in the pudding for extra banana goodness!
With this Old-Fashioned Homemade Banana Pudding, you’re on your way to creating a beloved dessert that will have everyone coming back for seconds! Enjoy every creamy, layered bite!
Step‑by‑Step Instructions for Old-Fashioned Homemade Banana Pudding
Step 1: Mix the Dry Ingredients
In a medium saucepan, combine 3/4 cup sugar, 1/4 cup flour, and a pinch of salt. Whisk these dry ingredients together until well blended. This will ensure your Old-Fashioned Homemade Banana Pudding has a smooth texture. Place the saucepan over medium heat and gradually whisk in 2 3/4 cups of milk until no lumps remain, creating a uniform mixture.
Step 2: Cook the Pudding Mixture
Continue cooking the mixture over medium heat, stirring frequently, for about 5–7 minutes. You’ll know it’s ready when it starts to thicken and bubble gently. Keep an eye on it to prevent sticking or burning at the bottom. Once thick, reduce the heat to low and cook for an additional 2 minutes, stirring constantly to maintain that velvety consistency.
Step 3: Temper the Eggs
In a separate bowl, whisk 3 large eggs until smooth. To temper the eggs, slowly pour about a cup of the hot pudding mixture into the bowl with the eggs, stirring constantly. This will gently warm the eggs without cooking them. After combined, pour the egg mixture back into the saucepan with the rest of the pudding, stirring well to incorporate.
Step 4: Complete the Cooking Process
Return the saucepan to low heat, cooking the pudding for another 2 minutes until it reaches a gentle boil. Stir in 1 tablespoon of pure vanilla extract, allowing the warm flavors to infuse. Remove the saucepan from the heat and let the pudding cool for about 15 minutes, stirring occasionally to keep it smooth and prevent a skin from forming.
Step 5: Layer the Dessert
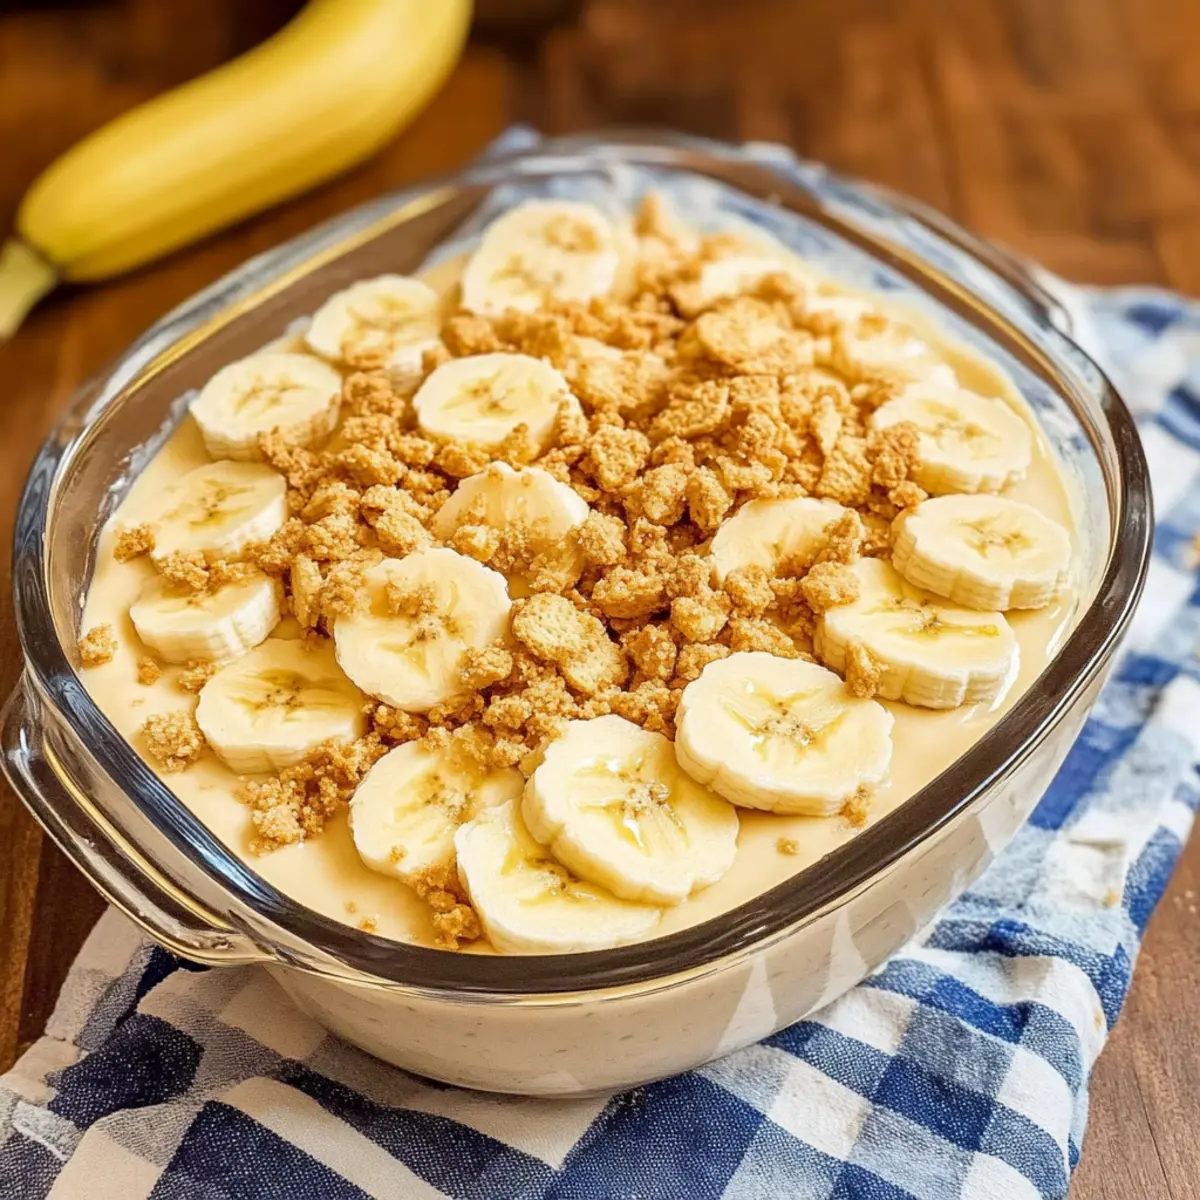
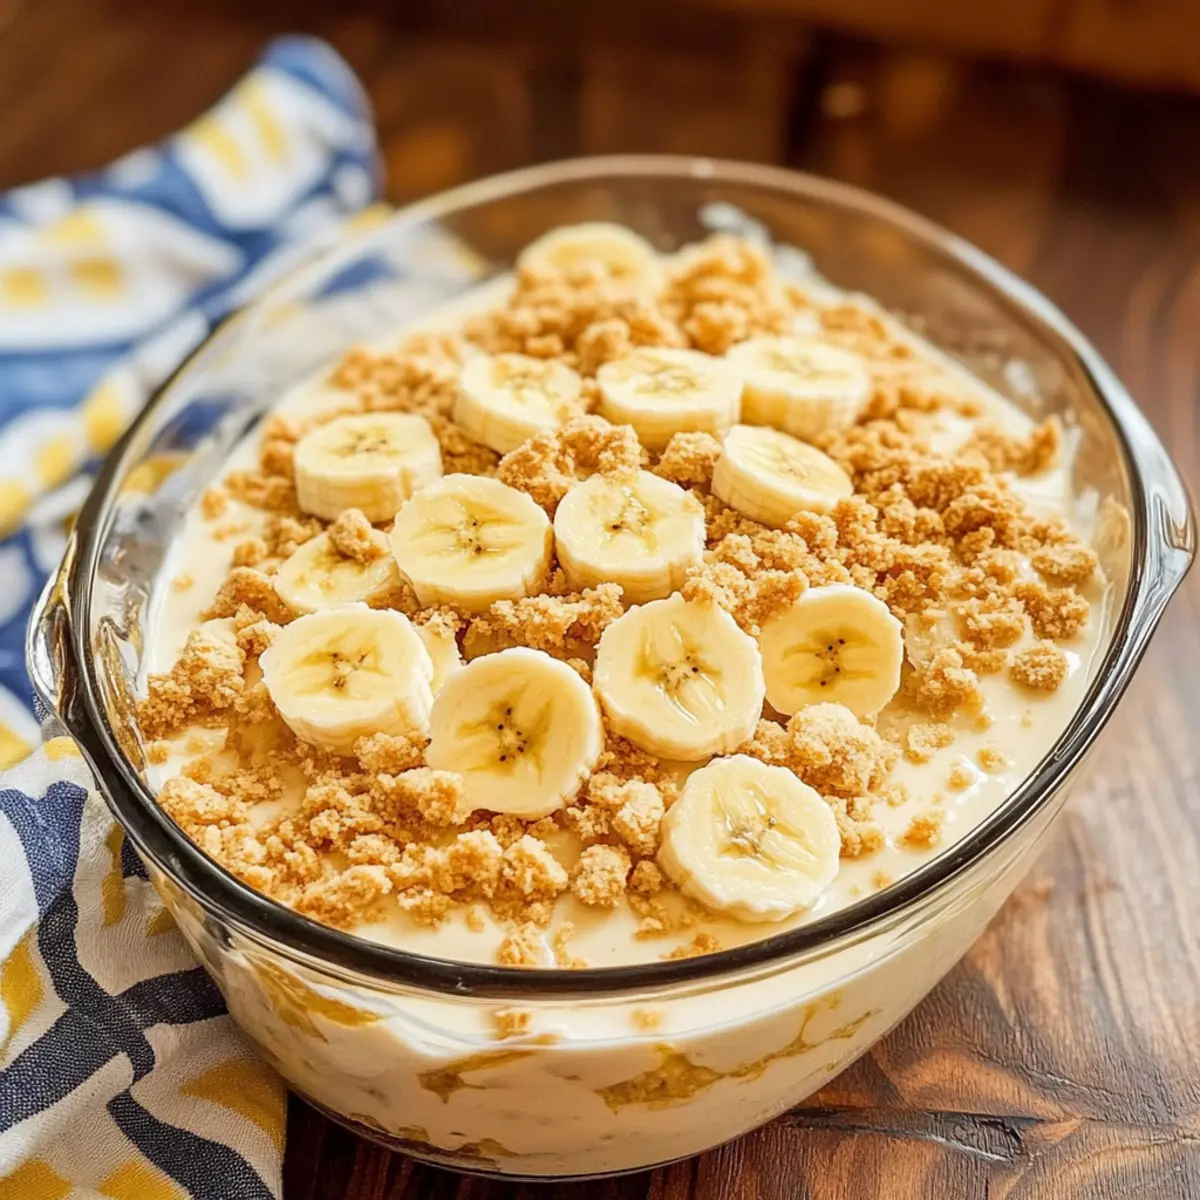
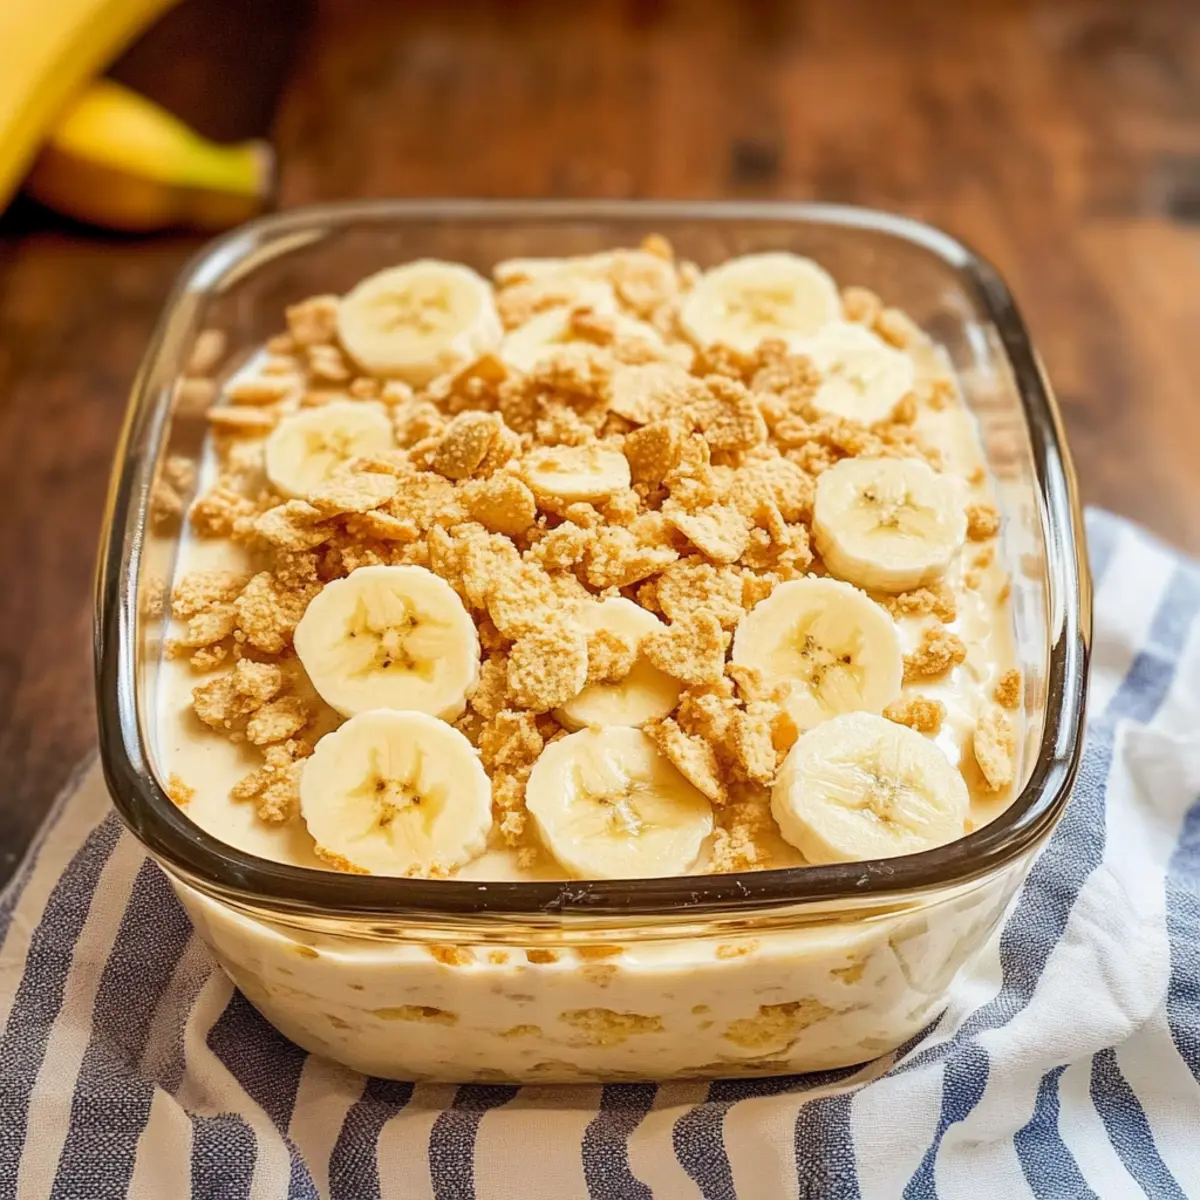
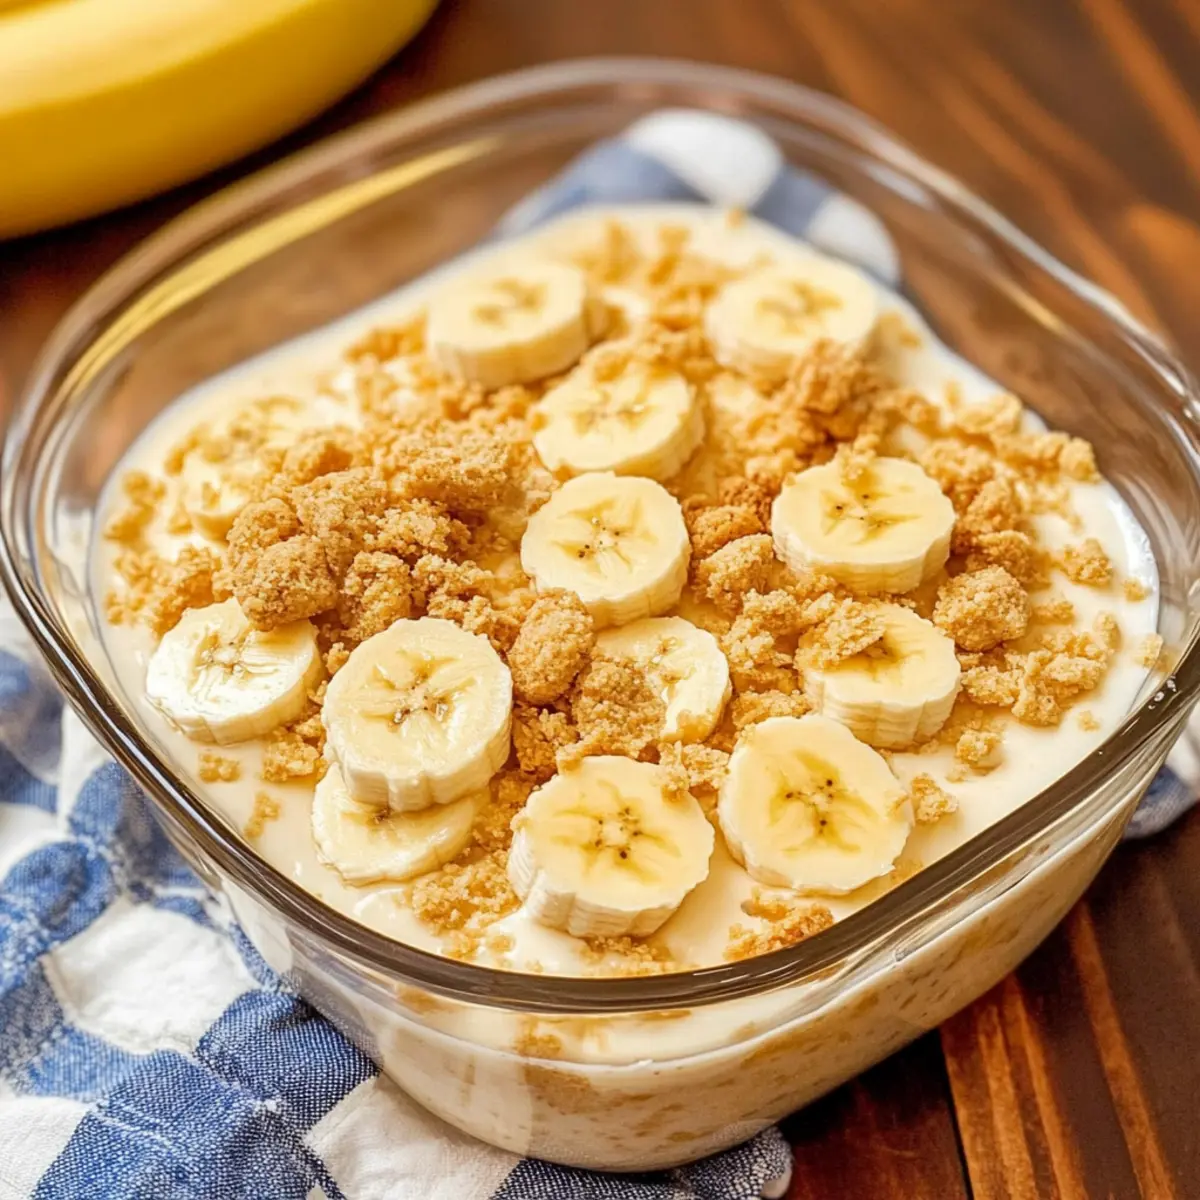
In an ungreased 8-inch square dish, begin layering your Old-Fashioned Homemade Banana Pudding. Start by arranging about 25 vanilla wafers in one even layer. Follow this with half of the sliced bananas (from 4 ripe bananas), and then pour half of the cooled pudding mixture over the top. Use a spatula to spread it evenly for the best presentation.
Step 6: Repeat the Layers
Repeat the layering process, adding another layer of vanilla wafers, the remaining banana slices, and finishing with the rest of the pudding mixture. Smooth the pudding layer on top to create an inviting surface for when it’s chilled. After assembling, cover the dessert with plastic wrap, ensuring it touches the surface to minimize skin development.
Step 7: Chill Before Serving
Refrigerate the pudding for at least 4 hours, or preferably overnight. This chilling time allows the flavors to meld and the pudding to set beautifully, enhancing the overall taste and texture. If you’re preparing this classic dessert a day ahead, hold off on garnishing with additional wafers until just prior to serving.
Step 8: Final Touches
Before serving your luscious Old-Fashioned Homemade Banana Pudding, crush a few remaining vanilla wafers and sprinkle them generously over the top. This adds a delightful crunch and visual appeal. Slice into portions, and serve cold for a refreshing dessert that brings comfort and joy with every bite.
Expert Tips for Old-Fashioned Homemade Banana Pudding
- Perfect Thickness: Ensure the pudding thickens adequately while cooking; it should resemble a thick custard to avoid a runny final dish.
- Banana Freshness: If preparing ahead, leave the banana slices on top for the last moment to prevent browning.
- Chill Time: Allow at least 4 hours in the fridge for optimal flavor melding; overnight chilling is even better for your Old-Fashioned Homemade Banana Pudding.
- Layering Technique: Spread the pudding evenly in layers for a beautiful presentation. Uneven layering can lead to imbalanced flavors.
- Cookie Alternatives: Feel free to experiment with different cookies instead of vanilla wafers—coconut macaroons or chocolate cookies can add a unique twist!
How to Store and Freeze Old-Fashioned Homemade Banana Pudding
Refrigerator: Store in an airtight container for up to 4 days. This keeps the pudding fresh and creamy, maintaining its delightful texture.
Room Temperature: It’s best not to leave banana pudding at room temperature for more than 2 hours. Doing so can affect its quality and safety.
Freezer: Avoid freezing this old-fashioned dessert, as it may change the texture of the pudding and bananas, leading to separation upon thawing.
Reheating: If you’ve stored it in the fridge, simply serve it chilled. If it’s a bit too thick, you can gently stir in a tablespoon of milk to reach your desired consistency before serving.
What to Serve with Classic Homemade Banana Pudding?
As you bask in the creamy delight of this dessert, consider pairing it with a few enchanting dishes that will elevate your meal even further.
-
Fluffy Whipped Cream:
A generous dollop of whipped cream adds a light, airy contrast to the dense pudding, enhancing every bite. -
Fresh Strawberries:
Juicy, ripe strawberries’ tartness beautifully balances the sweetness of the banana pudding, creating a refreshing contrast. -
Chocolate Chip Cookies:
The chewy, rich flavors of chocolate chip cookies provide a delightful crunch and decadent pairing alongside the soft pudding. -
Coconut Macaroons:
With their chewy texture and tropical notes, coconut macaroons add an interesting flavor twist and are perfect for enthusiasts of banana desserts. -
Crispy Toasted Pecans:
A sprinkle of toasted pecans introduces a crunch and a touch of savory nuttiness that complements the creamy sweetness of the pudding. -
Chilled Iced Tea:
A glass of sweetened iced tea offers a delightful refreshment, balancing rich flavors with its crisp, citrusy profiles. -
Lemon Bars:
Light and zesty, lemon bars bring a refreshing tang that cuts through the richness of the pudding, making for a harmonious dessert spread. -
Mint Chocolate Chip Ice Cream:
This cool treat adds an exciting flavor twist with the mint contrasting beautifully with the banana and vanilla notes of the pudding. -
Sparkling Water with Lime:
A bubbly drink like sparkling water enhances the meal’s vibrancy, cleansing the palate between dessert bites. -
Peanut Butter Cookies:
The rich, nutty flavor of peanut butter cookies can add another layer of comfort to your dessert experience, merging perfectly with banana.
Make Ahead Options
These Old-Fashioned Homemade Banana Pudding are perfect for busy weeknights and meal prep! You can prepare the pudding mixture up to 24 hours in advance by cooking and cooling it as directed, then storing it in the refrigerator. Layering the vanilla wafers and bananas should be done just before serving to prevent browning—this way, they remain fresh and delightful. For best quality, cover the pudding tightly with plastic wrap to avoid a skin forming. When ready to serve, simply add the layers of wafers and bananas, and top with crushed wafers for that irresistible crunch. With these make-ahead options, you’ll have a delicious dessert ready with minimal effort!
Old-Fashioned Homemade Banana Pudding Variations
Feel free to unleash your creativity and personalize this delightful pudding to fit your taste preferences and dietary needs!
- Dairy-Free: Substitute whole milk with almond or coconut milk for a creamy yet dairy-free version. You won’t miss the dairy flavor!
- Sweetener Swap: Try using brown sugar or natural sweeteners like honey for a deeper, caramel-like flavor that enhances the banana essence.
- Flavor Boost: Add a dash of cinnamon or a splash of rum to the pudding mixture for an exciting twist that elevates the taste experience.
- Cookie Alternatives: Use chocolate cookies or graham crackers instead of vanilla wafers for a new texture and flavor. Coconut macaroons can also add a delightful tropical flair.
- Extra Bananas: Mash an additional banana into the pudding mixture for an intensified banana flavor, creating layers of sweetness in every bite.
- Heat Level: Add a pinch of cayenne pepper or a few dashes of hot sauce to create a surprising kick that pairs beautifully with the sweetness.
- Nutty Addition: Incorporate chopped nuts, like walnuts or pecans, into the layers for added texture and a satisfying crunch.
- Layered Delight: For a more extravagant dessert, consider layering your pudding with whipped cream or chocolate mousse for a multi-dimensional treat.
With these suggestions, your Old-Fashioned Homemade Banana Pudding can be as unique as your taste buds desire! Want more inspiration? Check out our delightful Graveyard Pudding Cookie Cups for a fun dessert pairing!
Old-Fashioned Homemade Banana Pudding Recipe FAQs
What kind of bananas should I use for this pudding?
Absolutely! For the best flavor and texture, use 4 ripe bananas with a few brown spots for sweetness. You want the bananas to be firm but not overly soft; if you see dark spots all over, they may be too ripe. For extra banana flavor, consider mashing one into the pudding mixture.
How should I store leftover banana pudding?
To keep your Old-Fashioned Homemade Banana Pudding fresh, transfer it to an airtight container and store it in the refrigerator for up to 4 days. This method helps maintain that creamy texture and delightful taste. Make sure to cover it tightly to prevent it from absorbing any fridge odors.
Can I freeze banana pudding?
It’s best to avoid freezing Old-Fashioned Homemade Banana Pudding. Freezing can change the texture of the pudding and bananas, which may lead to separation when thawing. If you find yourself with leftovers, simply refrigerate them instead!
What should I do if my pudding is too runny?
If your pudding ends up too runny, don’t fret! You can thicken it further by simmering it gently over low heat while stirring constantly. You might also consider adding a little cornstarch slurry (1 tablespoon of cornstarch mixed with 2 tablespoons of milk) and cooking for another minute or two until thickened.
Is there a non-dairy option for this recipe?
Very much! If you’re looking for a non-dairy version of Old-Fashioned Homemade Banana Pudding, substitute regular milk with almond or coconut milk. For added creaminess, try using full-fat coconut milk. Just make sure to use a non-dairy yogurt for further creaminess if you’re layering.
How can I prevent the bananas from browning?
To keep your bananas looking fresh, it’s a good idea to slice them just before serving if you’re preparing the pudding a day in advance. Alternatively, you can toss the banana slices in a bit of lemon juice to help slow down the browning process, although this may slightly alter the flavor.
Decadent Old-Fashioned Homemade Banana Pudding Recipe
Ingredients
Equipment
Method
- In a medium saucepan, combine 3/4 cup sugar, 1/4 cup flour, and a pinch of salt. Whisk together and gradually whisk in 2 3/4 cups of milk until no lumps remain.
- Cook over medium heat, stirring frequently, for about 5–7 minutes until thickened and bubbly. Reduce heat to low and cook for an additional 2 minutes.
- In a separate bowl, whisk 3 large eggs until smooth. Slowly pour a cup of hot pudding into the eggs, stirring constantly to temper. Pour egg mixture back into saucepan.
- Return to low heat, cooking for another 2 minutes until gently boiling. Stir in 1 tablespoon of vanilla extract, then let cool for about 15 minutes.
- In an ungreased 8-inch square dish, layer 25 vanilla wafers, half the sliced bananas, and half the cooled pudding. Spread evenly.
- Repeat layering with another layer of wafers, remaining bananas, and rest of the pudding. Cover with plastic wrap to minimize skin formation.
- Refrigerate for at least 4 hours or preferably overnight to allow flavors to meld.
- Before serving, crush remaining wafers and sprinkle over the top for crunch. Serve cold.
Leave a Reply