
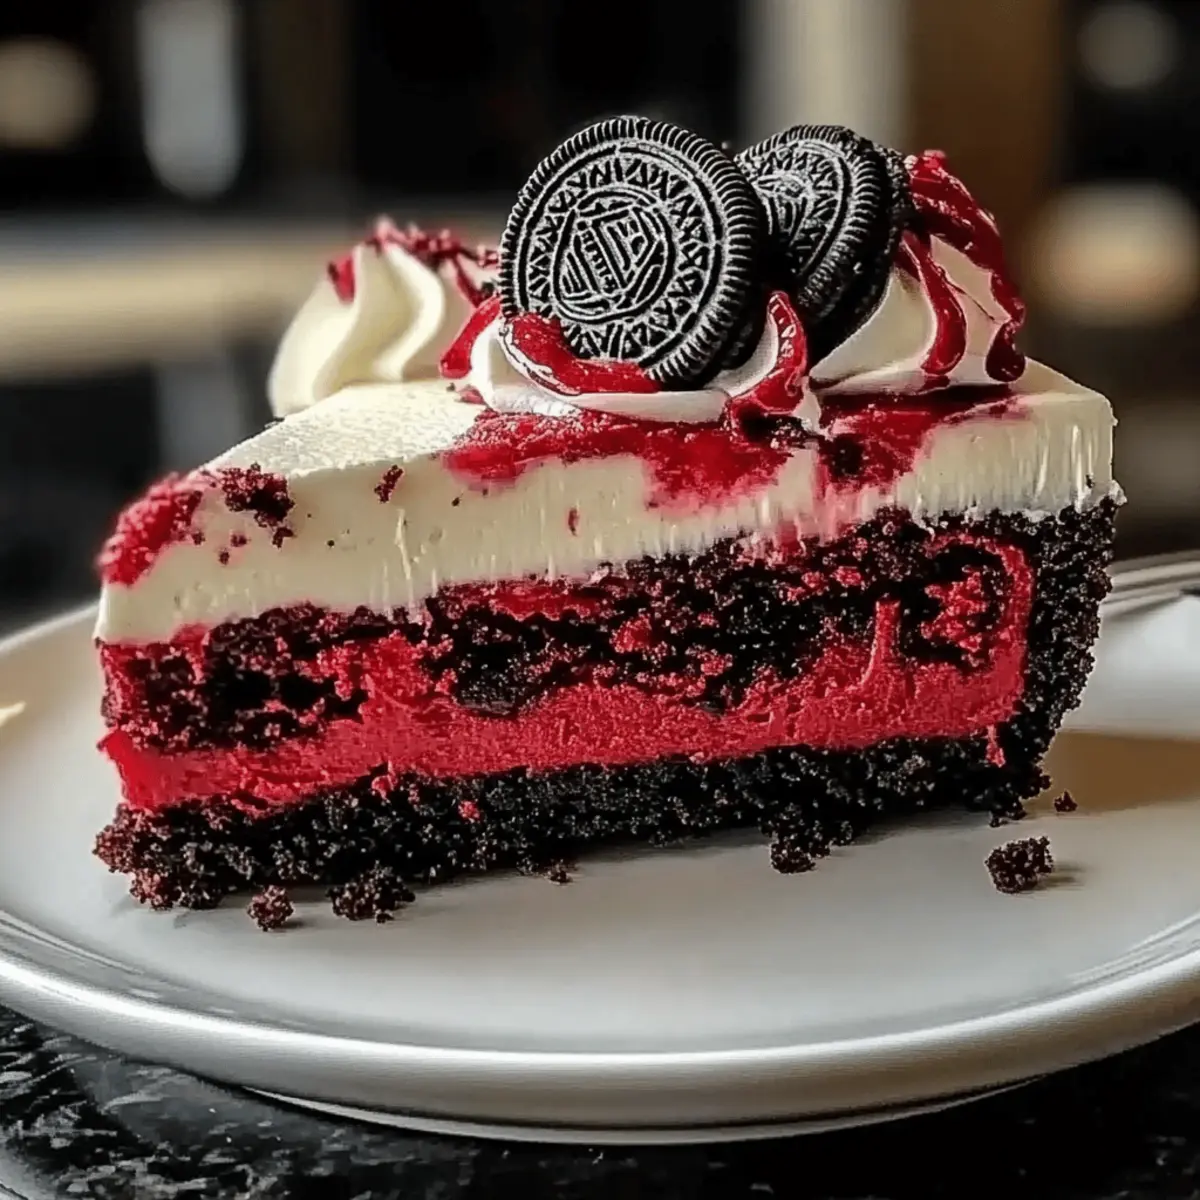
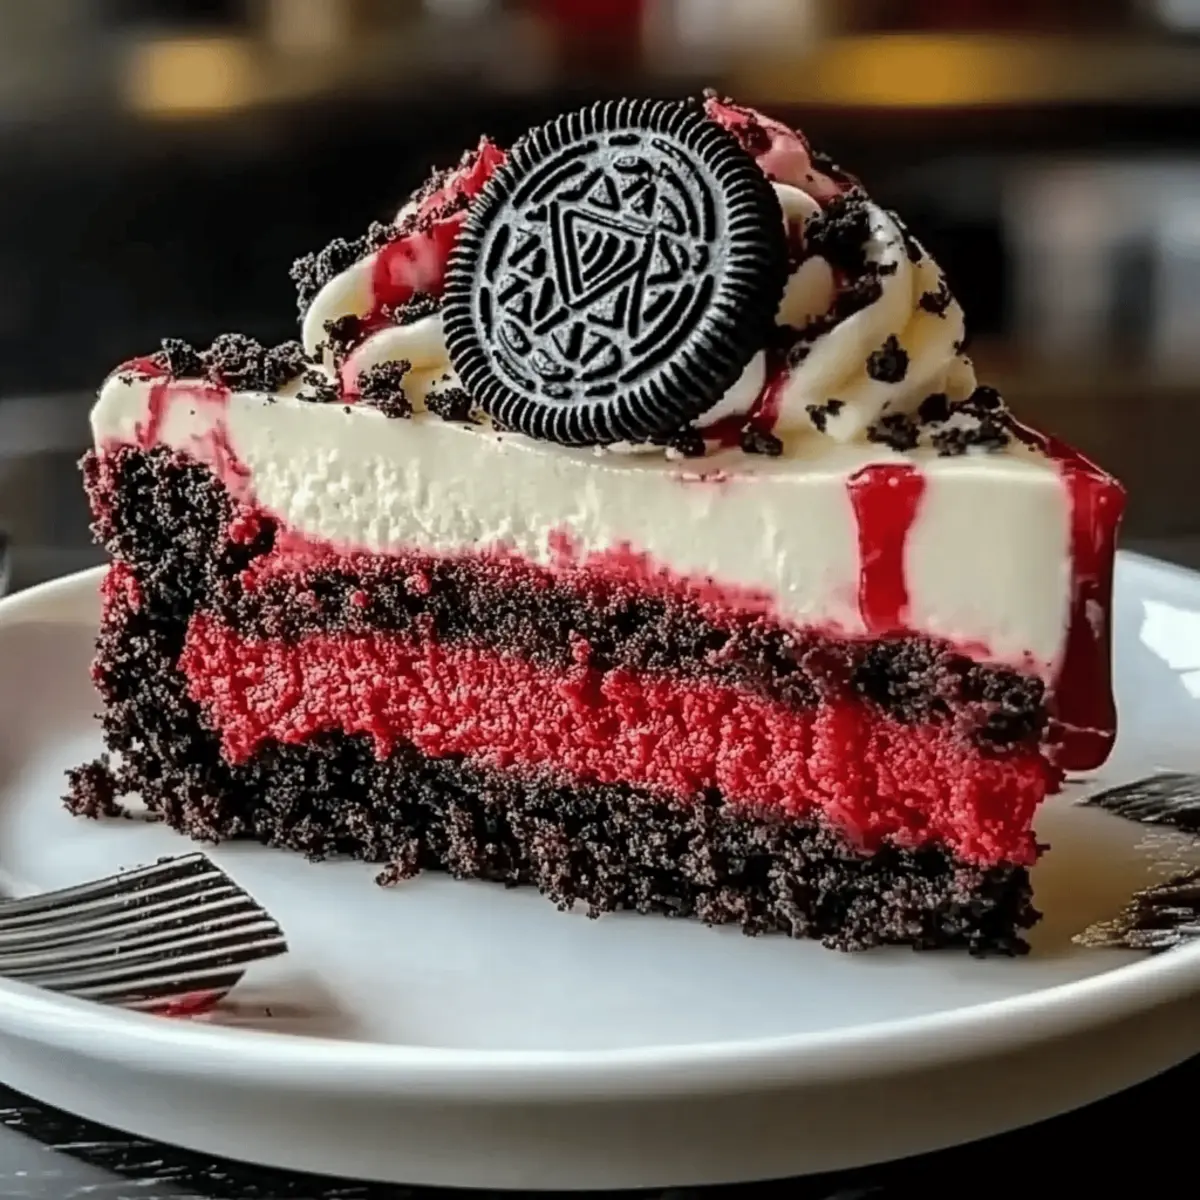
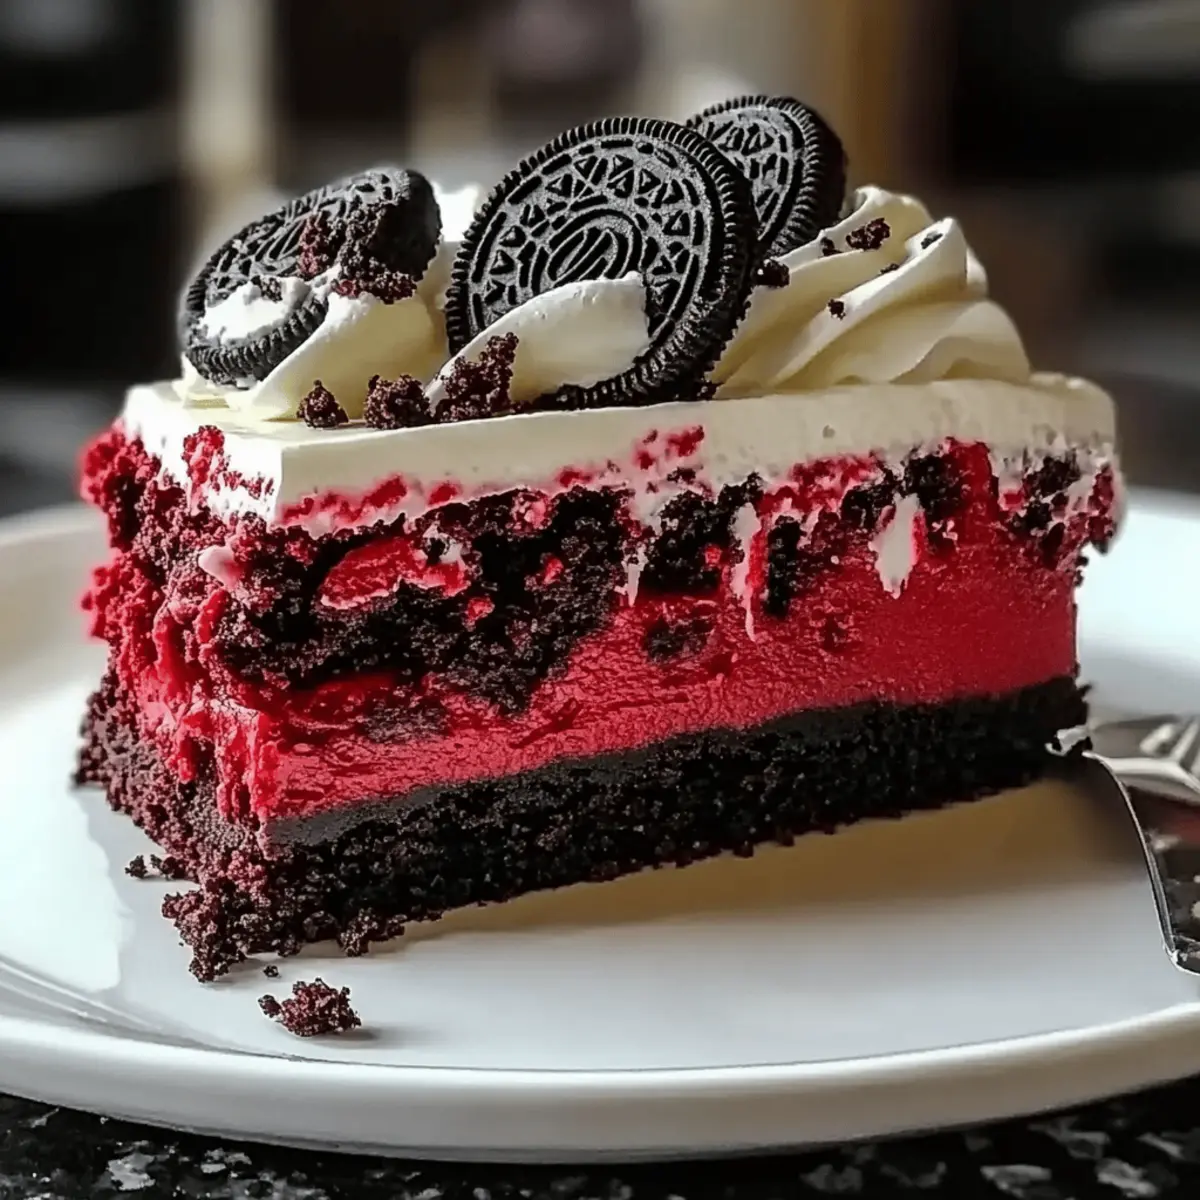
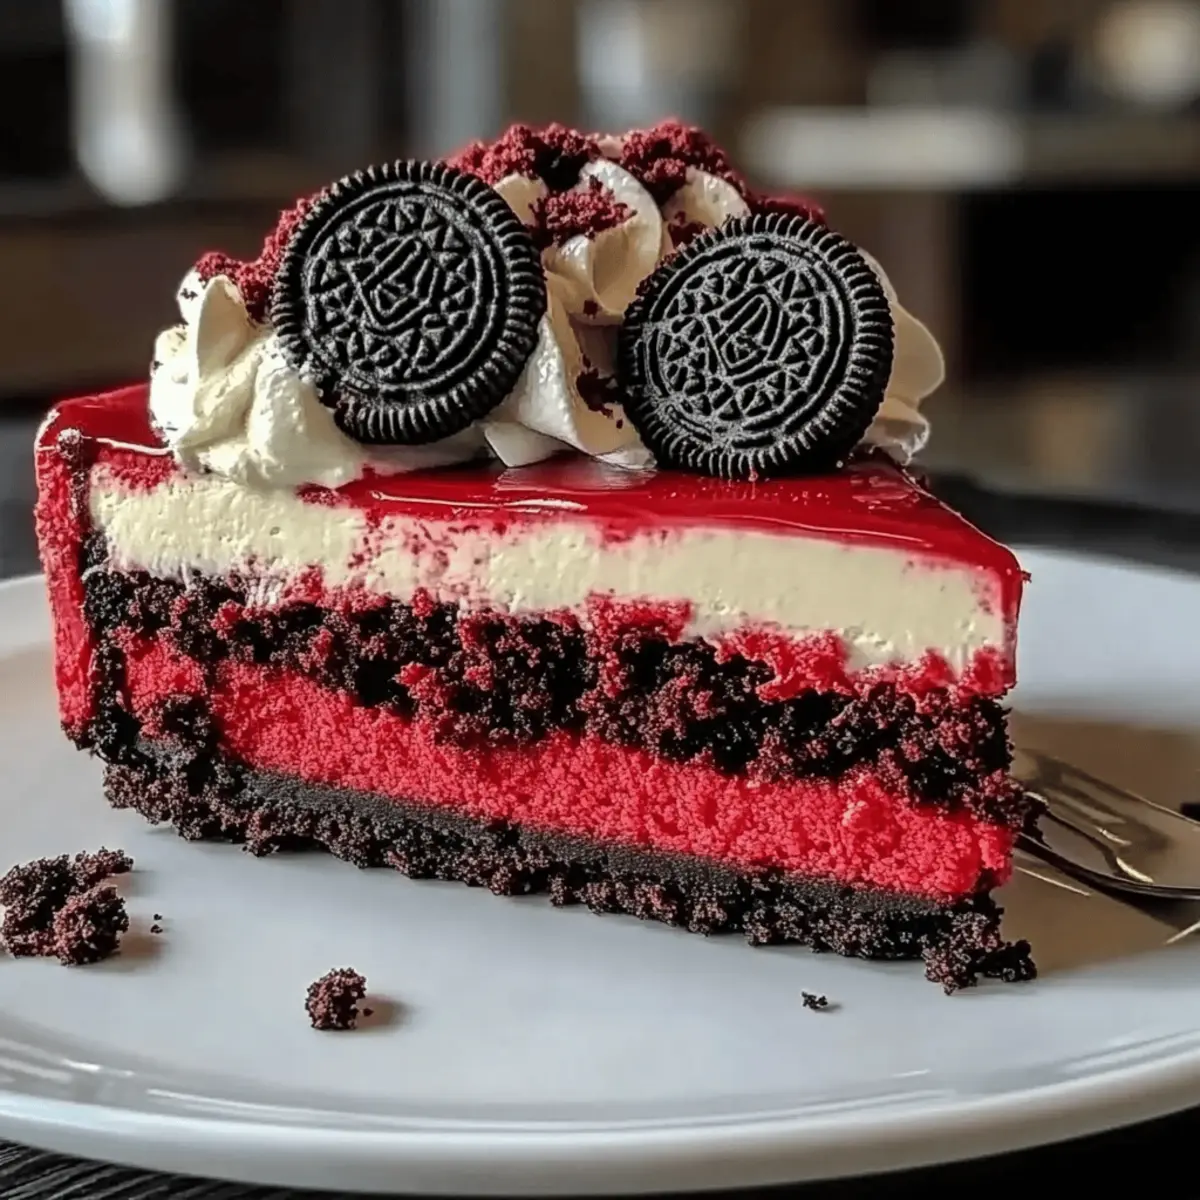
You won’t believe how simple it is to create an indulgent Red Velvet Oreo Cheesecake that will leave your friends and family begging for the recipe! This showstopper blends rich red velvet cake with a luscious cheesecake filling, all complemented by the delightful crunch of Oreo cookies. It’s a dessert that not only looks stunning on any table but also offers the perfect combination of texture and flavor. Whether you’re celebrating a special occasion or just craving something sweet, this cheesecake is customizable to fit any dietary preference, including gluten-free alternatives. Imagine the joy of sharing a slice that balances creamy and crunchy, with a flavor profile that tantalizes the senses. Are you ready to dive into a baking adventure that’s as satisfying to make as it is to eat? Let’s get started!
Why is This Cheesecake a Must-Try?
Indulgent Flavor: The delightful blend of creamy cheesecake with rich red velvet cake and crunchy Oreos creates an unforgettable dessert experience.
Customizable Options: Easily adapt this recipe with gluten-free alternatives or by adding mix-ins like crushed Oreos for extra texture.
Simple Process: This showstopper can be whipped up with minimal baking skills, making it accessible to everyone—from novice to experienced baker.
Perfect for Any Occasion: Whether you’re hosting a party or just enjoying a quiet night in, this cheesecake is sure to impress friends and family.
Impressive Presentation: Its striking layers and vibrant color make it not only a delight to eat but also a gorgeous centerpiece for your dessert table. Don’t miss out on exploring similar treats, such as the lush Pistachio Mushroom Cheesecake or the fun Oreo Dirt Dessert for more baking inspiration!
Red Velvet Oreo Cheesecake Ingredients
For the Red Velvet Cake
• Red Velvet Cake Mix – Adds sweetness and structure; you can substitute with a homemade red velvet recipe if desired.
• Eggs – Provides moisture and binding; no substitutes are recommended for the best texture.
• Vegetable Oil – Contributes to moisture; melt some butter as a swap if you prefer a richer flavor.
• Buttermilk – Adds richness and a slight tang; combine milk with vinegar for a quick substitute.
For the Cheesecake Filling
• Cream Cheese – The creamy base of the cheesecake filling; opt for full-fat for the best consistency.
• Granulated Sugar – Sweetens the cheesecake; to add depth, consider using brown sugar instead.
• Sour Cream – Introduces tang and creaminess; you can swap in plain Greek yogurt for a lighter option.
For the Crust & Topping
• Oreo Cookies – Forms a crunchy crust and topping; use gluten-free Oreos to accommodate dietary needs.
• Butter – Binds the cookie crust; unsweetened applesauce makes for a lower-fat alternative.
This Red Velvet Oreo Cheesecake will surely be a hit, bringing smiles with every bite!
Step‑by‑Step Instructions for Indulgent Red Velvet Oreo Cheesecake
Step 1: Prepare Cake Batter
In a large mixing bowl, combine the red velvet cake mix, eggs, vegetable oil, and buttermilk. Use an electric mixer on medium speed to blend the mixture until it’s smooth and free of lumps, about 2 minutes. The vibrant red color should be rich and evenly mixed, ready to transition into the baking stage.
Step 2: Bake Cake
Pour the red velvet cake batter into a greased 9-inch springform pan and spread it evenly. Bake in a preheated oven at 350°F (175°C) for 25–30 minutes, or until a toothpick inserted in the center comes out clean. Once baked, remove from the oven and let it cool completely in the pan on a cooling rack.
Step 3: Make Cheesecake Filling
While the cake cools, prepare the cheesecake filling. In a separate bowl, beat the cream cheese and granulated sugar until smooth and creamy, about 3–4 minutes. Gradually add in the sour cream and mix until combined. Incorporate the eggs one at a time, mixing gently just until everything is blended together.
Step 4: Prepare Crust
For the Oreo crust, crush the Oreo cookies in a zip-top bag or using a food processor until they form fine crumbs. In a medium bowl, mix the crumbs with melted butter until the mixture resembles wet sand. Press this mixture firmly into the bottom of the cooled springform pan to form a firmly packed crust.
Step 5: Layer Cheesecake
Once the cheesecake filling is ready, gently pour it over the cooled red velvet cake layer in the springform pan. Use a spatula to ensure an even distribution, smoothing the top so it’s level. This layering creates a beautiful and indulgent structure for your red velvet Oreo cheesecake.
Step 6: Bake Cheesecake
Preheat the oven again and bake the cheesecake at 325°F (160°C) for 50–60 minutes. It’s done when the edges are set and the center has a slight jiggle. Turn off the oven and leave the cheesecake inside, letting it cool gradually for about one hour to prevent cracks and ensure a smooth texture.
Step 7: Chill the Cheesecake
After cooling in the oven, carefully remove the cheesecake and refrigerate it for at least four hours or preferably overnight. This chilling time allows the flavors to meld beautifully and sets the cheesecake for slicing. Cover it with plastic wrap to keep it fresh.
Step 8: Serve and Enjoy
When ready to serve your delightful Indulgent Red Velvet Oreo Cheesecake, carefully remove it from the springform pan. You can garnish it with additional crushed Oreos or fresh berries for a pop of color. Slice into wedges and delight in the layers of vibrant red velvet and creamy cheesecake!
Red Velvet Oreo Cheesecake Variations
Feel free to sprinkle your own creativity and tastes into this delightful cheesecake recipe—let your imagination take flight!
-
Extra Crunchy: Incorporate crushed Oreos into the cheesecake filling for bursts of flavor in every bite. Imagine the satisfying crunch and how it plays against the creaminess, elevating your cheesecake experience!
-
Gluten-Free Delight: Swap in gluten-free flour and use gluten-free Oreos to create a dessert that everyone can enjoy without missing out. Your friends will never know it’s gluten-free with how delicious this cheesecake is!
-
Chocolate Drizzle: Enhance the indulgent experience by drizzling melted chocolate over the top before serving. The added richness will prompt oohs and aahs from your guests as they take the first bite.
-
Different Base: Swap the Oreo crust for a base of chocolate chip cookies or graham crackers to create a new flavor profile. Each base brings its unique flair—experiment to find your favorite!
-
Layered Surprise: Add a middle layer of fruit preserves or even a cream cheese icing swirl into the filling for a delightful surprise. The mix of flavors will dance on your palate, making it a showstopper!
-
Red Velvet Twist: Take it up a notch by using a homemade red velvet cake recipe instead of the mix. You’ll enjoy the process, and the flavor will shine through with even more depth.
-
Fruity Topping: Consider topping each slice with fresh berries or sliced strawberries for a refreshing contrast. The tartness of the fruit complements the sweetness beautifully—perfect for warm weather!
-
Mochaccino Vibes: Blend in a hint of coffee extract to your cheesecake filling for a scrumptious mocha flavor. Pair it with a cup of coffee for the perfect afternoon treat!
This Red Velvet Oreo Cheesecake can be as delightful and unique as you wish it to be. Enjoy the process of making it your own, and don’t forget to check out the lush Pistachio Mushroom Cheesecake or the fun Oreo Dirt Dessert for more baking inspiration!
Make Ahead Options
These Indulgent Red Velvet Oreo Cheesecake slices are perfect for busy home cooks looking to save time! You can prepare the red velvet cake layer up to 24 hours in advance by baking it, letting it cool completely, and then storing it tightly wrapped in the fridge. Additionally, mix the cheesecake filling a day ahead and refrigerate it separately. When you’re ready to assemble, simply make the Oreo crust, layer the cheesecake over the red velvet cake, and bake it right before serving. This method ensures your cheesecake remains just as delicious while cutting down on last-minute prep, allowing you to enjoy your time with family and friends!
How to Store and Freeze Red Velvet Oreo Cheesecake
Fridge: Store leftover slices in an airtight container for up to 5 days. This keeps your indulgent red velvet Oreo cheesecake fresh and ready to enjoy!
Freezer: For longer storage, carefully wrap slices in plastic wrap, then foil, and freeze for up to 2 months. Thaw overnight in the refrigerator before serving for best results.
Serving: When ready to serve, take the cheesecake out of the fridge and let it sit at room temperature for about 15 minutes. This enhances the creamy texture and flavor.
Expert Tips for Red Velvet Oreo Cheesecake
-
Room Temperature Ingredients: Ensure all your ingredients, especially cream cheese and eggs, are at room temperature. This creates a smoother filling and avoids lumps in your red velvet Oreo cheesecake.
-
Avoid Overmixing: When combining the cheesecake filling ingredients, mix just until combined. Overmixing can introduce too much air, leading to cracks during baking.
-
Use a Water Bath: For a creamier texture and to prevent cracks, consider baking your cheesecake in a water bath. Wrap the springform pan in foil and place it in a larger pan filled with hot water before baking.
-
Cool Gradually: After baking, leave the cheesecake in the oven with the door slightly ajar for an hour. This gradual cooling helps prevent sudden temperature changes that could cause cracks.
-
Chill Thoroughly: Allow your cheesecake to chill in the refrigerator for at least four hours or overnight for the best flavor and texture. This also helps it to set properly before slicing.
What to Serve with Indulgent Red Velvet Oreo Cheesecake
Treat your taste buds to a delightful experience, perfectly complementing the rich flavors of this heavenly cheesecake!
-
Fresh Berries: Bright and juicy, a mixture of strawberries, blueberries, and raspberries adds a refreshing contrast that balances the sweetness.
-
Vanilla Ice Cream: A scoop of creamy vanilla ice cream creates a heavenly pairing, making each bite even more indulgent and satisfying.
-
Chocolate Ganache: Drizzle warm chocolate ganache on top to enhance the luxurious feel. The rich chocolate will elevate the cheesecake’s flavor profile beautifully.
-
Mint Leaves: A touch of fresh mint not only looks pretty but also adds a pop of freshness that cuts through the richness of the cheesecake.
-
Coffee: A cup of freshly brewed coffee brings out the dessert’s chocolate notes, making it an excellent companion for those cozy evenings.
-
Homemade Whipped Cream: Light and airy, this fluffy topping enhances the creamy texture of your red velvet Oreo cheesecake, adding a touch of elegance.
-
Pomegranate Seeds: Sprinkle some pomegranate seeds over the cheesecake for a burst of tartness that contrasts with the sweet flavors, plus they add a lovely pop of color.
-
Sparkling Water: An elegant sparkling water with a splash of lemon or lime refreshes the palate and complements the rich dessert, perfect for serving at celebrations.
Red Velvet Oreo Cheesecake Recipe FAQs
How do I choose the best red velvet cake mix?
Absolutely! When selecting a red velvet cake mix, look for one with high-quality ingredients. Check for a vibrant red color in the mix—if it looks dull, it may not yield the desired result. Avoid mixes with artificial flavors or added preservatives for the best taste!
How should I store leftovers of this cheesecake?
Very! To store leftover slices of your indulgent Red Velvet Oreo Cheesecake, place them in an airtight container and refrigerate. They’ll stay fresh for up to 5 days. Make sure to cover it well to prevent it from drying out and losing that creamy texture you love.
Can I freeze the Red Velvet Oreo Cheesecake?
Of course! To freeze, wrap each slice tightly in plastic wrap followed by aluminum foil. This prevents freezer burn and keeps the cheesecake tasting fresh. It can be frozen for up to 2 months. When you’re ready to enjoy it, transfer the cheesecake to the refrigerator and let it thaw overnight for the best flavor and texture.
What should I do if my cheesecake cracks during baking?
Oh no! If your cheesecake cracks, don’t worry—everyone makes mistakes! To prevent this in the first place, ensure you bake at a lower temperature and avoid overmixing your filling. If it does crack, the best remedy is to cover it with a layer of whipped cream or frosting—the deliciousness will distract from the imperfection!
Are there any dietary considerations for this cheesecake?
Certainly! If you’re looking to make this Red Velvet Oreo Cheesecake gluten-free, simply substitute the regular Oreo cookies with gluten-free versions. Additionally, check labels on your cake mix and other ingredients to ensure they meet your dietary needs, especially for those with allergies. It’s always a good idea to personalize recipes for a happy gathering!
Irresistible Red Velvet Oreo Cheesecake for Every Celebration
Ingredients
Equipment
Method
- In a large mixing bowl, combine the red velvet cake mix, eggs, vegetable oil, and buttermilk. Blend the mixture until smooth, about 2 minutes.
- Pour the red velvet cake batter into a greased 9-inch springform pan and bake at 350°F (175°C) for 25–30 minutes.
- In a separate bowl, beat the cream cheese and granulated sugar until smooth. Add sour cream and mix, then incorporate eggs one at a time.
- Crush the Oreo cookies and mix with melted butter to form a crust. Press firmly into the bottom of the springform pan.
- Pour the cheesecake filling over the cooled red velvet cake layer in the springform pan.
- Bake the cheesecake at 325°F (160°C) for 50–60 minutes. Let it cool in the oven for about an hour.
- Refrigerate the cheesecake for at least four hours or overnight to set it properly.
- Carefully remove the cheesecake from the springform pan and serve with garnishes if desired.
Leave a Reply