
Sinking my spoon into a bowl of creamy delight, I can’t help but reminisce about family gatherings filled with laughter and the warm aroma of this Old-Fashioned Homemade Banana Pudding wafting through the air. Crafted from scratch, this Southern classic layers luscious vanilla custard, crunchy vanilla wafers, and ripe banana slices—a combination that sings comfort in each bite. With its easy assembly, this dessert not only impresses but also brings a smile to everyone’s face, making it the perfect addition to any occasion. Whether you’re hosting a celebration or enjoying a quiet evening at home, this made-from-scratch pudding can elevate your meal. What’s your favorite way to enjoy a traditional dessert like this?
Why Is This Banana Pudding Irresistible?
Homemade Goodness: Every layer of this classic dessert is made from scratch, ensuring fresh and delightful flavors that store-bought options simply can’t match.
Easy Assembly: With just a few straightforward steps, you’ll have a delicious treat ready to chill and impress!
Creamy Texture: The rich custard combined with ripe bananas and crispy wafers creates a tantalizing contrast in every spoonful.
Endless Variations: Feel free to experiment by adding your favorite fruits or flavored wafers; it’s a versatile recipe that invites creativity!
Family Favorite: This pudding is sure to spark nostalgia and joy, making it a beloved centerpiece for gatherings. Treat yourself and your loved ones with a taste of comfort — check out my Graveyard Pudding Cookie for another fun dessert option!
Old-Fashioned Homemade Banana Pudding Ingredients
For the Custard
- Sugar – Sweetness and helps in thickening the custard; brown sugar can add a toasty flavor.
- Flour – Provides structure to the pudding; all-purpose flour is best, but not gluten-free.
- Salt – Balances sweetness and enhances flavors; consider using sea salt for a refined taste.
- Milk – The creamy base of the pudding; substitute with non-dairy milk for a lactose-free version.
- Eggs – Adds richness and firmness to the pudding; cornstarch is a great egg-free alternative.
- Vanilla Extract – Deepens the flavor profile; vanilla bean paste can offer a more intense aroma.
For the Layers
- Vanilla Wafers (about 8 oz.) – Adds a delightful crunch and sweetness for layering; graham crackers also make a good stand-in.
- Bananas (4, sliced) – The star ingredient that adds natural sweetness; swap with sweetened canned pineapple for a twist.
Step‑by‑Step Instructions for Old-Fashioned Homemade Banana Pudding
Step 1: Prepare the Custard Base
In a medium saucepan, whisk together sugar, flour, and salt. Gradually stir in the milk while cooking over medium heat. Keep stirring continuously until the mixture thickens and bubbles appear, about 10-12 minutes. You’ll know it’s ready when it coats the back of a spoon. Remove it from the heat to avoid overcooking.
Step 2: Incorporate the Eggs
Reduce the heat to low and cook the custard for an additional 2 minutes. In a small bowl, whisk the eggs until smooth. Temper the eggs by adding a few spoonfuls of the hot custard into them, whisking constantly, to prevent curdling, then pour the egg mixture back into the saucepan. Continue cooking for approximately 2 more minutes until thickened.
Step 3: Add Vanilla and Cool
Remove the saucepan from heat and stir in the vanilla extract, contributing a delightful aroma to your Old-Fashioned Homemade Banana Pudding. Let the mixture cool for about 15 minutes, stirring occasionally to prevent a skin from forming. It should still be warm but no longer hot as you prepare to layer your dessert.
Step 4: Assemble the Layers
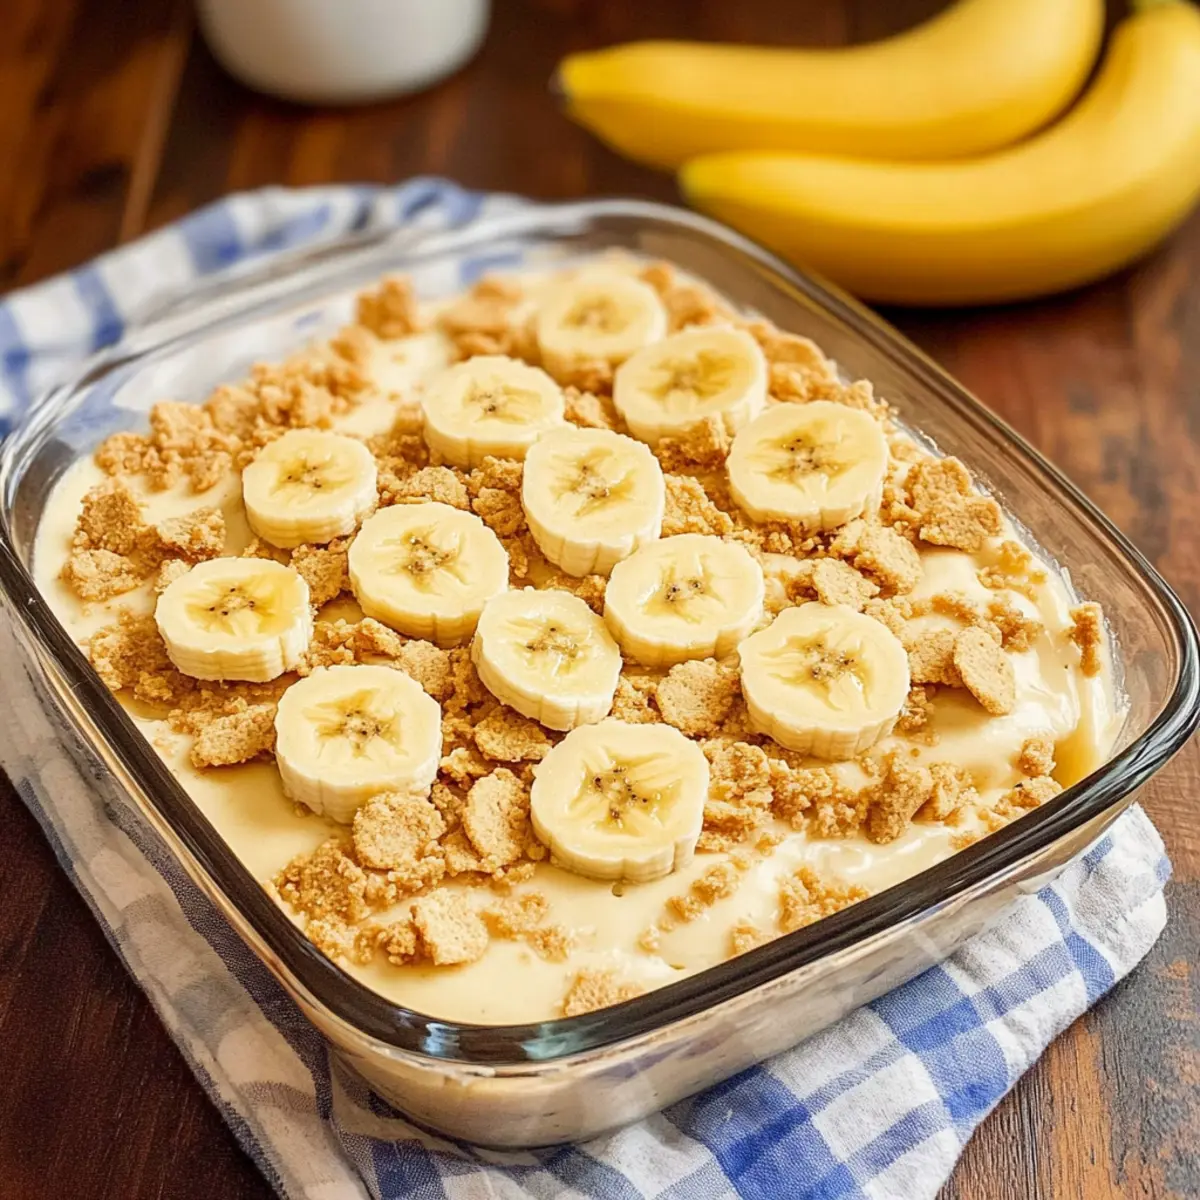
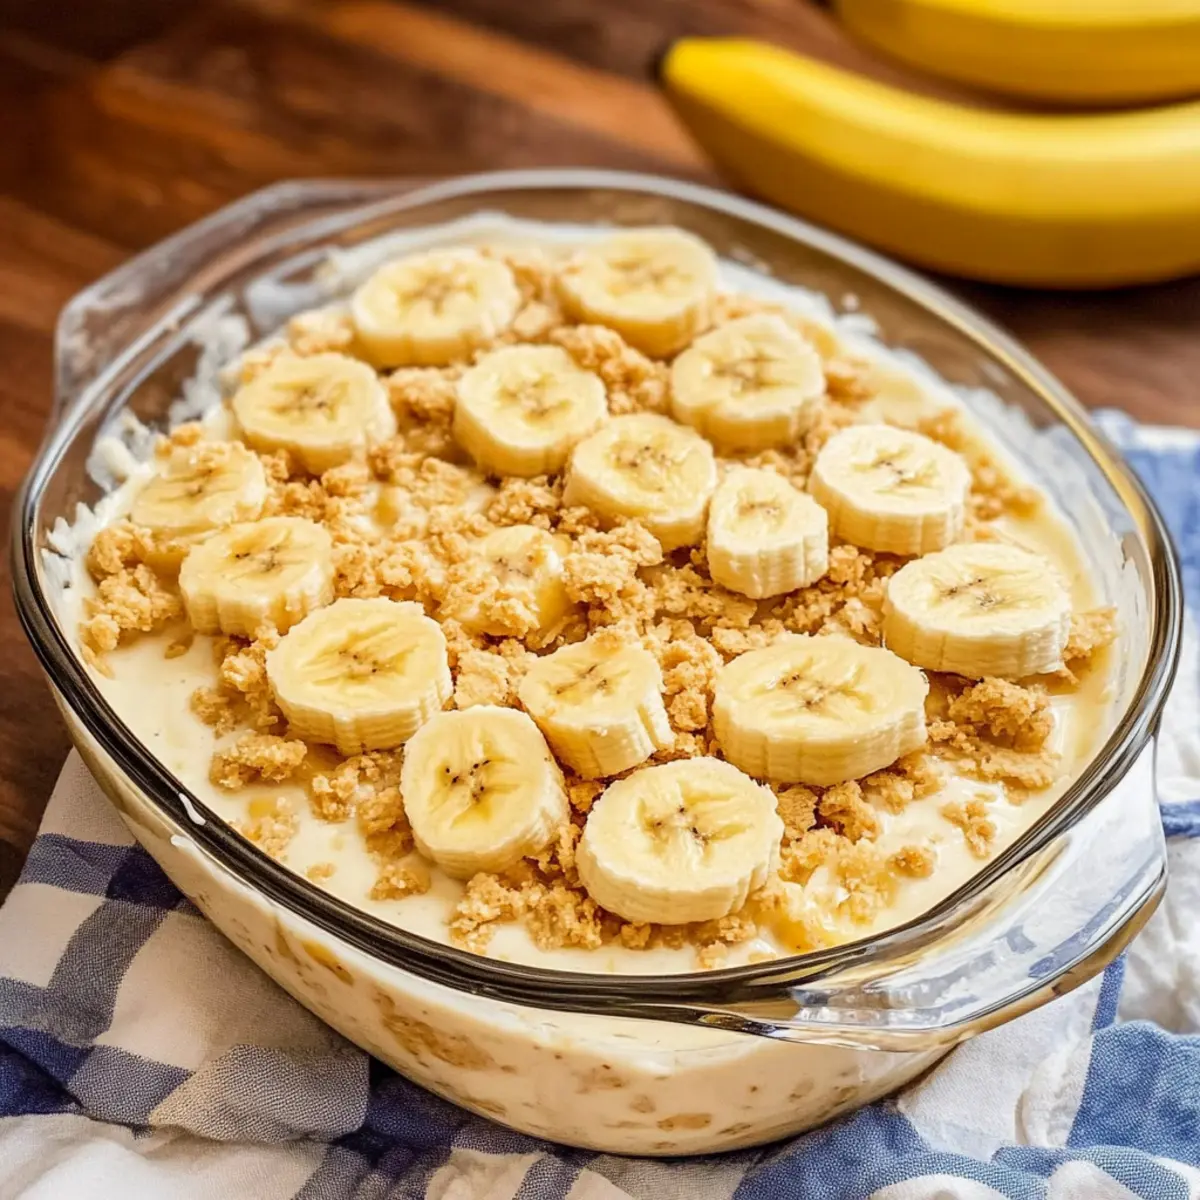
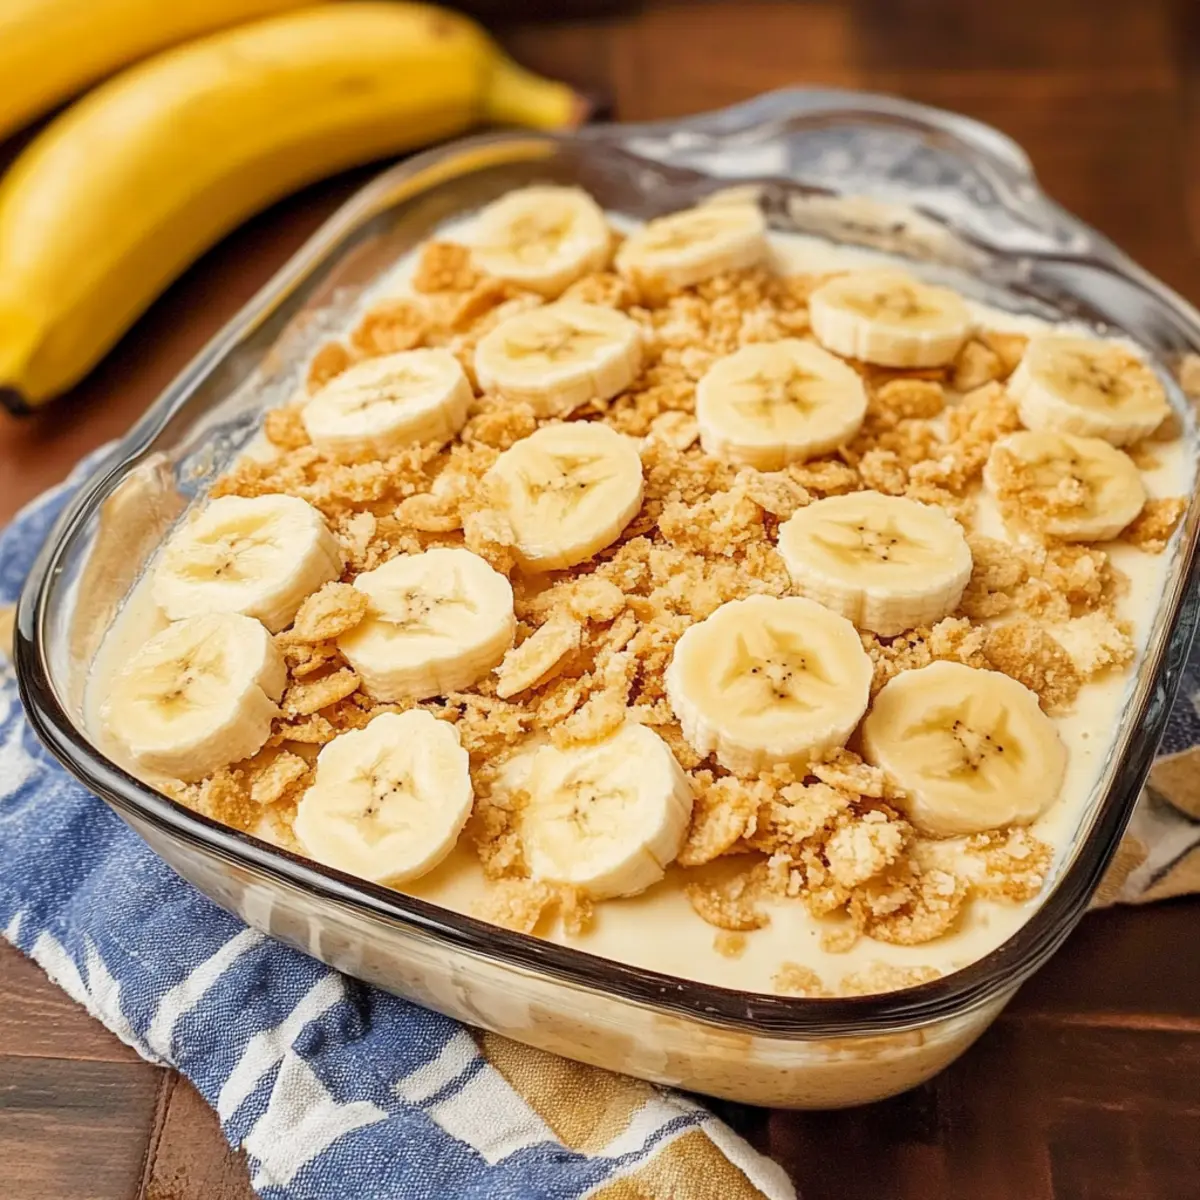
In an ungreased 8×8 inch square pan, create your first layer by placing about 25 vanilla wafers uniformly across the bottom. Follow with half of the banana slices, distributing them evenly for sweetness. Pour half of the warm pudding mixture over the bananas, smoothing it out gently. Repeat the layers with the remaining wafers, banana slices, and pudding, finishing with a creamy layer of pudding on top.
Step 5: Chill the Pudding
Cover the assembled dessert with plastic wrap, ensuring it clings tightly to the surface to prevent skin formation. Refrigerate the Old-Fashioned Homemade Banana Pudding for at least 4 hours, but overnight chilling is ideal, as it melds the flavors beautifully and enhances the pudding’s creamy texture.
Step 6: Add the Final Touches
Before serving, remove the pudding from the refrigerator and crush any remaining vanilla wafers. Sprinkle the crushed wafers on top for an added crunch and visual appeal. This final step not only garnishes your dessert but also elevates the homemade style, making your pudding even more delightful for guests or family gatherings.
Step 7: Serve and Savor
Scoop out the rich, creamy layers of your Old-Fashioned Homemade Banana Pudding and serve it cold. For an extra indulgence, consider garnishing with a few fresh banana slices or a dollop of whipped cream, allowing everyone to experience the nostalgic comfort of this beloved Southern classic.
How to Store and Freeze Old-Fashioned Homemade Banana Pudding
Fridge: Keep your Old-Fashioned Homemade Banana Pudding covered in the refrigerator for up to 4 days. This helps maintain its creamy texture and delightful flavors.
Airtight Container: For best results, use an airtight container to prevent the pudding from absorbing any odors from the fridge and to keep it fresh.
Banana Slices: Avoid adding banana slices until just before serving to prevent browning and keep your dessert looking its best.
Freezer: Do not freeze, as the texture of the custard will change, becoming grainy when thawed. Enjoy this delicious treat fresh for the best experience!
What to Serve with Old-Fashioned Homemade Banana Pudding
Delighting in a scoop of this creamy dessert opens the door to endless meal possibilities that enhance your dining experience.
-
Buttery Biscuits: These soft, flaky biscuits bring a warm, comforting texture that pairs beautifully with the sweetness of the pudding. An ideal side for any Southern feast!
-
Fresh Fruit Salad: A vibrant mix of seasonal fruits adds a refreshing contrast, balancing the richness of the banana pudding while enhancing its flavor.
-
Classic Southern Fried Chicken: The crispy exterior and juicy interior of fried chicken offer a delightful contrast to the soft creaminess of the pudding, creating a satisfying meal.
-
Crispy Green Salad: Tossed with a light vinaigrette, a fresh salad will brighten your palate, providing a refreshing bite alongside the decedent dessert.
-
Iced Tea: A chilled glass of sweet tea is a traditional Southern pairing, complementing the bananas’ sweetness while offering a refreshing counterpoint.
-
Chocolate Chip Cookies: These warm, gooey cookies provide a playful crunch after the smooth dessert, creating an enjoyable textural transition at the end of the meal.
Let these delightful choices accompany your Old-Fashioned Homemade Banana Pudding, transforming your table into a feast of flavors and textures.
Make Ahead Options
These Old-Fashioned Homemade Banana Pudding layers are perfect for busy home cooks looking to save time! You can prepare the custard base and layer it with vanilla wafers and bananas up to 24 hours in advance; simply refrigerate it to maintain its creamy texture and prevent browning. However, it’s best to add fresh banana slices just before serving to ensure they stay vibrant and delicious. When ready to enjoy, you only need to crush additional wafers and sprinkle them on top for that delightful crunch. This simple meal prep will allow you to impress your family with minimal effort, delivering a nostalgic dessert that’s just as loved!
Old-Fashioned Homemade Banana Pudding Variations
Feel free to get creative with this dessert and make it uniquely yours, infusing different flavors and textures!
-
Fruit Swap: Replace bananas with strawberries or peaches for a delightful twist. Fresh fruits really brighten the pudding!
-
Flavorful Wafer Switch: Try flavored wafers like chocolate or lemon for an unexpected burst of zest. This simple change can add a whole new dimension.
-
Nutty Crunch: Add a layer of toasted pecans or walnuts between layers for an added crunch and depth of flavor. Nuts complement the creamy custard beautifully!
-
Whipped Cream Layer: Fold in some freshly whipped cream into the custard for an extra light and fluffy texture. This twist creates an even more decadent treat.
-
Dairy-Free Delight: Use coconut or almond milk to make this recipe dairy-free, while still keeping all the creamy richness that banana pudding is famous for.
-
Spiced Pudding: Add a sprinkle of cinnamon or nutmeg to the custard for a warm, comforting flavor that pairs perfectly with the sweet bananas.
-
Chocolate Drizzle: Drizzle melted chocolate over the top for a rich finish that will leave chocolate lovers craving more. The combination with vanilla is irresistibly decadent!
-
Frozen Treat: Turn this pudding into a frozen treat! Just pour the assembled pudding into a freezer-safe container and freeze for a creamy banana pudding ice cream experience. Perfect for hot summer days!
Don’t forget to try your hand at my Graveyard Pudding Cookie for a fun take on dessert—who knows, it might become a new family favorite!
Expert Tips for Old-Fashioned Homemade Banana Pudding
- Chill Thoroughly: Allow the pudding to chill overnight for enhanced flavor and a firmer texture; short chill times won’t allow flavors to fully meld.
- Banana Timing: Add banana slices just before serving to prevent browning—this keeps the dessert looking fresh and inviting.
- Thickening Consistency: Make sure your custard is thick before layering; undercooked custard may result in a runny Old-Fashioned Homemade Banana Pudding that doesn’t hold its shape.
- Layering Technique: Be gentle when layering to avoid crushing the wafers or mixing the pudding; each layer should maintain its integrity for visual appeal.
- Leftover Storage: Store any leftovers covered in the refrigerator for up to 4 days to preserve freshness—avoid freezing to maintain texture.
Old-Fashioned Homemade Banana Pudding Recipe FAQs
How do I choose ripe bananas for this recipe?
Absolutely! For the best flavor, select bananas that are just ripe—think yellow with a few small brown spots. These provide the perfect sweetness and texture. Avoid overly brown or mushy bananas as they can turn the pudding too soft and lead to an overpowering flavor.
What is the best way to store leftovers of Old-Fashioned Homemade Banana Pudding?
Very! Store your pudding covered in the refrigerator for up to 4 days. I recommend using an airtight container to keep the flavors intact and prevent it from absorbing any odors. Always add banana slices just before serving to maintain their freshness.
Can I freeze Old-Fashioned Homemade Banana Pudding?
No, unfortunately! Freezing is not recommended for this pudding as the custard will separate and become grainy when thawed. Instead, savor this delightful dessert fresh, as the flavor and texture are simply unbeatable.
What if my pudding doesn’t thicken properly?
Sometimes, a pudding can be tricky! If your custard isn’t thickening, ensure you’re cooking it at medium heat and stirring continuously to prevent sticking. If it doesn’t seem to thicken within 12 minutes, increase the heat slightly while keeping an eye on it. If it’s still runny after adding the eggs, continue cooking for an additional minute or so until it reaches the desired thickness.
Are there any dietary considerations I should be aware of?
Great question! If you have allergies, be cautious with eggs and dairy; consider substituting with cornstarch for eggs and non-dairy milk options for a lactose-free version. Always check the specific brands you’re using to ensure no hidden allergens are present that could affect your guests or family members.
How long should I chill the pudding before serving?
Definitely! For the best results, chill your Old-Fashioned Homemade Banana Pudding in the refrigerator for at least 4 hours, but ideally overnight. This allows the flavors to meld beautifully, creating a more balanced and creamy dessert.

Creamy Old-Fashioned Homemade Banana Pudding Bliss
Ingredients
Equipment
Method
- In a medium saucepan, whisk together sugar, flour, and salt. Gradually stir in the milk while cooking over medium heat, stirring continuously until the mixture thickens and bubbles, about 10-12 minutes.
- Reduce the heat to low and cook the custard for an additional 2 minutes. In a small bowl, whisk the eggs. Temper the eggs, then pour back into the saucepan, and cook for 2 more minutes until thickened.
- Remove from heat and stir in vanilla extract. Let cool for about 15 minutes, stirring occasionally.
- In an 8x8 inch square pan, place about 25 vanilla wafers as the first layer. Follow with half of the banana slices and pour half of the pudding over them. Repeat layers.
- Cover with plastic wrap, refrigerate for at least 4 hours or overnight for best results.
- Before serving, crush any remaining vanilla wafers and sprinkle on top.
- Serve cold, optionally garnished with fresh banana slices or whipped cream.
Leave a Reply