
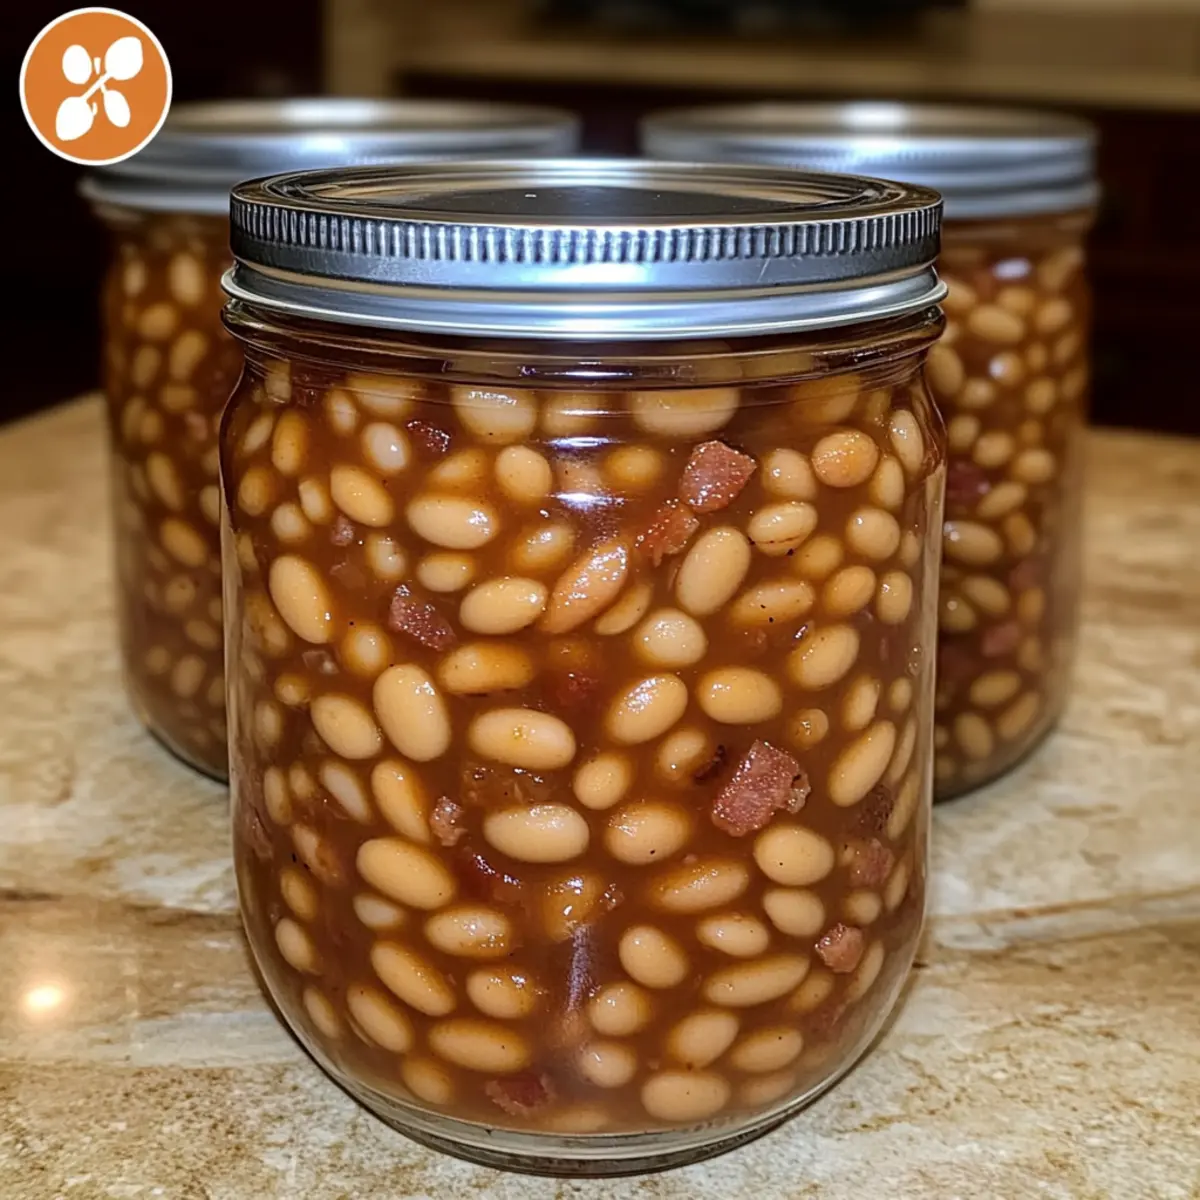
As the aroma of simmering navy beans fills my kitchen, I can’t help but feel transported back to carefree summer barbecues. This recipe for Home Canned Better Than Bush’s Baked Beans is a true game changer—offering all the comforting sweetness and savory depth of flavor we crave, while also allowing me to preserve a taste of summer all year round. Not only is this dish incredibly satisfying, but it’s also quick to prepare, making it a perfect addition to family dinners or casual get-togethers. Plus, by canning your own beans, you ensure that homemade quality and flavor reign supreme over any store-bought options. So, are you ready to elevate your comfort food game and wow your loved ones? Let’s get started!
Why Choose This Baked Bean Recipe?
Comforting flavors: Enjoy the sweet and savory balance that turns every spoonful into a cozy experience.
Homemade Goodness: Skip the preservatives—canning allows you to create delicious, fresh beans right in your kitchen.
Flexible Ingredients: Customize your beans to fit any palate! Swap navy beans for pinto, or mix in spicy jalapeños for a kick.
Quick and Easy: With simple steps, you’ll be on your way to enjoying this classic dish in no time, making it ideal for busy weeknights or friendly gatherings.
Perfect Pairing: Serve these beans alongside cornbread or grilled meats for a true delight—just like at your favorite picnic! If you’re looking for more inspiration, try serving them with Mediterranean Baked Fish for a perfect summer meal.
Home Canned Better Than Bush’s Baked Beans Ingredients
For the Beans
• Navy Beans – These are the star of the show, providing a creamy texture and substantial protein; pinto beans can work as a tasty alternative.
For Sweetness & Flavor
• Brown Sugar – It brings a rich sweetness to your baked beans; swap with maple syrup for a unique twist.
• Ketchup – Offers the right amount of sweetness and tang; try using homemade barbecue sauce for an exciting flavor boost.
For the Aromatics
• Onion – An essential base for depth; yellow onion is preferred, but shallots can add a gentler touch.
• Bacon – Infuses the dish with a smoky richness; consider turkey bacon for a lighter version.
For the Spice & Balance
• Mustard Powder – Adds a zesty kick that complements the sweetness; Dijon mustard can elevate the flavors further.
• Apple Cider Vinegar – Balances sweetness with a touch of acidity; use white vinegar as a substitute if needed.
For Cooking
• Water – Essential for cooking to achieve the desired sauciness; adjust as necessary based on your texture preference.
These ingredients will come together beautifully to create your own Home Canned Better Than Bush’s Baked Beans, ensuring a dish that’s both comforting and irresistibly delicious!
Step‑by‑Step Instructions for Home Canned Better Than Bush’s Baked Beans
Step 1: Prepare Beans
Start by soaking 1 cup of navy beans in plenty of water overnight. This process hydrates the beans, ensuring they cook evenly and become tender. The next day, drain and rinse the beans, discarding any broken pieces. Your beans should be plump and ready to absorb delicious flavors in the next steps!
Step 2: Cook Bacon
In a large pot over medium heat, sauté 4 strips of chopped bacon until they are crispy and golden, about 5–7 minutes. The bacon should render its fat and infuse the dish with smoky goodness. Once done, use a slotted spoon to remove the bacon from the pot, draining it on a paper towel while leaving the drippings for the next step.
Step 3: Sauté Aromatics
In the same pot with the bacon drippings, add one finely chopped onion and sauté for about 4–5 minutes, or until the onion becomes translucent and fragrant. This step builds a flavorful base for your Home Canned Better Than Bush’s Baked Beans. Keep stirring occasionally to ensure the onions caramelize evenly without burning.
Step 4: Combine Ingredients
Add the soaked navy beans, the crispy bacon, ½ cup of ketchup, ½ cup of brown sugar, 1 teaspoon of mustard powder, and 2 tablespoons of apple cider vinegar to the pot. Stir everything together until combined, allowing each ingredient to meld, creating a creamy and flavorful mixture for the baked beans.
Step 5: Simmer
Pour in enough water to just cover the beans—about 2–3 cups—with the pot still over medium-high heat. Bring the mixture to a rolling boil, then reduce the heat to low and cover. Let your beans simmer gently for 1 hour, stirring occasionally, until they become tender and the sauce thickens. Look for a rich, bubbly consistency!
Step 6: Canning Process
Prepare your canning jars by sterilizing them in boiling water for 10 minutes. Once your baked beans are cooked, carefully ladle them into the sterilized jars, leaving 1-inch headspace at the top. Wipe any residue from the rims, place on the sterilized lids, and process in a pressure canner according to the manufacturer’s instructions, which usually involves cooking at 10–15 PSI for 75 minutes.
How to Store and Freeze Home Canned Better Than Bush’s Baked Beans
Cool Place: Store canned beans in a cool, dark place; they can last up to a year when properly processed.
Refrigerate: Once opened, transfer any unused beans to an airtight container; they will stay fresh in the fridge for up to 3 days.
Freezer Option: For long-term storage, freeze the beans in a freezer-safe container, where they can last up to 6 months; thaw in the fridge before use.
Reheating: Simply reheat on the stovetop or in the microwave, adding a splash of water to rehydrate and achieve that delightful texture in your Home Canned Better Than Bush’s Baked Beans.
Home Canned Better Than Bush’s Baked Beans Variations
Feel free to explore these delicious twists on the classic recipe that will make your homemade beans truly your own!
- Spicy Kick: Add diced jalapeños or a dash of cayenne pepper for a fiery flavor that will awaken your taste buds.
- Veggie Medley: Toss in sautéed bell peppers and carrots for a pop of color and added nutrients—it’s a feast for the eyes and the palate!
- Maple Sweetener: Swap brown sugar for pure maple syrup to create a unique sweet profile that pairs beautifully with the beans’ savory elements.
- Herbal Infusion: Stir in fresh thyme or smoked paprika for an aromatic twist that elevates the comforting flavors even higher.
- Bacon Alternative: Use turkey bacon or tempeh bacon for a healthier, yet still satisfying, alternative that doesn’t sacrifice flavor.
- Vegan Option: Omit the bacon altogether and replace with liquid smoke for that smoky depth without the meat.
- Barbecue Flair: Substitute the ketchup with homemade barbecue sauce for a tangy sweetness that gives a summer grill vibe.
- Sour Twist: For a bright flavor boost, replace apple cider vinegar with fresh lemon juice—it’s refreshing and adds a zingy finish.
If you’re looking for more ways to enjoy home cooking, consider pairing these beans with Mediterranean Baked Fish or enjoy them alongside a slice of Cinnamon Roll Cookies for a delightful dessert finish!
What to Serve with Home Canned Better Than Bush’s Baked Beans
The hearty essence of homemade baked beans creates a comforting meal experience, inviting you to explore delightful pairings that elevate your table.
- Creamy Cornbread: This classic accompaniment is sweet and buttery, perfect for sopping up the delicious sauce of your baked beans.
- Grilled Vegetables: A medley of seasonal veggies adds a smoky char and freshness, balancing the rich flavors of the beans perfectly.
- Coleslaw: The crunchy texture and tangy dressing provide a refreshing contrast, making every bite a delightful mix of flavors and textures.
- BBQ Ribs: Tender, juicy ribs slathered in barbecue sauce harmonize beautifully with the sweetness of baked beans for that quintessential backyard feast.
- Potato Salad: Cool and creamy, it contrasts the warm beans, creating a classic picnic pairing that pleases any crowd.
- Iced Tea: This refreshing drink complements the savory notes, adding a touch of sweetness that enhances the overall meal experience.
- Apple Crisp: Following your savory feast, a warm apple crisp topped with vanilla ice cream is the perfect sweet ending, wrapping up the meal on a heartwarming note.
Expert Tips for Home Canned Better Than Bush’s Baked Beans
- Bean Tenderness: Ensure beans are fully cooked and tender before canning to prevent spoilage during storage.
- Headspace Matters: Leave adequate headspace in jars (about 1 inch) to allow for expansion during the canning process.
- Use Pressure Canner: Canning low-acid foods like beans requires a pressure canner for safe preservation—don’t skip this step!
- Avoid Overcooking: Be careful not to over-simmer your beans; aim for a perfect thick sauce, reminiscent of a homemade chili.
- Label Jars: Don’t forget to label your jars with the date so you can enjoy your delicious Home Canned Better Than Bush’s Baked Beans at their best!
Make Ahead Options
These Home Canned Better Than Bush’s Baked Beans are perfect for meal prep enthusiasts looking to save time during busy weeks! You can soak and prepare the navy beans up to 24 hours ahead of time by soaking them overnight, then store them in the refrigerator until you’re ready to cook. Additionally, you can sauté the bacon and onions a day in advance, keeping them refrigerated to maintain their freshness and flavor. When you’re ready to serve, simply combine all ingredients and simmer. This way, you’ll achieve that delicious, comforting taste with minimal effort, making your meals just as delightful as if they were made fresh daily!

Home Canned Better Than Bush’s Baked Beans Recipe FAQs
How do I choose the right beans for this recipe?
Absolutely! Navy beans are ideal due to their creamy texture and ability to absorb flavors, but if you prefer a different taste, pinto beans make a fantastic substitute. Just ensure they’re fresh and free from any dark spots or wrinkles for the best results.
What’s the best way to store my canned baked beans?
For optimal storage, place your canned beans in a cool, dark location like a pantry or cellar. When properly processed, they can last up to a year. After opening, keep any leftovers in an airtight container in the fridge, where they’ll stay good for about 3 days.
Can I freeze my baked beans for longer storage?
Very! To freeze your Home Canned Better Than Bush’s Baked Beans, first let them cool completely. Then, transfer them to a freezer-safe container, leaving some space at the top to allow for expansion. They can be stored in the freezer for up to 6 months. When you’re ready to enjoy them again, thaw in the fridge overnight and reheat gently on the stovetop.
What are some common troubleshooting tips for canning?
If you find your beans are not as thick as you’d like, it’s often due to insufficient simmering time; make sure you allow them to cook long enough to develop that rich, saucy consistency. Additionally, ensure you’ve properly followed the canning guidelines to avoid spoilage—using a pressure canner is crucial for low-acid foods like beans.
Are these baked beans suitable for those with dietary restrictions?
Yes, indeed! This recipe is gluten-free as long as you ensure all ingredients are sourced accordingly. For a healthier option, turkey bacon can replace regular bacon. Always double-check ingredient labels if cooking for individuals with specific allergies, and feel free to adjust the sweetness level to fit personal preferences!
Can pets eat these baked beans?
While beans can be a healthy treat for pets in moderation, avoid letting them consume the dish as it contains bacon, onions, and various spices that can be harmful. It’s best to stick to plain cooked beans if you want to share!
Home Canned Better Than Bush’s Baked Beans for Comfort Bliss
Ingredients
Equipment
Method
- Soak 1 cup of navy beans in water overnight. Drain and rinse.
- Cook 4 strips of chopped bacon in a large pot over medium heat until crispy.
- Sauté 1 finely chopped onion in bacon drippings until translucent.
- Combine navy beans, crispy bacon, ½ cup ketchup, ½ cup brown sugar, 1 teaspoon mustard powder, and 2 tablespoons apple cider vinegar in the pot.
- Add enough water to cover the beans. Bring to a boil, then simmer on low for 1 hour.
- Sterilize canning jars in boiling water. Ladle cooked beans into jars, leaving 1-inch headspace. Process in a pressure canner for 75 minutes at 10-15 PSI.
Leave a Reply