
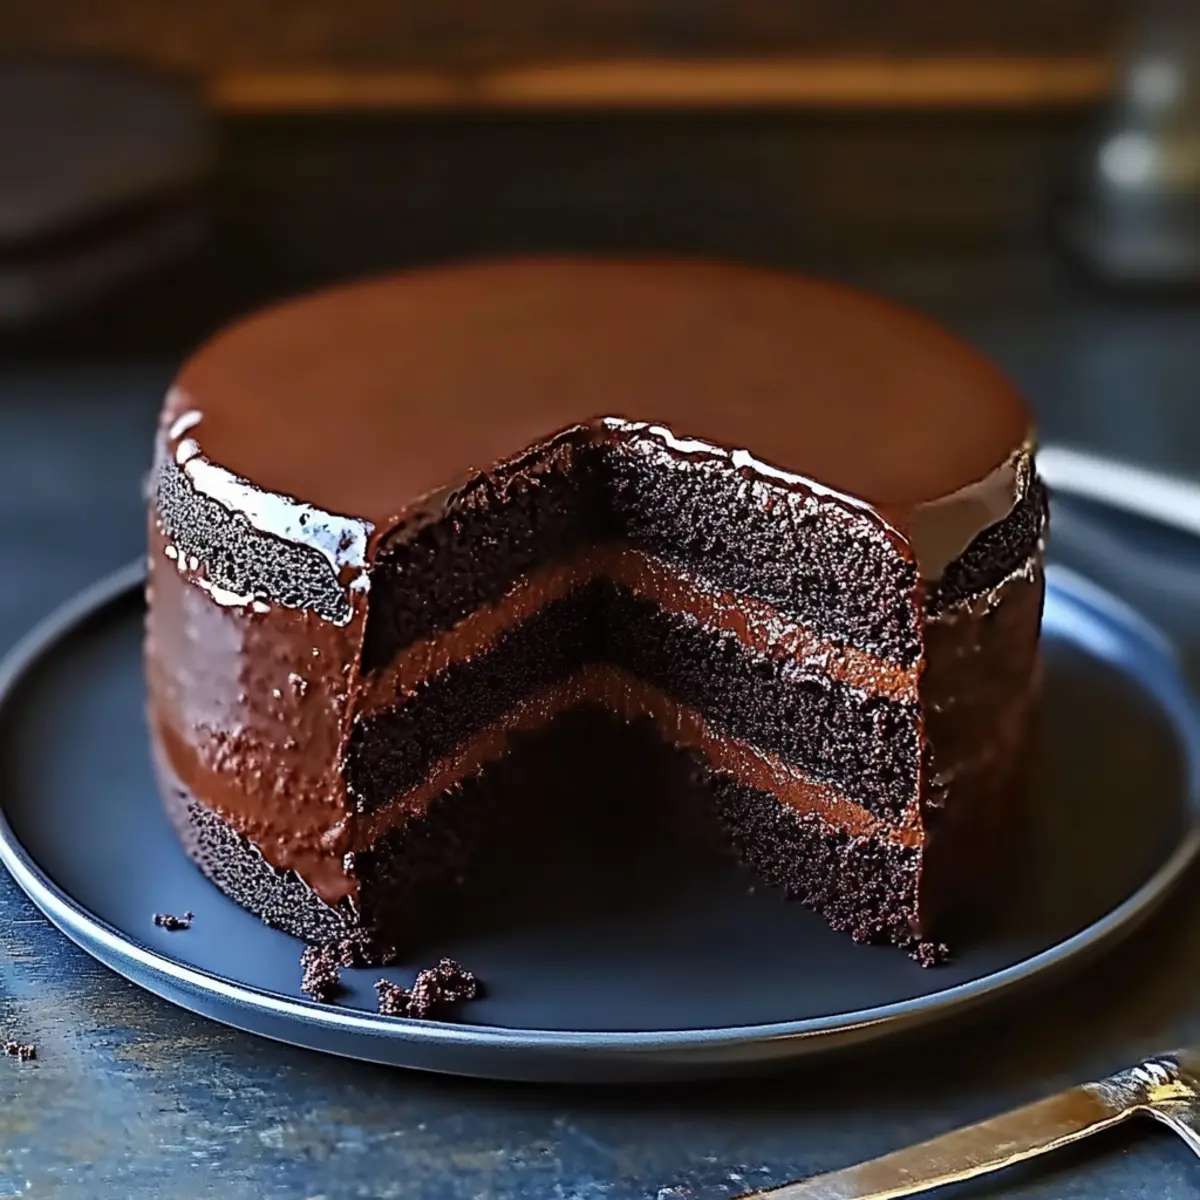
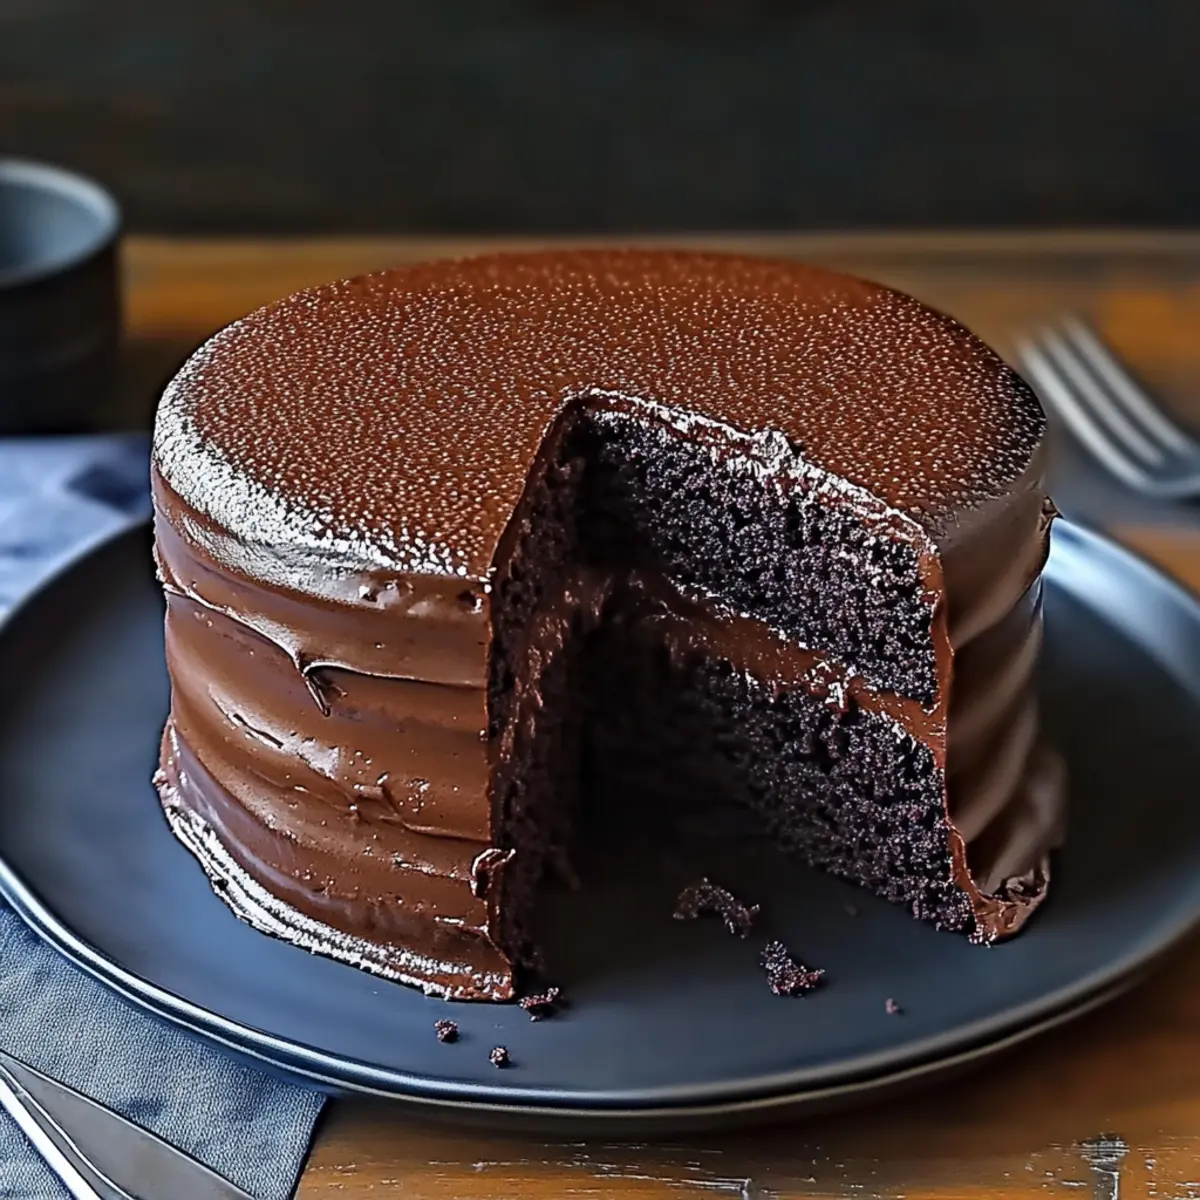
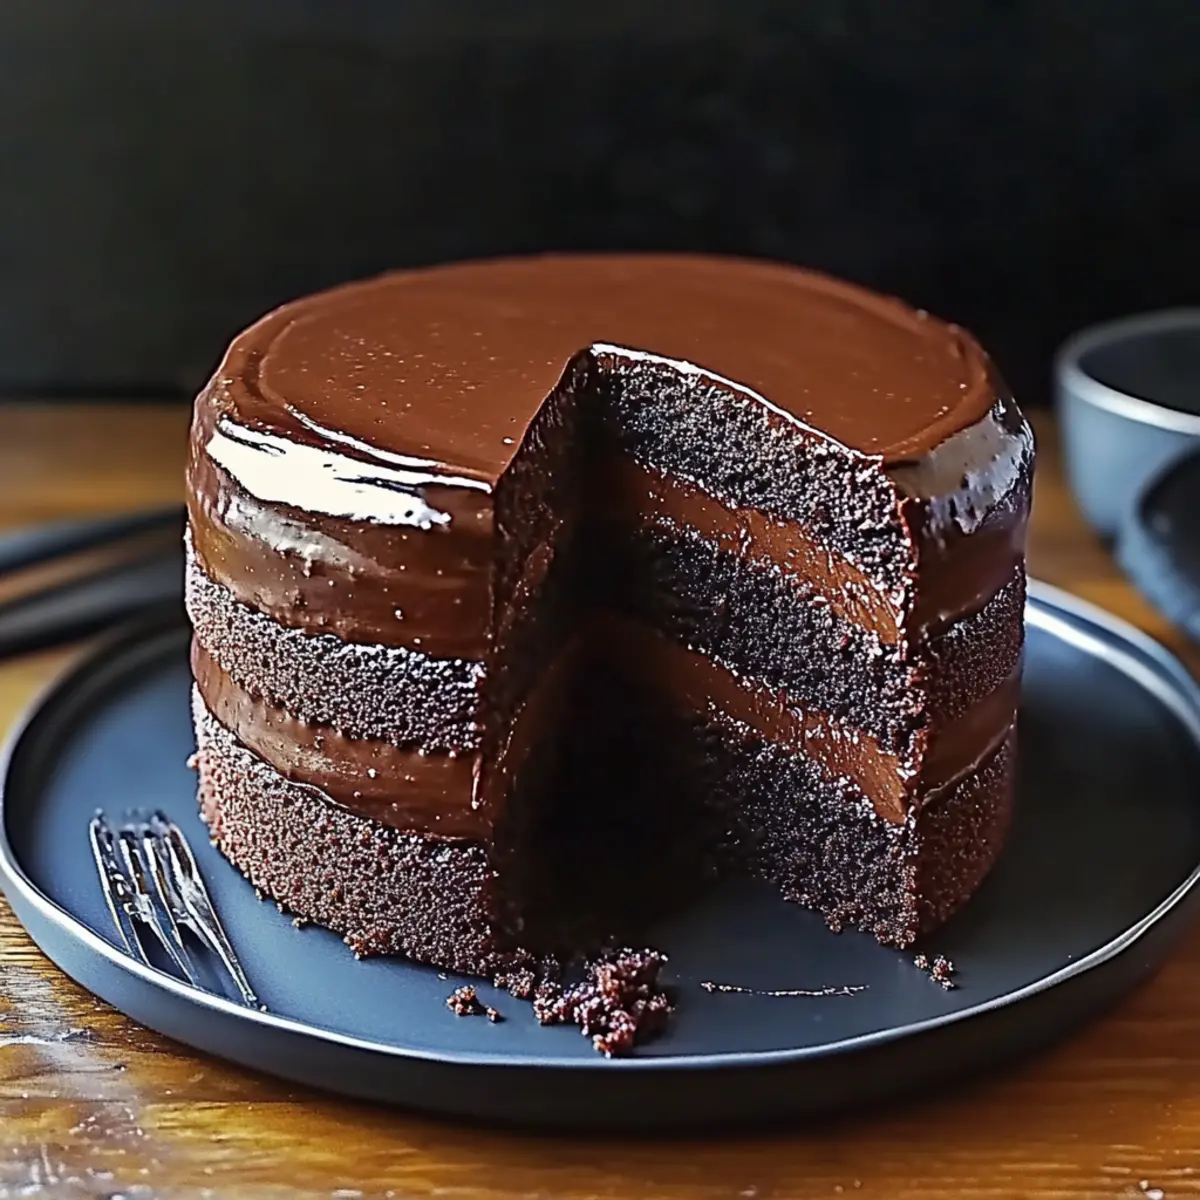
As the aroma of baked chocolate wafts through the kitchen, I can’t help but feel a surge of excitement—it’s Brooklyn Blackout Cake time! This lavish dessert is practically a love letter to chocolate lovers, featuring layers of fluffy cake enveloping a silky chocolate pudding, all crowned with a glossy ganache. What makes this recipe truly enticing is its crowd-pleasing nature—it’s not only perfect for birthdays and celebrations, but it also satisfies those mid-week chocolate cravings. Plus, I’ve included gluten-free options, so no one has to miss out on this dreamy experience. Are you ready to indulge in Brooklyn Blackout Cake and bring a slice of New York’s sweetest tradition right into your home? Let’s dive in!
Why indulge in Brooklyn Blackout Cake?
Decadent Delight: The Brooklyn Blackout Cake is a luscious treat that delivers layers of chocolate joy in every bite.
Easy to Make: This simple recipe allows both novices and seasoned bakers to create an impressive dessert with minimal fuss.
Gluten-Free Options: Don’t worry if you have dietary restrictions—gluten-free alternatives ensure everyone can enjoy this indulgent cake.
Crowd-Pleaser: Whether it’s a birthday bash or a Tuesday night, this chocolate masterpiece will wow your guests.
Comforting Texture: Experience the perfect pairing of fluffy cake, creamy pudding, and glossy ganache that invites you to savor every mouthful.
Endless Variations: Feel free to experiment with flavors and textures, like adding fresh berries or a hint of mint, making it uniquely yours! For more delightful chocolate recipes, check out my Chocolate Raspberry Cake or the rich Velvet Oreo Cheesecake.
Indulge in Brooklyn Blackout Cake Ingredients
For the Cake
• All-Purpose Flour – Provides structure to the cake; you can substitute with gluten-free flour for a gluten-free version.
• Unsweetened Cocoa Powder – Adds rich chocolate flavor; consider using Dutch-processed cocoa for a deeper taste.
• Granulated Sugar – Sweetens the cake while contributing to its fluffy texture.
• Baking Powder – Helps the cake rise and achieve the perfect lightness.
• Baking Soda – Works with baking powder for excellent leavening.
• Salt – Enhances overall flavors, balancing the sweetness.
• Vegetable Oil – Imparts moisture and richness, ensuring the cake is tender.
• Large Eggs – Binds ingredients and adds structure to the cake.
• Whole Milk – Creates a tender crumb and boosts moisture.
• Pure Vanilla Extract – Develops flavor complexity throughout the cake.
For the Filling
• Instant Chocolate Pudding Mix – Creates a creamy filling that adds texture to the cake.
For the Ganache
• Heavy Cream – Essential for making the luscious chocolate ganache that tops the cake.
• Chocolate Chips – Key for the ganache, providing rich chocolatey flavor to indulge your taste buds.
Step‑by‑Step Instructions for Indulge in Brooklyn Blackout Cake
Step 1: Preheat the Oven
Begin by preheating your oven to 350°F (175°C). While the oven is heating up, take two round baking pans and grease them generously with butter or cooking spray, then lightly dust them with flour. This will ensure your beautiful chocolate cake layers come out smoothly after baking.
Step 2: Combine Dry Ingredients
In a large mixing bowl, whisk together 2 cups of all-purpose flour, ¾ cup of unsweetened cocoa powder, 1 ½ teaspoons of baking powder, 1 teaspoon of baking soda, and a pinch of salt. Mix these dry ingredients thoroughly until combined, ensuring there are no lumps. The cocoa powder should create a rich, dark mixture that’s a sign of deliciousness to come.
Step 3: Cream Wet Ingredients
In another bowl, beat together 1 ¾ cups of granulated sugar and ¾ cup of vegetable oil using an electric mixer on medium speed until the mixture is light and fluffy, about 3 minutes. Then, add 3 large eggs one at a time, mixing well after each addition, followed by 1 cup of whole milk and 2 teaspoons of pure vanilla extract. This combination creates a velvety base for your Brooklyn Blackout Cake.
Step 4: Incorporate Dry Ingredients
Gradually fold the dry mixture into the wet ingredients, using a spatula or a wooden spoon. Be gentle, as you want to combine them without overmixing; stop when just combined, and the batter should still have some small lumps. This method preserves the tenderness of your cake, creating that moist, melt-in-your-mouth texture everyone loves.
Step 5: Bake the Cakes
Divide the batter evenly between the two prepared pans. Smooth the tops with a spatula for even baking. Place them in the preheated oven and bake for 30 to 35 minutes. To test for doneness, insert a toothpick in the center; it should come out clean or with a few moist crumbs.
Step 6: Cool the Cakes
Once baked, carefully remove the pans from the oven and let them cool for about 10 minutes. After that, turn the cakes out onto wire racks to cool completely. Make sure they are fully cooled before proceeding, as building your Brooklyn Blackout Cake with warm layers could melt the filling!
Step 7: Prepare the Chocolate Pudding
While your cakes are cooling, prepare the instant chocolate pudding mix according to the package instructions. Whisk until smooth and creamy, then place it in the refrigerator to chill for at least 15 minutes. This step ensures a delicious, firm filling for your cake that won’t ooze out when layered.
Step 8: Assemble the Cake
Once the cakes have cooled completely, place one layer on a serving plate. Spread the chilled chocolate pudding evenly over the top. Next, carefully place the second cake layer on top, pressing down gently to create a perfect sandwich of chocolate goodness.
Step 9: Make the Ganache
In a small saucepan, heat 1 cup of heavy cream over medium heat until it begins to simmer. Remove it from the heat and pour it over 2 cups of chocolate chips in a bowl. Allow it to sit for a minute before stirring until smooth and glossy. This irresistible chocolate ganache is what will crown your Brooklyn Blackout Cake.
Step 10: Finish with Ganache
Pour the warm ganache over the top of the assembled cake, letting it drip down the sides for that elegant, bakery-worthy look. Use a spatula to spread any excess ganache smoothly over the sides. Allow the ganache to set for a few minutes before slicing and serving your stunning Brooklyn Blackout Cake!

Tips for the Best Brooklyn Blackout Cake
Avoid Overmixing: Keep your cake tender by mixing the batter until just combined; this helps maintain that delightful fluffiness.
Cool Completely: Make sure the cakes are completely cooled before layering with the pudding to prevent any melting mishaps.
Use Quality Ingredients: Opt for high-quality cocoa powder and chocolate chips in your ganache; this elevates the chocolate flavor in your Brooklyn Blackout Cake.
Grease the Pans Well: Generously greasing and flouring your baking pans prevents any sticky situations when it’s time to remove the cakes.
Chill Your Pudding: Allow the pudding to chill before spreading; a firm filling helps create neat, clean layers and enhances your overall presentation.
What to Serve with Brooklyn Blackout Cake?
The perfect pairing can elevate your chocolate experience, enhancing every bite of rich, indulgent cake!
- Fresh Berries: A medley of raspberries and strawberries adds a refreshing burst of flavor, cutting through the sweetness.
- Whipped Cream: Light and airy, a dollop of homemade whipped cream complements the dense, rich layers beautifully.
- Vanilla Ice Cream: The warmth of the cake contrasts perfectly with a scoop of creamy vanilla ice cream for a decadent treat.
- Chocolate Sauce: For the ultimate chocolate lover, an extra drizzle of warm chocolate sauce can intensify the richness of each bite.
- Coffee: A cup of brewed coffee enhances the cake’s chocolate notes, making it the perfect afternoon pick-me-up.
- Mint Tea: The cooling notes of mint tea provide a refreshing balance to the cake’s richness, perfect for a lighter option.
- Milkshake: A thick chocolate milkshake creates a nostalgic pairing that’s always a hit, especially for kids (and kids at heart)!
- Pecan Pie: For a cozy dessert spread, serve with a slice of pecan pie, contrasting textures and flavors delightfully.
- Dark Chocolate Truffles: Intensify the chocolate experience with gourmet dark chocolate truffles alongside the cake for a luxurious treat.
- Fruit Salad: A vibrant fruit salad adds a colorful, refreshing element that lightens up the indulgent dessert, making the meal feel balanced.
Make Ahead Options
These decadent Brooklyn Blackout Cake components are perfect for meal prep, saving you time when you’re ready to indulge! You can bake the cake layers up to 3 days in advance and keep them wrapped in plastic wrap in the refrigerator to maintain moisture. The instant chocolate pudding can also be prepared up to 24 hours ahead; just refrigerate it until ready to assemble. When you’re ready to serve, layer the chilled pudding between the cooled cake layers and finish with the ganache made fresh for the best texture. Following these simple steps ensures your Brooklyn Blackout Cake will remain just as indulgent and satisfying, even when prepared in advance!
Indulge in Brooklyn Blackout Cake Variations
Feel free to unleash your creativity with the Brooklyn Blackout Cake by exploring these delightful variations!
-
Gluten-Free: Use a high-quality gluten-free flour blend to ensure everyone can enjoy this decadent dessert without compromise.
-
Dutch-Processed Cocoa: Swap in Dutch-processed cocoa for a richer flavor and deeper chocolate experience that will have taste buds dancing!
-
Flavor Infusions: Replace vanilla extract with almond or peppermint extract for a refreshing twist that adds a unique aromatic character.
-
Espresso Kick: Stir in a teaspoon of espresso powder to the batter to amplify the chocolate’s richness, marking every bite with a touch of coffee warmth.
-
Nutty Texture: Add finely chopped nuts or fresh berries between the cake layers for a delightful surprise that enhances both flavor and texture.
-
Vegan Version: Make this cake plant-based by using flax eggs or applesauce and almond milk. This lighter alternative doesn’t skimp on flavor!
-
Layered Delight: For an extra indulgence, create a tri-layer cake by adding a layer of raspberry preserves or chocolate ganache between the cake layers.
-
Whipped Cream Topping: Top with freshly whipped cream or a scoop of ice cream for a stunning finish that perfectly complements the rich chocolate.
For more sweet inspirations, consider trying my delectable Chocolate Mousse Cake or the unforgettable Pistachio Mushroom Cheesecake. Happy baking!
Storage Tips for Brooklyn Blackout Cake
Room Temperature: Keep the Brooklyn Blackout Cake at room temperature for up to 3 days in an airtight container to preserve its moisture and flavor.
Fridge: If you prefer a chilled dessert, refrigerate the cake for up to a week. Make sure it’s covered to prevent drying out and absorbing other odors.
Freezer: Freeze individual slices wrapped tightly in plastic wrap and aluminum foil for up to 3 months. Thaw overnight in the fridge before serving.
Reheating: For that fresh-baked taste, microwave a slice on medium power for about 10-15 seconds, just until warm—perfect for a quick chocolate fix!
Indulge in Brooklyn Blackout Cake Recipe FAQs
How do I know when my ingredients are ripe or fresh enough for the cake?
Absolutely! When selecting your ingredients, choose all-purpose flour that’s fresh and not past its expiration date. For cocoa powder, opt for a deep, rich color without lumps, which indicates freshness. Eggs should be firm and not past their sell-by date, and whole milk should be fresh and cold. If you’re going gluten-free, check that your gluten-free flour blend is well mixed and hasn’t clumped.
How should I store my leftover Brooklyn Blackout Cake?
Very! Keep the cake in an airtight container at room temperature for up to 3 days, or refrigerate it for up to a week. Just make sure to cover it to prevent drying out. If you have a slice or two left, it’s best to freeze those for later enjoyment!
Can I freeze Brooklyn Blackout Cake? What’s the best way?
Certainly! To freeze, wrap individual slices tightly in plastic wrap and then in aluminum foil. This will prevent freezer burn and preserve the cake for up to 3 months. When you’re ready to enjoy them, simply thaw in the refrigerator overnight. No need to worry; the cake retains its delicious taste!
What should I do if my cake sinks in the middle?
Oh no! This can happen if the batter is overmixed or if it’s not baked long enough. To troubleshoot next time, ensure to fold the dry ingredients gently into the wet ones, and always check for doneness with a toothpick inserted in the center—if it comes out clean or with moist crumbs, the cake is ready!
Are there any dietary considerations I should keep in mind for this recipe?
Definitely! If you’re catering to gluten intolerance, opt for a high-quality gluten-free flour blend. For those with nut allergies, be cautious if you decide to add nuts or variations involving nut extracts. And, if you have dietary restrictions regarding dairy, consider using non-dairy milk and vegan butter for a delicious alternative.
Can I modify the flavors of the Brooklyn Blackout Cake?
Absolutely! If you’re looking to switch things up, you can easily experiment with flavor additives. For instance, adding almond or peppermint extract instead of vanilla can create an exciting twist. You might even want to mix in a teaspoon of espresso powder into the batter to enhance the chocolate flavor—it’s a delightful change that I often recommend!
Indulge in Brooklyn Blackout Cake: A Chocolate Lover's Delight
Ingredients
Equipment
Method
- Preheat your oven to 350°F (175°C) and grease two round baking pans with butter or cooking spray, dusting them with flour.
- In a large bowl, whisk together 2 cups of flour, ¾ cup of cocoa powder, 1 ½ teaspoons of baking powder, 1 teaspoon of baking soda, and a pinch of salt.
- In another bowl, beat together 1 ¾ cups of sugar and ¾ cup of vegetable oil until light and fluffy; add 3 eggs, 1 cup of milk, and 2 teaspoons of vanilla, mixing well.
- Gently fold the dry mixture into the wet ingredients until just combined, avoiding overmixing.
- Divide the batter evenly between the prepared pans and smooth the tops; bake for 30 to 35 minutes.
- Allow the cakes to cool in pans for 10 minutes before transferring them to wire racks to cool completely.
- Prepare the chocolate pudding mix according to package instructions and chill for at least 15 minutes.
- Once cooled, place one cake layer on a plate, spread the chilled pudding over it, and top with the second cake layer.
- In a saucepan, heat 1 cup of heavy cream until it simmers; pour it over 2 cups of chocolate chips, stirring until smooth.
- Pour the ganache over the assembled cake, allowing it to drip down the sides; let it set before serving.
Leave a Reply