
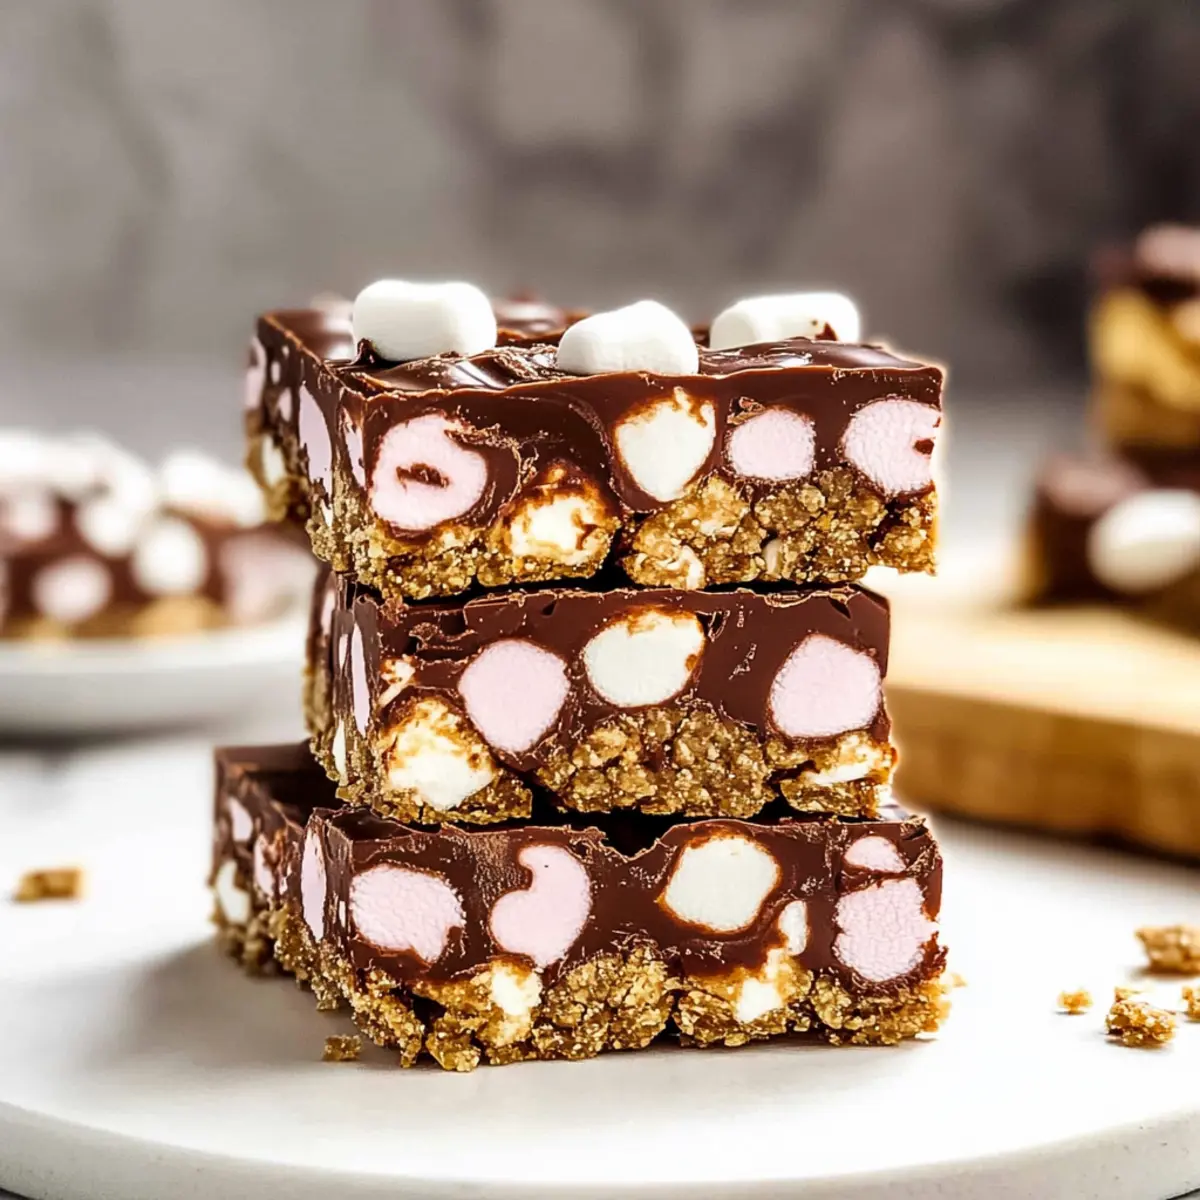
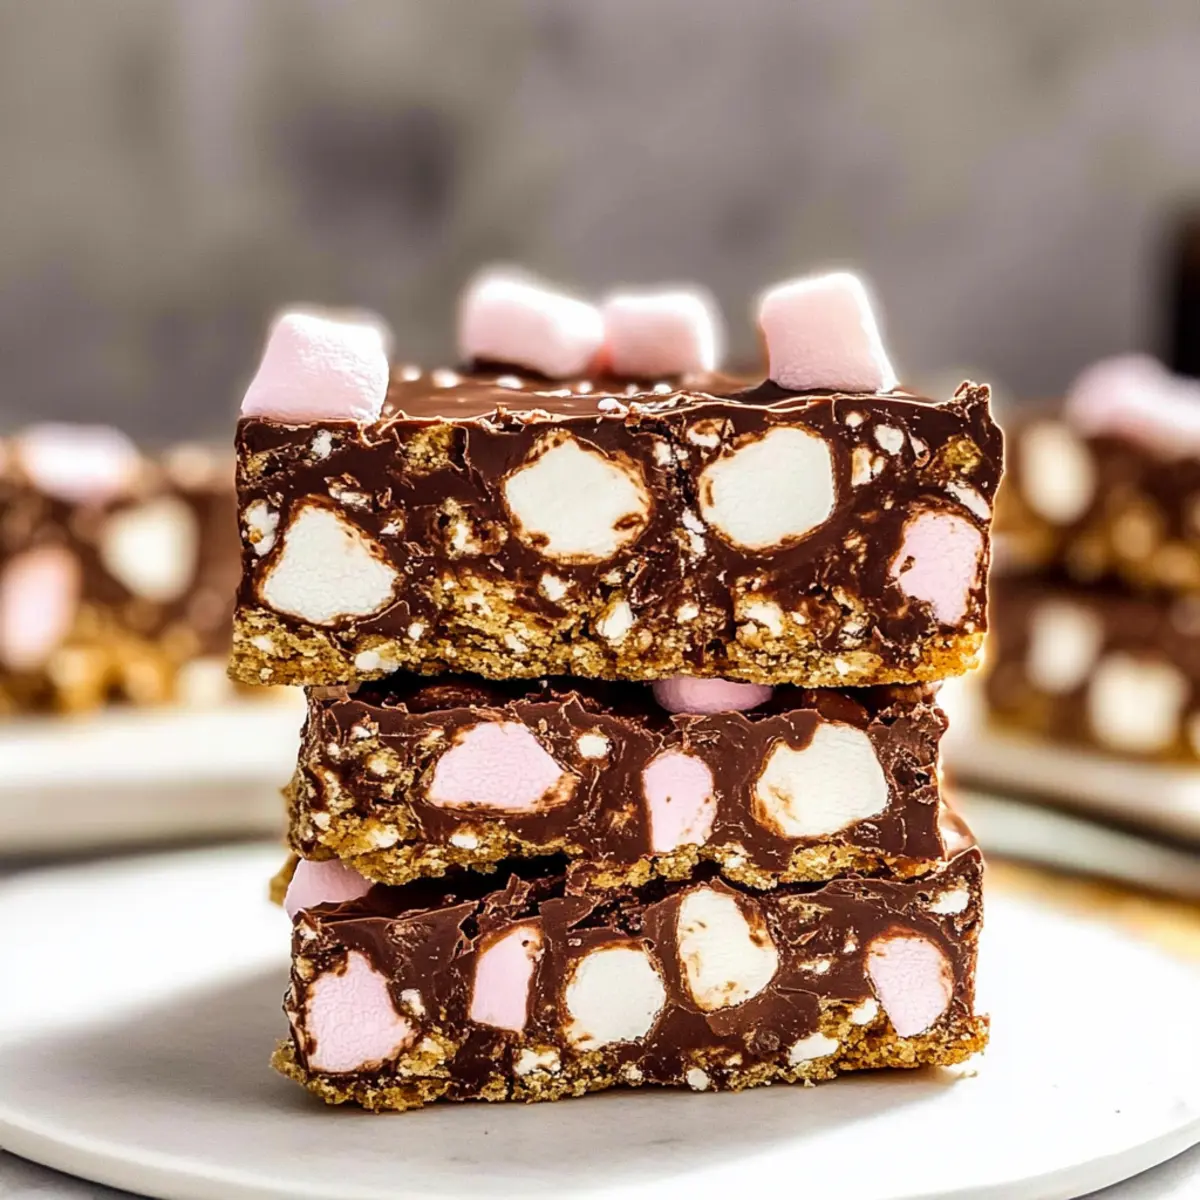
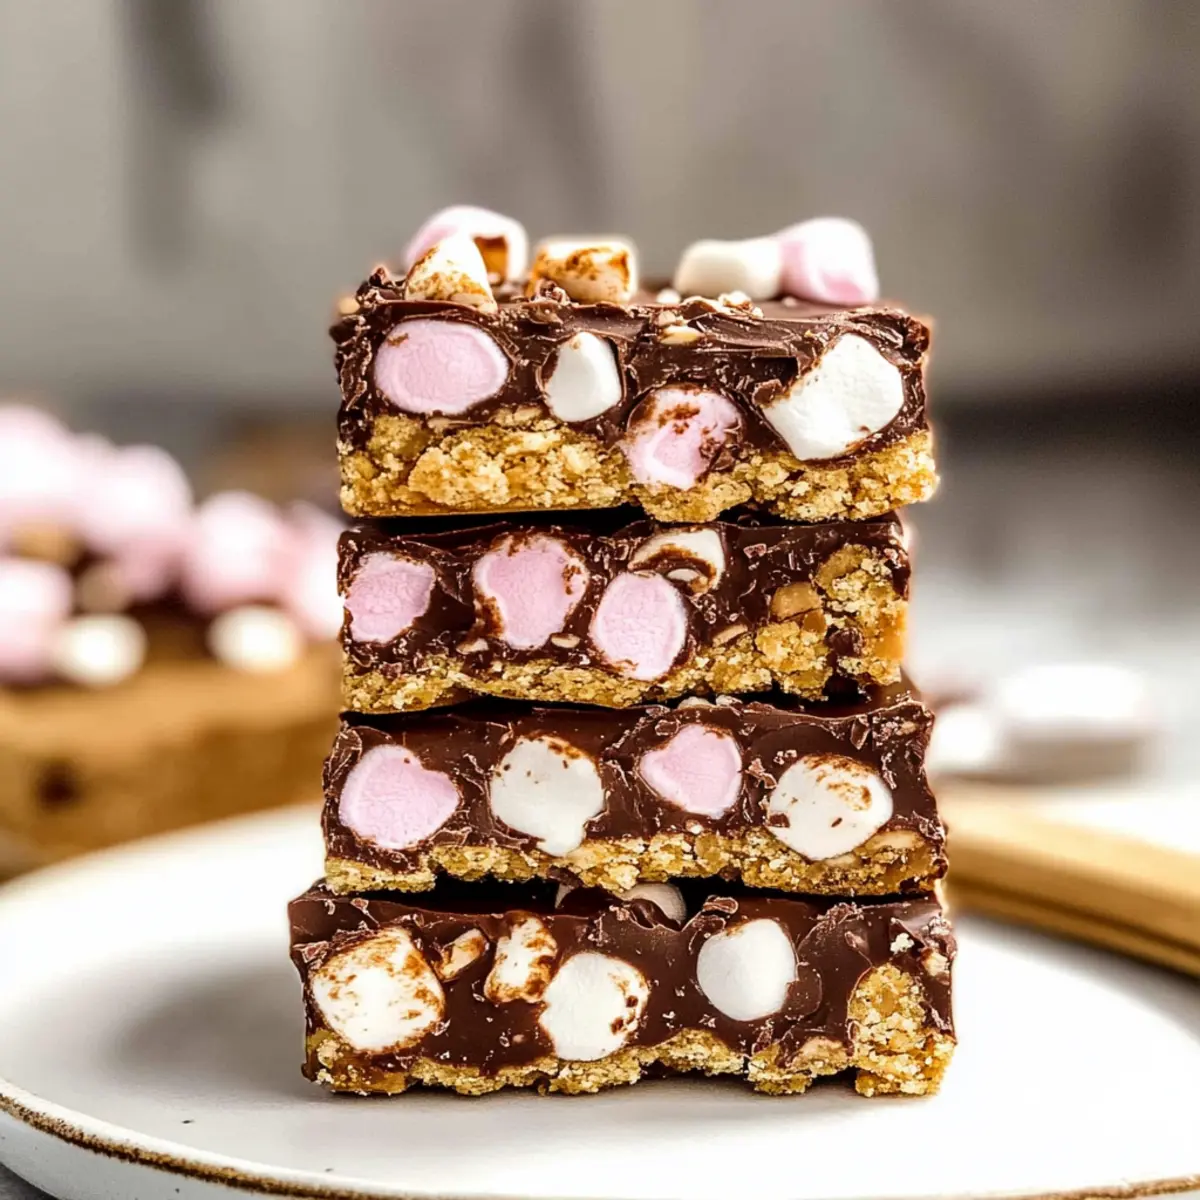
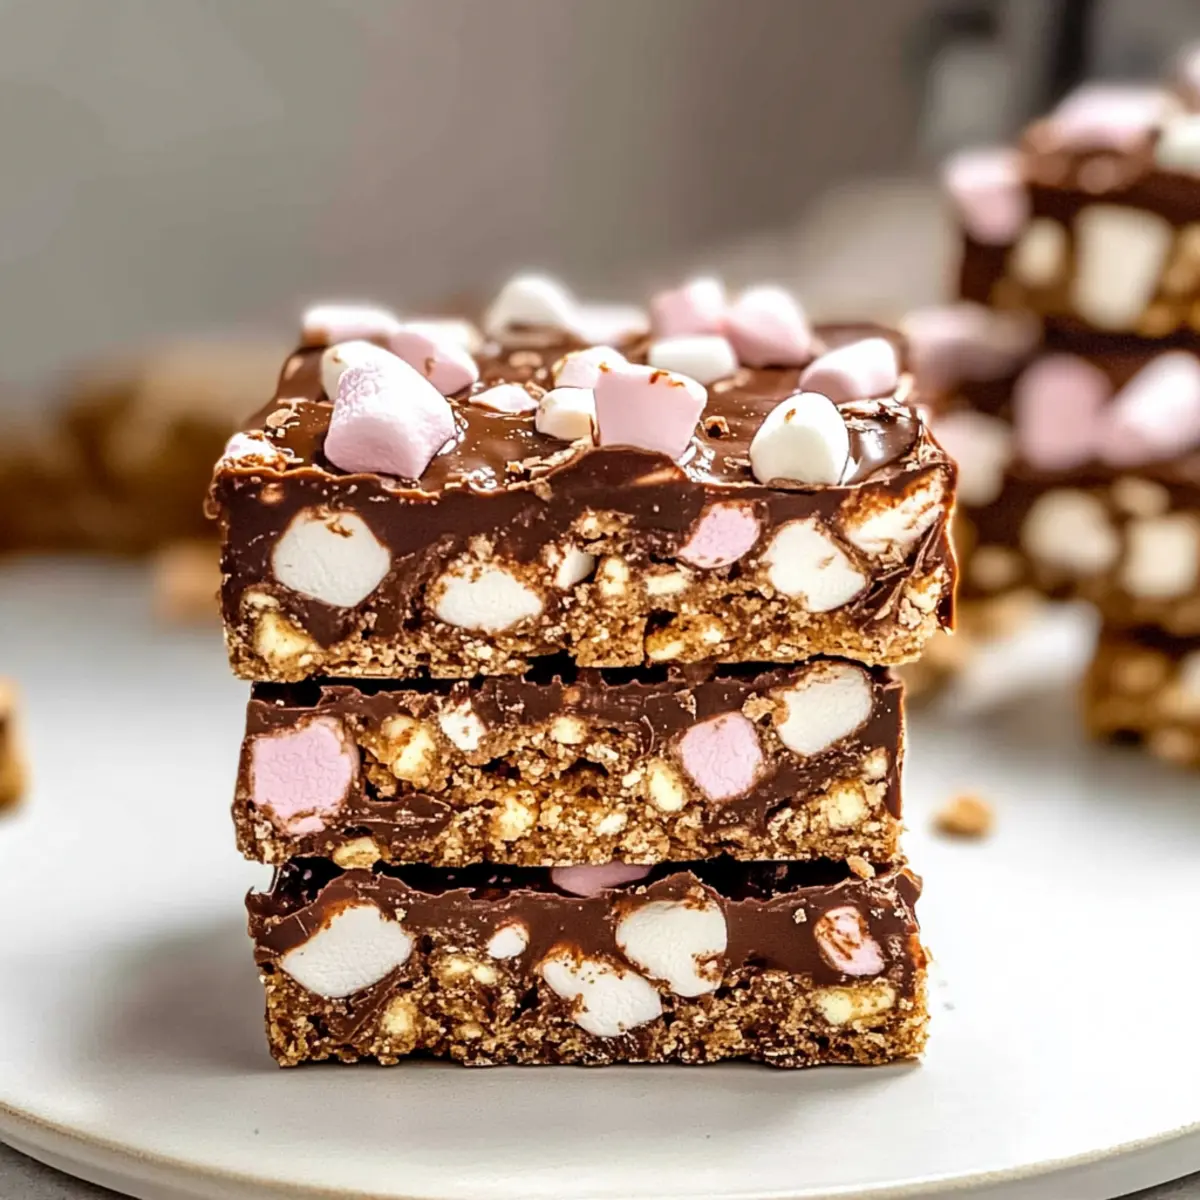
There’s nothing quite like a sweet surprise to brighten your day, and these No-Bake Rocky Road Dessert Bars deliver just that. Imagine sinking your teeth into a luscious blend of dark chocolate, chewy mini marshmallows, and crunchy biscuits, all harmonizing into a symphony of textures. The best part? This delightful treat is not only kid-friendly but also completely customizable to suit your taste buds. Whether you want to toss in some nuts for extra crunch or swap in your favorite dried fruits, this recipe makes it easy to create a dessert that feels personal. Plus, with no baking required, you can whip these up in no time and even make them ahead for those sweet moments when you just need a pick-me-up. Curious about how to bring this comforting creation to life? Let’s dive in!
Why is This Rocky Road Recipe Irresistible?
Deliciously Customizable: Tailor the ingredients to your liking, whether by adding your favorite nuts or swapping out dried cranberries for other fruits.
Quick and Easy: No oven is required with this no-bake marvel, making it a practical treat for any occasion.
Perfectly Chewy and Crunchy: Experience a delightful medley of textures with every bite, thanks to the combination of creamy chocolate, chewy marshmallows, and crunchy biscuits.
Kid-Friendly Fun: Let the little ones help in the kitchen—this recipe is a fantastic bonding activity that’s both delicious and entertaining!
Make-Ahead Convenience: Prepare these bars in advance for parties or snack emergencies; they stay fresh in the fridge and make for quick indulgences!
If you’re looking for more easy recipes, check out my White Bean Soup or our delightful Southern Maple Sweet Potato Casserole for delicious ideas that keep the whole family happy!
The Best Rocky Road Ingredients
-
For the Base
-
Dark Chocolate – A rich base that solidifies beautifully, giving your bars their decadent flavor.
-
Butter – Creamy goodness that helps bind everything together; you can use either salted or unsalted based on your preference.
-
Golden Syrup – Adds sweetness and keeps the mixture smooth; can be swapped with corn syrup if you’re in a pinch.
-
For the Crunch
-
Digestive Biscuits (or Graham Crackers) – Provide a satisfying crunch; try gluten-free varieties for those with dietary restrictions.
-
Roasted Nuts (optional) – A delightful addition that adds crunch and flavor; select your faves like pecans or walnuts.
-
For the Sweetness
-
Mini Marshmallows – Offer a chewy texture that complements the bar’s crunch.
-
Dried Cranberries (optional) – Add a tangy sweetness; feel free to swap with raisins or dried apricots for different flavor profiles.
-
For the Finish
-
Desiccated Coconut (optional) – A sprinkle gives a lovely nutty flavor; perfect if you’re a coconut lover!
With these ingredients, you’ll create the best rocky road bars, ideal for sharing or savoring on your own. Enjoy the sweet adventure!
Step‑by‑Step Instructions for The Best Rocky Road
Step 1: Melt the Chocolate
Start by setting a heatproof bowl over a simmering pot of water to create a double boiler. Add in the dark chocolate, butter, and golden syrup, stirring gently until the mixture is completely smooth and glossy. This should take about 5-7 minutes. Keep an eye on it to prevent scorching; if preferred, you can also microwave the ingredients in short bursts, stirring often.
Step 2: Prepare Dry Ingredients
While your chocolate mixture is melting, grab a separate bowl and crush the digestive biscuits into small pieces; they should be chunky but not powdery. Then, fold in the mini marshmallows, roasted nuts (if using), and dried cranberries. This combination should look colorful and enticing, signaling that your dry ingredients are ready for the chocolate.
Step 3: Combine Mixtures
Once your chocolate is melted, carefully pour it over the dry mixture. Using a spatula, gently fold the chocolate into the biscuit and marshmallow mix until every piece is well coated and glistening. This step should blend the textures beautifully, creating a cohesive mixture that is both sweet and inviting.
Step 4: Transfer to Pan
Prepare an 8-inch square baking tin by lining it with parchment paper, allowing some overhang for easy removal later. Pour the chocolate mixture into the tin, using the spatula to press it evenly and firmly into the corners. Aim for a smooth top, ensuring everything is compact. This process should take about 2-3 minutes.
Step 5: Chill
If you like, sprinkle desiccated coconut over the top of your rocky road mixture for added flavor. Then, cover the tin with cling film or foil and pop it into the refrigerator. Leave it to chill for about 2 hours, allowing the bars to set completely and firm up to a delightful texture.
Step 6: Serve
Once your dessert has chilled and set, remove it from the fridge and lift out the slab using the parchment overhang. Place it on a cutting board and slice it into squares or bars; this step is where The Best Rocky Road truly shines. Enjoy immediately or store in an airtight container in the fridge for delicious bites later on.
Expert Tips for The Best Rocky Road
-
Choose Quality Chocolate: Use high-quality dark chocolate for richer flavor and better texture; avoid chocolate chips if you want a smoother melt.
-
Don’t Overheat: Melt the chocolate gently; overheating can lead to a gritty texture. Use a double boiler or microwave in short bursts, stirring often.
-
Press Firmly: Ensure you press the mixture into the pan firmly to help it bind and hold together once set, avoiding crumbly bars.
-
Customize Wisely: When adding nuts or dried fruits, keep proportions in mind; too much can make your rocky road lose its structure.
-
Check for Doneness: Allow ample time for chilling—about 2 hours for perfect firmness—as this is key for enjoying the best rocky road bars.
-
Storage Savvy: Keep your bars in an airtight container in the fridge, where they’ll last up to two weeks, or freeze for up to three months for a longer treat.
The Best Rocky Road Variations
Feel free to unleash your creativity and customize these bars to your heart’s content!
- Nut-Free: Omit nuts entirely for a safe, school-friendly treat that’s just as delicious without the crunch.
- Mixed Nuts: Replace with any combination of your favorite nuts like cashews, almonds, or pecans for extra flavor and crunch.
- Dried Fruit Swap: Go for dried cherries or apricots instead of cranberries for a unique twist and delightful sweetness.
- Coconut Lovers: Stir in desiccated coconut for a tropical flair that complements the chocolate beautifully.
- Gluten-Free Alternative: Use gluten-free biscuits to ensure everyone can indulge in this heavenly treat.
- Candy Smash-Up: Add chopped candy bars or chocolate-covered pretzels for a surprise burst of flavor in every bite.
- Spicy Kick: For a heat level twist, sprinkle in a pinch of cayenne or chili powder for a surprising yet pleasant kick.
- Minty Fresh: Add a drop of mint extract to the chocolate mixture for an invigorating minty version that dazzles the palate.
Once you’ve perfected your creation, enjoy them while sharing with loved ones, and don’t forget to check out my Flavorful Street Rice for another fun twist on a delicious treat!
Make Ahead Options
These No-Bake Rocky Road Dessert Bars are ideal for busy home cooks looking to save time! You can prepare the chocolate mixture and combine it with the dry ingredients up to 24 hours in advance. Simply refrigerate the combined mix in an airtight container, ensuring it’s tightly sealed to maintain freshness and prevent browning of the marshmallows. When you’re ready to serve, press the mixture into the prepared baking tin and chill. Allow it to set for about 2 hours, and you’ll have delicious, ready-to-enjoy bars that are just as delightful as if made fresh! This make-ahead option makes it easy to indulge in your sweet cravings anytime.
Storage Tips for The Best Rocky Road
- Room Temperature: Keep these bars at room temperature for up to 1 week if you plan to enjoy them quickly. Store in a cool, dry place away from sunlight.
- Fridge: Store your Rocky Road bars in an airtight container in the refrigerator for up to 2 weeks. This keeps them fresh and chewy without fear of them drying out.
- Freezer: For longer storage, wrap each bar individually in plastic wrap and place them in a freezer-safe bag. They can be frozen for up to 3 months.
- Thawing: To enjoy frozen bars, simply transfer them to the fridge and let them thaw overnight or for a few hours before serving. They’ll maintain their delicious flavor and texture!
What to Serve with No-Bake Rocky Road Dessert Bars
There’s something magical about combining flavors and textures to create a memorable meal. Let’s elevate your sweet treat experience!
- Fresh Fruit Salad: A vibrant mix of seasonal fruits adds a refreshing contrast to the rich bars, making each bite feel balanced.
- Vanilla Ice Cream: Creamy ice cream complements the chocolate richness beautifully, transforming dessert into a delightful sundae experience.
- Chocolate Sauce Drizzle: An added layer of melted chocolate offers indulgence, amplifying the chocolatey goodness of the bars.
- Hot Cup of Coffee: The bold flavors of coffee create a delightful contrast to the sweetness, making for a comforting pairing any time of day.
- Whipped Cream Topping: Light and airy, whipped cream enhances the texture journey, providing a fluffy contrast with each chewy bite of the bars.
- Nutty Biscotti: Crunchy biscotti provide an extra layer of texture, perfect for dipping alongside or enjoying with a side of coffee.
- S’mores Dip: For a twist, serve these bars with a s’mores dip for a cozy gathering—a lovely nod to the classic flavors!
- Mint Tea: A soothing cup of mint tea offers a refreshing finish, cleansing the palate and elevating the dessert experience.
- Chocolate-Covered Strawberries: Elegant and delicious, chocolate-covered strawberries enhance the dessert experience, adding a fruity twist to your indulgence.
The Best Rocky Road Dessert Bars Recipe FAQs
What type of chocolate is best for Rocky Road?
I absolutely recommend using high-quality dark chocolate for a rich flavor and smooth texture. Avoid chocolate chips as they can have additives that prevent a good melt. Look for chocolate that is at least 60% cacao for the best results in these delightful bars!
How should I store my Rocky Road bars?
Keep your bars in an airtight container in the refrigerator for up to 2 weeks to maintain their chewy goodness. If you want them to last longer, wrapping each individually in plastic wrap and placing them in a freezer-safe bag allows you to keep them for up to 3 months. Just be sure to thaw them in the fridge before enjoying!
Can I make Rocky Road bars gluten-free?
Absolutely! Simply substitute the digestive biscuits or graham crackers with gluten-free versions. Brands like gluten-free graham crackers or chocolate wafer cookies work beautifully, ensuring that those with gluten sensitivities can still indulge in these delicious bars.
What if my chocolate mixture is too hard after chilling?
If your bars turn out too hard, it may mean that the chocolate was overheated or there wasn’t enough butter in the mixture. To fix this next time, ensure that you melt the chocolate slowly and gently and measure your butter accurately. If needed, you can add a small amount of melted butter during mixing to soften the mixture a bit before chilling.
Can I use fresh fruits instead of dried fruits?
While I recommend using dried fruits like cranberries or apricots for the best texture and preservation, if you’re eager to try fresh fruits, opt for firmer varieties like apples, which can hold up a little better. Just be aware that fresh fruits might introduce more moisture and could shorten the shelf life of your bars.
How long do Rocky Road bars last at room temperature?
These treats will last for about a week at room temperature if you store them in a cool, dry place away from direct sunlight. Just keep in mind that they might become a bit melty if it’s too warm, so the fridge is always a good backup to keep them fresh!
The Best Rocky Road Bars: Irresistibly Chewy & Customizable
Ingredients
Equipment
Method
- Melt the chocolate: Set a heatproof bowl over a simmering pot of water. Add dark chocolate, butter, and golden syrup, stirring gently until smooth and glossy (5-7 minutes).
- Prepare dry ingredients: Crush digestive biscuits into small pieces and fold in mini marshmallows, roasted nuts, and dried cranberries.
- Combine mixtures: Pour melted chocolate over dry ingredients and fold until well coated.
- Transfer to pan: Line an 8-inch baking tin with parchment paper and press the mixture evenly into the corners.
- Chill: Sprinkle desiccated coconut on top if desired. Cover with cling film and refrigerate for 2 hours to set.
- Serve: Remove from fridge, lift out using parchment, cut into squares, and enjoy.
Leave a Reply