
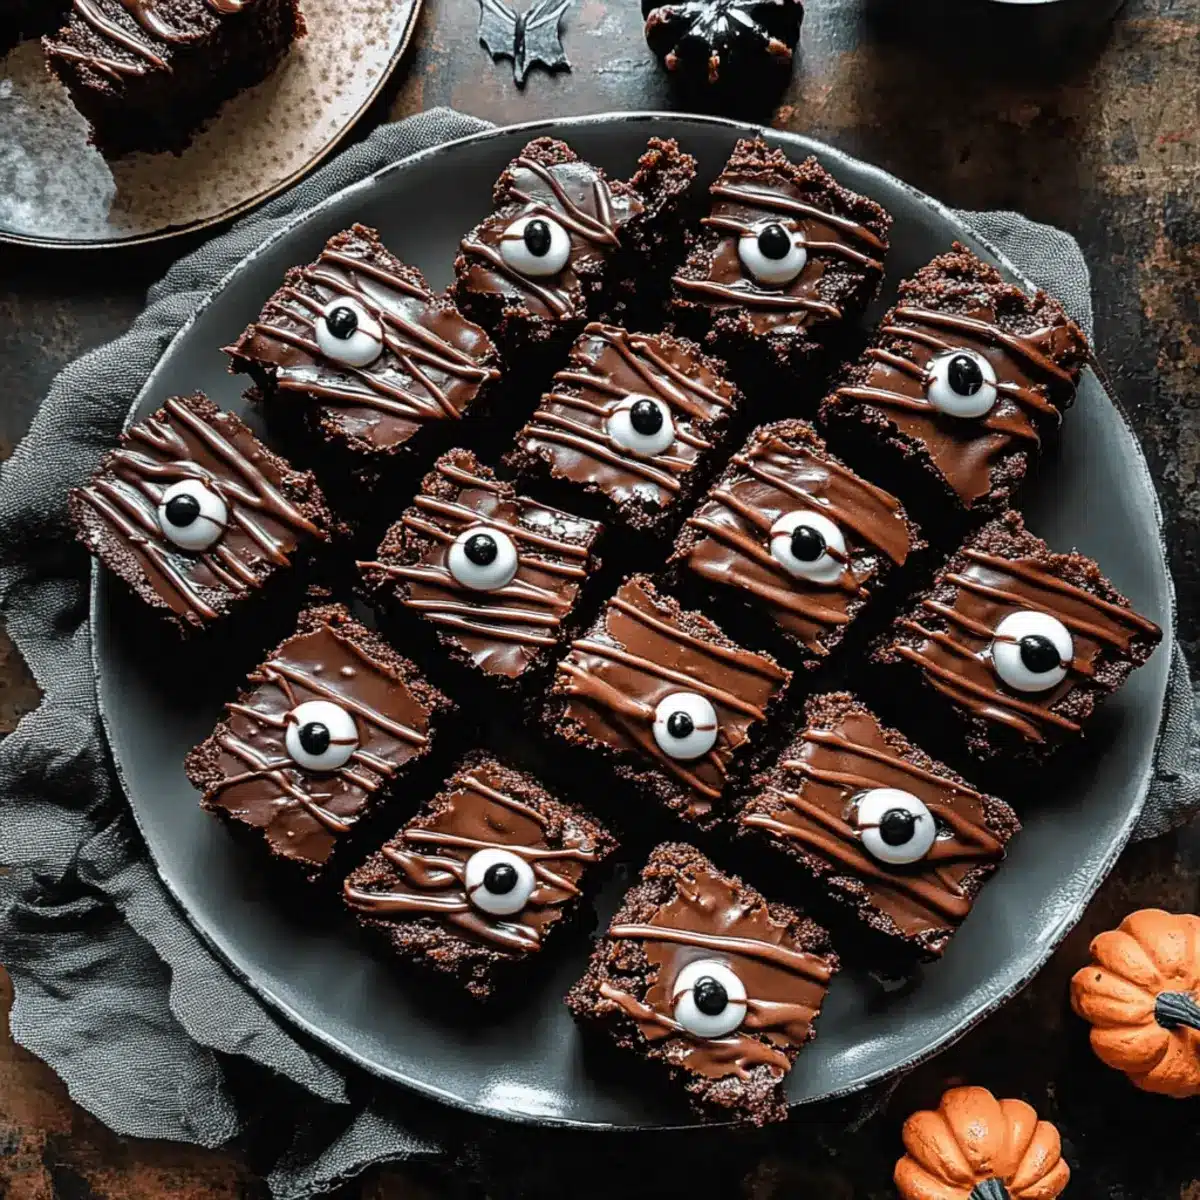
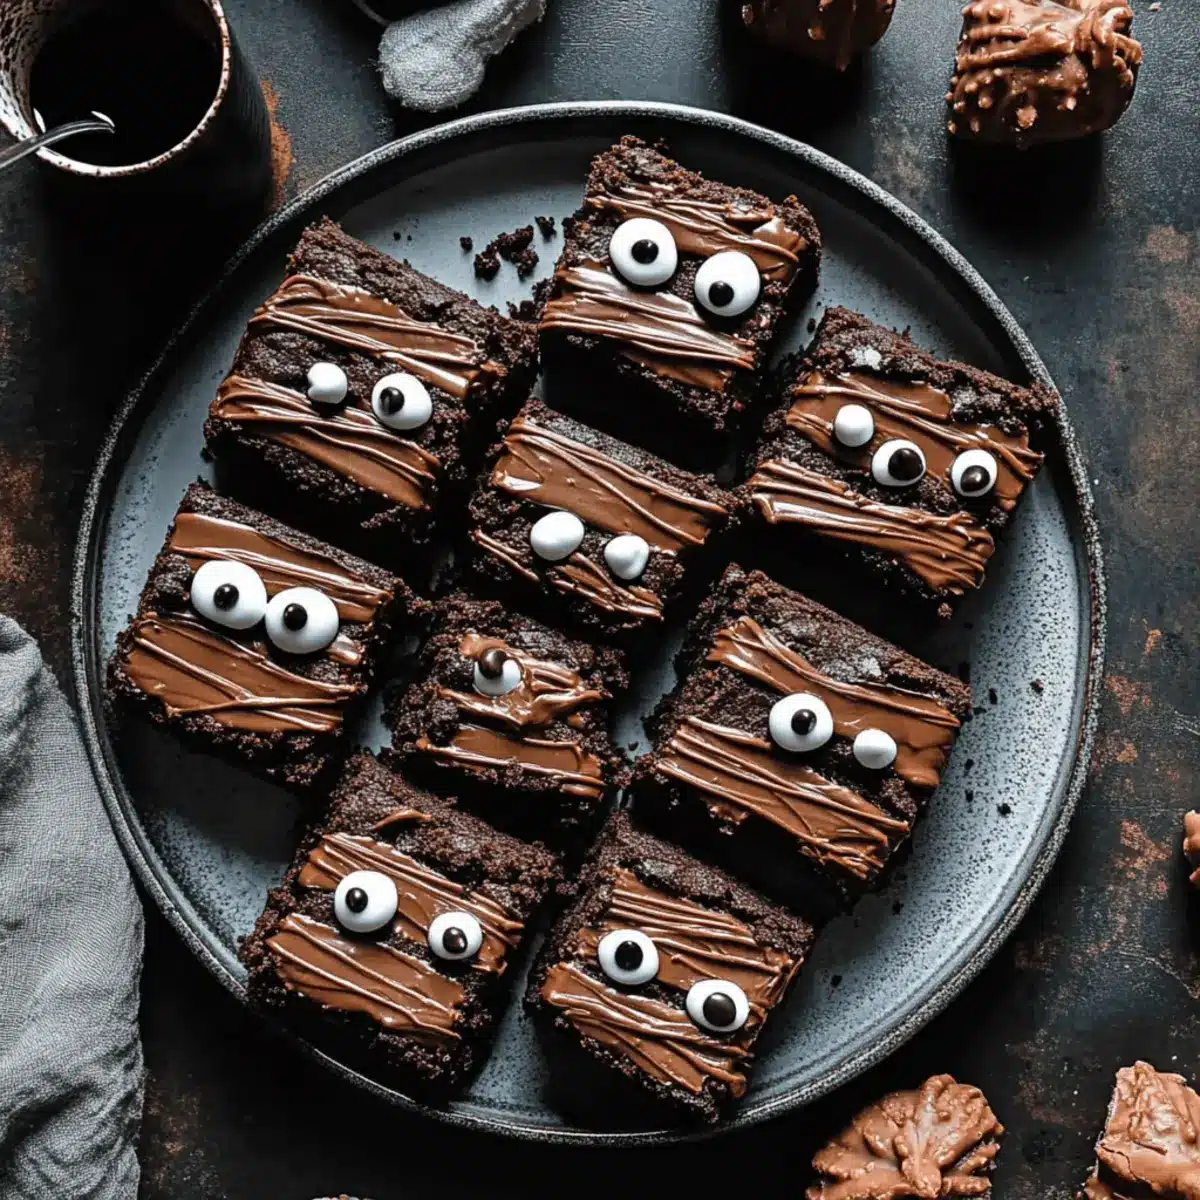
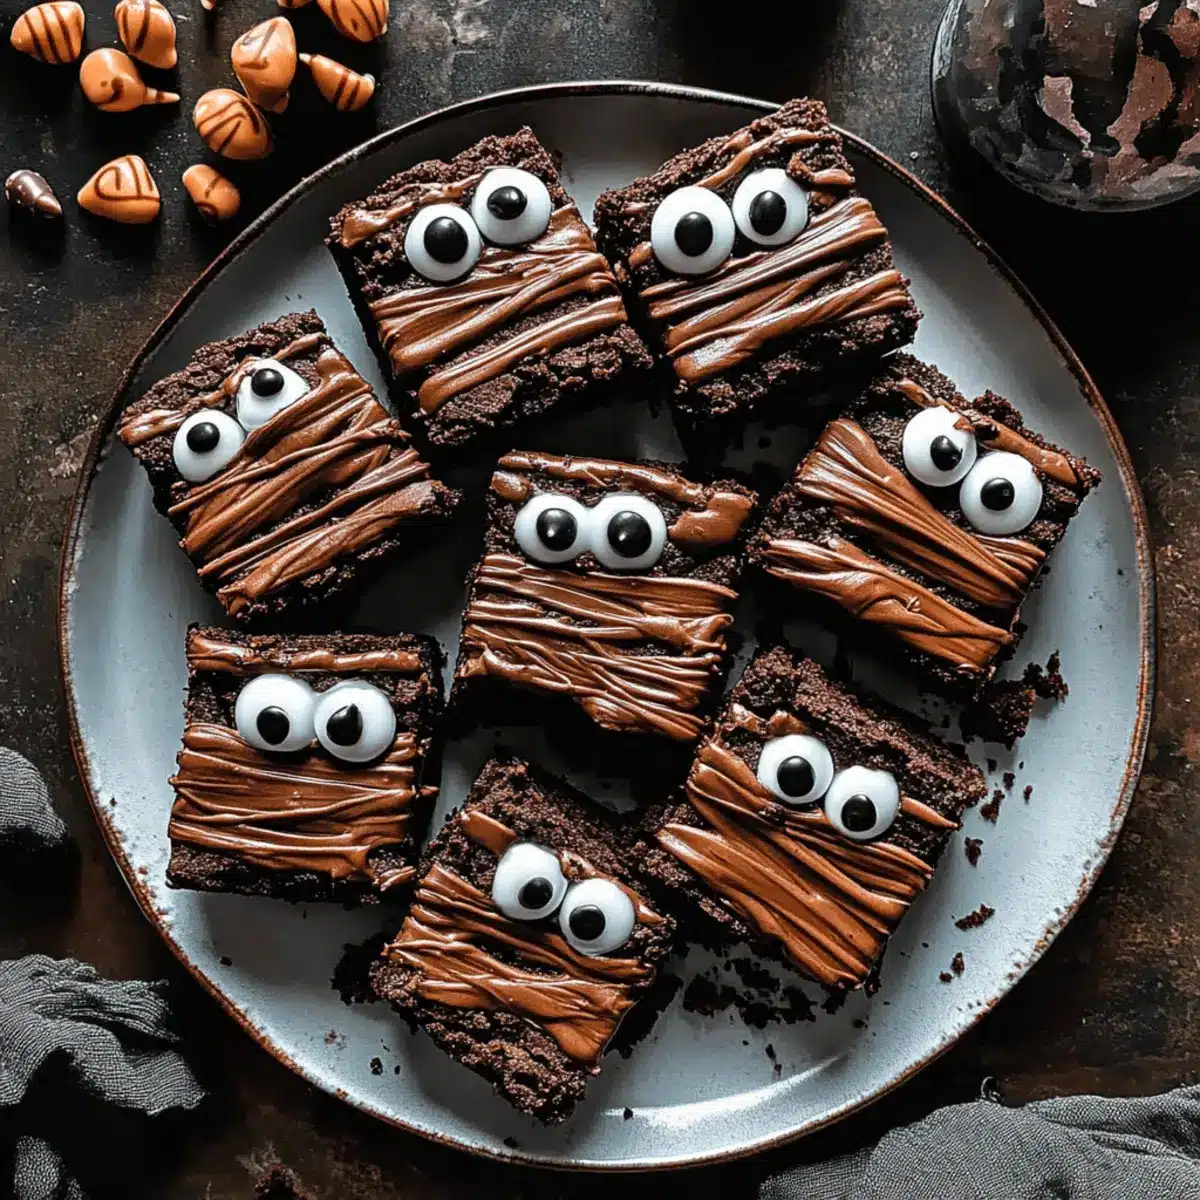
As Halloween creeps up on us, it’s time to swap the usual treats for something delightfully spooky—but let’s keep it delicious! My Mummy Halloween Brownies are here to steal the spotlight at your festive gatherings. These rich, fudgy treats are not just a visual delight with their playful mummy wrappings of silky chocolate ganache; they also satisfy those daunting chocolate cravings in a way that’s utterly irresistible. With their quick prep time and impressive presentation, these brownies are perfect for both novice bakers and seasoned pros alike, ensuring that everyone at your Halloween party will be asking for seconds. Curious about how to create this festive confection? Let’s dive in!
Why not elevate your Halloween treats?
Decadent and delicious, these Mummy Halloween Brownies are a fun twist on a classic favorite, sure to be a hit at any gathering. Quick prep means you can whip these up in no time, making them ideal for busy hosts. Visually striking with their ganache ‘bandages’ and candy eyeballs, they’re bound to spark conversations! Flexible ingredients cater to various dietary needs, so everyone can indulge. For an extra treat, serve them with a scoop of ice cream, just like my Spooky Cute Tarts.
Mummy Halloween Brownies Ingredients
• Get ready to delight in these spooky treats!
For the Brownies
- Unsalted Butter – Provides richness and moisture; you can use coconut oil for a dairy-free twist.
- Dark Chocolate – Delivers a deep chocolate flavor; chop it roughly for easier melting. Milk chocolate is a sweet option if preferred!
- Granulated Sugar – Balances the darkness of the chocolate; try brown sugar for a hint of molasses flavor.
- Large Eggs – Binds everything together while enhancing fudginess; consider flax eggs for a vegan version.
- All-Purpose Flour – Creates structure; for fudgy brownies, avoid overmixing. Gluten-free flour can step in nicely here.
- Kosher Salt – Enhances flavors all around; sea salt works well as a substitute.
For the Ganache
- Heavy Cream – Base for the silky ganache; coconut cream can be a great dairy-free alternative.
- Dark Chocolate – For that smooth ganache; use extra chopped chocolate at a 2:1 ratio with cream.
For Decoration
- Candy Eyeballs – Add a playful touch to your brownies; chocolate chips can be swapped for simplicity.
These Mummy Halloween Brownies are sure to be the highlight of your Halloween festivities!
Step‑by‑Step Instructions for Mummy Halloween Brownies
Step 1: Preheat the Oven
Begin by preheating your oven to 350°F (175°C). While it heats up, line a 9 x 9-inch baking pan with parchment paper, allowing some excess to hang over the sides for easy removal later. Lightly spray the parchment with cooking spray to prevent sticking, ensuring your Mummy Halloween Brownies come out perfectly.
Step 2: Melt the Chocolate and Butter
In a medium microwave-safe bowl, combine unsalted butter and roughly chopped dark chocolate. Heat in 30-second increments, stirring after each, until the mixture is smooth and fully melted. This should take about 1–2 minutes, so keep an eye on it to avoid burning the chocolate, which is the star of your brownies!
Step 3: Mix the Sugar and Eggs
Once the chocolate and butter are melted and combined, stir in half of the granulated sugar until well incorporated. Next, add the large eggs one at a time, mixing thoroughly after each addition. Then, incorporate the remaining sugar. This process will create a glossy mixture, setting a delightful foundation for your fudgy Mummy Halloween Brownies.
Step 4: Add Flour and Salt
Gradually fold in the all-purpose flour and kosher salt using a spatula or wooden spoon. Mix just until no flour streaks remain, being careful not to overmix. This step is crucial to maintain the fudgy texture of the brownies. When done, you’ll notice a thick and rich batter that smells heavenly!
Step 5: Bake the Brownies
Pour the brownie batter into your prepared pan and spread it evenly. Bake in the preheated oven for 30-35 minutes, or until the edges are set and a toothpick inserted in the center comes out with a few moist crumbs. Keep an eye on them as they bake; you want moistness, not gooeyness—just perfect for Mummy Halloween Brownies!
Step 6: Cool and Prepare Ganache
Once baked, remove the brownies from the oven and let them cool in the pan on a wire rack. Meanwhile, prepare the ganache by heating the heavy cream in a small saucepan until just simmering. Pour the cream over additional chopped dark chocolate in a bowl, letting it sit for a minute before stirring until you achieve a smooth, silky consistency.
Step 7: Cut the Brownies
After the brownies are completely cool, lift them out of the pan using the parchment paper. Place them on a cutting board and slice them into 18 equal pieces. A sharp knife is key here to achieve neat edges, enhancing the presentation of your Mummy Halloween Brownies!
Step 8: Decorate with Ganache and Eyes
Drizzle the ganache over the cut brownies to create the illusion of mummy bandages. Be generous, but ensure the brownie tops remain somewhat visible. Quickly place candy eyeballs on each brownie before the ganache sets. This playful decoration will bring your Mummy Halloween Brownies to life, making them perfect for your spooky gathering!
Expert Tips for Mummy Halloween Brownies
-
Chewy Texture: Maintain a higher fat-to-flour ratio by slightly underbaking. This keeps your Mummy Halloween Brownies wonderfully fudgy and moist.
-
Cooling Time: Allow brownies to cool completely in the pan before cutting. This helps prevent them from crumbling and ensures clean edges.
-
Storage Secrets: Store your brownies in an airtight container at room temperature, adding a slice of bread to keep them moist for a longer duration.
-
Ganache Consistency: If your ganache is too thick, warm it slightly and stir until smooth. You want it pourable to mimic those mummy bandages!
-
Creative Decorations: Feel free to swap candy eyeballs with nuts or other fun toppings for a unique look. This way, your Mummy Halloween Brownies can suit any festive theme!
What to Serve with Mummy Halloween Brownies
Imagine a spooky dessert table where every bite of these rich, fudgy delights is paired with equally enchanting treats!
- Vanilla Ice Cream: A scoop of creamy vanilla contrasts beautifully with the chocolate brownies, adding a refreshing chill to each bite.
- Caramel Sauce: Drizzled over your Mummy Halloween Brownies, warm caramel adds a gooey sweetness that perfectly complements the chocolate richness.
- Pumpkin Spice Latte: This seasonal favorite’s spiced warmth pairs wonderfully with brownies, enhancing the festive Halloween vibes.
- Chocolate Dipped Strawberries: Fresh, juicy berries provide a fruity contrast and an elegant touch, perfect for balancing the dense chocolate flavors.
- Spiced Nuts: A mix of roasted spiced nuts adds a satisfying crunch, creating a delightful textural contrast on your dessert plate.
- Mummy Hot Chocolate: For a cozy pairing, serve a cup of adult hot chocolate topped with whipped cream and festive marshmallows—perfect for sipping alongside the brownies!
- Ghostly Cupcakes: Delightfully decorated cupcakes can serve as fun companions, keeping the spooky theme alive with their creamy frosting and playful looks.
- Cheesecake Bars: Adding a creamy cheesecake texture will bring a delightful richness alongside the brownies’ fudgy nature, creating a luscious dessert trio.
Make Ahead Options
These Mummy Halloween Brownies are perfect for busy home cooks who want to save time without compromising on quality! You can prepare the brownie batter up to 24 hours in advance by mixing all the ingredients and storing it in an airtight container in the refrigerator. Additionally, you can make the ganache up to 3 days ahead of time; simply refrigerate it in a covered container. When you’re ready to bake, pour the chilled batter into the prepared pan and follow the baking instructions. After they cool, just reheat the ganache slightly if needed before drizzling it on top and adding candy eyeballs. This approach ensures your brownies remain just as delicious while you enjoy a more relaxed party prep!
How to Store and Freeze Mummy Halloween Brownies
Room Temperature: Store your Mummy Halloween Brownies in an airtight container at room temperature for up to 3 days to keep them fresh and fudgy.
Fridge: If you want them to last a little longer, refrigerate the brownies in an airtight container for up to 1 week. Just remember, they taste best at room temperature!
Freezer: For longer storage, freeze the brownies wrapped tightly in plastic wrap and then placed in a freezer-safe bag for up to 3 months. Thaw in the fridge before serving.
Reheating: To enjoy them warm, pop the thawed brownies in the microwave for about 15-20 seconds, ensuring the fudgy goodness of the Mummy Halloween Brownies returns!
Mummy Halloween Brownies Variations & Substitutions
Feel free to get creative and put your own spin on these delightfully spooky brownies!
- Dairy-Free: Replace the heavy cream with coconut cream in the ganache for a luscious, dairy-free version.
- Nutty Flavors: Add 1/2 cup of chopped nuts or peanut butter chips to the brownie batter for a delightful crunchy texture.
- White Chocolate Ganache: Use melted white chocolate instead of dark for a striking visual contrast against the brownie base.
- Lower Sugar Option: Substitute granulated sugar with erythritol or your favorite sugar alternative for a guilt-free treat.
- Flavor Twist: Mix in a teaspoon of vanilla extract or espresso powder to elevate the chocolate flavor and add rich undertones.
- Gluten-Free Version: Swap all-purpose flour for a 1:1 gluten-free flour blend, ensuring everyone can join in on the fun!
- Halloween Spirit Boost: Incorporate orange food coloring into the ganache for an extra festive touch—perfect for Halloween gatherings!
Looking for more creative ideas? You might enjoy serving these brownies alongside a scoop of ice cream or caramel sauce, just like my Spooky Cute Tarts or pair them with my fun Halloween Skull Potatoes for the ultimate festive treat!

Mummy Halloween Brownies Recipe FAQs
How do I choose the best chocolate for my brownies?
Absolutely! Opt for high-quality dark chocolate with at least 60% cocoa content for a deep, rich flavor. Look for bars that have a glossy finish without any white spots or oxidation. If you prefer a sweeter taste, milk chocolate can also be used, but it will alter the brownie’s depth.
How should I store my Mummy Halloween Brownies?
Store your Mummy Halloween Brownies in an airtight container at room temperature for up to 3 days for optimum freshness. If you want to keep them longer, refrigerate them for up to 1 week, but keep in mind they taste best at room temperature. Adding a slice of bread in the container helps retain moisture!
Can I freeze these brownies?
Very! To freeze your Mummy Halloween Brownies, wrap each piece tightly in plastic wrap and then place them in a freezer-safe bag. They can be stored in the freezer for up to 3 months. When you’re ready to enjoy, simply thaw them in the fridge overnight and reheat for about 15-20 seconds in the microwave to revive their fudginess.
What if my brownies are too crumbly or dry?
If your brownies turn out dry or crumbly, it’s possible they were overbaked or mixed too much. For a fudgier texture, maintain a higher fat-to-flour ratio and slightly underbake; keep checking for that moist crumb test! You can also try adding a bit more melted butter next time for extra moisture.
Are there any dietary considerations for my Mummy Halloween Brownies?
Absolutely! If you have dietary restrictions, you can easily accommodate them. For a dairy-free version, substitute unsalted butter with coconut oil and use coconut cream for the ganache. For a vegan option, flax eggs work wonderfully. Always check for allergens, especially if using decorative elements like candy eyeballs!
Decadent Mummy Halloween Brownies That Will Haunt Your Cravings
Ingredients
Equipment
Method
- Preheat your oven to 350°F (175°C) and line a 9 x 9-inch baking pan with parchment paper.
- Melt the unsalted butter and dark chocolate in a microwave-safe bowl in 30-second increments until smooth.
- Stir in half of the granulated sugar, then add eggs one at a time, mixing until well incorporated before adding the remaining sugar.
- Fold in the all-purpose flour and kosher salt until no flour streaks remain, careful not to overmix.
- Pour the batter into the prepared pan and bake for 30-35 minutes until edges are set and a toothpick comes out with a few moist crumbs.
- Let the brownies cool in the pan on a wire rack, while preparing the ganache by heating the heavy cream until simmering and combining it with dark chocolate.
- After cooling, lift brownies out and cut into 18 equal pieces.
- Drizzle ganache over the brownies and quickly add candy eyeballs before it sets.
Leave a Reply