
With every bite I take of these Easy Cheese Danishes, I’m transported to a cozy café down a sunlit street, where the scents of butter and vanilla swirl in the air. These delightful quick breakfast pastries are not just simple to make—they’re a comforting embrace for your morning routine. Imagine flaky crescent roll pastry cradling a rich, sweet cream cheese filling that dances on your palate. Whether you’re serving them for a leisurely brunch or simply indulging in a sweet treat after dinner, these danishes promise minimal effort with maximum satisfaction. Perfect for keeping up with a busy schedule while still relishing homemade goodness, they shine as a versatile delight. Curious to uncover just how easy it is to create these little pieces of heaven in your own kitchen? Let’s dive in!

Why Make Cheese Danishes at Home?
Simple and Quick: With just a few pantry staples and minimal prep time, these Cheese Danishes can be yours in under 30 minutes!
Everyone’s Favorite: Their flaky pastry and creamy filling will win over both family and friends, making them perfect for gatherings or cozy brunches.
Versatile Delight: Customize with your favorite fruit preserves or spices for a unique twist that suits any palate!
Café-Quality Taste: Enjoy the bakery experience right at home, indulging in that rich buttery flavor whenever the craving strikes.
Make-Ahead Magic: Prepare these danishes in advance to make your mornings effortless. Just pop them in the oven, and breakfast is ready!
Make sure to serve them alongside a cup of coffee for a delightful break, just like you’ll find at a cafe! If you’re looking for more tempting recipes, why not check out the Pan Seared Steak for dinner or treat yourself to a slice of Pistachio Mushroom Cheesecake?
Cheese Danishes Ingredients
• Discover the easy components!
For the Danish Pastry
• Crescent Roll Dough – Provides structure and flakiness to the danish. Can use store-bought or homemade dough.
• Salted Butter – Adds richness and helps with browning. Unsalted butter can be used, but may require additional salt in the filling.
For the Cream Cheese Filling
• Cream Cheese – Adds a creamy, rich filling. Low-fat cream cheese can be used for a lighter version, but full-fat yields better texture.
• Granulated Sugar – Sweetens the cream cheese filling. Can substitute with coconut sugar for a lower glycemic index option.
• Vanilla Extract – Enhances flavor. Can substitute with almond extract for a different taste profile.
For the Glaze
• Powdered Sugar – Used in the glaze for sweetness and a smooth finish. Can be omitted for a less sweet option.
• Additional Vanilla Extract for Glaze – Adds depth of flavor to the glaze. Almond extract can be used for a twist.
• Milk – Thin the glaze to desired consistency. Non-dairy milk options are also suitable.
For the Topping
• Light Brown Sugar – Adds a caramel-like sweetness and is sprinkled on top for extra flavor. Granulated sugar can be substituted if unavailable.
Step‑by‑Step Instructions for Easy Cheese Danishes
Step 1: Preheat the Oven
Begin by preheating your oven to 375°F (190°C). This ensures that your pastries will bake evenly and reach that perfect golden-brown color. While the oven heats up, gather your ingredients and equipment, including a large mixing bowl and a baking sheet lined with parchment paper.
Step 2: Prepare the Dough
Open the tubes of crescent roll dough and gently unroll them on a clean surface. Carefully separate the dough into individual triangles, making sure not to tear them. You want to keep the edges neatly intact, as these will form the lovely shape of your Cheese Danishes.
Step 3: Make the Cream Cheese Filling
In a mixing bowl, combine the softened cream cheese, granulated sugar, and vanilla extract. Using a hand mixer or a spatula, blend the ingredients until the mixture is smooth and creamy, with no lumps. This rich filling is what makes your Easy Cheese Danishes irresistibly delicious!
Step 4: Assemble the Danishes
Take a spoonful of the cream cheese filling and place it at the wide end of each crescent triangle. Gently roll the dough over the filling, tucking in the edges as you go to seal in that creamy goodness. Arrange them so that they resemble crescent shapes, which will make for a beautiful presentation after baking.
Step 5: Arrange on Baking Sheet
Carefully transfer the assembled Cheese Danishes onto your prepared baking sheet. Space them about two inches apart to allow room for them to puff up while baking. Make sure they’re well positioned to achieve that lovely flaky texture as they rise in the oven.
Step 6: Brush with Butter
Melt the salted butter and use a pastry brush to generously coat the tops of each Danish. This step adds a rich flavor and helps the pastries achieve a delightful golden brown crust. Following the butter, sprinkle a little light brown sugar on top of each danish for an extra touch of sweetness.
Step 7: Bake the Danishes
Place the baking sheet in your preheated oven and bake for about 18-20 minutes. Keep an eye on them; you’re looking for a beautiful golden-brown color that indicates the dough is cooked through and the filling is warm and creamy.
Step 8: Prepare the Glaze
While the Easy Cheese Danishes bake, whisk together the powdered sugar, additional vanilla extract, and a splash of milk in a small bowl until the mixture is smooth and glossy. Adjust the thickness of the glaze by adding more milk, if necessary, to achieve your desired consistency.
Step 9: Drizzle with Glaze
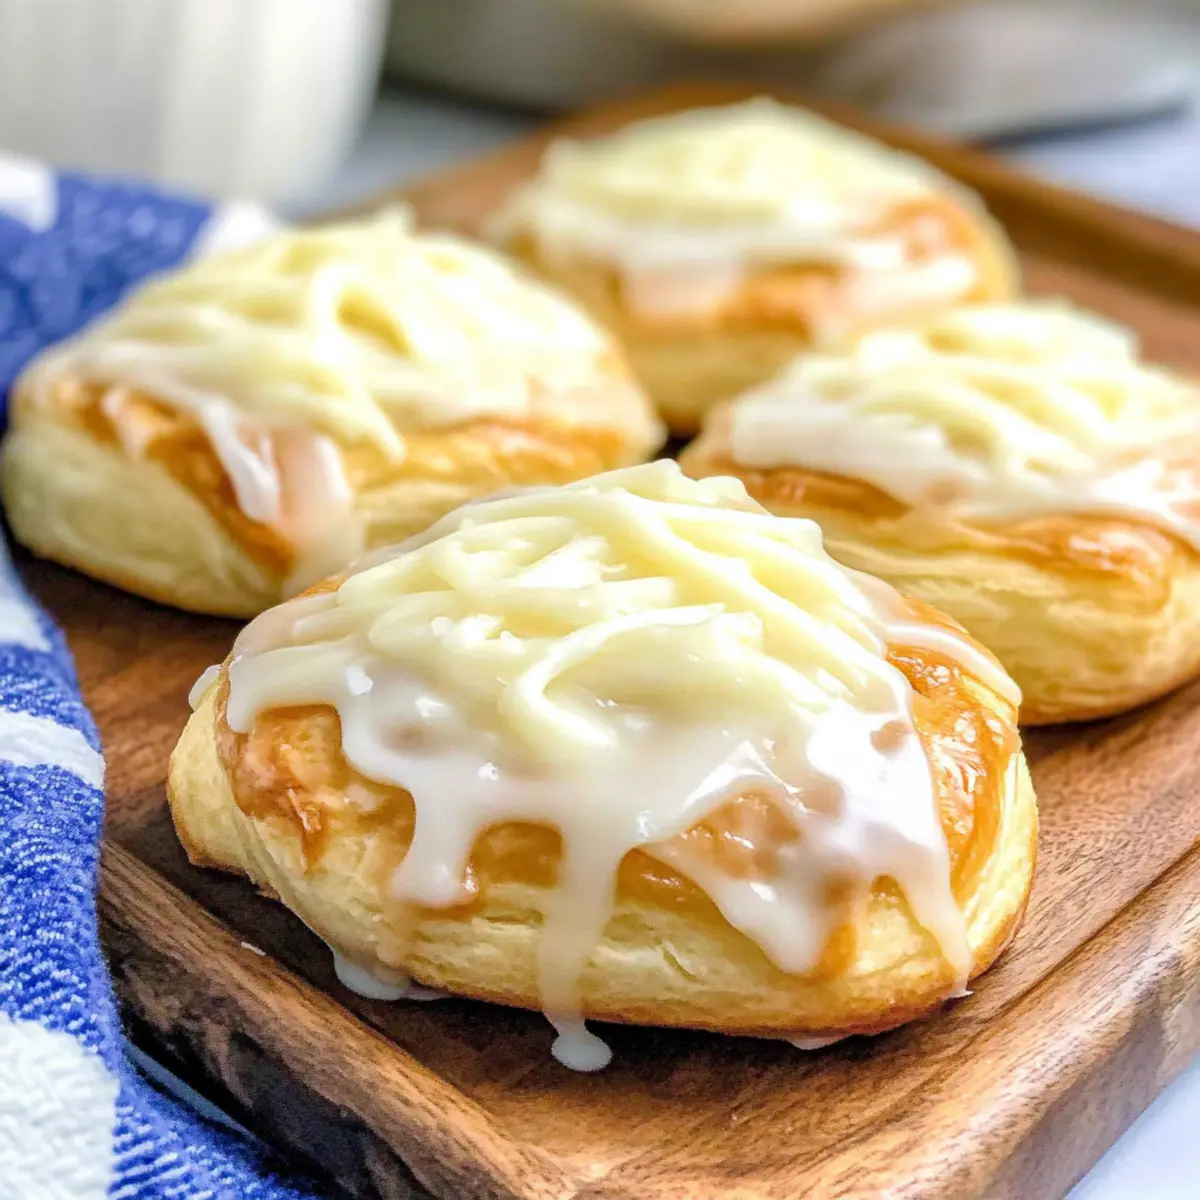
Once the danishes are out of the oven and slightly cooled, drizzle the prepared glaze generously over the warm pastries. This sweet topping complements the rich filling wonderfully and adds that perfect finishing touch to your delicious Cheese Danishes.
Step 10: Serve and Enjoy
Serve these Easy Cheese Danishes warm alongside a cup of coffee or tea for a delightful breakfast or snack. They are best enjoyed fresh but can also be stored in an airtight container for later indulgence. Enjoy your bakery-style treat right from your home!

What to Serve with Easy Cheese Danishes?
Nothing pairs better with these delightful pastries than a few thoughtful accompaniments to create a harmonious meal experience.
-
Fresh Berries: Juicy strawberries, blueberries, and raspberries add a burst of freshness that beautifully balances the rich, creamy filling.
-
Crispy Bacon: The salty crunch of bacon provides a savory component, making your brunch spread both exciting and satisfying.
-
Coffee or Tea: A steaming mug enhances the cozy feeling, making your leisurely breakfast complete with pleasant aromas to savor.
-
Scrambled Eggs: Fluffy, light eggs add a wholesome aspect to your meal. Their soft texture makes a wonderful contrast to the flaky danishes.
-
Fruit Salad: A medley of seasonal fruits infuses vibrant colors and refreshing flavors, elevating your meal while keeping it light and healthy.
-
Maple Syrup Drizzle: A touch of syrup can sweeten the experience. Drizzle it gently over your danishes for that extra touch of sweetness.
-
Yogurt Parfait: Layered with granola and honey, yogurt provides creaminess and crunch, complementing the danishes’ texture while adding a nourishing element.
-
Chilled Sparkling Water: Refreshingly fizzy, sparkling water cleanses the palate and pairs delightfully with the sweet and creamy danishes for a sophisticated brunch feel.
Make Ahead Options
These Easy Cheese Danishes are perfect for busy home cooks who want to streamline their mornings! You can assemble the danishes and refrigerate them for up to 24 hours before baking, which allows the flavors to meld beautifully. Simply prepare the dough and fill them as instructed, placing them tightly wrapped in an airtight container in the fridge. When you’re ready to bake, preheat your oven and pop them straight in—no need to wait for them to come to room temperature! For ultimate freshness, remember to brush with melted butter and sprinkle brown sugar just before baking to ensure your danishes are golden and flaky, just as delightful as if made fresh!
Expert Tips for Perfect Cheese Danishes
Prep Ahead: Assemble the danishes the night before and refrigerate. This way, you can simply bake them in the morning for a fresh treat.
Choose Quality Cream Cheese: Always use softened cream cheese for a smooth filling. Microwaving it briefly can help if you’re pressed for time.
Watch for Browning: Keep an eye on the danishes while baking; typically, they should be golden brown after 18-20 minutes. If they’re getting too dark, cover loosely with foil.
Customize Wisely: Feel free to experiment with different fillings or spices, like cinnamon, but remember that too many add-ins can alter the texture of your cheese danishes.
Store Properly: If you have leftovers, store them in an airtight container. Reheat them in the oven to retain their flakiness instead of using a microwave.
How to Store and Freeze Cheese Danishes
Fridge: Store leftover Cheese Danishes in an airtight container for up to 2-3 days to maintain freshness. Reheat in the oven to restore flakiness.
Freezer: For longer storage, freeze baked danishes in a single layer on a baking sheet until firm, then transfer to an airtight container for up to 2 months.
Reheating: To enjoy frozen Cheese Danishes, bake from frozen at 350°F (175°C) for about 15-20 minutes, or until heated through and crispy.
Make-Ahead Tip: Assemble danishes ahead of time and refrigerate overnight, then bake fresh in the morning for a delightful breakfast treat.
Cheese Danishes Variations & Substitutions
Feel free to get creative with your Cheese Danishes and make them your own! Each tweak adds a special twist that can elevate your baking experience.
- Cream Cheese Swap: Substitute cream cheese with mascarpone for a luxuriously rich filling. This twist works beautifully if you prefer a creamier texture.
- Fruit-Filled Delight: Add a layer of fruit preserves, like raspberry or apricot, under the cream cheese for fruity danishes. The sweet fruitiness pairs wonderfully with the creaminess!
- Spicy Kick: Incorporate a teaspoon of cinnamon or nutmeg into the cream cheese filling for a warm, aromatic flavor twist. This adds a delightful spiciness that complements the sweetness.
- Dairy-Free Option: Opt for a dairy-free cream cheese alternative to create a vegan version of these danishes without sacrificing taste. They’ll still be delightful and flavorful!
- Nutty Surprise: Toss in some chopped nuts like pecans or almonds into the filling for added crunch and depth of flavor. It creates an unexpected texture that pleasantly surprises the palate.
- Almond Glaze: Instead of vanilla, whisk in almond extract into the glaze for a sophisticated twist that enhances the overall flavor. It offers a lovely nuttiness that shines through!
- Chocolate Lovers: Add chocolate chips into your cream cheese filling for a decadent treat. The melty chocolate creates a delicious contrast to the creamy filling and flaky pastry.
- Savory Version: Swap the sweet filling for a savory mix of cream cheese, herbs, and spices for a delightful brunch option. Try adding chives or garlic powder for extra flavor!
Want to accompany your danishes with something special? Try serving them with a cup of rich coffee or a slice of Velvet Oreo Cheesecake for an indulgent treat!
Easy Cheese Danishes Recipe FAQs
What type of crescent roll dough should I use for Cheese Danishes?
I recommend using store-bought crescent roll dough for convenience and ease. However, if you’re feeling adventurous, homemade dough can elevate the taste and texture! Just ensure your dough is properly rolled out to maintain its flaky goodness.
How should I store leftover Cheese Danishes?
Store your leftover Cheese Danishes in an airtight container in the refrigerator for up to 2-3 days. To maintain their flaky texture, reheat them in the oven for a few minutes before enjoying them again. A little warm-up makes all the difference!
Can I freeze Cheese Danishes?
Absolutely! To freeze, bake the danishes first, allowing them to cool completely. Then, place them in a single layer on a baking sheet and freeze until firm. Transfer to an airtight container or heavy-duty freezer bag for up to 2 months. When you’re ready to enjoy them, bake from frozen at 350°F (175°C) for about 15-20 minutes or until crispy.
What if my cream cheese filling is too thick?
No worries! If your cream cheese filling is too thick, you can add a splash of milk or a little extra vanilla extract and mix until you reach your desired consistency. This will help it spread easily across the dough, ensuring a creamy filling without lumps.
Are Cheese Danishes safe for people with dietary restrictions?
For those with allergies, it’s essential to check the labels of your ingredients. If you’re concerned about gluten, opt for gluten-free crescent roll dough. Additionally, substituting dairy cream cheese with a vegan alternative can accommodate lactose intolerance. Always choose ingredients that fit your dietary needs!
Can I make these Cheese Danishes ahead of time?
Definitely! You can assemble Cheese Danishes the night before and refrigerate them until morning. When you wake up, simply bake them fresh for a delightful breakfast that feels like a treat, minus the extra effort!
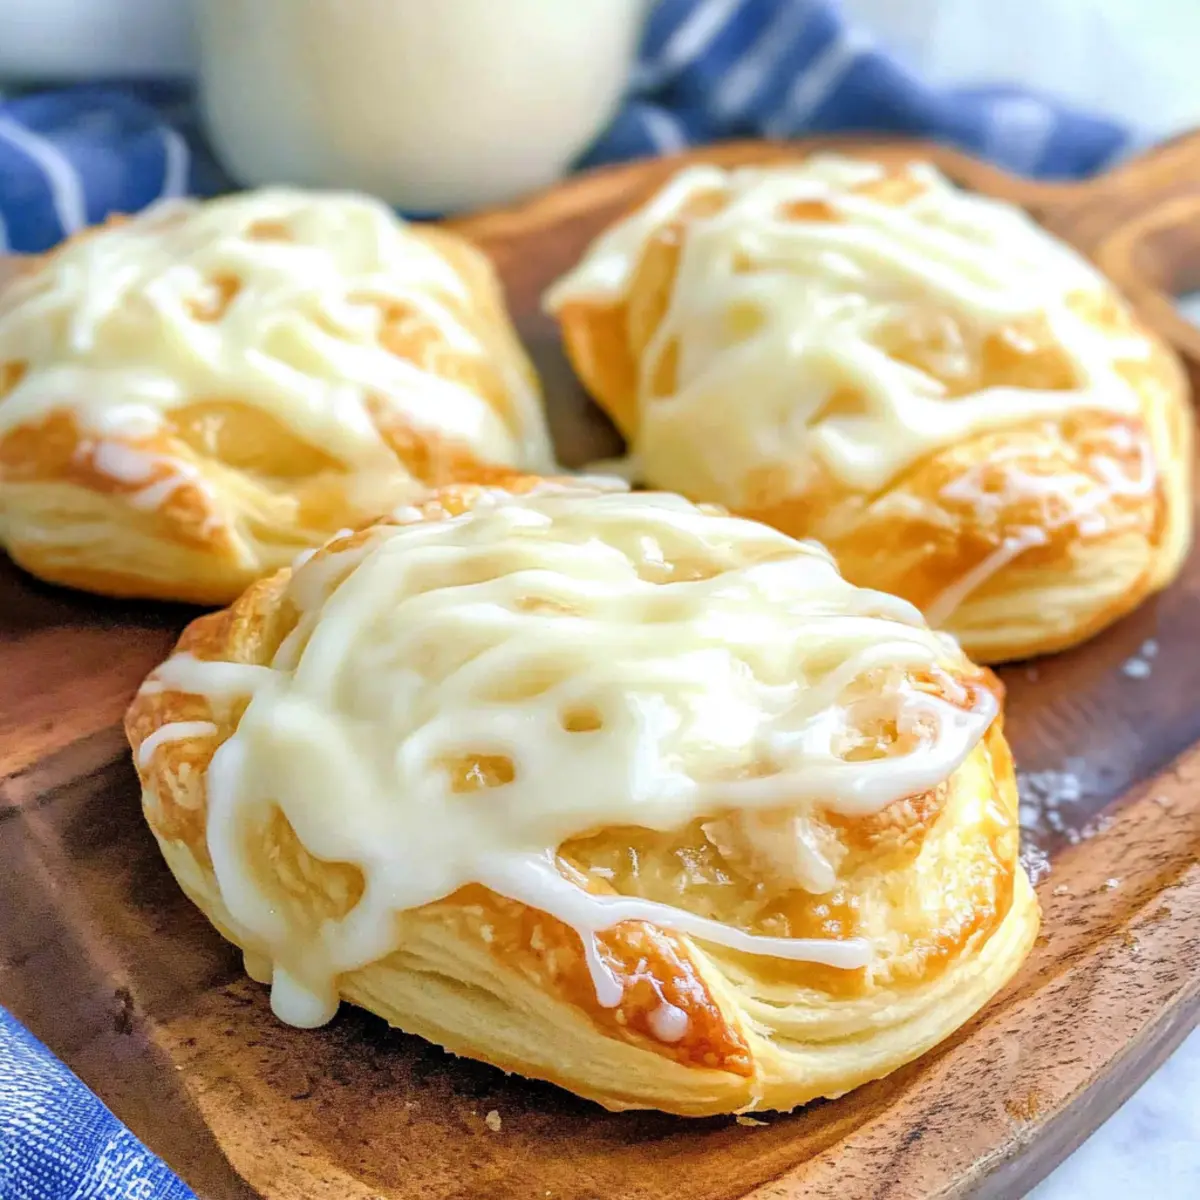
Irresistible Cheese Danishes That Melt in Your Mouth
Ingredients
Equipment
Method
- Preheat your oven to 375°F (190°C). Gather your ingredients and equipment.
- Open the tubes of crescent roll dough and unroll them on a clean surface. Separate into individual triangles.
- Combine the softened cream cheese, granulated sugar, and vanilla extract in a mixing bowl and blend until smooth.
- Place a spoonful of the cream cheese filling at the wide end of each crescent triangle and roll over the filling.
- Transfer the assembled Cheese Danishes onto a baking sheet lined with parchment paper.
- Melt the salted butter and brush generously on top of each Danish, then sprinkle light brown sugar on top.
- Bake for about 18-20 minutes or until golden brown.
- Whisk together the powdered sugar, additional vanilla extract, and milk until smooth to make the glaze.
- Drizzle the glaze generously over the warm pastries after they're out of the oven.
- Serve warm alongside coffee or tea.
Leave a Reply