
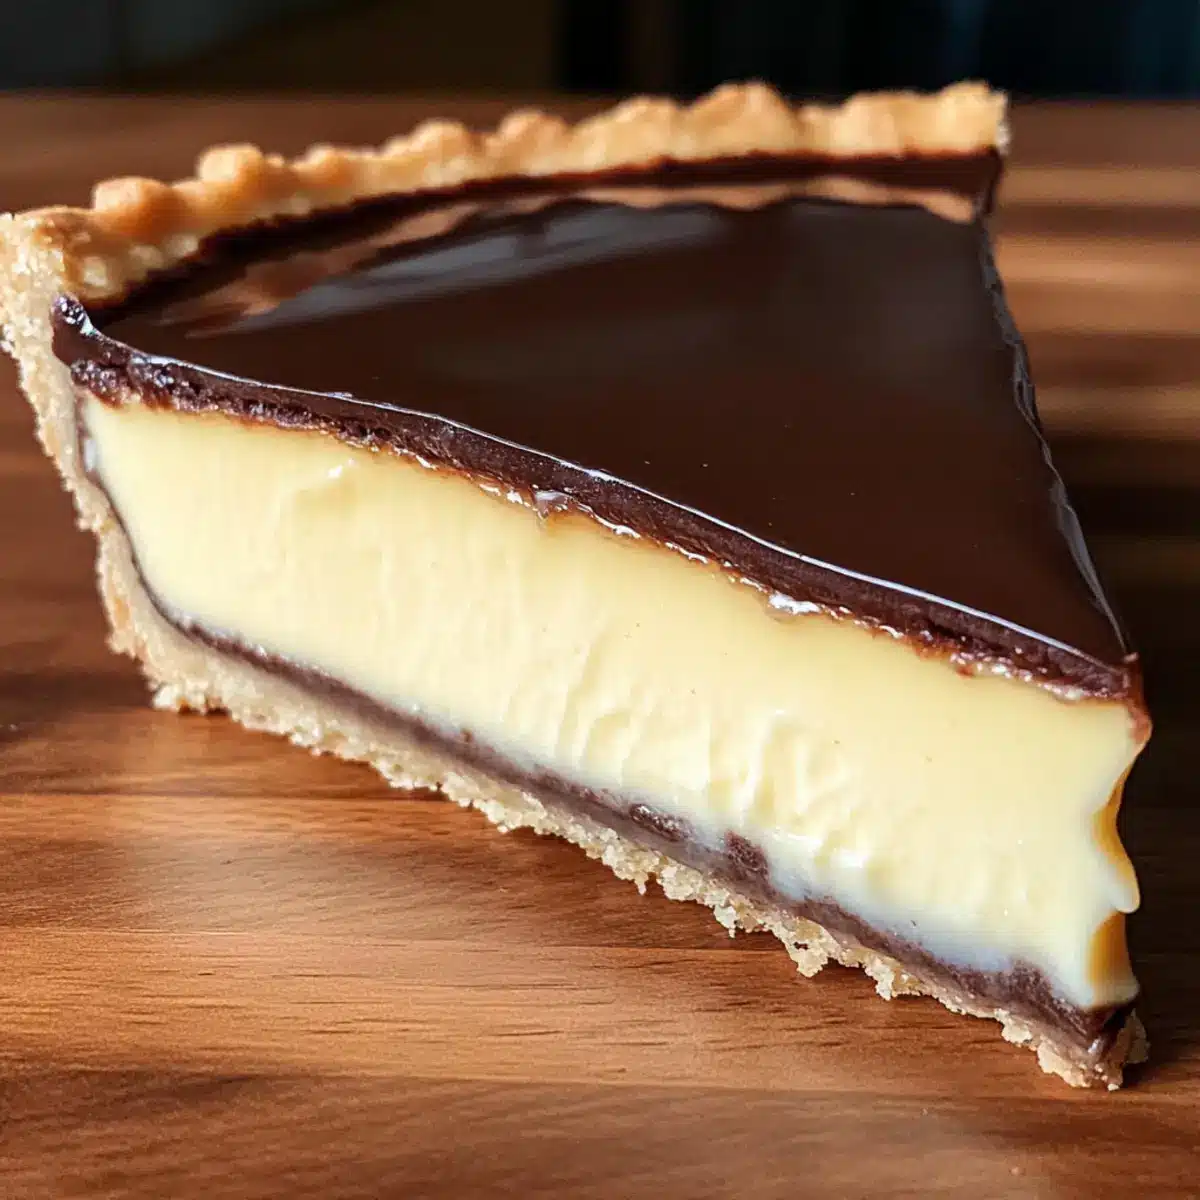
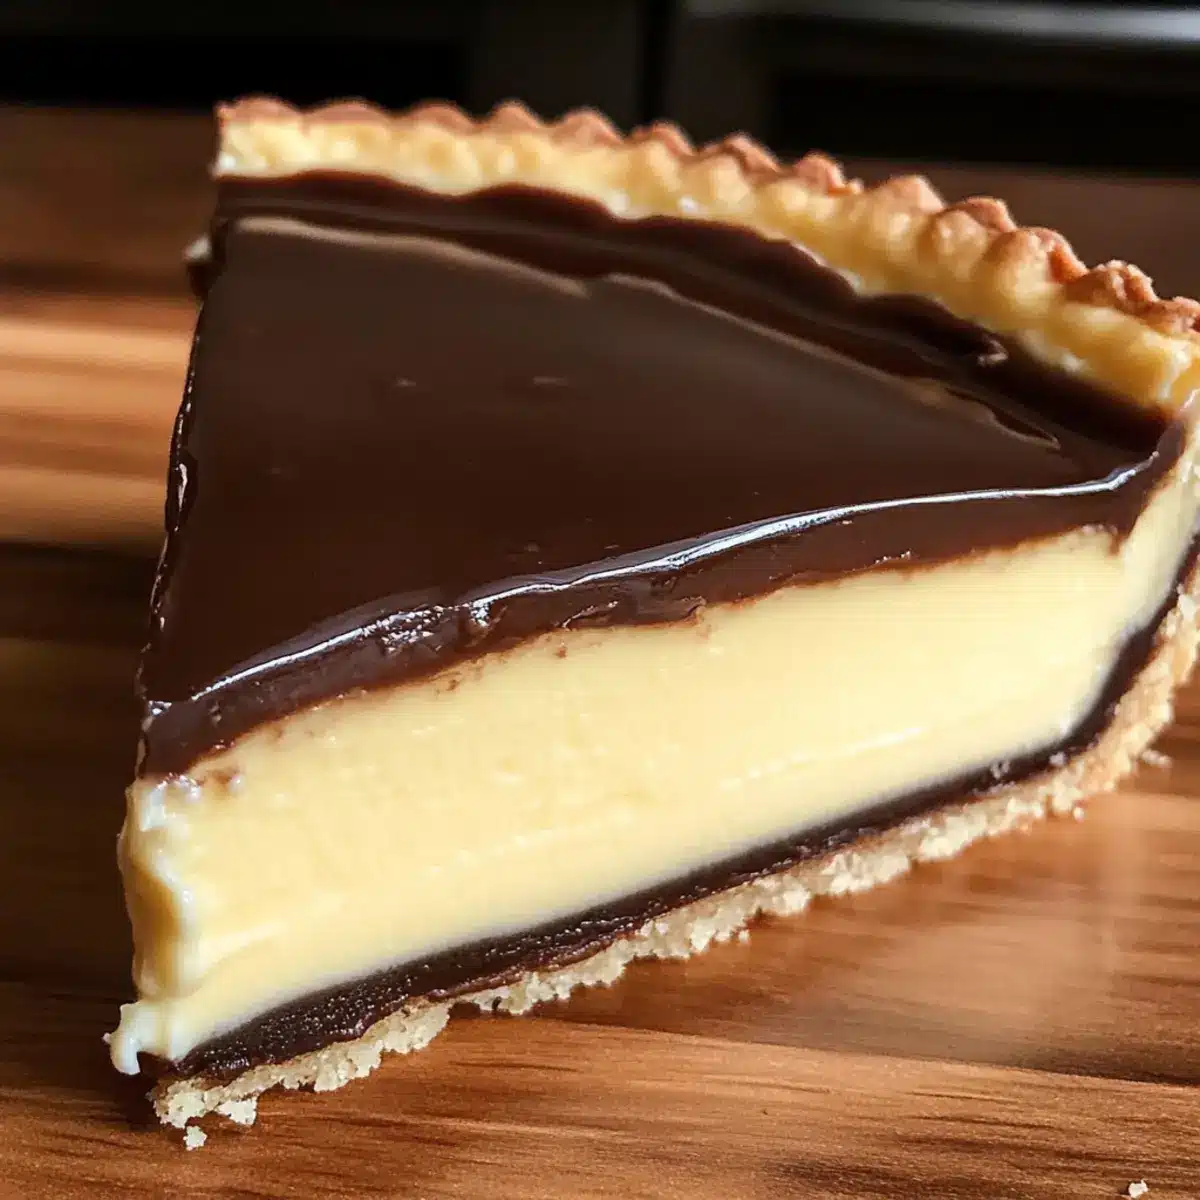
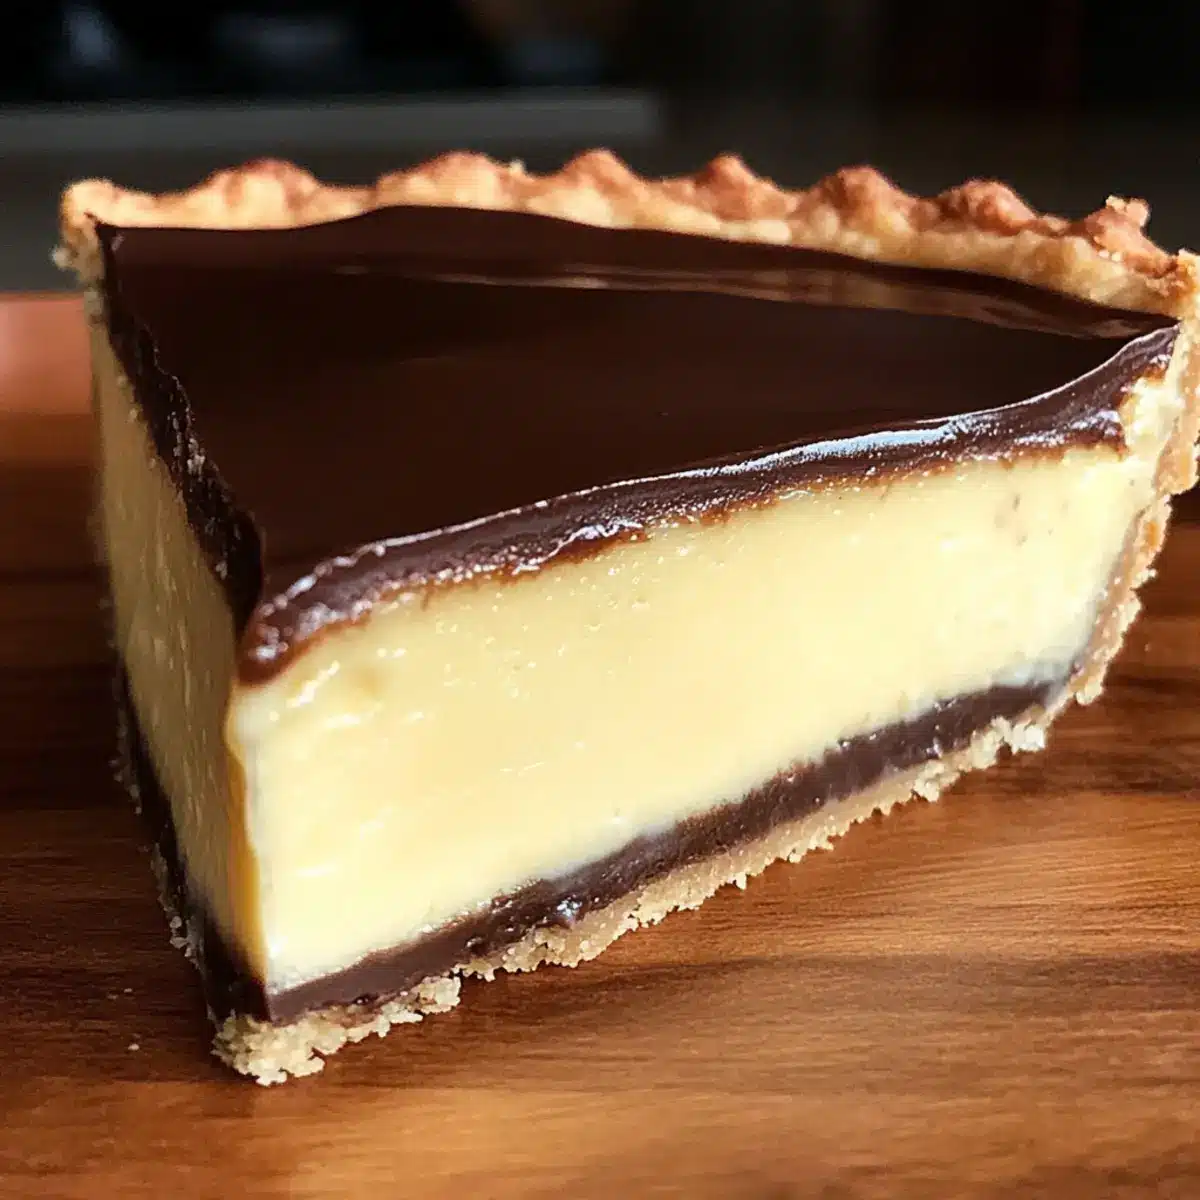
The moment I take a bite of Classic Boston Cream Pie, I’m transported back to family gatherings where laughter filled the air and dessert was the highlight. This iconic American dessert seamlessly melds silky vanilla custard with a rich chocolate glaze, tucked between layers of tender sponge cake. What I adore about this Classic Boston Cream Pie Recipe with Vanilla Custard and Chocolate is its ability to impress without demanding hours of kitchen time. It’s just as delightful for a special occasion as it is for a cozy night in, making it a versatile addition to my dessert repertoire. Not only is this cake a showstopper, but it’s also customizable, so you can adapt it to your taste or what you have on hand. Curious about how to create your own slice of nostalgia? Let’s dive into the luscious details!
Why is Classic Boston Cream Pie Irresistible?
Rich, Creamy Custard: The silky vanilla custard is the star of this dessert, creating a mouthwatering contrast to the soft cake. Decadent Chocolate Glaze: With its glossy finish, the rich chocolate glaze adds a luxurious touch that’s simply irresistible. Quick and Easy: This recipe is straightforward, making it perfect for both novice and experienced bakers. Versatile Delight: Dress it up for special occasions or enjoy it with a cup of coffee on a relaxed evening. If you’re on the lookout for more dessert inspiration, try my Chocolate Marshmallow Swirl or the classic Chocolate Chip Cookies. Crowd-Pleasing Favorite: Served chilled, this showstopper is sure to impress your guests, making it a must-have for any gathering!
Classic Boston Cream Pie Ingredients
• Indulge in the essential components of this delightful dessert!
For the Cake
• Cake Flour – Provides structure and tenderness to the cake. Use all-purpose flour for a sturdier base.
• Granulated Sugar – Sweetens the cake. Substitute with brown sugar for a deeper flavor profile.
• Unsalted Butter – Adds richness and moisture. Can be replaced with margarine for a dairy-free option.
• Eggs – Offers binding and stability. Substitute with a flax egg for a vegan version.
• Milk – Hydrates the batter and adds flavor. Use almond milk for a dairy-free version.
• Vanilla Extract – Enhances the flavor profile. Use fresh vanilla bean for a more aromatic touch.
For the Custard & Glaze
• Heavy Cream – Used for the custard and chocolate glaze, providing richness. Coconut cream can be a non-dairy alternative.
• Cornstarch – Thickens the custard. Substitute with potato starch if needed.
• Chocolate – Adds depth to the glaze. Use dark chocolate for a more intense flavor.
Get ready to create a stunning Classic Boston Cream Pie with Vanilla Custard and Chocolate that will delight your family and friends!
Step‑by‑Step Instructions for Classic Boston Cream Pie Recipe with Vanilla Custard and Chocolate
Step 1: Preheat and Prepare
Preheat your oven to 350°F (175°C) and grease two 9-inch round cake pans. Line the bottoms with parchment paper to ensure easy release. In a large mixing bowl, cream together softened unsalted butter and granulated sugar, beating until the mixture is light and fluffy, which should take about 3-5 minutes. Then, add in eggs one by one, mixing well after each addition along with the vanilla extract.
Step 2: Combine Dry Ingredients
In a separate bowl, sift together 2 cups of cake flour and 1 tablespoon of baking powder. Gradually stir the dry mixture into the creamed butter mixture, alternating with 1 cup of milk. Mix until just combined, ensuring there are no flour streaks, and you achieve a smooth batter with a thick yet pourable consistency.
Step 3: Bake the Cake
Pour the cake batter evenly into the prepared pans. Bake in the preheated oven for 25–30 minutes, or until a toothpick inserted in the center comes out clean and the edges begin to pull away from the pan. Once baked, remove the cakes from the oven and allow them to cool in the pans for 10 minutes before transferring to a wire rack to cool completely.
Step 4: Make the Custard
In a medium saucepan over medium heat, combine 2 cups of milk, 4 egg yolks, ¾ cup of sugar, and ¼ cup of cornstarch. Whisk continuously until the mixture thickens and begins to bubble, about 8–10 minutes. Once thickened, remove from the heat and stir in a splash of vanilla extract. Transfer the custard to a bowl and cover with plastic wrap directly on the surface to prevent a skin from forming as it cools.
Step 5: Prepare the Chocolate Glaze
In a small saucepan, heat 1 cup of heavy cream until it begins to simmer. Remove it from the heat and add 6 ounces of chopped chocolate, stirring until fully melted and combined into a glossy glaze. Allow the glaze to cool slightly before use, ensuring it thickens to a pourable consistency but remains smooth.
Step 6: Assemble the Classic Boston Cream Pie
Once the cakes and custard are completely cool, slice each cake layer in half horizontally to create four layers. Place one layer on a serving plate, spread a generous layer of custard on top, and repeat with the second layer. After adding a third cake layer, pour the chocolate glaze over the top, allowing it to cascade beautifully down the sides.
Step 7: Chill and Serve
Refrigerate the assembled Classic Boston Cream Pie for at least 1 hour before serving. This chilling time allows the custard to set and the flavors to meld beautifully. When ready to serve, slice into wedges and enjoy this delightful fusion of vanilla, chocolate, and soft cake!
Classic Boston Cream Pie Variations
Feel free to get creative and make this Classic Boston Cream Pie your own with these delightful variations!
- Pastry Cream: Swap the vanilla custard for pastry cream for an extra layer of flavor complexity; this twist enhances the texture and taste beautifully.
- Chocolate Ganache: Use a thick ganache instead of basic chocolate glaze to add a deep richness that turns this pie into a luxurious treat. You’ll fall in love with the velvety texture!
- Gluten-Free: Substitute cake flour with a gluten-free blend to make this pie suitable for those with dietary restrictions. It’s a delicious option that everyone can enjoy!
- Dairy-Free: To keep it creamy while being dairy-free, use almond milk and coconut cream in place of traditional ingredients, allowing all to relish the pie without compromise.
- Flavor Infusion: Spice up the custard by adding a hint of cinnamon or a splash of coffee for a unique flavor twist; this adds warmth and depth that tantalizes the taste buds.
- Heat It Up: For those who enjoy a bit of heat, add a pinch of chili powder or cayenne to the chocolate glaze for a spicy kick that elevates the dessert’s profile.
- Mini Pies: Turn this recipe into individual mini pies by using ramekins; it’s a fun way to serve a personal portion that everyone will love.
- Nutty Crust: Add crushed nuts or almond meal to the cake batter for a delightful textural twist; the nuttiness enriches the overall flavor, giving it that extra oomph!
And if you’re looking for more sweet inspiration, be sure to check out my Decadent Chocolate Pie or try whipping up the delightful Chocolate Marshmallow Swirl cookies for a cookie jar full of fun!
Make Ahead Options
These Classic Boston Cream Pie layers are perfect for meal prep enthusiasts! You can bake the cake and prepare the vanilla custard up to 24 hours in advance, which not only saves time but also allows the flavors to develop. Just remember to store the cooled cake layers in an airtight container to maintain their moisture, while the custard should be covered with plastic wrap directly on the surface to prevent a skin. When you’re ready to impress your family or guests, simply assemble the pie by layering the custard between the cake layers and topping it with the chocolate glaze. Chill the assembled dessert for at least 1 hour before serving, and you’ll be rewarded with a slice that’s just as delicious as if it were made on the spot!
What to Serve with Classic Boston Cream Pie
Indulging in the creamy layers of Classic Boston Cream Pie is a delightful experience, but pairing it with the right sides can elevate your meal to new heights.
- Fresh Berries: Juicy strawberries, raspberries, or blueberries offer a vibrant contrast, balancing the dessert’s sweetness with a burst of freshness.
- Whipped Cream: Light and airy, a dollop of freshly whipped cream adds an extra layer of indulgence that complements the rich custard and chocolate.
- Coffee or Espresso: A warm cup of coffee perfectly cuts through the sweetness, creating a wonderful harmony between flavors and textures.
- Chocolate Eclairs: Continue the chocolate theme with these delightful pastries; their crisp exterior and creamy filling echo the flavors of Boston Cream Pie.
- Vanilla Ice Cream: Creamy and cool, a scoop of vanilla ice cream pairs beautifully with the warm, rich cake, making for a decadent dessert experience.
- Caramel Sauce Drizzle: A light drizzle of caramel sauce adds a sweet, buttery note that enhances the chocolate glaze and adds a touch of elegance.
- Nutty Biscotti: Crunchy almond or hazelnut biscotti provides a delightful texture, perfect for dipping into a cup of coffee alongside your dessert.
These pairings will enhance your enjoyment of the Classic Boston Cream Pie, creating a memorable culinary occasion with every bite!
Expert Tips for Classic Boston Cream Pie
- Custard Consistency: If your custard is too runny, add a little more cornstarch during cooking for a thicker texture.
- Layering Technique: Ensure each cake layer is cooled completely before assembling to prevent sogginess; this keeps your Classic Boston Cream Pie firm and delightful.
- Chocolate Glaze Tip: Let the glaze cool slightly before pouring to ensure it stays thick and glossy, creating a beautiful finish.
- Storage Advice: For the best flavor, store your assembled pie in the refrigerator; however, avoid freezing once assembled as it can change the texture of the custard.
- Customization Ideas: Feel free to swap flavors in the custard or glaze for a unique twist; experimenting keeps this Classic Boston Cream Pie fresh and exciting!
How to Store and Freeze Classic Boston Cream Pie
Fridge: Store the assembled Classic Boston Cream Pie in the refrigerator, covered, for up to 3 days to maintain freshness and flavor.
Freezer: If you want to freeze the unassembled components, the unglazed cake can be wrapped tightly in plastic wrap and aluminum foil for up to 2 months.
Reheating: For serving, simply thaw the frozen cake at room temperature before assembling with custard and glaze. Avoid freezing the assembled pie since it affects the custard’s texture.
Custard Storage: The vanilla custard can be stored in an airtight container in the fridge for up to 2 days, so you can prepare it ahead of time for your Classic Boston Cream Pie!

Classic Boston Cream Pie Recipe FAQs
What kind of flour should I use for the cake?
I highly recommend using cake flour for a softer, fluffier texture. However, if you only have all-purpose flour on hand, it will work just fine—but expect a sturdier cake.
How long can I store the assembled Boston Cream Pie?
You can keep the assembled Classic Boston Cream Pie in the refrigerator for up to 3 days. This will keep it fresh and delicious, but make sure it’s covered to prevent it from absorbing any odors from your fridge.
Can I freeze the Classic Boston Cream Pie?
Freezing the assembled pie is not advisable since the custard will change texture once thawed. However, you can freeze the unglazed cake layers by wrapping them tightly in plastic wrap and then in aluminum foil for up to 2 months. Thaw at room temperature before assembling with the custard and glaze.
What should I do if my custard turns out lumpy?
Absolutely! If you encounter lumpy custard, don’t fret. Simply pour the custard through a fine-mesh sieve into a bowl to remove lumps. This will leave you with a smooth and creamy filling ready to use. Additionally, make sure to whisk continuously while cooking to ensure it thickens evenly.
Are there any allergies I should consider when making this dessert?
If you are serving guests with dietary restrictions, be mindful of common allergens such as eggs and dairy. You can substitute eggs with a flax egg or applesauce for a vegan version. For dairy-free, consider using coconut cream in both the glaze and custard. Always double-check your ingredient labels for allergens, especially if baking for someone with food sensitivities.
How can I customize the Classic Boston Cream Pie for different flavors?
The more the merrier! You can easily switch out the vanilla custard for different flavors, such as chocolate or coffee. For a unique twist, consider adding a layer of fruit such as strawberries or raspberries in between the layers for a fresh and vibrant contrast. Just remember to adjust flavors according to your taste!
Classic Boston Cream Pie Recipe with Velvety Custard & Chocolate
Ingredients
Equipment
Method
- Preheat your oven to 350°F (175°C) and grease two 9-inch round cake pans. Line the bottoms with parchment paper.
- In a large mixing bowl, cream together softened unsalted butter and granulated sugar until light and fluffy, about 3-5 minutes. Add eggs one by one, mixing well after each addition along with the vanilla extract.
- In a separate bowl, sift together the cake flour and baking powder. Gradually stir the dry mixture into the creamed butter mixture, alternating with the milk, until just combined.
- Pour the cake batter evenly into prepared pans and bake for 25–30 minutes, or until a toothpick comes out clean.
- In a medium saucepan, combine milk, egg yolks, sugar, and cornstarch. Whisk continuously over medium heat until thickened and bubbling, about 8–10 minutes. Stir in vanilla extract, cover to cool.
- In a small saucepan, heat heavy cream until it simmers, then remove from heat and add chopped chocolate, stirring until smooth and glossy.
- Once cakes and custard are cool, slice each cake layer in half to create four layers. Layer custard between cakes and pour chocolate glaze over the top.
- Refrigerate for at least 1 hour before serving to allow custard to set.
Leave a Reply