
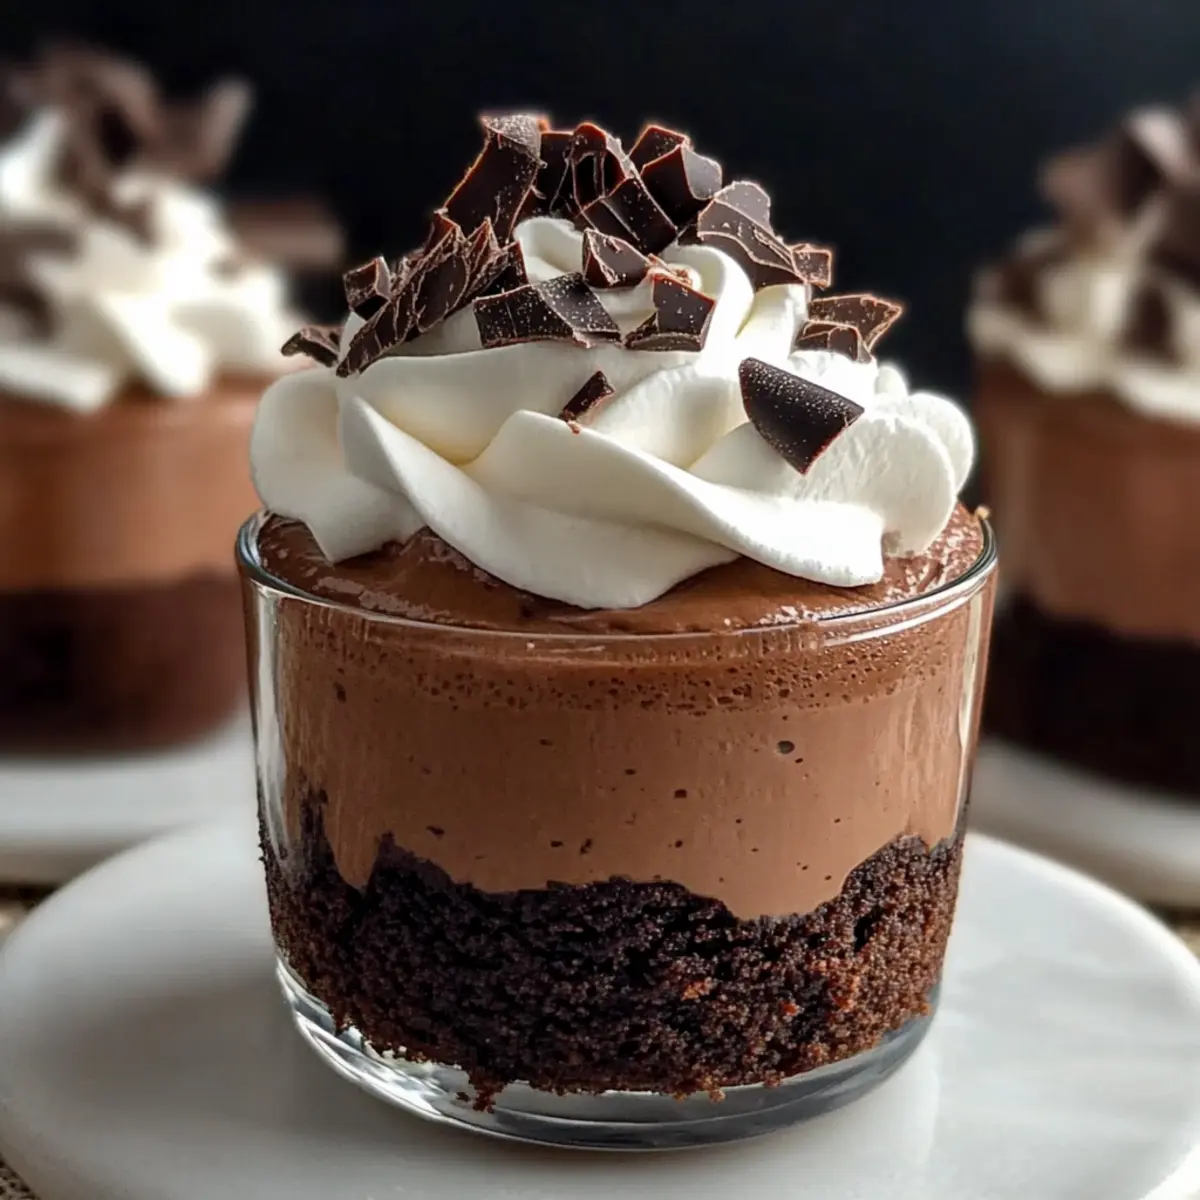
As I took a bite of my latest creation, the richness of the fudgy brownie met the lightness of the chocolate mousse in a way that made my taste buds dance. Introducing my Brownie Chocolate Mousse Cups—where indulgent dessert meets effortless preparation! This delightful treat is not only a crowd-pleaser but also incredibly customizable to fit your dietary needs. Imagine serving these luscious cups at your next gathering, impressing friends and family without spending hours in the kitchen! Whether you choose to stick with the classic ingredients or explore substitutions like almond milk or fat-free whipped topping, you’ll find that this recipe is all about flexibility and flavor. Are you ready to make dessert magic happen?
Why Are Brownie Chocolate Mousse Cups Irresistible?
Decadent Indulgence: These brownie chocolate mousse cups are a chocolate lover’s dream come true, combining fudgy brownies with ethereal mousse for an unforgettable dessert experience.
Customizable Delight: Feel free to tweak the components! Swap in almond milk or even fat-free options for a lighter take, making it suitable for everyone at your gathering.
Effortless Presentation: Serve in clear jars for an elegant look—perfect for showcasing those delectable layers.
Quick & Easy: With simple steps and minimal prep time, you’ll have a stunning dessert ready to impress your guests without the fuss!
Crowd-Pleasing Appeal: Whether for family dinners or parties, these cups are sure to win over hearts and fill stomachs! Enjoy alongside your favorites like Decadent Chocolate Peanut Butter Swirl Pie or Texas Chocolate Pecan for a full dessert spread.
Brownie Chocolate Mousse Cups Ingredients
For the Brownie Base
• Brownies – Use your favorite recipe or box mix for a fudgy foundation.
For the Mousse
• Melting Chocolate (8 oz.) – Choose high-quality chocolate for the richest mousse flavor.
• Whole Milk (½ cup) – Adds creaminess; almond milk works for a dairy-free version.
• Cream Cheese (4 oz.) – Gives the mousse a smooth texture; sour cream is a tangy alternative.
• Sugar (3 tbsp.) – Sweetens the mousse; adjust to your taste preference.
• Whipped Topping (8 oz.) – Lightens the mousse; consider fat-free for a lower-calorie option.
For Garnish
• Chocolate Wafers/Oreos – Sprinkle for a crunchy topping; pick any variety you love!
Indulge in these Brownie Chocolate Mousse Cups that combine rich flavors and delightful textures for an unforgettable dessert experience.
Step‑by‑Step Instructions for Brownie Chocolate Mousse Cups
Step 1: Prepare the Brownies
Begin by baking your brownies according to your chosen recipe or box instructions. Once baked, allow them to cool completely on a wire rack. Once cooled, cut the brownies into small squares, ensuring they’re the perfect size to fit in your serving cups for the delectable Brownie Chocolate Mousse Cups.
Step 2: Melt the Chocolate
In a medium saucepan, combine the melting chocolate and whole milk. Heat over medium-low, stirring gently until the chocolate is fully melted and the mixture is smooth, about 5 minutes. Remove it from the heat and let it cool completely at room temperature, ensuring it’s ready for the mousse layer without curdling the cream cheese.
Step 3: Beat the Cream Cheese
In a large mixing bowl, add the softened cream cheese and sugar. Using an electric mixer, beat until the mixture becomes smooth and creamy with no lumps, about 2-3 minutes. This will form the base for your light and fluffy mousse, which will perfectly complement the fudgy brownies beneath.
Step 4: Combine Chocolate Mixture
Gradually pour the cooled chocolate mixture into the cream cheese mixture. Beat on low speed until fully combined, scraping down the sides of the bowl as necessary. You’ll want a luscious, chocolatey base for your mousse that promises a delightful richness in each bite of the Brownie Chocolate Mousse Cups.
Step 5: Fold in the Whipped Topping
Gently fold in the whipped topping using a spatula until just combined. Be careful to maintain the light and airy texture of the mousse; this step is vital for ensuring your Brownie Chocolate Mousse Cups have that dreamy melt-in-your-mouth quality.
Step 6: Chill the Mousse
Transfer the mousse into the refrigerator and chill for at least 30 minutes. This step not only helps in firming up the mousse but also allows the flavors to meld beautifully, resulting in a richer taste when you finally layer it over the brownies.
Step 7: Layer the Brownies and Mousse
Once the mousse is chilled, it’s time to assemble your Brownie Chocolate Mousse Cups. Start by placing a layer of brownie squares in the bottom of each cup, followed by a generous dollop of the mousse. Repeat the layers, finishing with a luscious layer of mousse on top to create that inviting presentation.
Step 8: Add the Finishing Touches
Before serving, add a final dollop of whipped topping on top of each mousse cup. For an extra touch, sprinkle with chocolate shavings or crushed cookies of your choice to add that perfect crunch. Chill the assembled cups again briefly until ready to serve for the best flavor and texture.
Brownie Chocolate Mousse Cups Variations
Feel free to unleash your creativity and personalize these delightful cups to cater to your taste buds!
-
Dairy-Free: Substitute whole milk with almond or coconut milk for a smooth dairy-free experience.
Embrace the rich flavors without the dairy, making it enjoyable for everyone at the table! -
Gluten-Free: Use gluten-free brownie mix instead of traditional brownies for a gluten-free option.
This way, you won’t miss out on the deliciousness while keeping dietary needs in mind! -
Low-Sugar: For a healthier twist, swap sugar with a sugar substitute like stevia or erythritol.
Your sweet tooth gets satisfied, and your waistline stays happy—it’s a win-win! -
Flavor Boost: Add a teaspoon of espresso powder or flavor extract like almond or mint to the mousse.
This little twist elevates the chocolate experience, making every bite feel extra special! -
Fruity Layers: Incorporate fresh berries or fruit puree between the brownie and mousse layers.
Imagine the pop of fresh strawberries contrasting against the rich chocolate—sheer bliss! -
Nutty Crunch: Mix in some finely chopped nuts like hazelnuts or almonds into the mousse for added texture.
The combination of creamy and crunchy will tantalize your taste buds, adding a new dimension to each cup! -
Spicy Kick: For those who enjoy heat, sprinkle in a pinch of cayenne pepper or cinnamon in the mousse mixture.
This surprising touch warms the soul and adds an adventurous flair to your dessert! -
Indulgent Topping: Swap out classics for decadent toppings like caramel sauce or chocolate ganache instead of whipped topping.
This extra layer of richness will definitely leave a lasting impression on anyone you serve!
Explore these variations and feel the joy of crafting your unique spin on these amazing Brownie Chocolate Mousse Cups. You might find yourself falling in love with a new favorite, or perhaps your next celebration dessert!
Storage Tips for Brownie Chocolate Mousse Cups
-
Fridge: Store your Brownie Chocolate Mousse Cups in an airtight container for up to 3-4 days. This helps maintain their fresh taste and texture.
-
Freezer: For longer storage, you can freeze the cups for up to 2-3 months. Make sure they’re well wrapped to prevent freezer burn.
-
Thawing: To enjoy frozen cups, thaw them overnight in the refrigerator. This gradual process preserves the delicate mousse texture.
-
Reheating: Since these cups are served chilled, there’s no need to reheat. Just take them out of the fridge or freezer and enjoy!
What to Serve with Brownie Chocolate Mousse Cups
The rich layers of brownies and mousse deserve to be complemented by equally delightful pairings.
-
Fresh Berries: Juicy strawberries or raspberries add a vibrant, tart contrast that enhances the sweetness of the mousse. Their refreshing taste brightens every bite.
-
Vanilla Ice Cream: A scoop of creamy vanilla ice cream brings a classic touch, balancing the richness and adding a delightful creaminess that melts beautifully over the warm brownie base.
-
Coffee or Espresso: A rich cup of coffee or espresso enhances the chocolate flavors, creating an indulgent experience. The bitterness of coffee pairs beautifully with the sweetness of the dessert, making it a perfect after-dinner treat.
-
Mint Chocolate Chip Cookies: The coolness of mint complements the richness of the brownie mousse, adding a refreshing twist. These cookies can also double as crumbs sprinkled atop for added crunch.
-
Chocolate Drizzle: A warm chocolate sauce drizzled over the mousse cups elevates them to decadent heights, enhancing the chocolatey goodness further while adding a delightful sheen.
-
Sparkling Water with Lime: The fizzy refreshment of sparkling water with a twist of lime cleanses the palate, making it an excellent drink choice to accompany this dessert.
-
Homemade Whipped Cream: A dollop of fresh whipped cream adds lightness and texture, scaling up the dessert’s luxurious feel with each spoonful.
-
Chocolate Covered Strawberries: These sophisticated bites echo the dessert’s components while adding elegance to your serving plate and a pop of flavor that diners will adore.
-
Hazelnut Praline: The crunchy, nutty notes of a hazelnut praline bring another layer of texture, plus it harmonizes wonderfully with deep chocolate flavors while providing a unique twist.
Expert Tips for Brownie Chocolate Mousse Cups
-
Cool Completely: Allow the chocolate mixture to cool fully before adding it to the cream cheese; otherwise, you risk curdling the mousse.
-
Gentle Folding: When incorporating whipped topping, fold gently to preserve the airiness. A common mistake is over-mixing, which can lead to a dense mousse.
-
Chill Time: Don’t skip chilling the mousse! This step enhances both flavor and texture, ensuring each cup is delightfully rich.
-
Layer Wisely: Start with brownie pieces in the bottom, but don’t hesitate to play with your layers! The order can impact how flavors meld together in these Brownie Chocolate Mousse Cups.
-
Make it Yours: Feel free to experiment with variations, like adding a splash of espresso or using sugar alternatives based on your preferences!
Make Ahead Options
These Brownie Chocolate Mousse Cups are perfect for meal prep, allowing you to enjoy this decadent dessert with minimal last-minute effort! You can bake and cool the brownies up to 3 days in advance, storing them in an airtight container to keep them fresh. The mousse can also be prepared up to 24 hours ahead; simply make the mousse, chill it, and layer it with the brownies just before serving to prevent them from becoming soggy. For best results, assemble the cups shortly before you plan to enjoy them, and keep them refrigerated until ready. This way, the flavors remain vibrant, ensuring your Brownie Chocolate Mousse Cups are just as delicious when it’s time to indulge!
Brownie Chocolate Mousse Cups Recipe FAQs
What kind of chocolate is best for the mousse?
Absolutely! For the richest flavor, I recommend using high-quality melting chocolate—look for a brand with at least 60% cocoa content. You can also use semi-sweet or dark chocolate according to your taste preference, as they’ll deepen the mousse’s chocolate intensity.
How should I store leftover Brownie Chocolate Mousse Cups?
Store your Brownie Chocolate Mousse Cups in an airtight container in the refrigerator for up to 3-4 days. This keeps them fresh while ensuring the mousse remains fluffy and the brownies retain their texture. If you don’t think you’ll finish them within that time frame…
Can I freeze Brownie Chocolate Mousse Cups?
Yes, you can freeze these cups for up to 2-3 months! To do so, make sure they’re wrapped tightly to prevent freezer burn. Place each cup in a freezer-friendly bag or container. When you’re ready to enjoy, simply thaw them overnight in the fridge for the best results without compromising texture.
What if my mousse doesn’t thicken properly?
If your mousse isn’t thickening, ensure that the chocolate mixture is completely cooled before mixing with the cream cheese. If you find it too runny, you can refrigerate it longer—up to an hour—to help set. Also, be gentle when folding in the whipped topping to maintain that light, airy quality.
Are there any allergen considerations with this recipe?
Definitely! To make these Brownie Chocolate Mousse Cups safer for those with allergies, consider the following swaps: use almond milk or coconut milk in place of regular milk for dairy-free options. For a gluten-free dessert, ensure your brownie mix is gluten-free and select gluten-free cookies for topping.
Can I make these cupcakes in advance?
Yes, you can prepare the mousse a day ahead and refrigerate it in an airtight container. Just layer it with the brownies closer to serving time to maintain the perfect texture. This makes for a great make-ahead dessert that can save you time during gatherings!
Irresistible Brownie Chocolate Mousse Cups for Total Indulgence
Ingredients
Equipment
Method
- Prepare the Brownies: Bake brownies according to your chosen recipe or box instructions. Cool completely on a wire rack and cut into small squares.
- Melt the Chocolate: In a medium saucepan, combine melting chocolate and whole milk over medium-low heat, stirring until smooth (about 5 minutes). Cool completely.
- Beat the Cream Cheese: In a large bowl, beat softened cream cheese and sugar until smooth and creamy (about 2-3 minutes).
- Combine Chocolate Mixture: Gradually pour cooled chocolate into cream cheese mixture, beating on low speed until fully combined.
- Fold in the Whipped Topping: Gently fold in whipped topping until just combined.
- Chill the Mousse: Transfer mousse to the refrigerator and chill for at least 30 minutes.
- Layer the Brownies and Mousse: Place brownie squares in cup bottoms, add a layer of mousse, and repeat layers, finishing with mousse.
- Add the Finishing Touches: Top with whipped topping and sprinkle with chocolate shavings or crushed cookies. Chill briefly until ready to serve.
Leave a Reply