
As I sat at a sun-drenched café in Spain, the intoxicating aroma of sizzling potatoes and garlic danced through the air, pulling me into a culinary daydream. This experience led me straight to my kitchen where I discovered the joy of preparing an authentic Spanish torta. This delightful dish is a scrumptious combination of crispy potatoes and tender eggs—a vegetarian-friendly treasure that can elevate any mealtime. Whether you serve it for a cozy breakfast, a light lunch, or as part of your next tapas gathering, this Spanish Torta is incredibly budget-friendly and simple to whip up. The best part? You can easily customize it with ingredients like bell peppers or chorizo to suit your tastes. So, are you ready to embark on this delicious journey and bring a slice of Spain to your table?
Why Is Spanish Torta So Special?
Comforting Taste: The Spanish Torta delivers a heartwarming mix of crispy and creamy textures that’s simply irresistible.
Versatile Ingredients: Customize it with your favorite add-ins like bell peppers, chorizo, or even creamy cheese for a unique twist.
Easy Cooking: With minimal ingredients and a straightforward cooking process, this dish is perfect for both novice and experienced cooks.
Perfect for Any Meal: Whether you enjoy it at breakfast, lunch, or as a part of a tapas spread, it’s sure to impress friends and family. Plus, if you’re looking for more delicious options, check out the Packed Chicken Torta or try making some Bake Chocolate Oat bars for dessert!
Budget-Friendly: This budget-friendly recipe maximizes flavors without breaking the bank, making it a fantastic go-to for home cooks.
Spanish Torta Ingredients
For the Torta
- Eggs – essential for binding the torta, providing structure and richness.
- Milk – optional but adds fluffiness to the eggs; can be omitted if desired.
- Salt – enhances flavor; adjust according to taste since potatoes absorb salt.
- Black Pepper – adds seasoning; tweak according to your preference for spice.
- Garlic – brings aromatic flavor; reduce or omit for a milder taste.
- Onion – sweetens and adds depth; choose red or white based on preference.
- Potatoes – the cornerstone of the dish; small red or Yukon gold are best.
- Olive Oil – for frying; using high-quality Spanish olive oil ensures authentic flavor.
Optional Add-ins
- Bell Peppers – chopped for added color and crunch, enhancing visual appeal.
- Chorizo – incorporate for heartiness; a flavorful addition that complements the torta.
- Cheese – such as manchego or feta for a creamy texture variation.
Get ready to savor this delightful Spanish Torta that will surely become a staple in your home cooking repertoire!
Step‑by‑Step Instructions for Spanish Torta
Step 1: Prepare the Potatoes
Begin by peeling and thinly slicing 6 small red or Yukon gold potatoes—aim for thin pieces to ensure even cooking. Set a 10-inch frying pan over medium-low heat and pour in enough olive oil to completely cover the potatoes. Sauté the potatoes with 3 cloves of minced garlic and 1/2 chopped onion for about 15-20 minutes, stirring occasionally until the potatoes are tender but not browned.
Step 2: Drain and Cool
Once the potatoes are tender, carefully drain the excess oil from the pan, leaving about 2 tablespoons behind to enhance flavor. Transfer the potato mixture to a bowl to cool slightly. This cooling step is crucial, allowing the flavors to mingle and ensuring the eggs won’t cook prematurely when added later.
Step 3: Whisk the Eggs
In a large bowl, whisk together 6 eggs and 2 tablespoons of milk until well-combined. The milk is optional but recommended for a fluffier texture in your Spanish Torta. After a good whisk, gently fold in the cooled potato and onion mixture. Let this rest for about 10-15 minutes, allowing the egg to absorb the lovely flavors from the potatoes.
Step 4: Season the Mixture
Now it’s time to season your Spanish Torta! Sprinkle in salt and freshly ground black pepper to taste, stirring gently to ensure even distribution. Remember, the potatoes absorb flavor, so don’t be shy about seasoning. A good balance of salt and pepper will elevate the overall taste of your dish.
Step 5: Cook the Torta
Heat the reserved olive oil in the same frying pan over medium heat. Pour in the potato-egg mixture, smoothing it out to create an even layer. Cook for about 5-7 minutes, or until the edges start to set and the center is still slightly runny. This step is crucial for achieving that perfect creamy interior.
Step 6: Flip for Even Cooking
To flip the Spanish Torta, place a large plate over the frying pan. Carefully invert the pan so the torta lands on the plate, then slide it back into the pan to cook the other side. Let it cook for another 5-7 minutes until it turns golden brown, or finish in a preheated oven at 400°F (200°C) until completely set.
Step 7: Cool and Serve
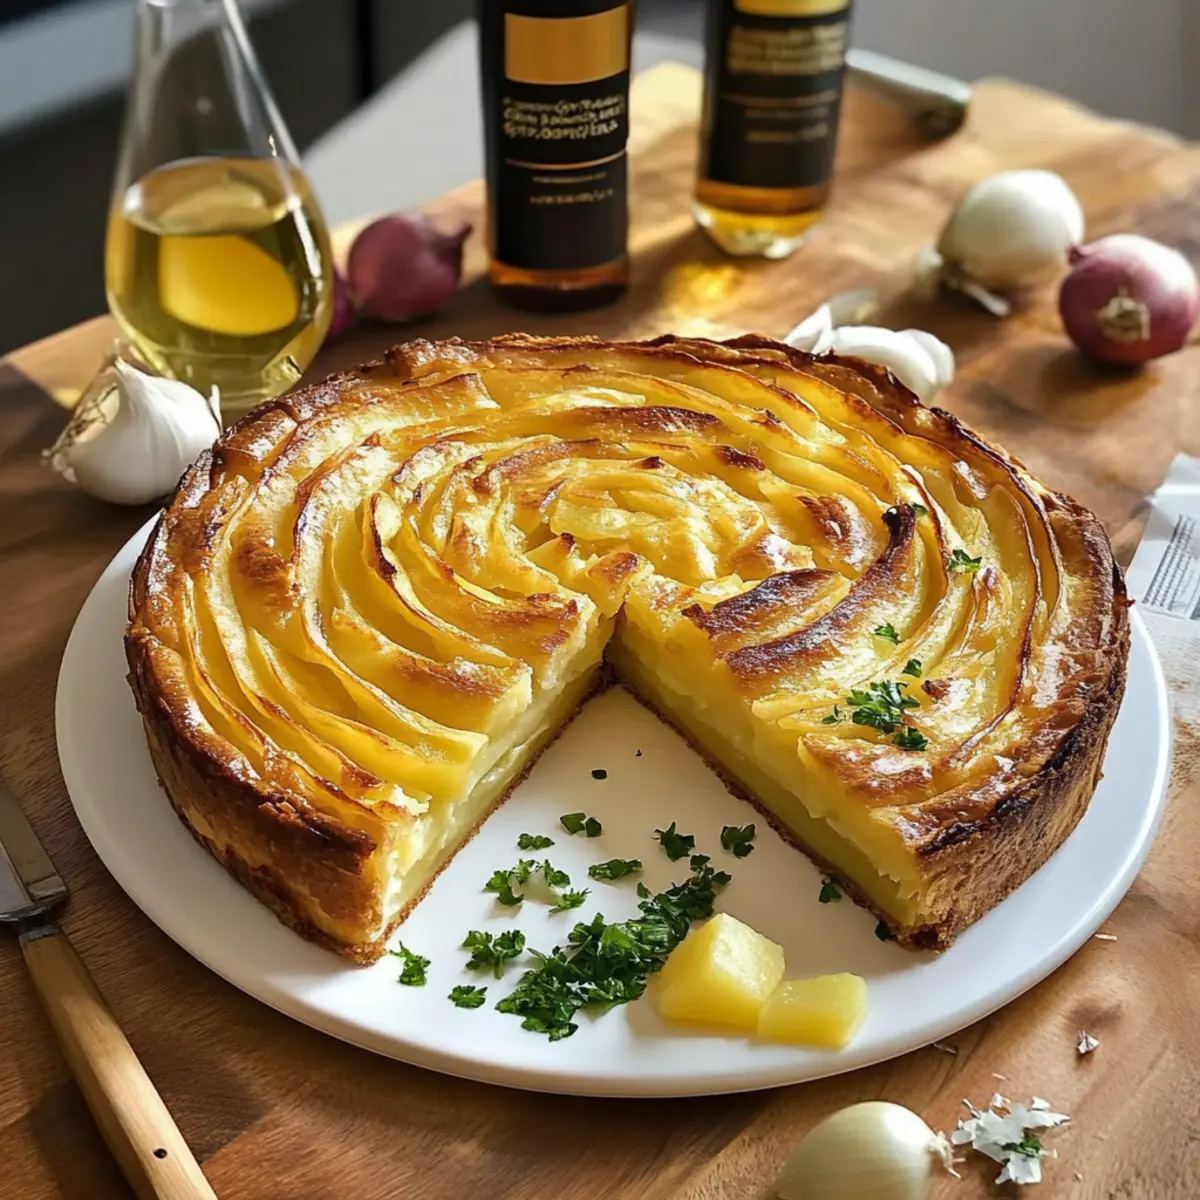
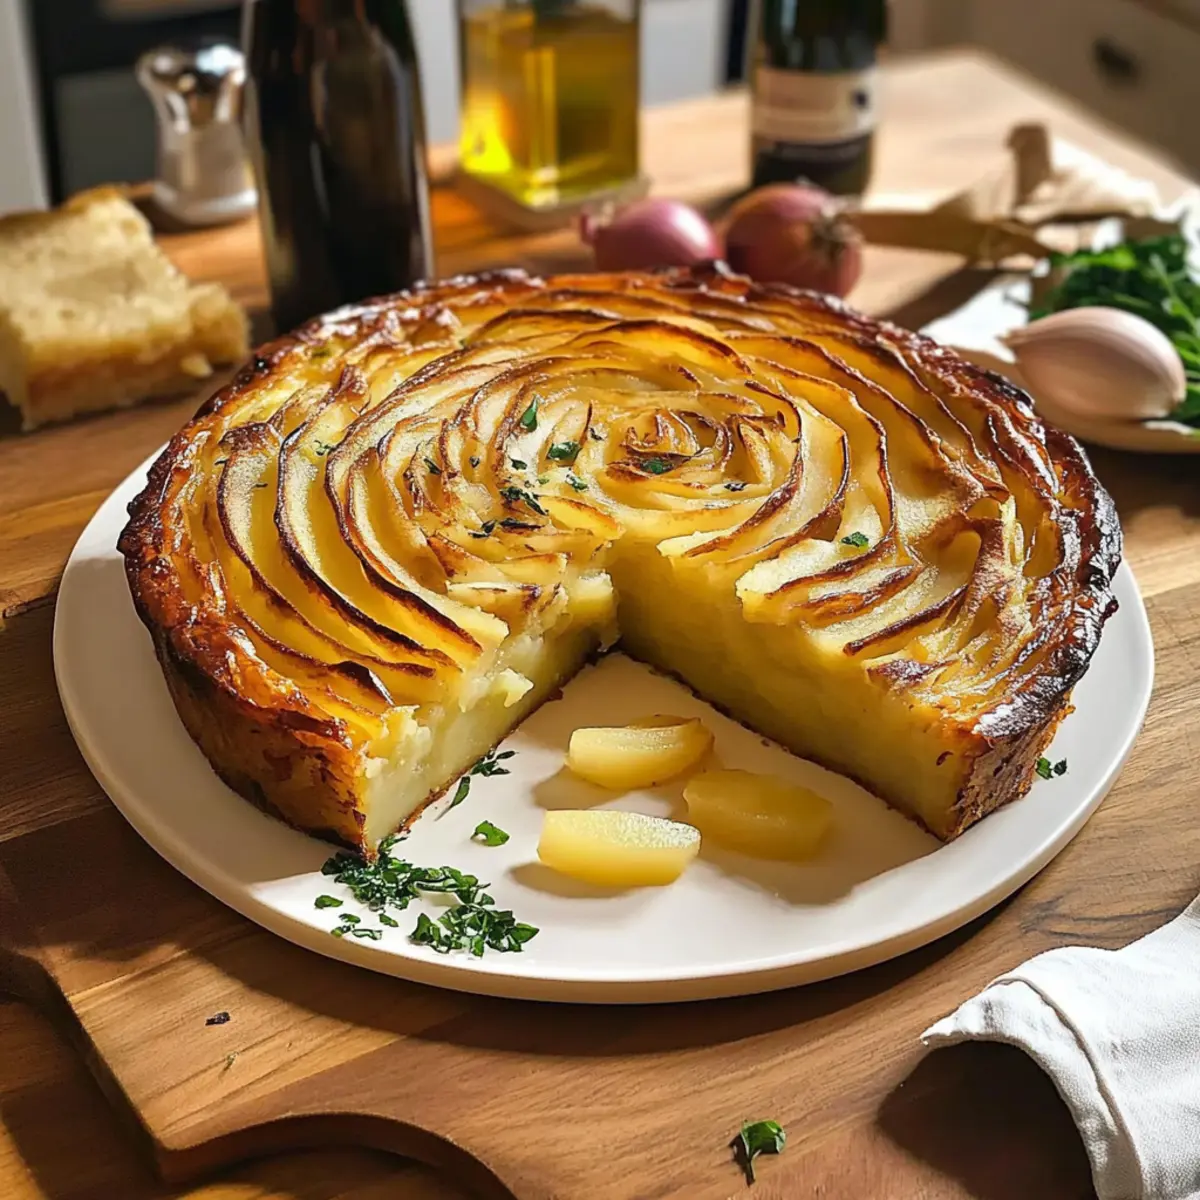
Once both sides are golden and cooked through, transfer the Spanish Torta to a cutting board. Allow it to cool slightly for about 5-10 minutes before slicing. This resting period enhances the flavors and makes cutting easier. Serve warm or at room temperature, and enjoy a delicious slice of Spanish Torta!
Expert Tips for Spanish Torta
-
Quality Oil Matters: Using high-quality Spanish olive oil will enhance the torta’s flavor significantly. Don’t cut corners here!
-
Perfect Potato Slicing: Ensure potatoes are sliced thinly for even cooking; this helps achieve that light and fluffy interior without overcooking the outer layers.
-
Season Generously: Potatoes absorb salt, so taste and adjust as necessary. Remember, a well-seasoned Spanish Torta is a delicious Torta!
-
Non-Stick Pan Advantage: A non-stick frying pan is crucial for easy flipping; it will prevent sticking and make the cooking process smoother.
-
Flipping Technique: If flipping feels intimidating, finish cooking the torta in a preheated oven at 400°F (200°C) for a flawless, golden finish.
Storage Tips for Spanish Torta
Fridge: Store leftover Spanish Torta in an airtight container for up to 3 days. It tastes great cold or reheated!
Freezer: Freeze slices wrapped tightly in plastic wrap and then in aluminum foil for up to 2 months. Thaw overnight in the fridge before reheating.
Reheating: Reheat slices in a pan over low heat or in the microwave for about 1-2 minutes, until warmed through and slightly crispy.
Room Temperature: If serving at a gathering, the Spanish Torta can sit out at room temperature for up to 2 hours before needing to be refrigerated.
Spanish Torta Variations & Substitutions
Embrace your creativity in the kitchen and transform this classic Spanish torta into your own signature dish!
- Vegetarian-Style: Skip the meat and embrace a medley of seasonal vegetables like zucchini or mushrooms for a vibrant twist.
- Dairy-Free: Substitute the milk with almond milk or omit it entirely; the torta will still be fluffy and delicious!
- Spicy Kick: Add diced jalapeños or a sprinkle of red pepper flakes to awaken your taste buds and ramp up the heat.
- Herb-Infused: Fresh herbs like parsley or chives can be mixed in for a fragrant and flavorful dimension that brightens every bite.
- Cheesy Delight: Incorporate creamy cheeses such as goat cheese or mozzarella for a rich, melting texture that takes this dish to the next level.
- Sweet Potato Swap: Try using sweet potatoes instead of regular potatoes; their natural sweetness uplifts the overall flavor profile of the torta.
- Rustic Chorizo: Adding chorizo or other cured meats enhances the depth of flavor, giving this dish a hearty touch.
- Roasted Garlic: For an extra savory punch, roast your garlic before adding it to the mix; it will give a sweet and nutty aroma.
Your Spanish Torta is just the beginning—pair it with a fresh salad or warm bread and you’ve got a delightful meal that will impress family and friends alike! If you’re looking for more inspiration, consider trying the Packed Chicken Torta or indulge in some Bake Chocolate Oat bars for dessert.
What to Serve with Spanish Torta
The Spanish Torta is a versatile dish that pairs beautifully with various sides and beverages to create a well-rounded meal experience.
-
Crusty Bread: Warm, crusty rolls provide a delightful contrast to the creamy interior of the torta, perfect for soaking up any eggy goodness.
-
Green Salad: A fresh, vibrant salad with mixed greens and a light vinaigrette adds a refreshing crunch, balancing the richness of the torta.
-
Garlicky Aioli: Adding a side of garlic aioli enhances flavors and gives a creamy element, making each bite even more indulgent.
-
Romesco Sauce: This nutty, smoky sauce pairs exceptionally well, providing depth and a hint of spice that complements the torta’s flavors beautifully.
-
Olives and Pickles: A small platter of olives and pickles introduces briny textures, perfect for those who enjoy a savory bite alongside the torta.
-
Sangria: A glass of fruity sangria offers a refreshing beverage choice that enhances the Spanish theme, providing a sweet counterbalance to the savory dish.
-
Cheese Platter: Accompany with a selection of Spanish cheeses—like manchego or goat cheese—for a versatile appetizer that showcases bold flavors.
-
Fruit Tart: Finish with a light dessert, such as a fruit tart, which adds a touch of sweetness and a refreshing end to your meal, making it memorable.
Make Ahead Options
These Spanish Torta are perfect for meal prep and can be made ahead to save you time during busy days! You can prepare the potato and onion mixture up to 24 hours in advance. Simply sauté the potatoes and onions, let them cool, and store them in an airtight container in the refrigerator. Also, feel free to whisk the eggs and milk together ahead of time; just keep the mixture refrigerated. When you’re ready to serve, combine the cooled potato mixture with the egg mixture, cook in your frying pan, and follow the flipping and cooking instructions for a delicious, time-saving meal that tastes just as fresh!

Spanish Torta Recipe FAQs
What type of potatoes are best for Spanish Torta?
Small red potatoes or Yukon gold potatoes are ideal as they cook evenly and provide a creamy texture. Aim to slice them thinly for the best result, ensuring they will soften without browning.
How should I store leftover Spanish Torta?
To store leftovers, place them in an airtight container in the refrigerator, where they will stay fresh for up to 3 days. You can enjoy the torta cold or gently reheated in a pan or microwave.
Can I freeze Spanish Torta?
Absolutely! To freeze, wrap individual slices tightly in plastic wrap, then in aluminum foil to prevent freezer burn. They can last up to 2 months in the freezer. When ready to eat, thaw overnight in the fridge before reheating.
Why is my Spanish Torta sticking to the pan?
If your torta is sticking, ensure you are using a good quality non-stick frying pan or adequately seasoning the pan with olive oil before cooking. Overheating the pan can also cause sticking, so keep it on medium-low heat as you cook.
Is Spanish Torta suitable for vegetarians?
Yes! The classic Spanish Torta is vegetarian-friendly, made primarily with potatoes and eggs. You can customize it with various vegetables or omit any animal products as desired. If you’re looking for a hearty option, consider adding cheese or using bell peppers for extra flavor.
How can I add more flavor to my Spanish Torta?
To amp up the flavor, feel free to incorporate ingredients like diced bell peppers, chorizo, or sharp cheese such as manchego. You can also experiment with different herbs or spices, like paprika, to suit your taste.
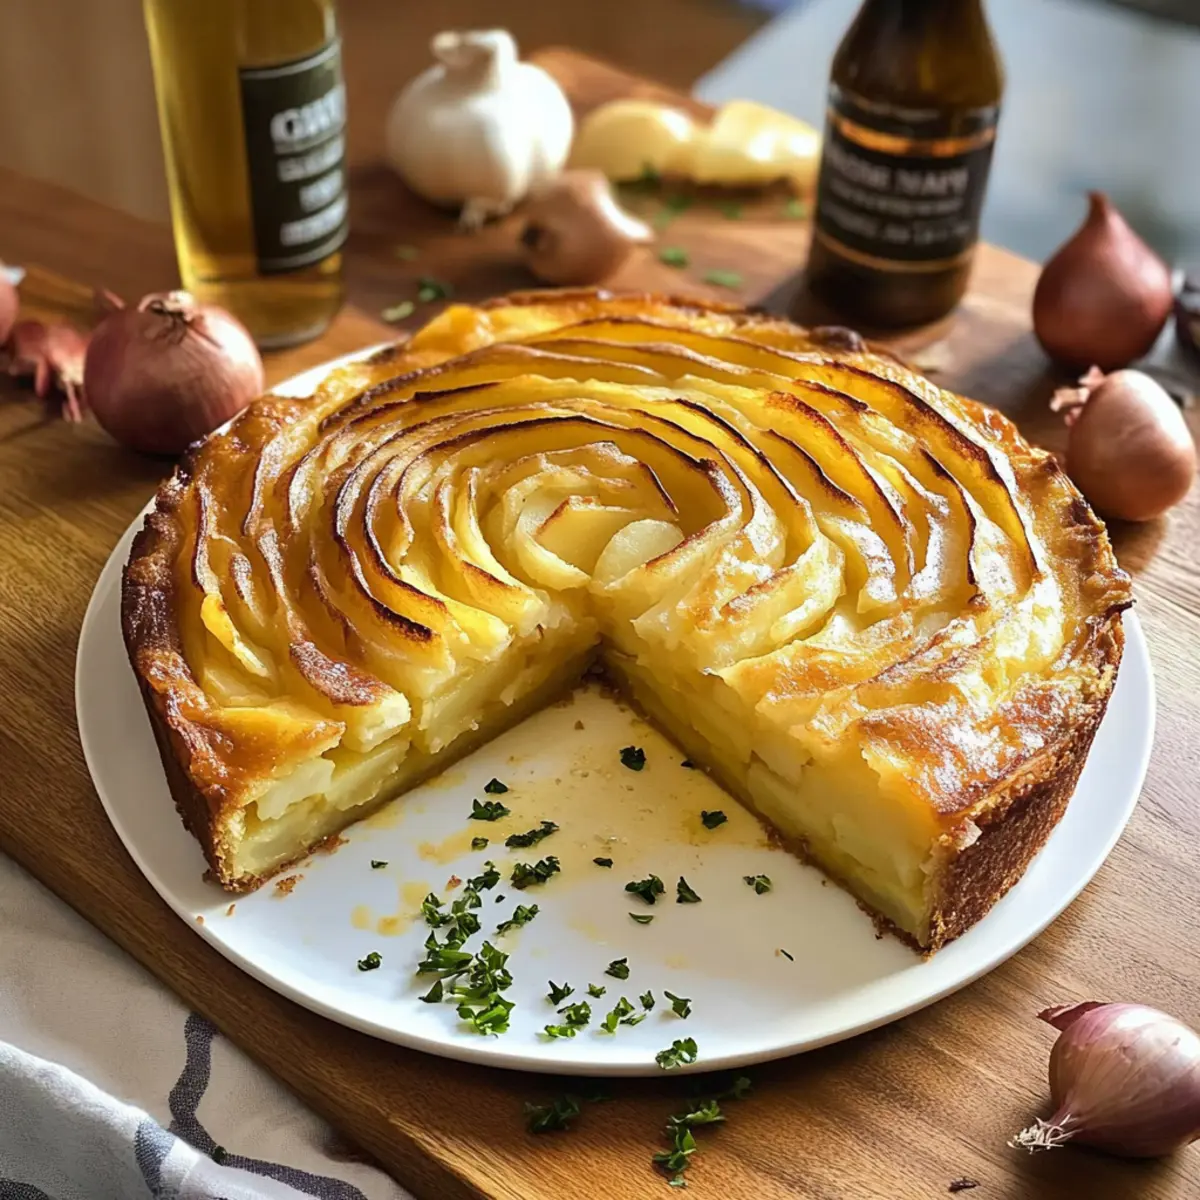
Spanish Torta: Ultimate Comfort Food for Your Table
Ingredients
Equipment
Method
- Prepare the Potatoes: Peel and thinly slice the potatoes. Sauté in olive oil with garlic and onion for 15-20 minutes until tender.
- Drain and Cool: Drain excess oil, leaving some behind for flavor. Transfer to a bowl to cool.
- Whisk the Eggs: In a bowl, whisk eggs and milk. Fold in cooled potato mixture and rest for 10-15 minutes.
- Season the Mixture: Add salt and pepper to taste, mixing gently.
- Cook the Torta: Heat olive oil in the pan, pour in the mixture, and cook for 5-7 minutes until edges set.
- Flip for Even Cooking: Invert the torta onto a plate, then slide back into the pan to cook the other side.
- Cool and Serve: Transfer to a cutting board, let cool for 5-10 minutes, then slice and serve warm.
Leave a Reply